
Transferring Data and Content Between Accounts
eSputnik has no single tool that transfers the whole contents of an account. The dedicated cross-account transfer feature covers message templates only. Contacts can be moved by export and import, and the rest of the data and settings have to be recreated manually.
Everything else is done the same way as a regular migration. If you are moving to eSputnik from another marketing platform, see How to Migrate to eSputnik from Other Platforms.
What Can and Cannot Be Moved
| Object | How to move it | Limitations |
|---|---|---|
| Message templates of any type | Copy to another account | Only into a child account, one template at a time; modules, tags, and categories are not copied |
| Image library | Copy the templates that use the images | The library itself can't be exported from the account; images travel only inside a copied template |
| Email HTML code | Create an HTML email from the source code | Doesn't reproduce the structure and features of the drag-and-drop editor |
| Custom field structure | Read the definitions via API, then create the fields manually | The API does not transfer fields; it returns definitions only |
| Contacts | Export and import a file | Subscription statuses need separate handling |
| Groups | Rebuild them, or export contacts group by group | Conditional groups have to be built from scratch |
| Workflows | Rebuild manually | Cannot be copied or transferred between accounts |
| Event types | Create them again | Identifiers may differ from the source account |
| Domain and senders | Configure again | Belong to the account |
| Integrations | Configure again | API keys and connectors are bound to the account |
| Statistics | Not transferred | Stays in the source account |
Copying a Message Template to Another Account
The feature creates a copy of the selected message's template in the child account, without exporting files. It works for messages of all types.
Copy to another account is available to users of the main (parent) account, and the target account has to be a child of it — ask support to link the accounts if it isn't. Open the message list, use the message's options menu, and select the target account.
Copy templates one at a time: copying templates to another account in bulk isn't supported.
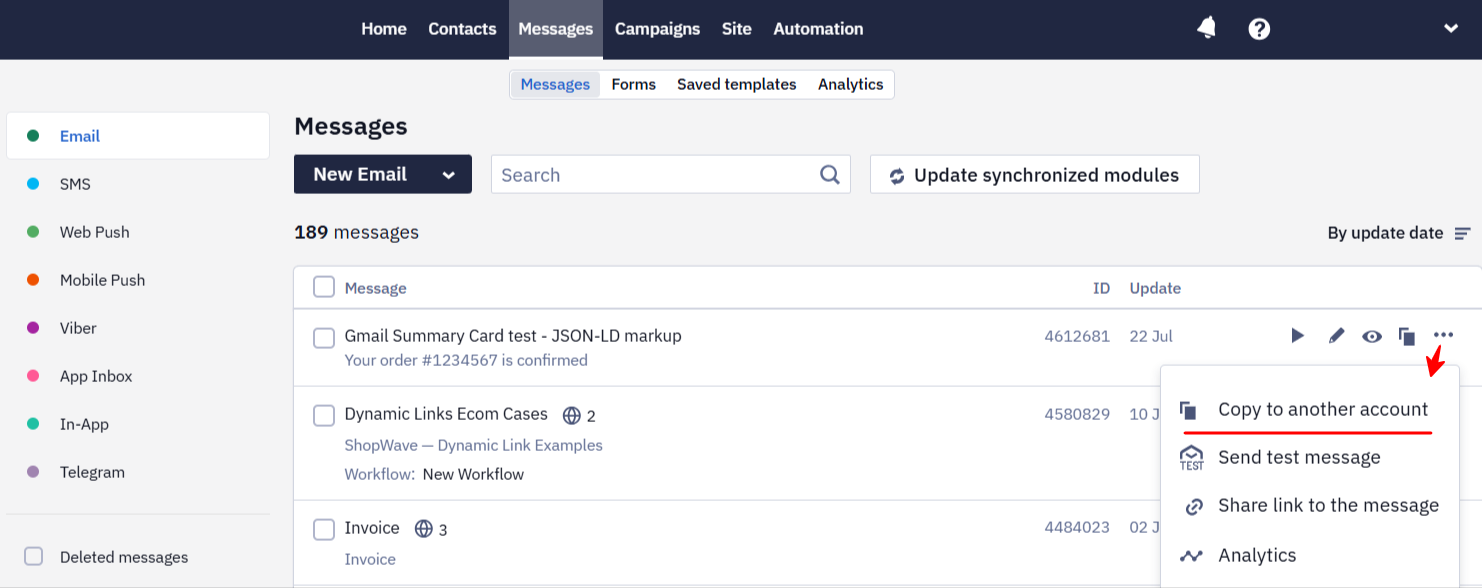
The template is copied together with its language versions and the images used in it. Reusable modules, tags, and categories are not carried over, and neither is the source account's image gallery: recreate the modules, tags, and categories, and re-upload the images to the target account's gallery if you need them there.
After the copy, check the settings that apply to that type of message:
- the sender and the other channel settings — they belong to the account and have to be set up again;
- for email — the unsubscribe link, subscription categories, product recommendation blocks, and external data sources: they reference the configuration of a specific account;
- personalization variables that read custom fields. Fields created in the target account get their own identifiers, so any expression that addresses a field by ID has to be updated. See User Profile Variables and Velocity Features.
- that every image in the message still renders.
Transferring the HTML Instead
If the source email was built as custom HTML, copy its code and create an HTML email in the target account. This also works between accounts that are not linked as parent and child.
Transferring the HTML doesn't reproduce the drag-and-drop editor structure, reusable modules, comments, language versions, or other template-level settings. After the transfer, check the email in the editor and send yourself a test. See Customizing an HTML Email Template.
What Else You Might Move
Contacts. Export them from the source account and import the file into the target account. Handle subscription statuses separately: a plain contact import can create active contacts out of people who had unsubscribed, complained about spam, or become undeliverable. See How to Migrate to eSputnik from Other Platforms for the correct procedure.
Custom contact fields. There is no automatic copying of custom fields between accounts. Read their names, types, and allowed values in the source account with Get additional fields or on the Additional fields tab, then create the same fields in the target account manually. See Creating Additional Fields.
The method returns field definitions only, not the values those fields hold for individual contacts. Create the fields before importing contacts, so the values land in the right fields.
Workflows. Workflows cannot be copied or transferred between accounts — Copy to another account works for message templates only. Rebuild them in the target account manually. Opening the source and the target account side by side helps: move the blocks, then the start configuration, events, conditions, messages, and the exit conditions. See Building and Editing Workflows.
Account-level settings. These are configured from scratch and are not content:
- Infrastructure — the sending domain and senders. The same sending domain can be added to several accounts only with the same verification type. For example, if the first account uses the Subdomain type, the second one has to use it too. Add the domain in the target account and publish the verification record generated for it. Don't change the existing records that the source account uses. If the domain refuses to verify, the usual cause is a different verification type or a different subdomain in the account that already holds it. See Setting Up Email Domain Authentication and Adding/Changing/Deleting a Sender.
- Access — users, roles, and API keys.
- Data and automation — event types, groups, and segments. See Creating Events.
- History — campaign statistics and message history stay in the source account.
Recommended Order
- Set up the domain, senders, and authentication in the new account.
- Recreate custom contact fields, then import contacts and check their subscription statuses.
- Recreate event types and send a test event.
- Copy or re-create message templates and check their settings and personalization.
- Rebuild groups and segments.
- Rebuild workflows and verify them with a one-time launch before activating.
Updated about 2 months ago