Welcome Сampaign
Customer data is often sent to our CDP using the subscribe API method. In this case, the subscriber is added to the database as an unconfirmed contact. You can't send promotional emails to unsubscribed contacts without their permission to receive them from you.
To get the customer's permission, you need to ask them to validate their email address by sending a confirmation email through a Double Opt-In series. The next step is to send a welcome series.
The design of a welcome series will depend on your marketing goals.
In this article, we’ll create a standard series consisting of two welcome emails. Since it is preceded by a double confirmation, thanking for the subscription is recommended in the first message. A discount or promotional code can also be a good start to the conversation. In the second message, you can tell more about the company and introduce the subscriber to other communication channels (social media, push notifications, YouTube, etc.).
Step 1. Create Welcome Emails
ImportantBefore getting started, we recommend you read a complete guideline on creating an email in the eSputnik drag-and-drop editor.
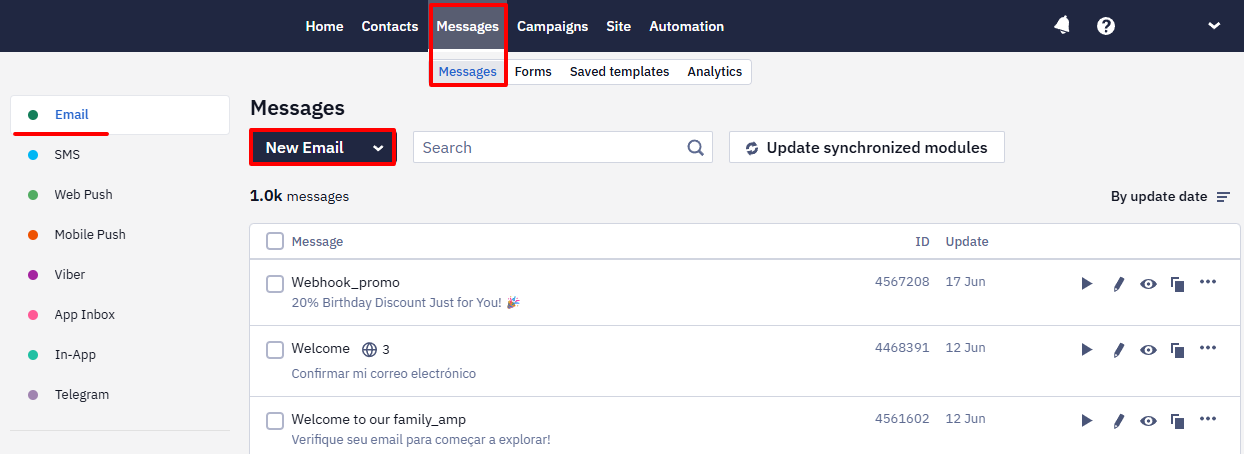
- Go to Messages → Messages → Email.
- Click New Email.
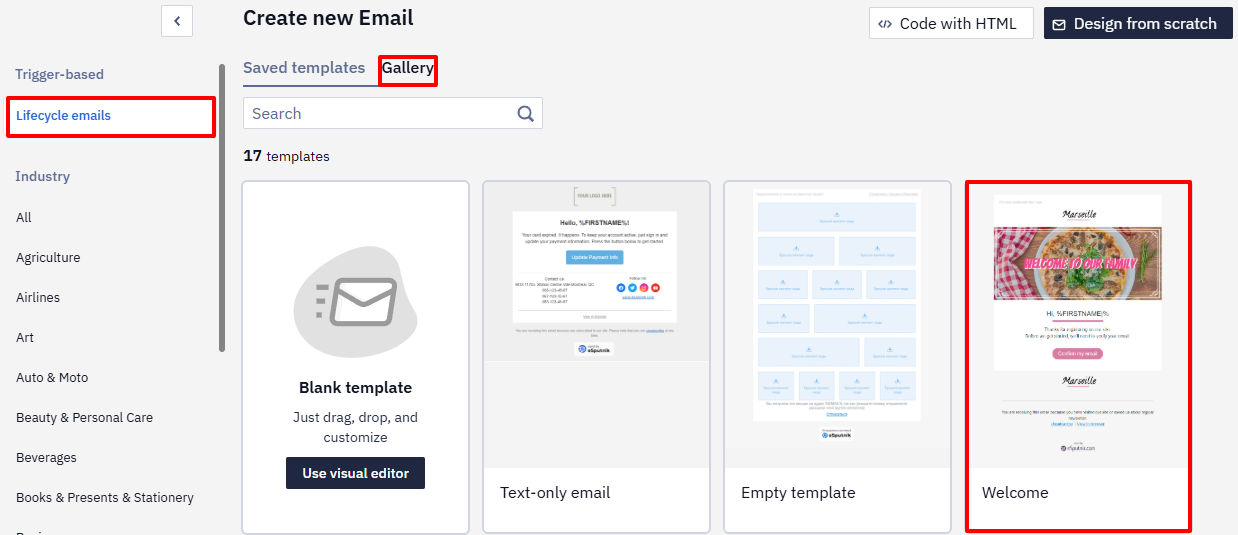
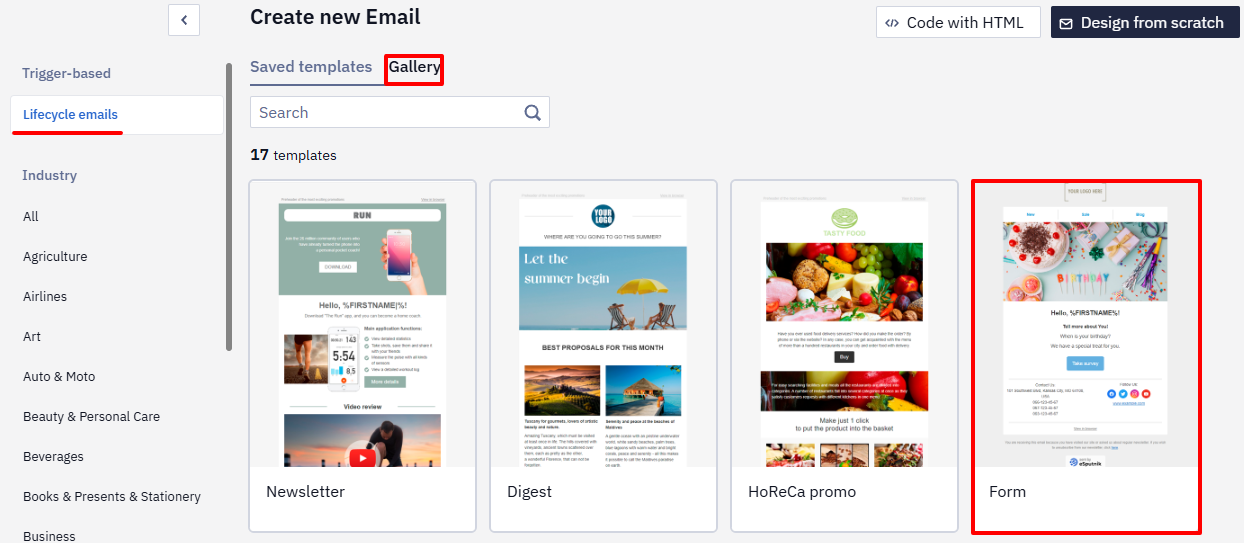
- Create two emails:
- the first — based on the Welcome template;
- the second — based on the Form template.
- Add content to the emails.
- Preview emails (1) on different devices and send a test email (2).
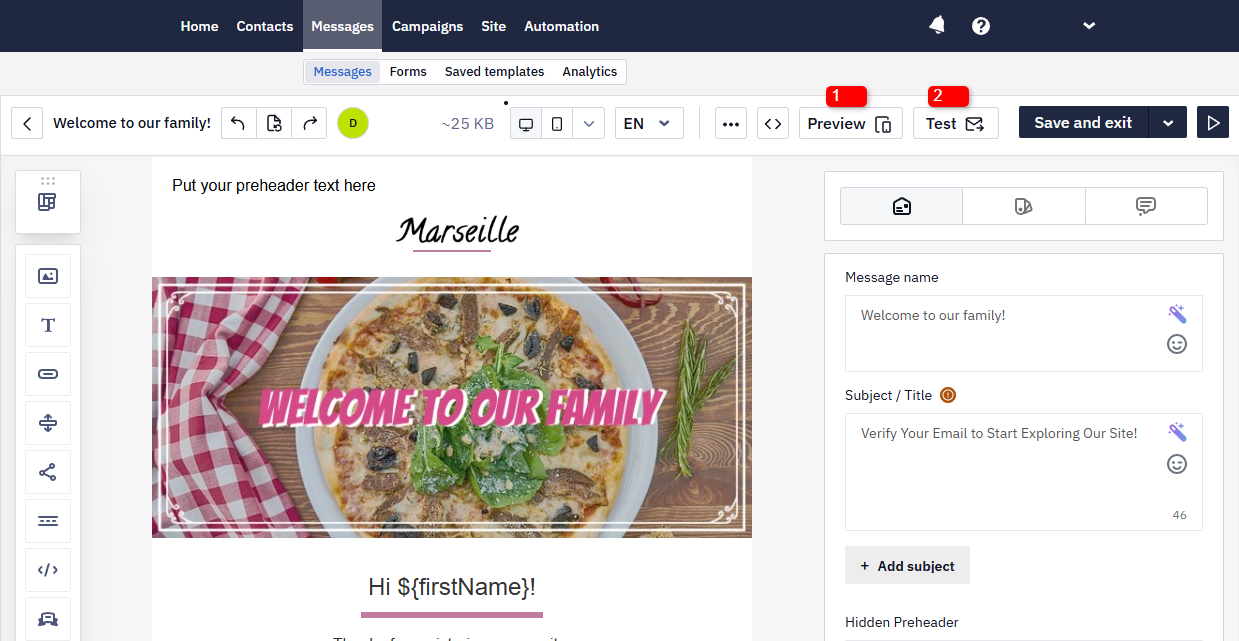
- Click Save.
ImportantBefore getting started, we recommend you read complete instructions on creating a workflow in the eSputnik drag-and-drop editor.
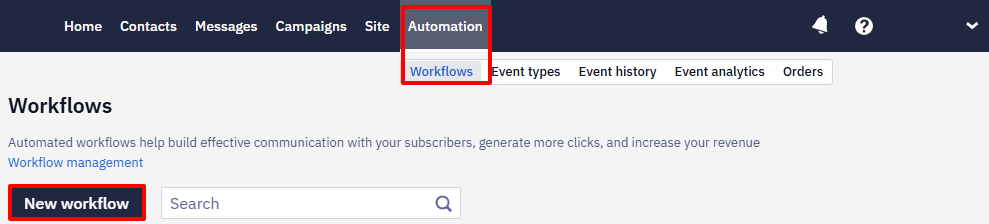
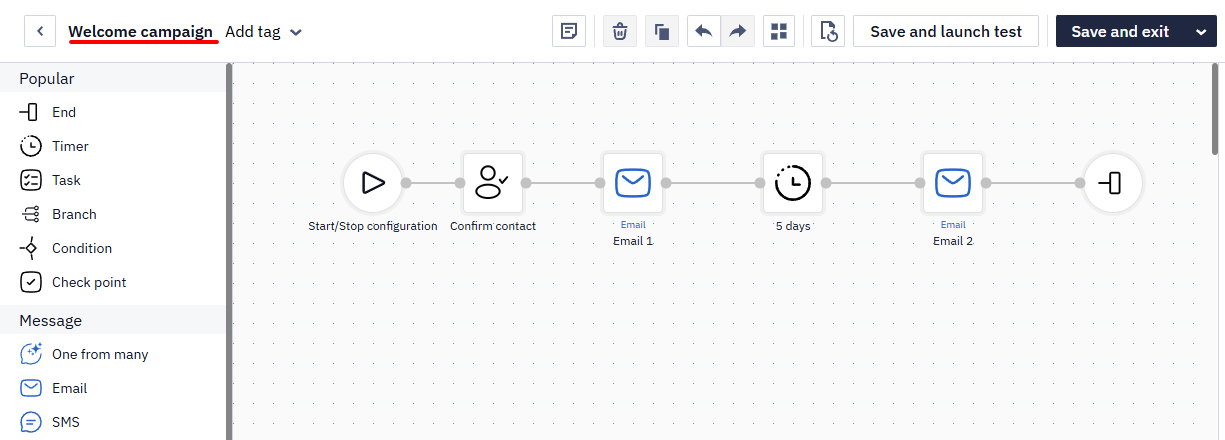
Step 2. Create a Workflow
- Go to Automation → Workflows and click New workflow.
- Create a workflow with the following blocks:
-
Start (added automatically);
-
Task: Confirm contact;
-
Email — first message;
-
Timer — set to 5 days;
-
Email — second message;
-
End.
-
Step 3. Set Up the Workflow Launch
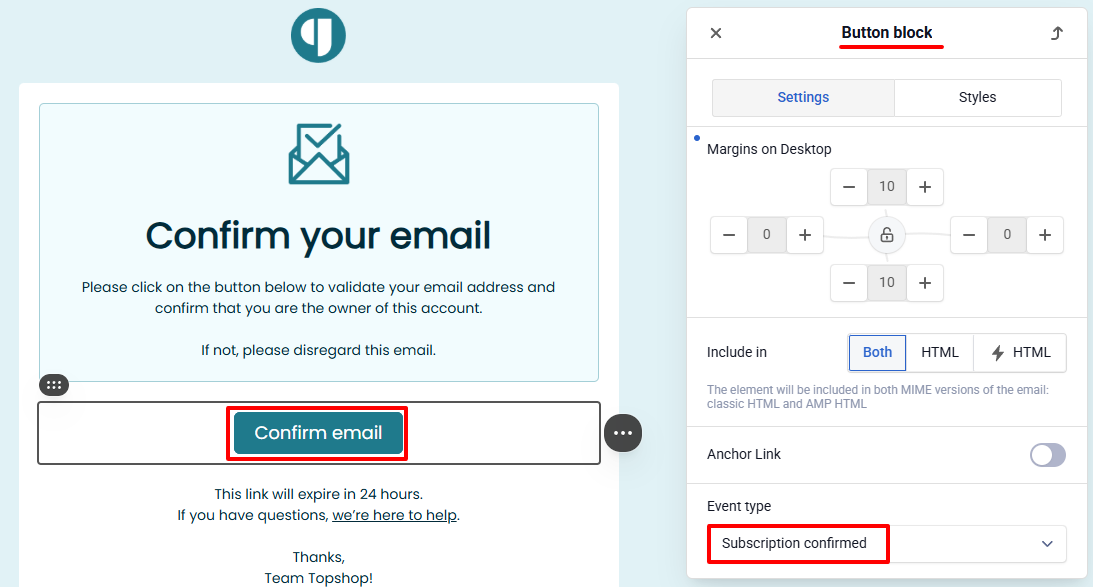
NoteIn the Double Opt-In email, the confirmation button is linked to the Subscription confirmed event. When a user clicks the button, the event triggers.
The subscriber confirms their address by clicking the corresponding button in the confirmation email. This button is assigned to the Confirmed subscription event type.
Use this event as the launch condition for the Welcome campaign workflow.
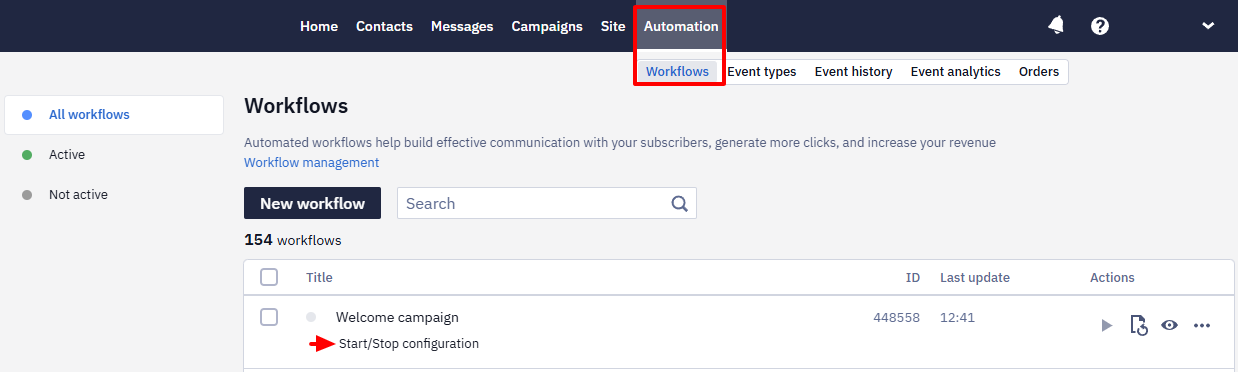
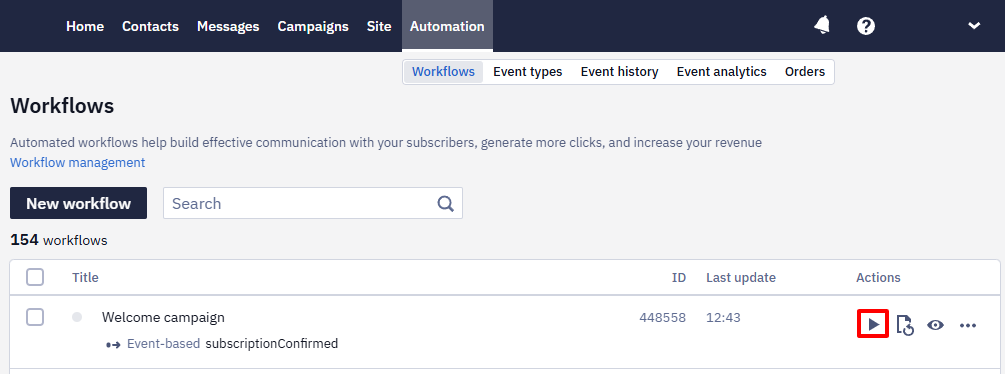
- Go to Automation → Workflows.
- Open Start/Stop configuration.
- Enable Start configuration.
- Select:
- Event-based launch condition;
- Subscription confirmed event.
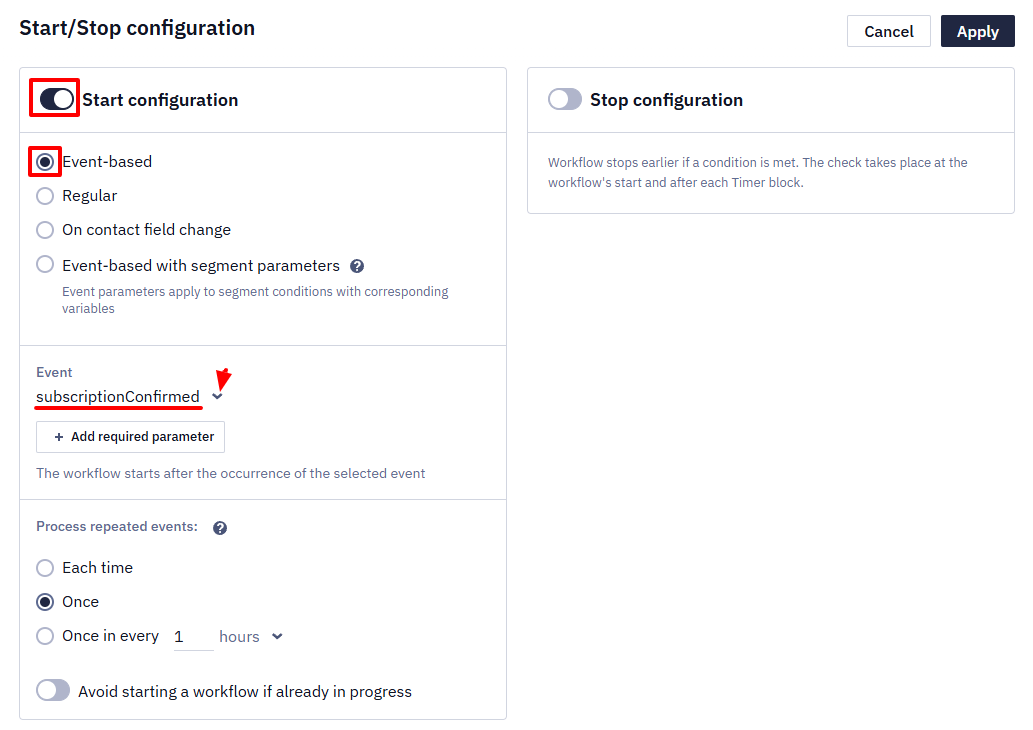
- Click Apply.
- Activate the workflow.
Result
After a user confirms the subscription:
- send the first email immediately;
- send the second email after 5 days.
This approach helps you gradually engage subscribers with your brand.
Updated 3 days ago