Sending Email Messages
Before you begin, make sure you have:
- Created an email message with a subject line, sender name, and content
- Built at least one contact segment to define your target audience
Let's look at this process step by step.
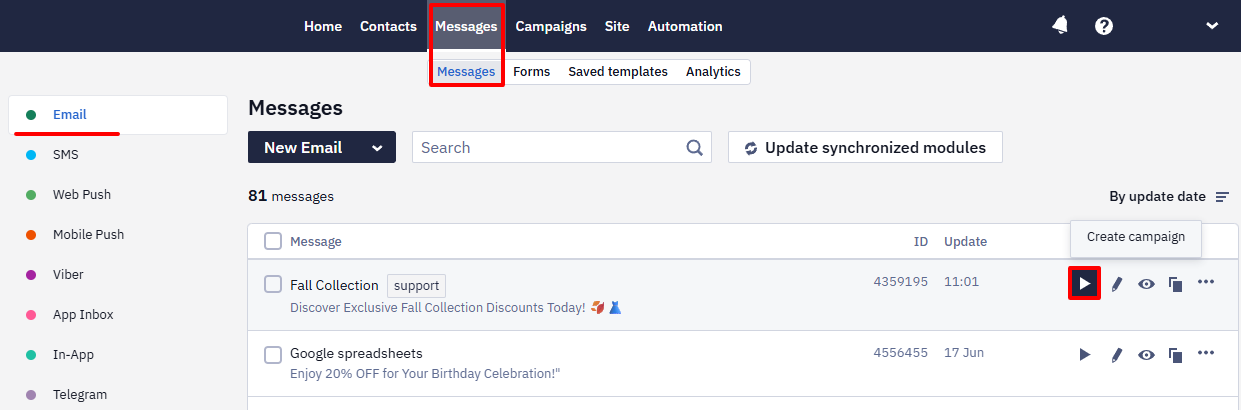
Select an Email
- Go to Messages → Email.
- Select the email you want to send and click Create campaign.
You can also click Create campaign inside the email editor.

- Select segments or contacts and click Go to campaign.
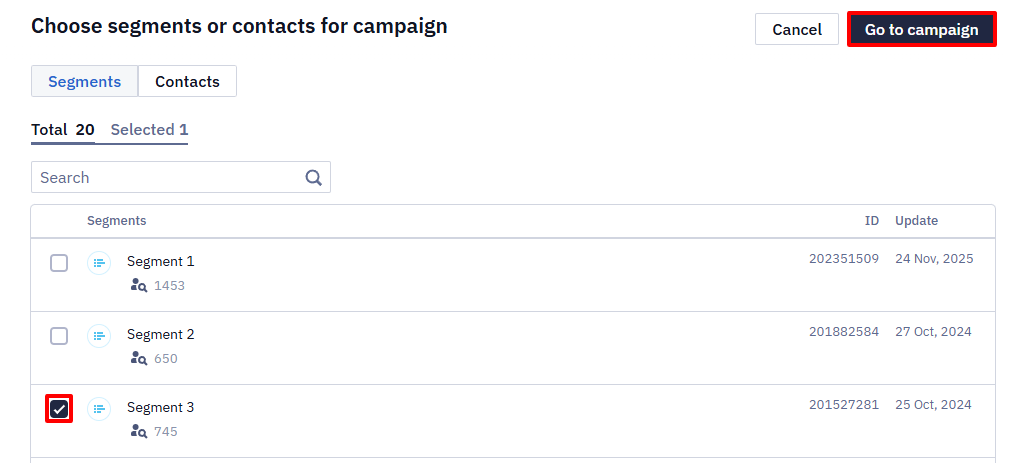
The campaign scheduling page opens.
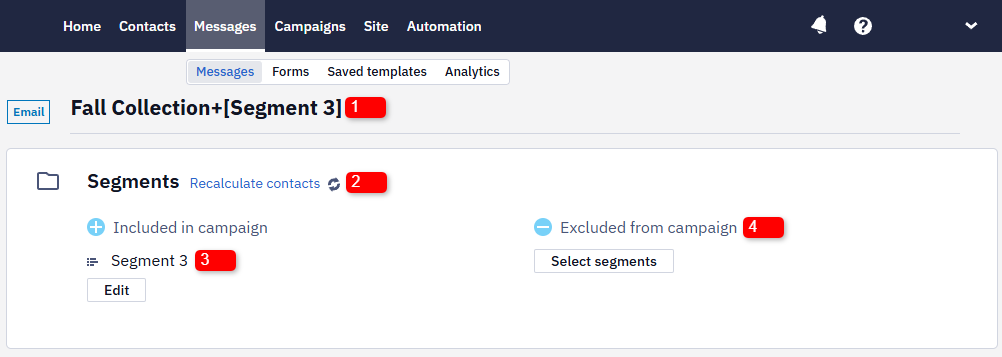
Scheduling Details
- Campaign name. The name is generated automatically. It includes the message name and the segment name. You can edit the campaign name.
- Recalculate contacts. Click Recalculate contacts to view the number of contacts included in the campaign.
- Included in campaign. Shows the contact segments selected for the campaign. Click Edit to add or change segments.
- Excluded from campaign. Shows contact segments excluded from the campaign. Click Select segments to exclude additional segments.
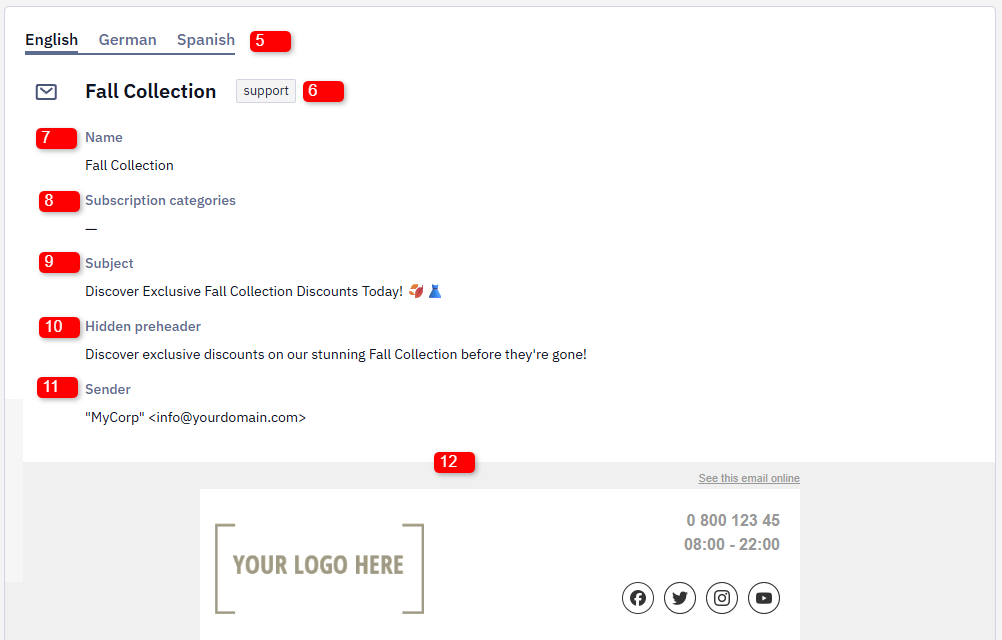
- Multilanguage. For multilingual campaigns, this section shows the number of language versions. You can switch between languages to view the corresponding content.
- Tags. Each message can be attributed with tags for better search and filter.
- Message name. Displays the message name defined in the email editor. This name is automatically set as the UTM tag in utm_campaign.
- Subscriptions categories. Shows the subscription categories assigned to the campaign. You can configure subscription categories in profile settings.
- Subject. Displays the email subject. If the subject is missing, a notification is shown. Emails without a subject cannot be sent. Return to the email editor to add a subject.
- Hidden preheader. Shows the text displayed after the subject line or on hover in the inbox.
- Sender name and address. Shows the sender name and email address displayed in the recipient’s inbox.
- Email preview. Review the email content before sending. Check for spelling errors, broken links, images, and CTAs.
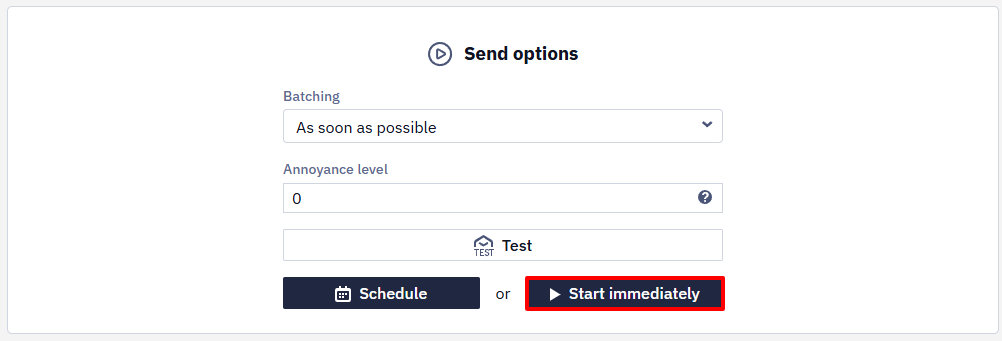
Send Options
Here, you can configure the following options:
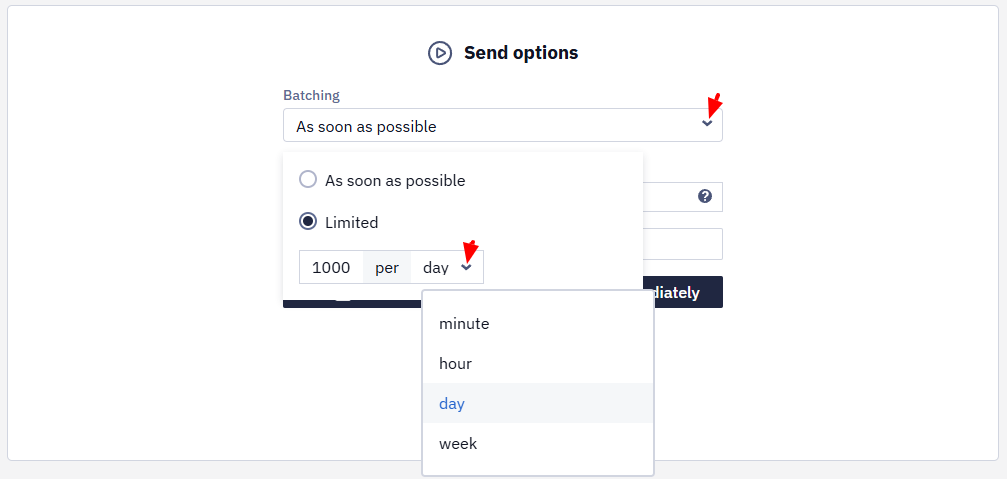
1. Batching
Controls the sending speed.
Available options:
- As soon as possible
- Limited speed by number of messages per minute, hour, day, or week
Rate limiting is used, for example, during domain warm-up.
NoteBatching is available only for campaigns with at least 10 contacts and without Use contact’s time zone enabled.
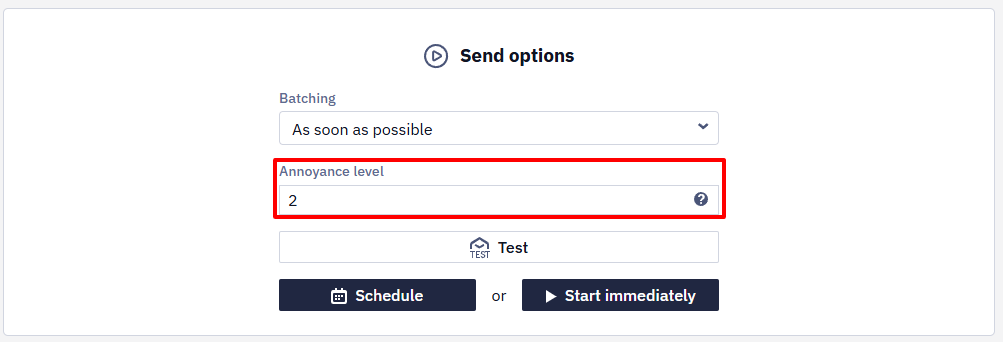
2. Annoyance Level
The annoyance level allows you to limit the number of campaigns for specific segments to avoid contact database burnout.
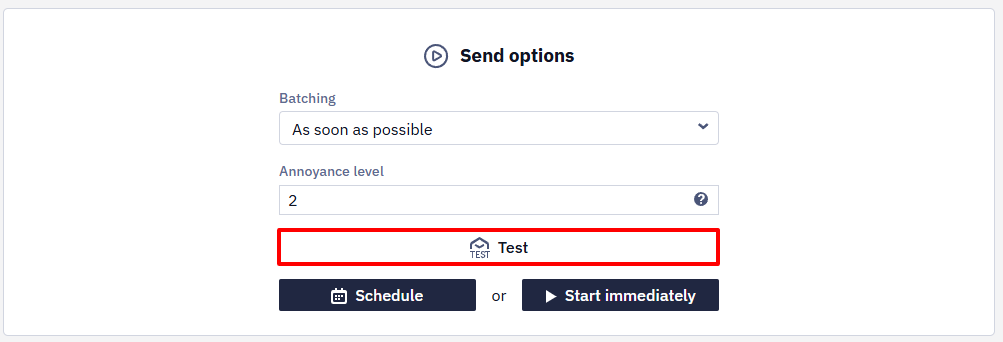
3. Test
Send a test message to check the email.
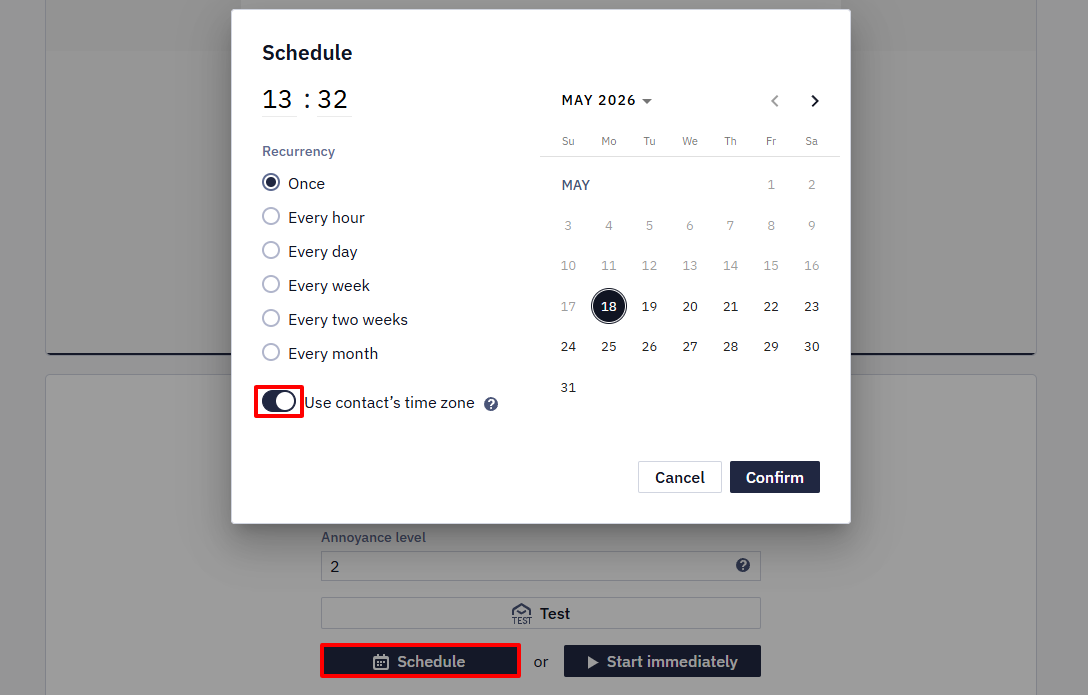
4. Schedule
Click Schedule to set the date, time, and sending frequency.
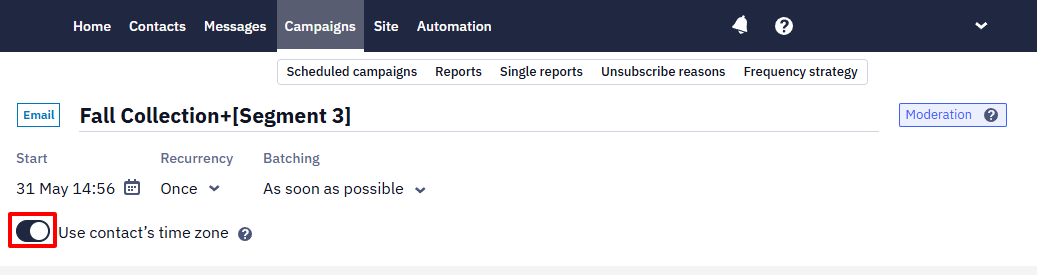
5. Use Contact’s Time Zone
Enable this option to send emails based on each contact’s time zone.
Example:
If the campaign is scheduled for 4:00 PM, each contact receives the email when 4:00 PM occurs in their time zone.
Contacts without a time zone receive the message based on the account time zone.
NoteYou cannot use batching when Use contact’s time zone is enabled.
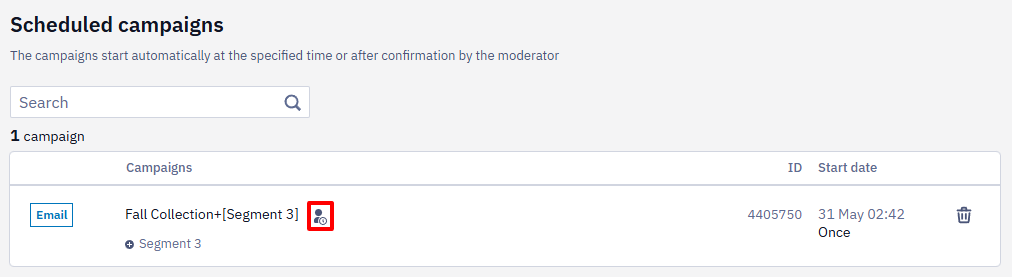
Campaigns scheduled by time zones are marked with a special icon on the report table and inside the report. The same icon is displayed in the campaign list scheduled by time zone.
To cancel time zone–based sending:
- Go to Campaigns → Scheduled campaigns.
- Open the campaign and disable Use contact’s time zone.
The campaign is then sent using the account time zone.
If the scheduled time has already passed in some time zones:
- the campaign appears as active in Reports;
- sending starts as soon as contacts reach the scheduled time in their time zone.
If the scheduled time has not occurred in any time zone:
- the campaign remains in Scheduled campaigns;
- it becomes active when the time is reached in the first time zone (UTC+14).
Contacts whose local time has already passed receive the email the next day at the same time.
NoteUse contact’s time zone is available for all eSputnik channels.
6. Start Immediately
Click Start immediately to send the campaign after moderation.
After scheduling or starting, the campaign is sent for moderation.
Moderation details:
- Time zone: GMT+03
- Duration:
- up to 10 minutes during working hours
(Mon–Fri: 08:00–19:00, Sat–Sun: 09:00–18:00) - 1–3 hours in the evening and on holidays
- up to 10 minutes during working hours
- Moderation is not performed at night.
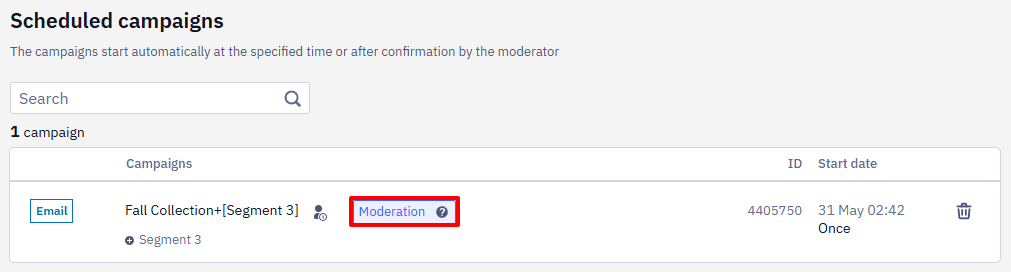
Campaign Statuses
- Preparing for sending.
- Moderation.
- Blocked — the campaign was rejected. A notification email with the reason is sent.
- Confirmed — the campaign is approved and waiting to be sent.
Before sending, the campaign automatically moves to Campaigns → Reports, where you can track delivery and statistics.
Updated about 1 month ago