
Segmentation by User Events
An event is any event on a website/in a mobile app that has a date, type, and a set of mandatory and optional parameters.
Examples of such events are:
- orders;
- abandoned browses;
- abandoned carts;
- new promotions;
- price drop.
Set up segmentation by events so that custom events and their parameters are recorded in contact cards and can be used to create dynamic segments.
NoteSegmentation by events is available depending on your pricing plan. To activate it, contact to [email protected].
Event Parameters for Contact Mapping
When using the Generate event v3 method, a new contact is created, provided segmentation is enabled for the event.
If a contact with the identifier from the event parameters is found, the system associates the event with it. If not, a new contact is created only when the event contains externalCustomerId together with an email address or phone number, and externalCustomerId doesn't match the email address. The source for creating such a contact will be recorded as Event in the contact card.
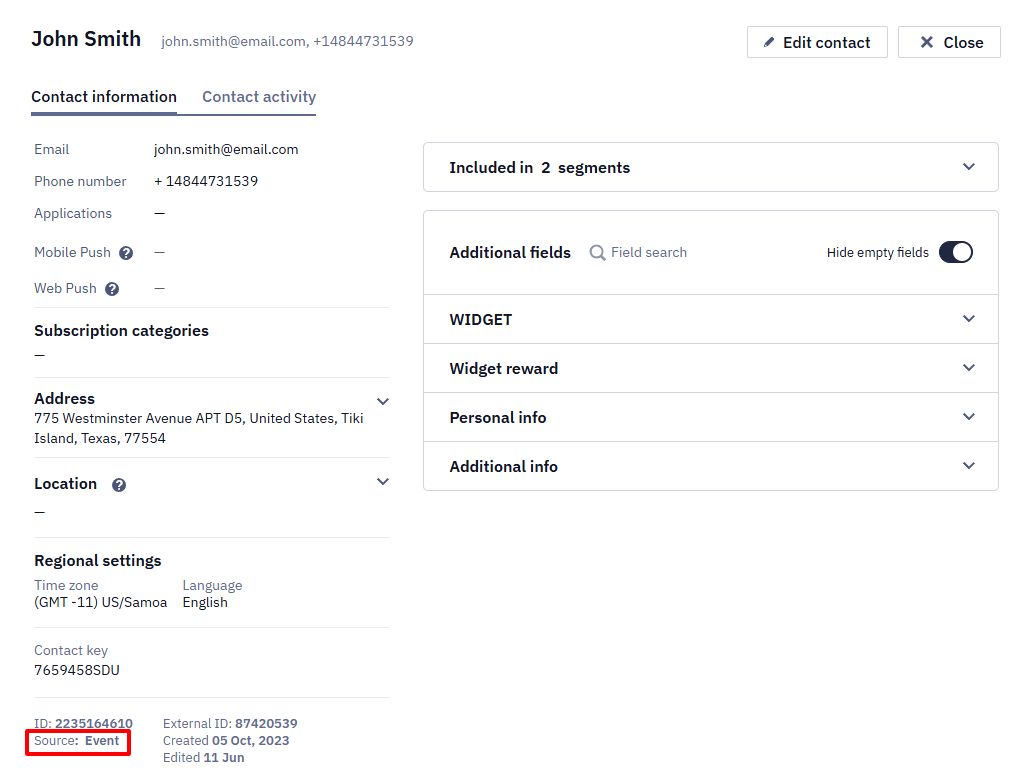
To save the event assigned to the contact, the event parameter must contain the contact identifier, by which the contact can be found in the eSputnik. Also, you need to know which contact field is used as an identifier.
By default, the system connects events with contacts when passing the following parameters:
| Event parameter | Contact field |
|---|---|
| ContactId | Contact ID |
| externalCustomerId | External ID |
| Email EmailAddress UserEmail ContactEmail | |
| Phone SMS PhoneNumber | Phone number |
| PushToken | Web push or mobile push token |
| ContactKey Contact_key | Additional contact field with the name {ContactKey} |
- Parameter names, except the email address, are case-sensitive. An event that passes
externalCustomerIDinstead ofexternalCustomerId, for example, isn't matched to a contact by that parameter. - Parameter values, except the email address, are compared with the passed event parameter values, case sensitive.
Suppose an event has one of the parameters listed in the left column. In that case, eSputnik will automatically associate it with the corresponding contact field in the system (right column) when it finds such an identifier.
Here is the event example automatically assigned to the contact:
{
  "eventTypeKey": "loginToMyWebSite",
  "keyValue": "bkeUc9sCpWoKLCOwmcZFKQ--",
  "params": {
    "contactId": "12312345612"
  }
}
The event key is "contactId" : "12312345612". eSputnik will assign the event to this contact if such contact exists.
Mapping Events with Contacts by External IDs >
Checking the event parameters
Select the event type which you will use for segmentation, and check its parameters. Let's look at the OrderDeliveredRefferal example.
- Go to Automation → Event history.

- In the Event type drop-down menu, select the
OrderDeliveredRefferalor search it.
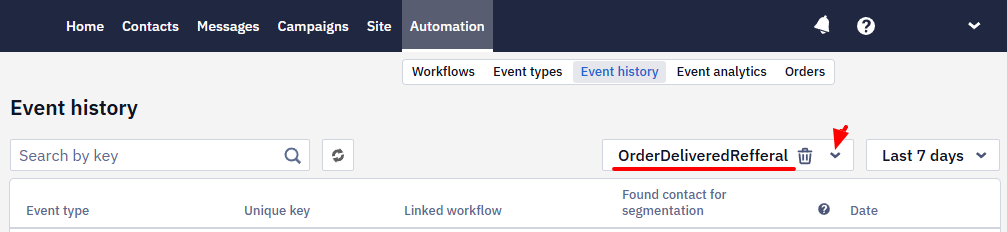
- Click the event name to see the event's parameters and check them with the parameters from the table above.
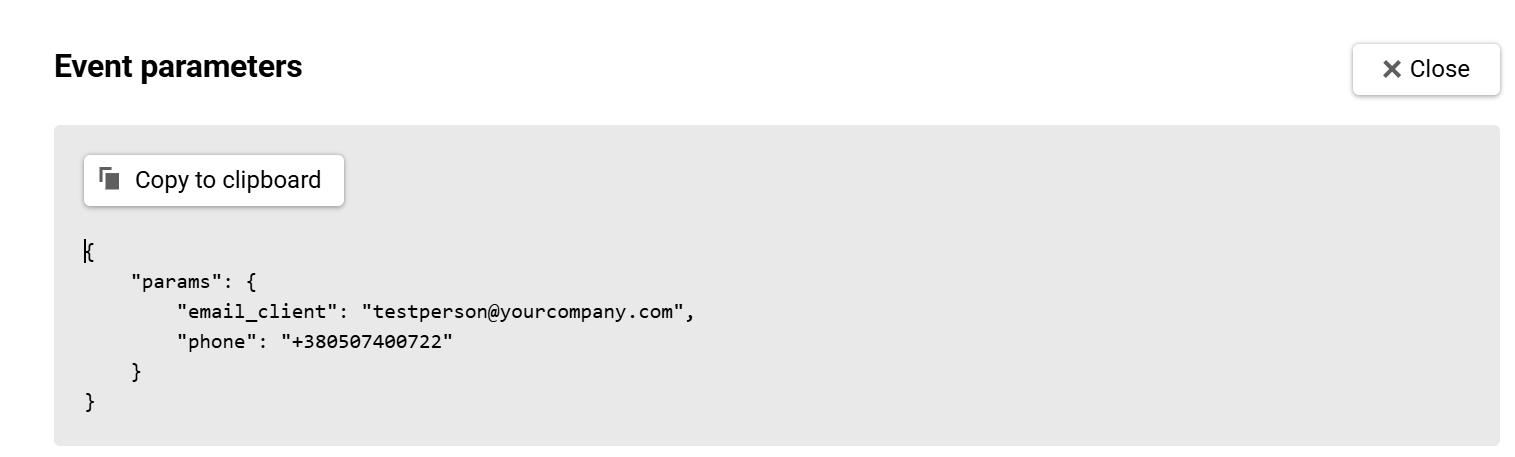
In the example, email_client parameter doesn't fit any value from the table. In this case, additional configuration for the email_client parameter is required.
| Event parameter | Contact field |
|---|---|
| Email EmailAddress UserEmail ContactEmail |
Setting event parameters
Set a matching rule to bind event parameters to a contact ID if you want to use a different event parameter name or a different contact field.
- Go to Settings → Events.
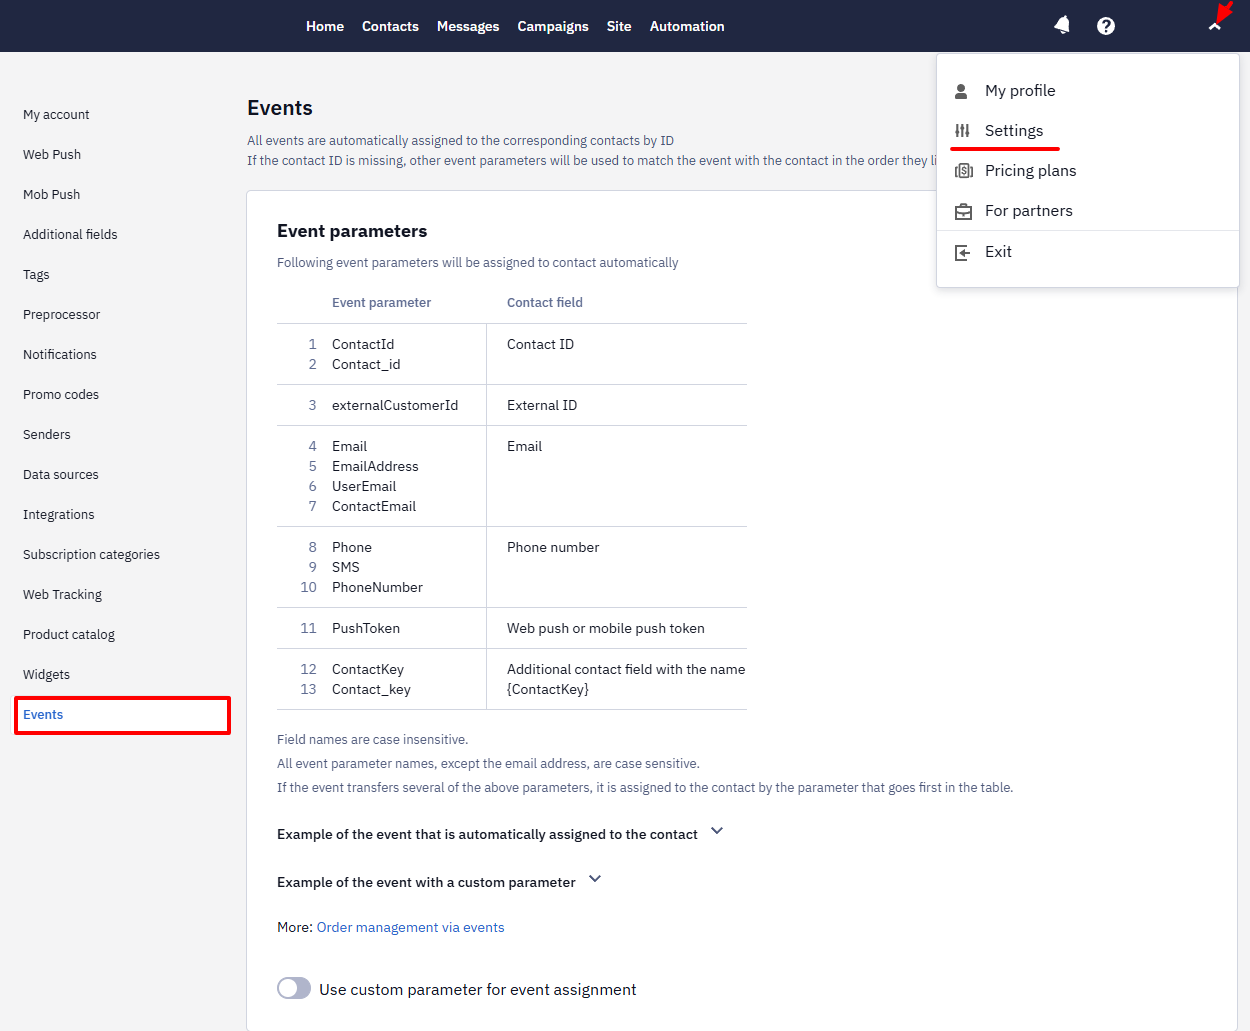
- Activate Use custom parameter for event assignment switcher, select the contact field, and enter the event parameter name.
In the example, the search for a match will go by Email additional field and email_client event parameter.
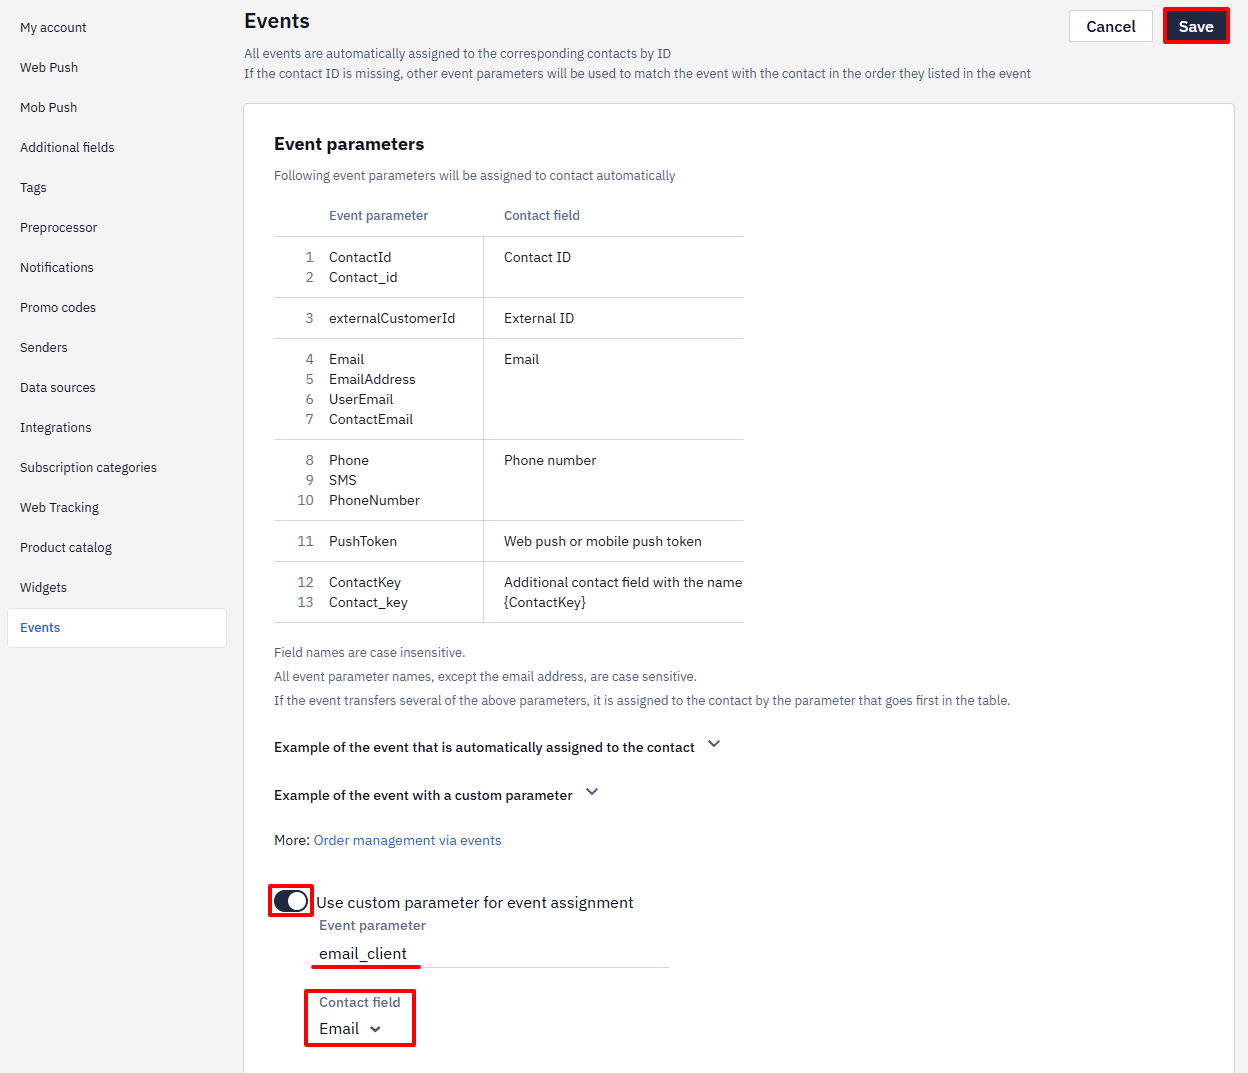
- Click Save.
Using Events for Segmentation
- Go to Automation → Event types and activate the switcher for the required event type.
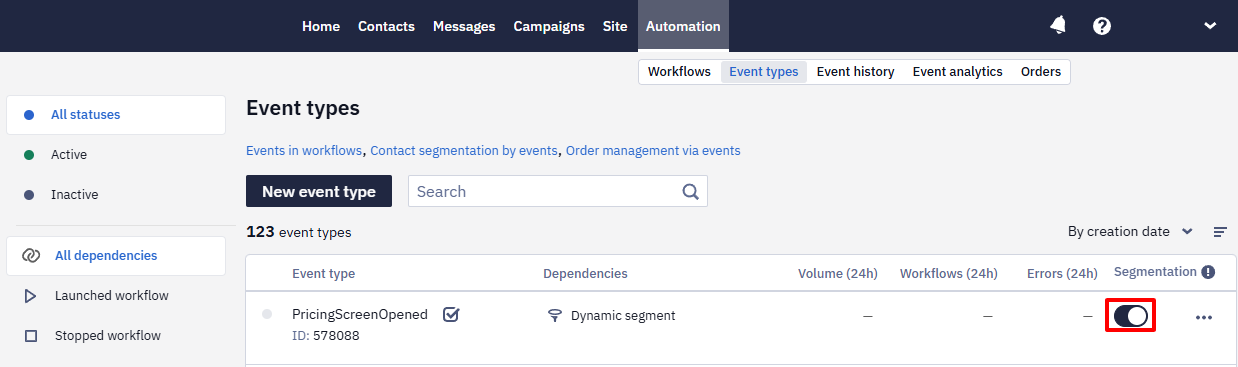
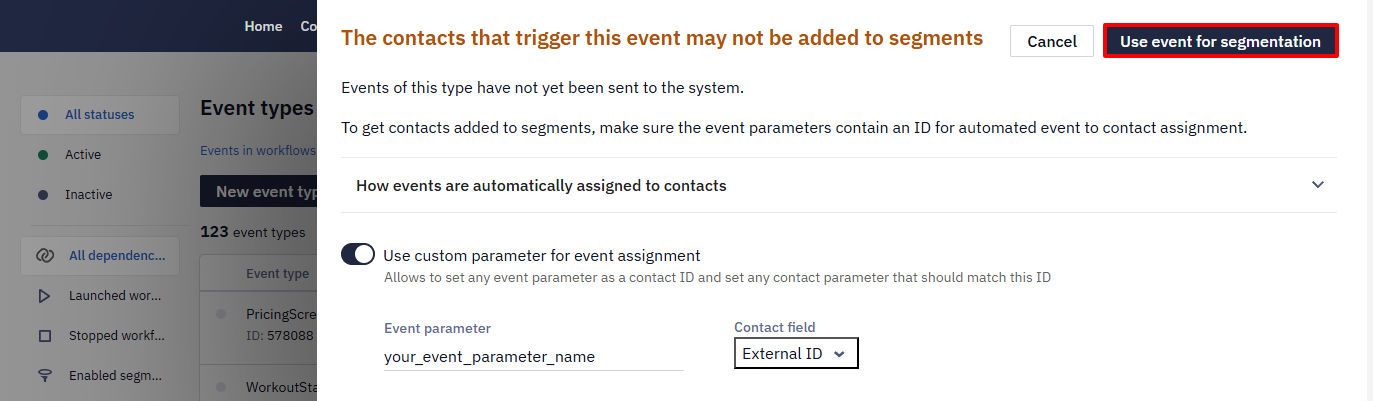
- In a pop-up window, click the Use event for segmentation button.
Important
- Only the events that occur after the feature has been enabled are used for segmentation.
- An event type appears in the list of conditions only after the first event of that type arrives. Marking a type for segmentation does not add it on its own, because until an event comes in there is nothing to segment by. Send one test event to make the type selectable.
- You can use up to 50 events for segmentation. This is an account-wide default — contact support if you need it raised.
- An event you send from your backend via API is linked to the contact card only if segmentation is enabled for its event type. Without it, such events are visible in the event history but not in the contact card.
Adding a Dynamic Segment for Segmentation by Events
- Go to Contacts → Segments. Click the Add segment button.
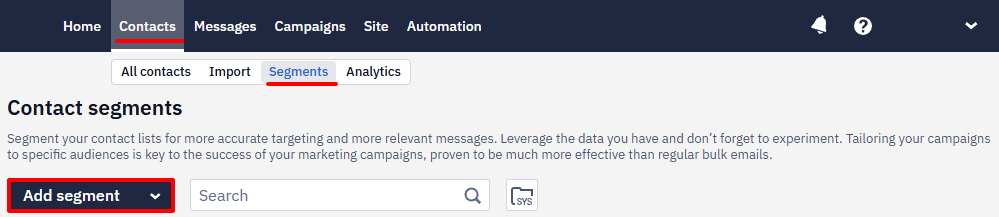
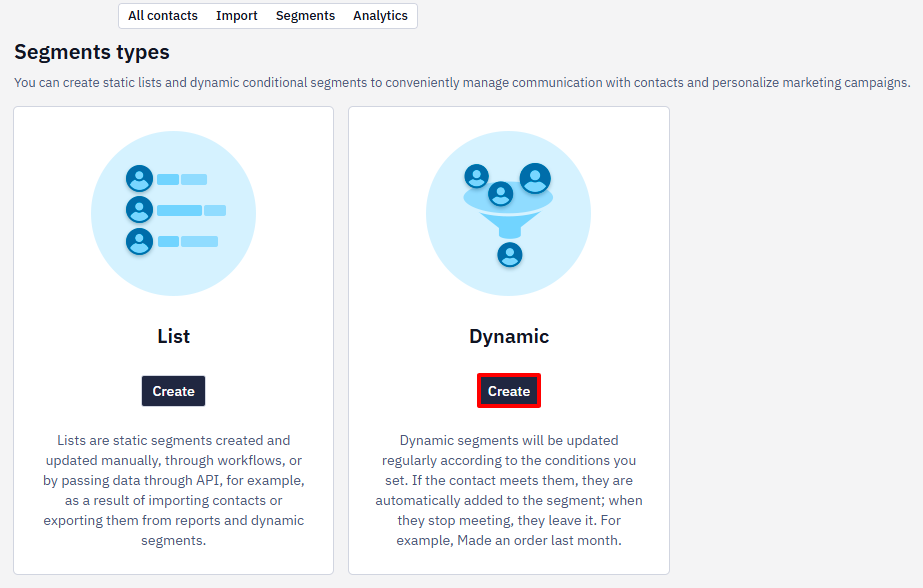
- Choose the Dynamic segment type and click Create.
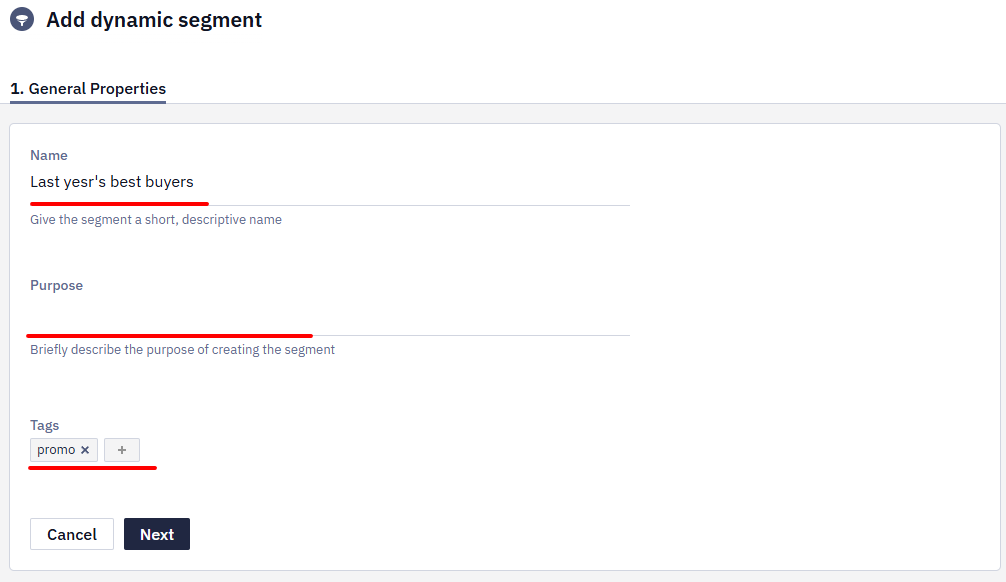
- Fill in the general properties:
- Segment name: it will be displayed in the general segments’ list.
- Segment purpose: for example, for regular promo campaigns.
- Tags: to find and filter the segments in the general list.
Click the Next button.
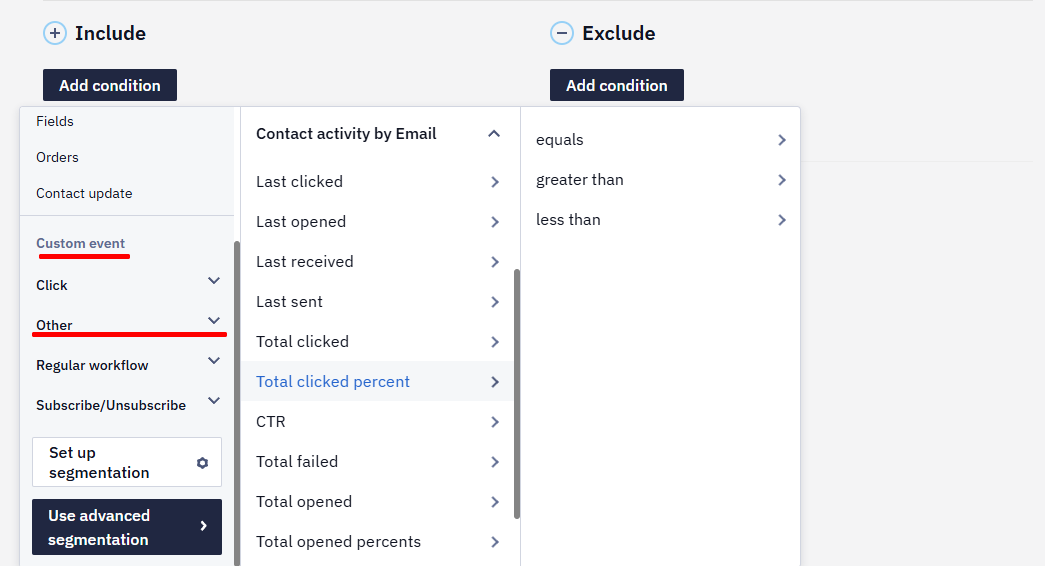
- Click the Add condition button. A new set of fields will appear in the list of conditions after the system receives event. Select the Custom event → Other fields.
- With basic segmentation, you can segment events only by the number and type;
- With advanced segmentation, you can segment events by the event parameters.
For example, we need to find everyone who ordered the Super Device brand in London today for more than $ 1,500.
To do this, first, create a card with all the events corresponding to making an order (you can specify other parameters of the number of events: for this, in the Event count condition, specify equals, greater than, less than or the range between).
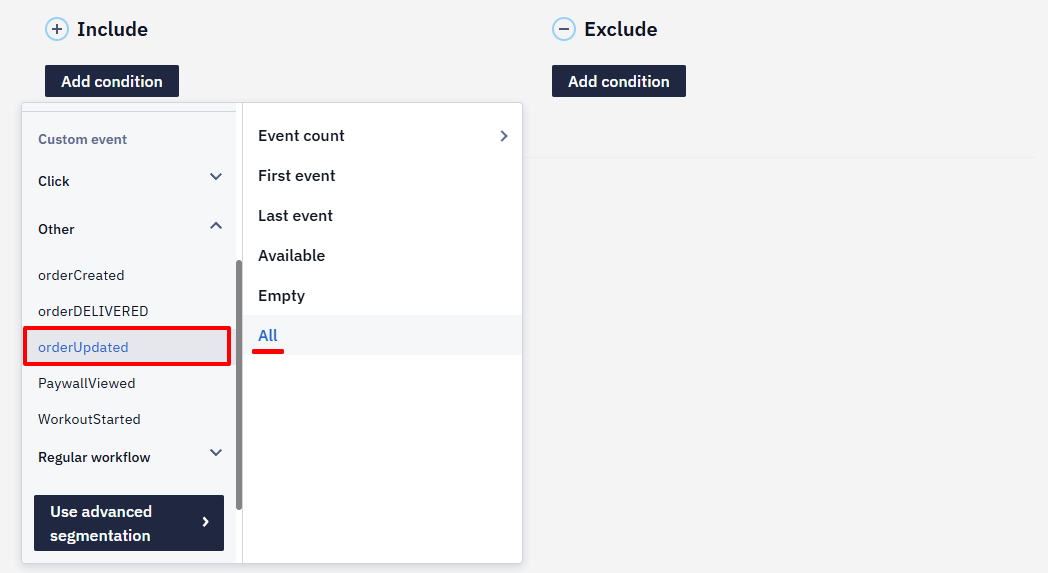
The event count in a condition is scoped to the selected event period (for example, "5 times today" or "5 times during the last 30 days") — it's not a running lifetime total across all time. To segment by a true all-time count (for example, "5+ orders ever"), export events to BigQuery, aggregate the count there, and feed it back as an additional field on the contact.
The same applies to the message text: the event count can't be inserted directly — a message shows the value already stored in a contact field.
Numeric parameter formatsPass numeric event parameters (for example, totalCost) in a consistent format. If the same number arrives as
1.2in one event and1.20in another, a segmentation condition on that parameter can fail to match. If a numeric condition unexpectedly returns nothing, check that the parameter is always sent with the same decimal format.
Card Conditions
We can select the event parameters required for additional filtering by clicking on the three dots in the card.
Segmentation by nested event parameters supports a maximum of 2 levels of nesting.
The is empty operator finds events in which the parameter was passed with an empty value or null. It doesn't find events that don't contain this parameter. Pass the parameter you filter by in every event. If that's not possible, add contacts with events of this type to the segment and exclude contacts whose events have the parameter set (the is set operator).
Parameter values are compared case-sensitively: WEB and web are different values.
The conditions available depend on the type of the parameter's values: numeric parameters offer equals, greater than, and less than, while text parameters offer contains, equals, doesn't equal, and one of.
To select by a part of a value that these conditions don't cover — the first digits of an order number, for example — pass that part as a separate parameter of the event and build the condition on it.
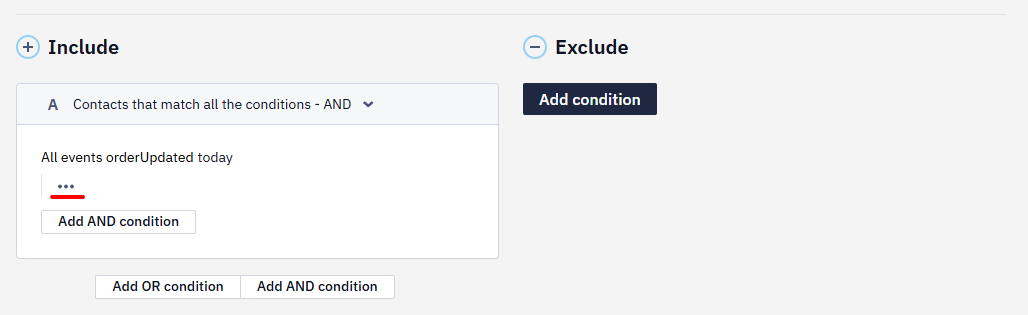
Let's choose the following options:
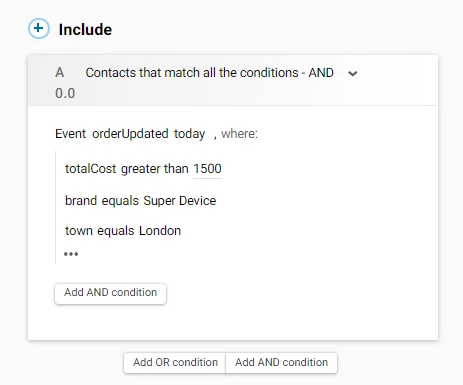
- brand → Super Brand.
- totalCost → more than $ 1500
- town → London
The segment card will look like this:
Several Product Criteria in One OrderFor event-based segmentation, the
itemsarray is effectively flattened into a set of values. A condition such ascategory = devicesANDquantity = 1can therefore be satisfied by different items of the same order — it does not guarantee that one and the same item carries both attributes.Per-item nested
ANDis not supported in this builder. If that distinction matters, pass a separate derived attribute at the item or event level, or build the segment externally.
Parameter Values for SegmentationThe system determines the type of each event parameter from the data it receives. A parameter whose values are long and nearly unique — a UUID, a link, a long description — is recognized as text, and a condition cannot be built on it.
So in the parameters you plan to segment by, pass short values — up to about 50 characters. Longer ones do not get into the list the one of operator takes its values from, so they can be found only with contains and a distinctive part of the value.
Event period
By default, the condition counts events that happened today. To pick another period, click today in the segment condition.
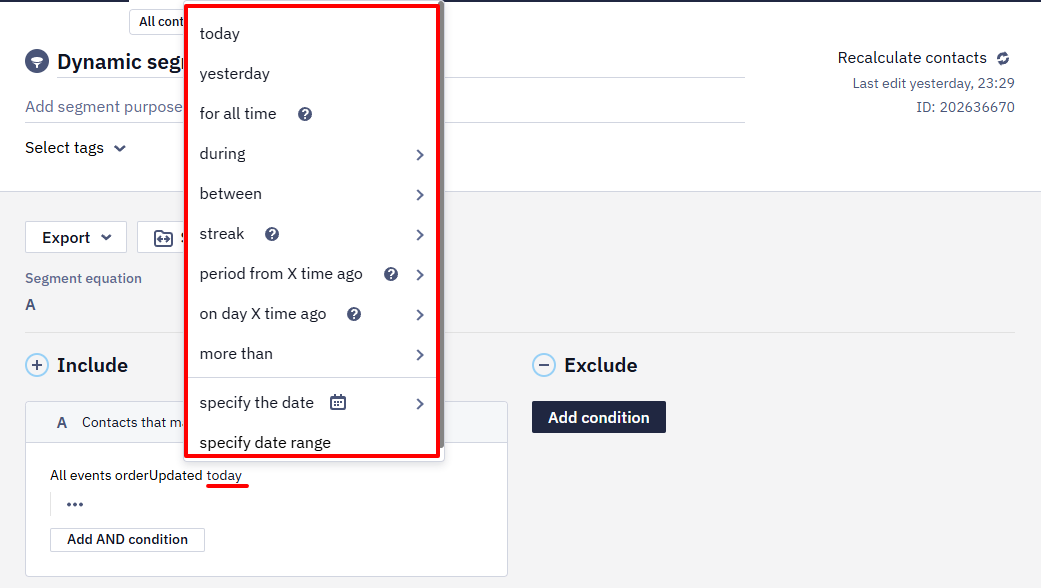
Relative periods — during → last N, between, and more than — are counted from the time the system recalculates the segment's contacts.
| Option | Events counted |
|---|---|
| today | Events of the current day. |
| yesterday | Events of the previous day. |
| for all time | Every stored event, with no further date limit. Events are stored for two years by default. |
| during | Events of the current week, month, or year, or of the last N minutes, hours, days, weeks, months, or years. |
| between | Events in a relative span, for example from five days ago to one day ago. Both ends are included, and the value 0 stands for the moment of recalculation. The bounds can be counted either back or forward from the moment of recalculation. |
| streak | Events that occurred at least once in each of the N previous complete days, weeks, or months in UTC. |
| period from X time ago | Events of a complete calendar period in the past, for example the calendar year two years ago. |
| on day X time ago | Events of the matching day in the past, for example exactly two years ago. |
| more than | Events older than the given point, for example more than 30 days ago. |
| specify the date | Events on a chosen date, before it, or after it. |
| specify date range | Events between two given dates and times. The dates can be in the future. |
For example, if the segment's contacts were recalculated on 20 August 2026 at 16:24:
- during last 7 days covers events from 13 August 16:24 to 20 August 16:24, while during this week covers events from the beginning of the current calendar week up to that moment;
- between 0 and 5 last days covers events from 15 August 16:24 to 20 August 16:24, including those of the current day;
- between 1 and 5 last days covers events from 15 August 16:24 to 19 August 16:24; events of the current day are left out;
- period from 2 years ago covers the whole of 2024;
- on day 2 years ago means 20 August 2024.
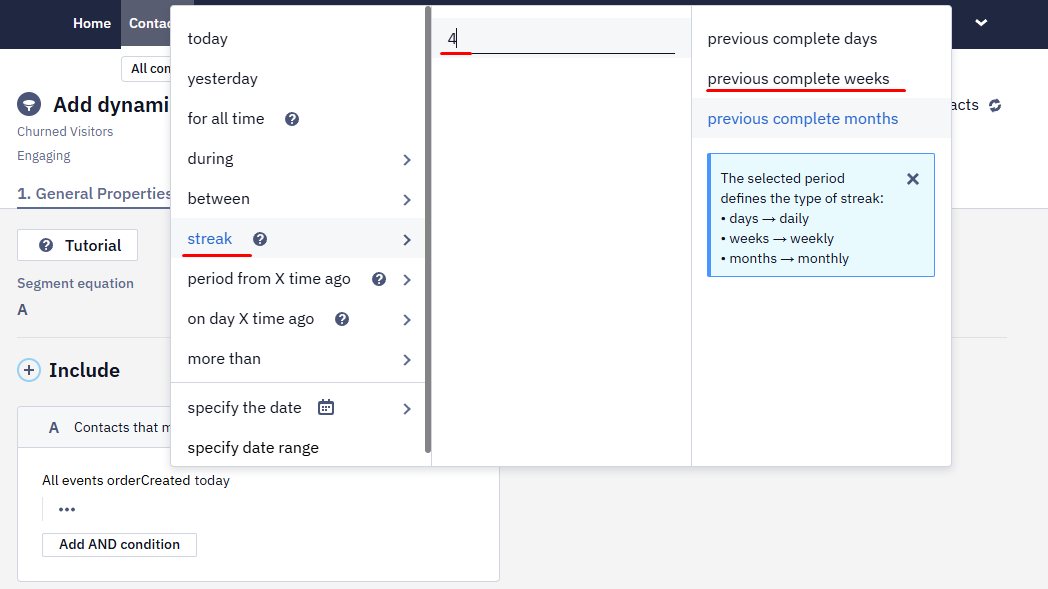
streak works with whole calendar periods in UTC. For example, the condition streak → 4 → previous complete weeks, recalculated on 20 August 2026, covers four weeks: 20–26 July, 27 July – 2 August, 3–9 August, and 10–16 August. The segment includes contacts for whom the event occurred at least once in each of those periods. The current, unfinished week is not counted.
Click Done to save the segment and use it to send promo campaigns or build workflows.
To create segments based on events that reflect the customer lifecycle stage, use the following conditions:
- First event – to identify the user's initial interaction (e.g., subscription, unsubscription, purchase, etc.);
- Last event – to understand when they last engaged in the same event.
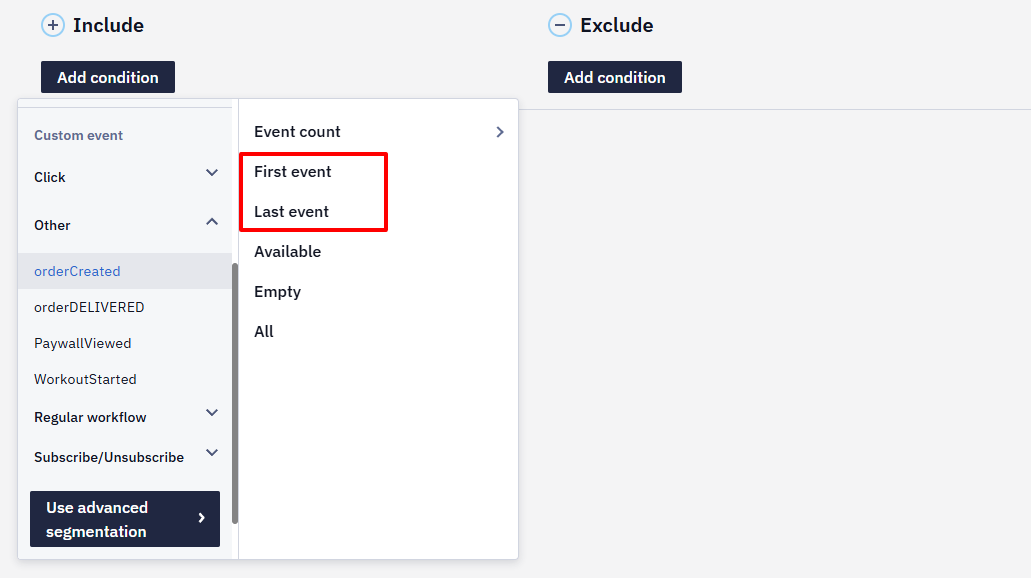
These conditions help you:
- Identify new users (e.g., the first event occurred within the last week, month, or a specific period);
- Find inactive users (e.g., the last event happened a month ago or hasn't occurred within the selected timeframe);
- Analyze returning users (e.g., the first event was a year ago, but a new one occurred last week).
This allows you to clearly distinguish between new and returning users. For example, if a contact was previously subscribed, then unsubscribed, and re-subscribed a few months later, they should not be considered new.
Updated 24 days ago