
FAQ: Billing
NoteVisit our pricing page to view a list of pricing plans.
Can I Top Up My Balance and Start Campaigns Immediately?
Starting campaigns and required setup
The algorithm for starting the system depends on what functionality you plan to use.
If you want to start with promo campaigns, first verify the domain. After this, you can send out campaigns even without topping up your account — within the Trial subscription limits.
If you activate CDP features, you need to make some additional settings. Please contact us for advice and support in connecting CDP packages.
To make omnichannel campaigns, prepare the following settings:
- SMS – register an SMS sender ID or enable processing.
- Viber – add sender ID.
- Web Push – follow the instructions on the link.
- Mobile Push – integrate your mobile app with eSputnik.
- App Inbox – set up a channel for a website and/or mobile app.
- Web Widget – install script on website and setting up widgets.
- In-App – connect your mobile app to eSputnik and install SDK.
- Telegram – integrating with Telegram Bot.
After completing the settings, connect the appropriate channels on the Pricing plans tab.
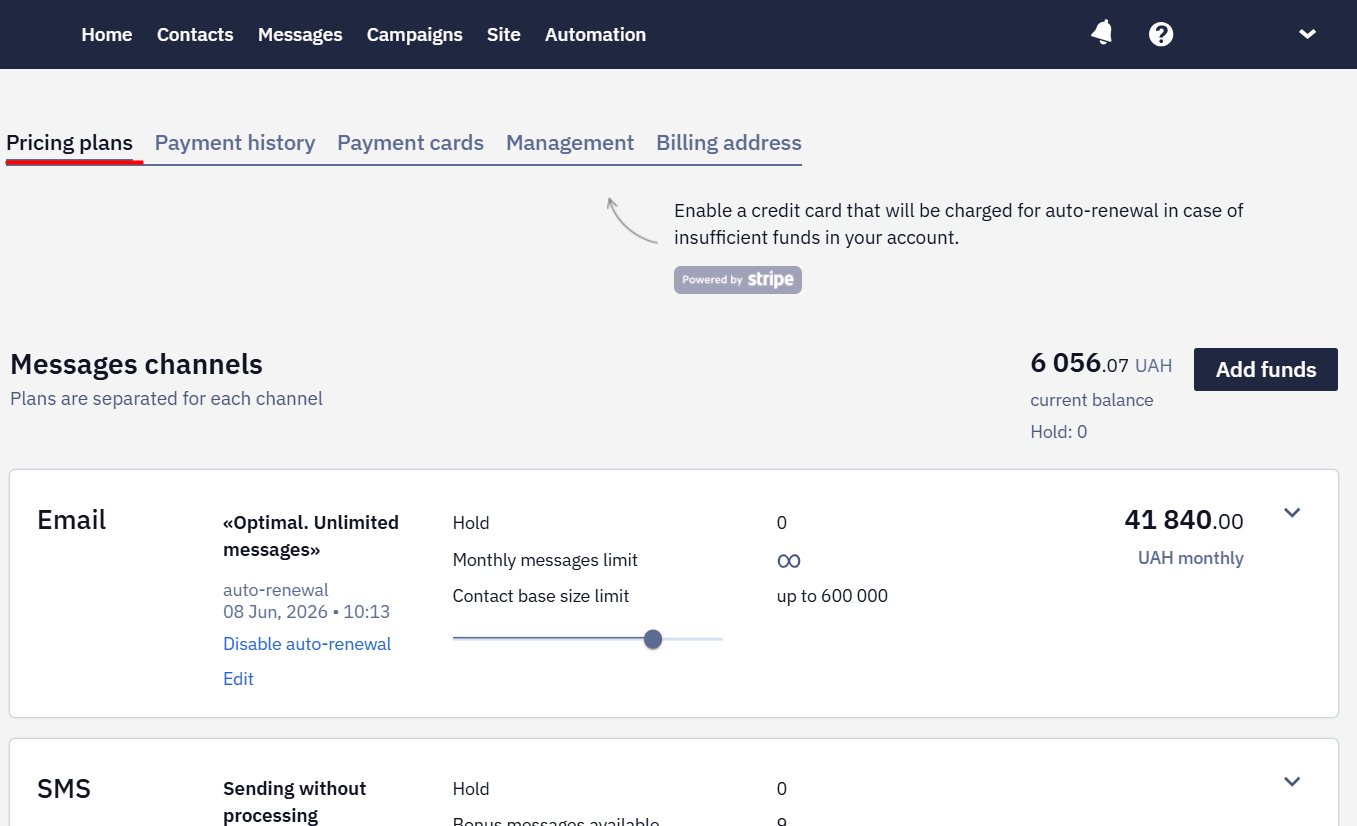
How to Top Up My Account in the System?
Adding funds and processing time
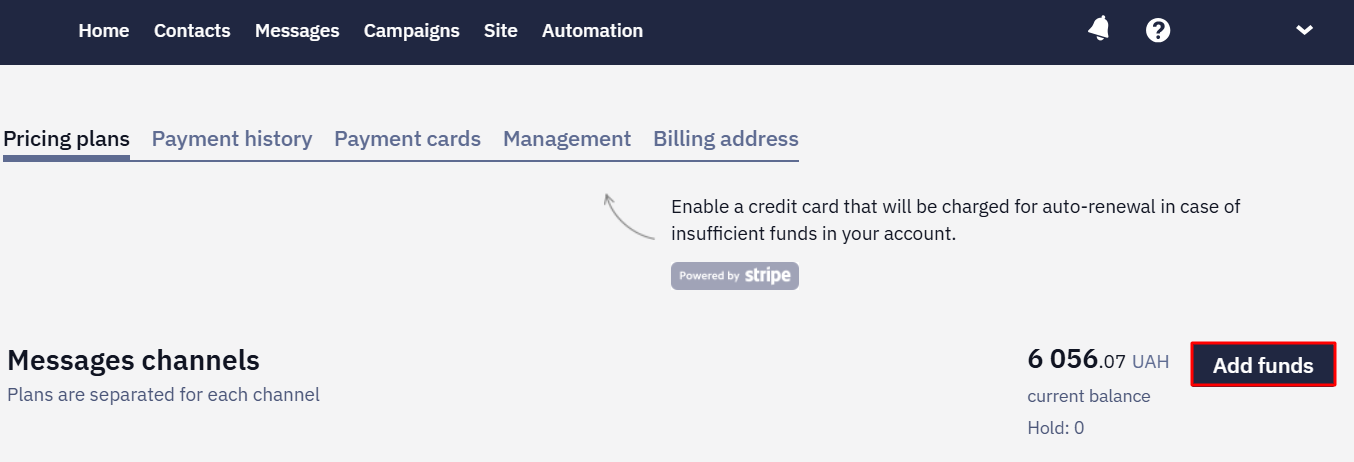
Click the Add funds button on the main account page. When replenishing via built-in systems, funds are credited automatically.
When paying by bank transfer, funds are received in the system within 3-4 hours; if there are delays on the bank's side, the payment may take 1-3 days. If you have an urgent campaign planned, send us a scan/photo of the receipt to [email protected].
What Payment Methods are in the System?
Supported payment methods
The system has several payment methods:
- Visa/Mastercard payment cards.
- Payment by legal entities and individuals with an invoice.
- Paypal.
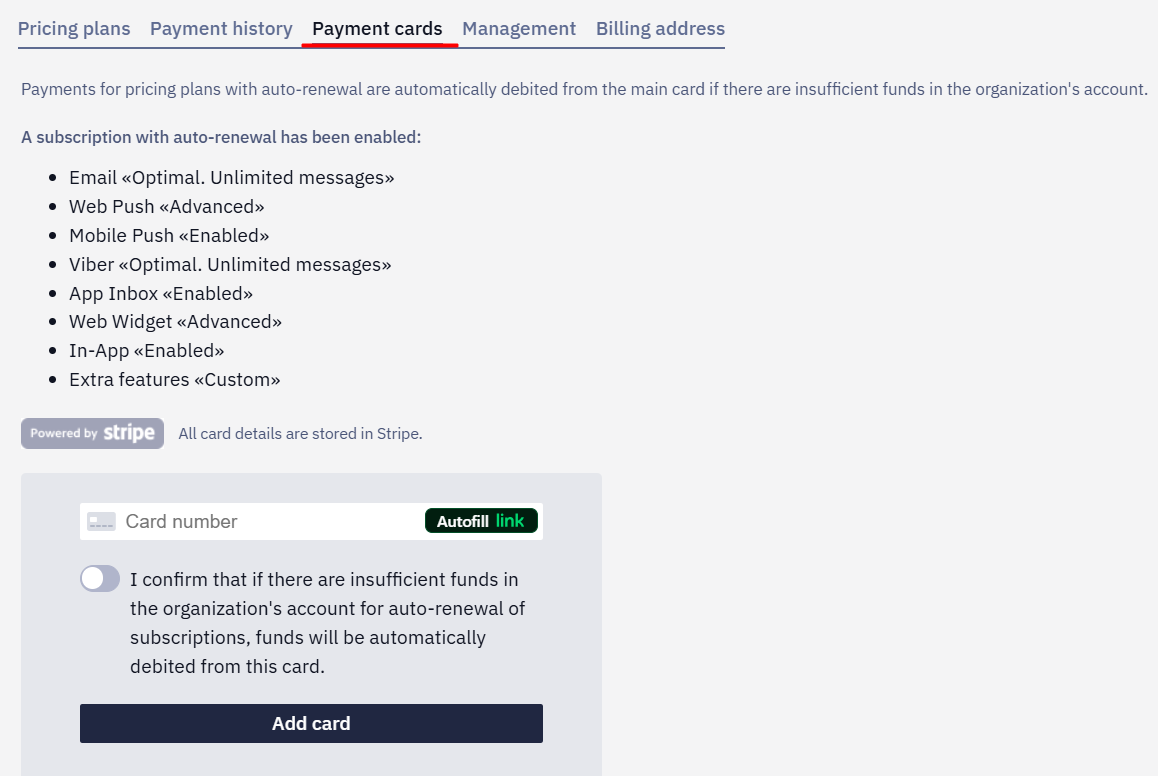
To add a card, click the Pricing plans button on the main account page or in your account settings, go to the Payment cards tab, and click Add card.
Where Can I Form an Invoice?
Generating and activating invoices
Click the Pricing plans button on the main account page or in your account settings. You will see a list of system features that you can activate.
For plans available for self-service activation:
- Expand the spacer with the functionality you want to activate.
- Select your plan settings using the slider.
- Click Enable.
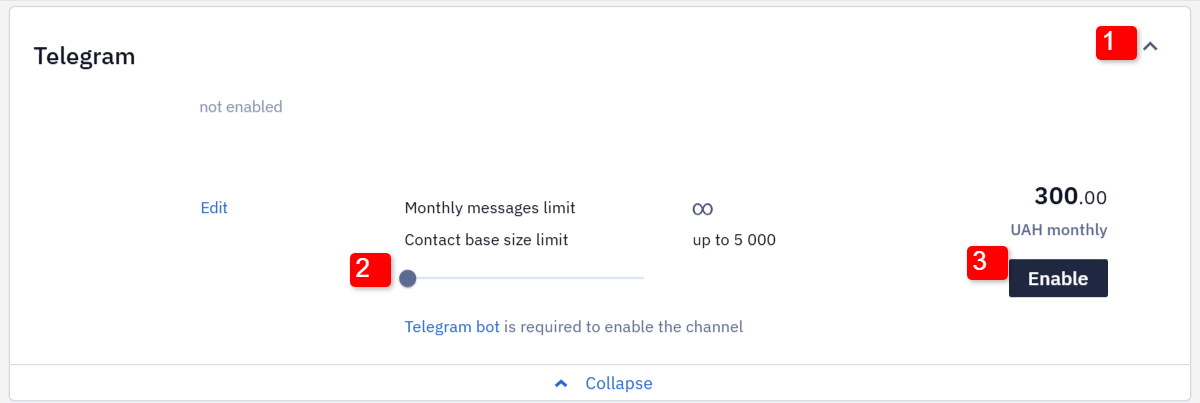
After replenishing the account, the monthly payment will be debited from the account, and the functionality will be activated.
For organizations with a postpaid subscription, this page shows the terms of the active plan and a link to the subscription instead of the self-service slider.
Postpaid Email Plans
For organizations with a postpaid Email subscription, the Pricing plans page shows the connected plan:
- Basic;
- Extended;
- Pro.
A plan can include limits on the number of active workflows and workflow launches. The specific limits and pricing depend on your subscription terms and are shown in your account.
If a campaign report shows Over tariff plan limit, check whether the organization has exceeded a limit of its active Pro plan. A plan limit applies at the organization level, so exceeding it can stop messages from any campaign, including channels billed per message.
By default, workflow launches stop when the plan limit is reached. Organizations with a prepaid subscription can enable Paid launches beyond the monthly limit in Pricing plans → CDP packages. After the limit is reached, the same option is available from the warning above the workflow list by clicking Allow extra launches. Each additional launch is then charged separately at the current price for the account currency. Charges are deducted from the balance or, if configured, the available credit limit. When no funds or credit remain, workflow launches pause until the balance is topped up. If paid over-limit launches are not enabled, increasing the balance alone does not remove the plan limit. Review the current limits and pricing on this page or contact support.
In the CDP section, organizations with an active postpaid subscription can view their individual cost and go to their postpaid subscription.
Does It Cost More to Send via a Workflow Than a Direct Send?
Pricing model for Workflow vs. direct sends
No. Pricing is based on the number of contact profiles stored in your account, not on the channel or method used to send a message. Sending the same message through a Workflow versus sending it directly (a broadcast or a single message via API) costs the same — there's no separate per-Workflow or per-send fee layered on top of your plan.
Why are there no funds on my balance after payment?
Payment processing time
Bank transactions take from several hours to several days.
What Happens If a Subscription Payment Fails?
Grace period
A grace period starts, during which the subscription stays active and all its features remain available. It lasts 5 days. During this time the system retries the payment once every 24 hours, up to five times in total.
If the balance is topped up or a credit limit is opened, the grace period ends immediately. The subscription continues with the same start and end dates.
If all payment retries fail, the subscription is canceled.
A subscription in the grace period is marked on the Pricing plans page, and a notification appears on the home page. The system also sends emails when the grace period starts, when the payment is retried, and when the period ends.
How to Receive Payment Documents?
Requesting payment documents
Please leave a request with a list of required documents at [email protected].
Where Can I See My Payment History?
Viewing billing history
Click the Pricing Plans button on the main account page or in your account settings and go to the Payment history tab. Select the period for which you want to view history.
If paid workflow launches above the plan limit are enabled, the payment history also shows the related charges and the number of paid launches.
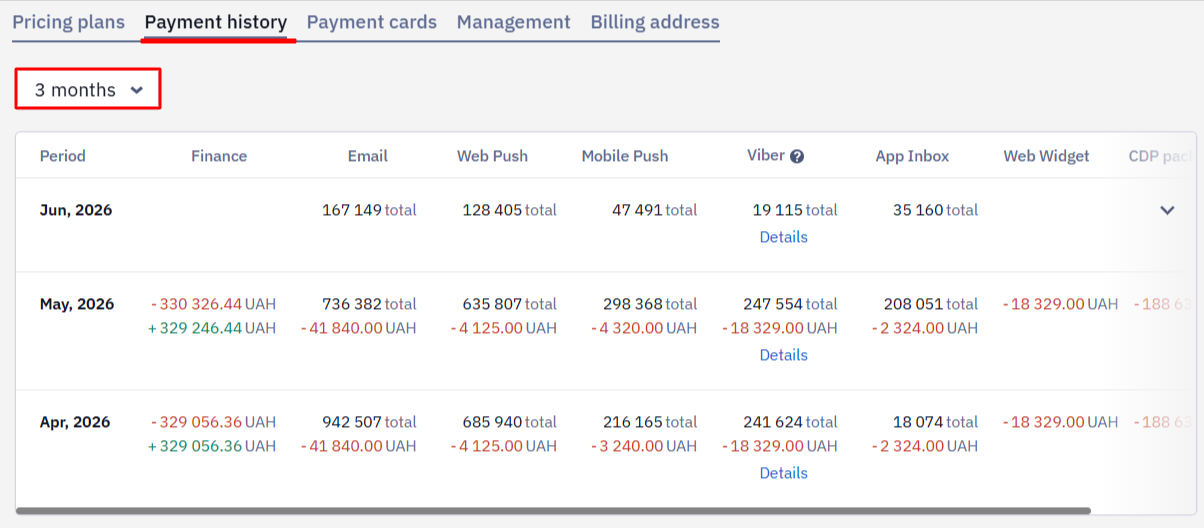
You can also use the Get organization billing history API method — the request will return the billing history separated by days and media channels.
The request returns the history of the account whose API key is used. When one account pays for several others, the top-ups and plans are connected in that account, so its history holds the charges for all of them.
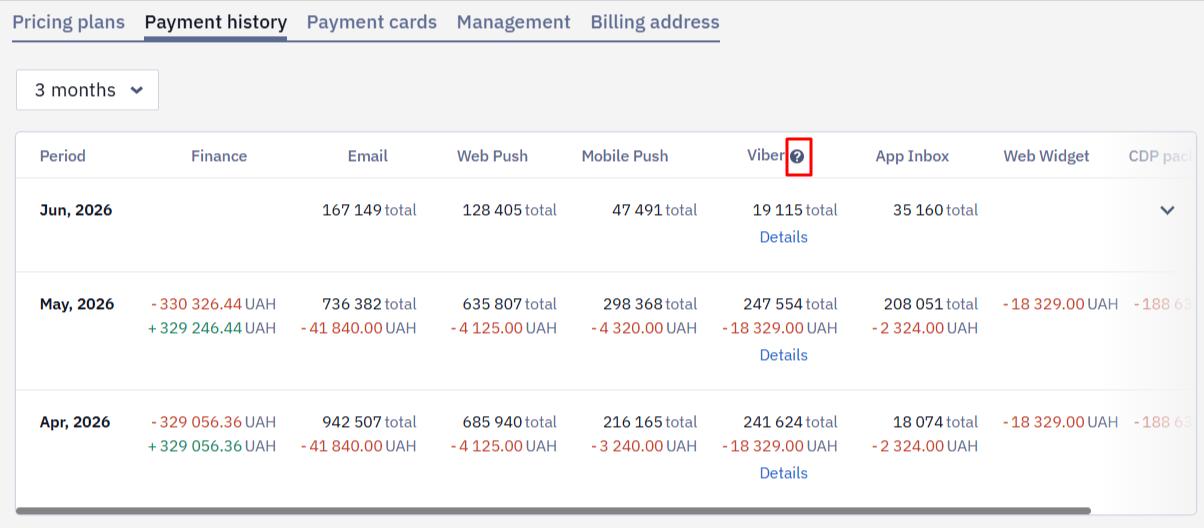
For a more detailed overview of Viber channel billing, click the help icon next to its name. If you need to view detailed tariff information, click Details — a menu will open with a monthly breakdown of expenses, refunds, and the number of delivered messages.
How Can I Add a Billing Address for Invoice Display?
Adding a billing address
To add a billing address, click Pricing plans on the account homepage, go to the Billing address tab, and fill in your organization's details. All fields are required except for Additional information.
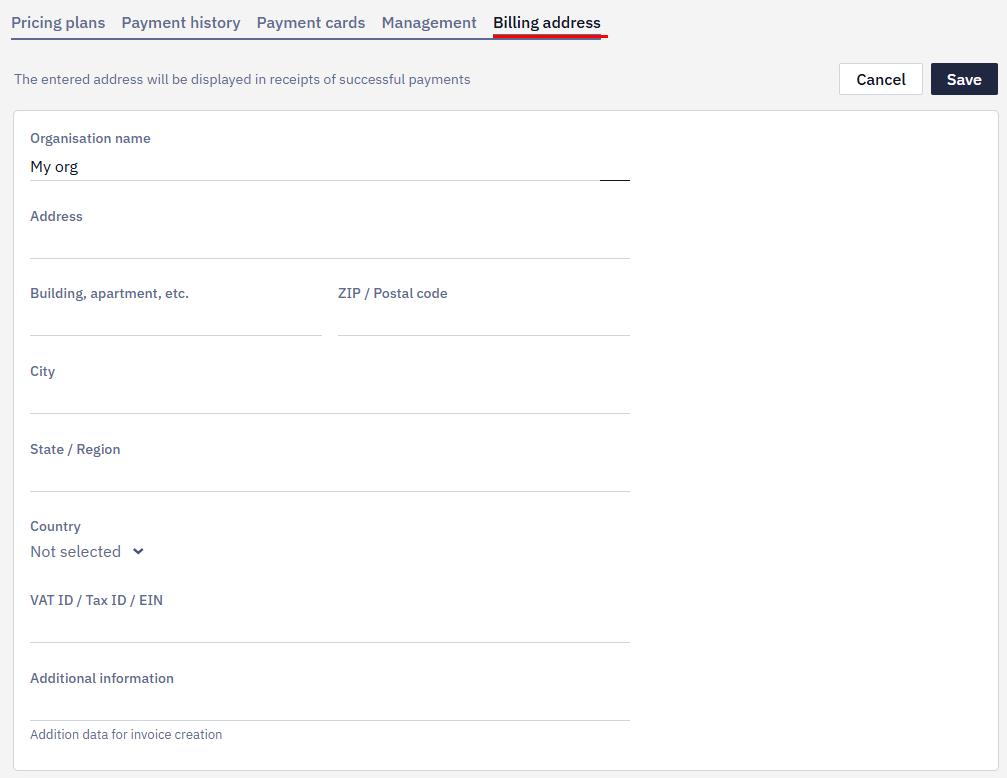
These details will then be used for invoice generation.
How Do I Set Up Billing Notifications?
Setting billing notifications
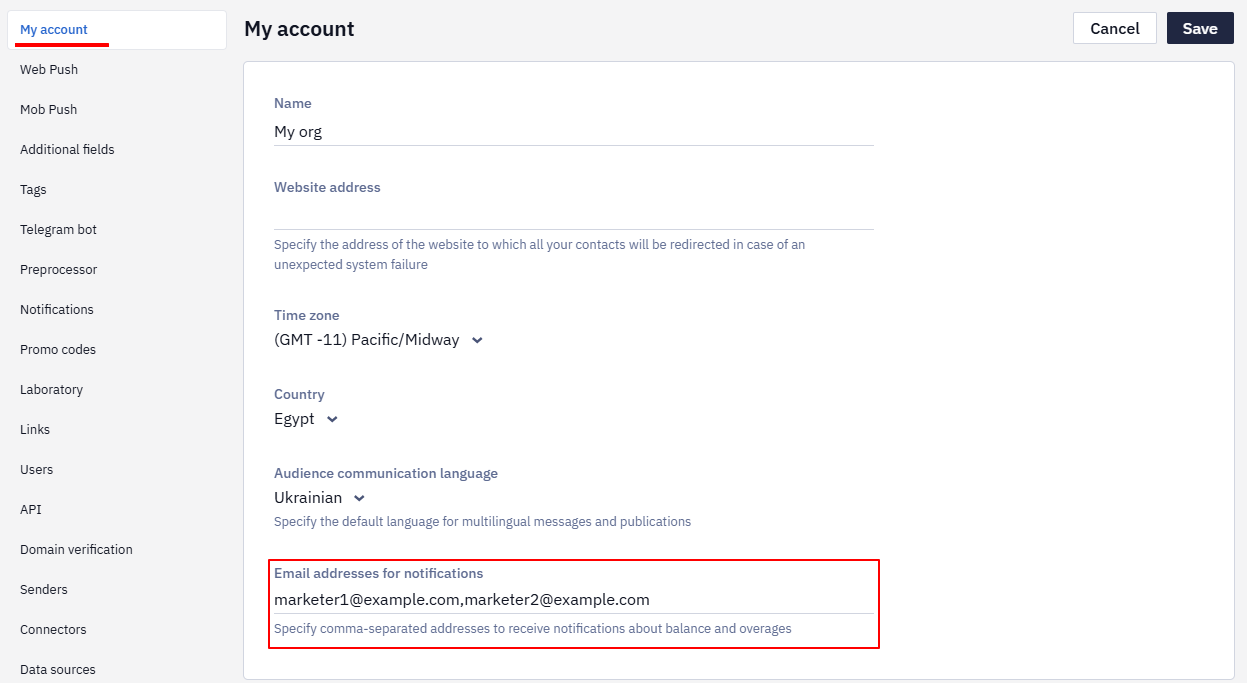
You can specify the email addresses that receive notifications about balance and overages in the account settings → My account tab, in the Email addresses for notifications field. Enter the addresses separated by commas and click Save.
These addresses also receive technical warnings — for example, about a webhook being unavailable. When the field is empty, such emails go to every user in the organization with the Admin role.
Do I Get a Warning When the Base Approaches the Plan Limit?
Contact limit warning
When the number of contacts in your base approaches your plan limit, you receive a warning email so you can change your plan or clean up the base in advance.
Updated 8 days ago