Actions Blocks
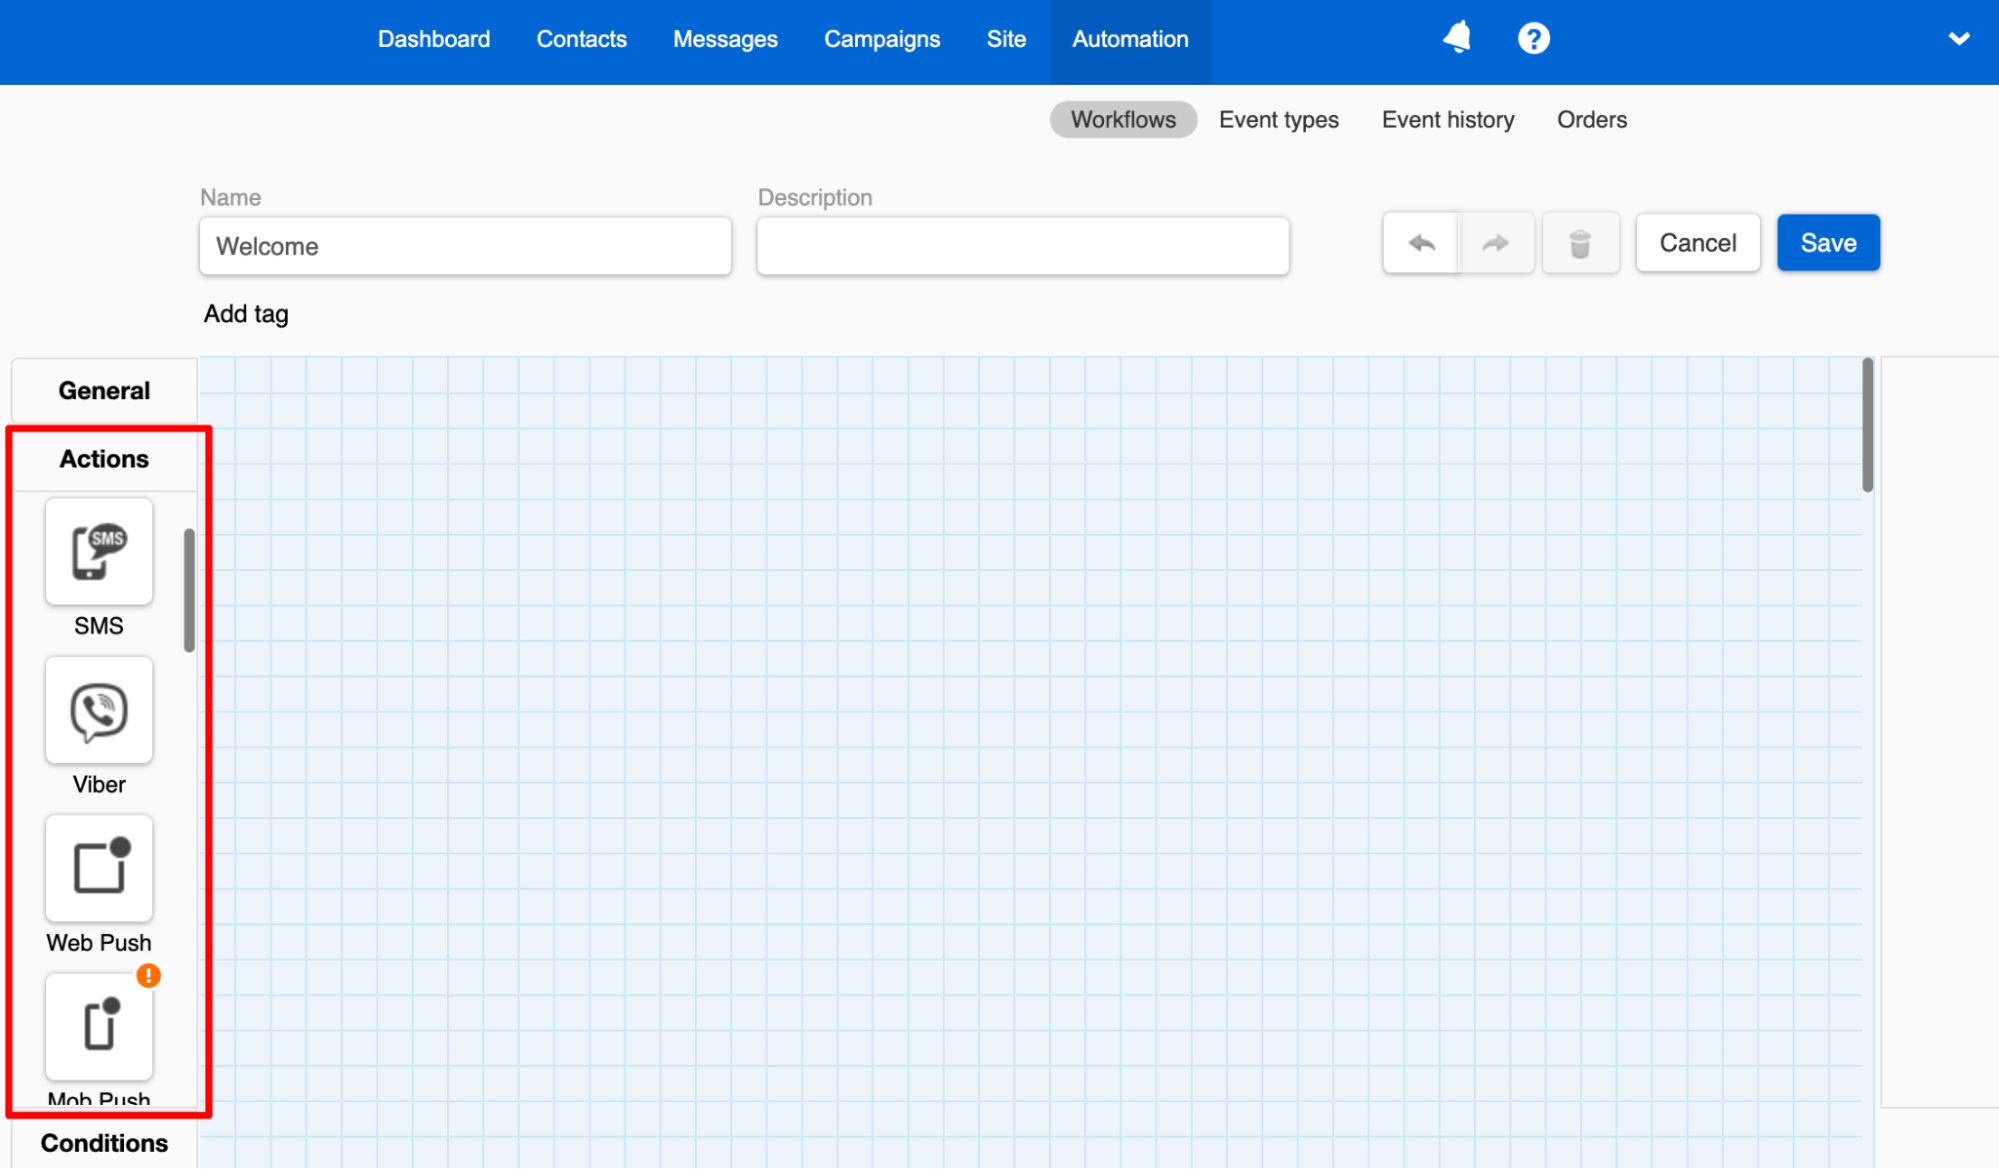
Actions blocks are used to set up an action in a workflow. The system performs such actions at a particular period of time or at a particular stage of contact management.
There are 3 action block types in the eSputnik system:
Common Blocks’ Parameters
Each action block contains several parameters and there are some common of them:
- Message: required parameter. You can select the necessary message in two ways:
- Select from the drop-down menu (the easiest and most common way).
- Specify the message ID (select ${EmailMessageId} from the drop-down menu or click the gear icon and enter in both fields the name of the parameter that contains a message ID in your event, without ${}).
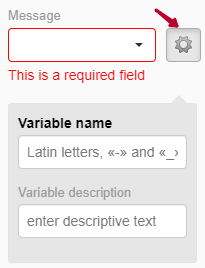
- Contact ID: contact ID in the system. You can specify contact ID other than an email address. Click the gear icon and enter in both fields the name of the parameter containing the contact ID. For many system events, this parameter is called ContactId. Note that in these fields the parameter is entered without ${}.
- JSON: you can enter data in the JSON format or specify the event parameter that contains such data. Don't fill this field if you don’t pass in the event the parameter with the JSON line.
JSON example:
{
"name": "items",
"value": "{\"array\":[{\"name\":\"Brenda Flatform Sport Sandals\",\"price\":\"100.00\",\"url\":\"https://site.com/catalog/steve-madden-brenda-flatform-sport-sandals?ID=8472233&CategoryID=56233&swatchColor=Natural\",\"imageUrl\":\"https://site.com/uploads/product/big/20161122/20161122_7zvb.jpg\"},{\"name\":\"Cloudsteppers Women's Brio Sol Flip-Flop Sandals\",\"price\":\"78.00\",\"url\":\"https://site.com/catalog/clarks-cloudsteppers-womens-brio-sol-flip-flop-sandals?ID=10566812&CategoryID=56233&swatchColor=Red%20Synthetic\",\"imageUrl\":\"https://site.com/uploads/product/big/23112013/2125.jpg\"}]}"
}
Sharing the JSON field with the block Get contact requires access to data from this field through the intermediate jsonParam object, using the example of the array items, the field name of the first element will be available using this construction:
$!data.get('jsonParam').get('array').get(0).get('name')If the block Get contact isn’t used, the construction will be:
$!data.get ('array')You can also enable Send only at specified hours to send messages only within a specified time gap.
Channels
The block sends one message to one user. It’s used in a workflow to react to a user’s action or compliance with certain conditions.
Email
The block sends one email to one contact.
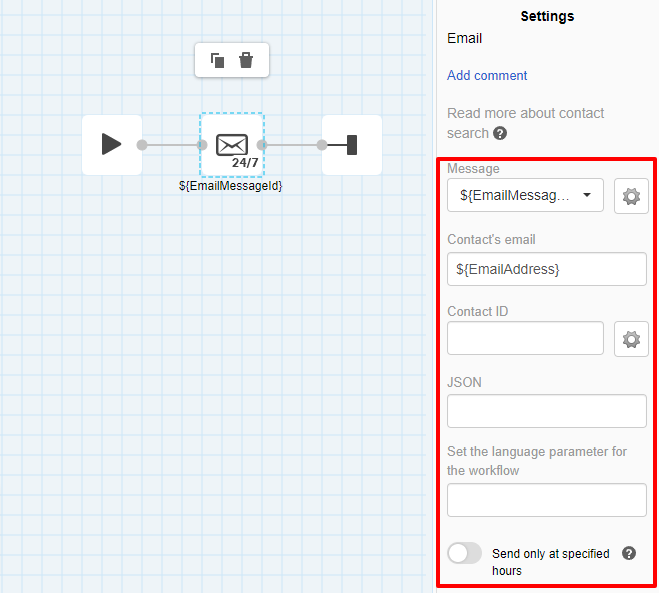
The block has such parameters:
- Сontact’s email: email address of the contact or the event parameter that contains an email address. The variable ${EmailAddress} is specified by default. If in your event this parameter has a different title, enter it.
- Language parameter: language ID or the event parameter containing it. It is needed to create multilingual messages. Leave the field blank if you don't use Multilanguage, or the language of the contacts is specified in their carts.
Event parameter example:

Language ID can be entered as follows:
- en, es, fr;
- EN, ES, FR;
- en-US, fr-CA, en-AR.

You can also enable Send only at specified hours to send messages only within a specified time gap.
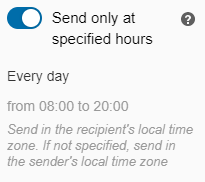
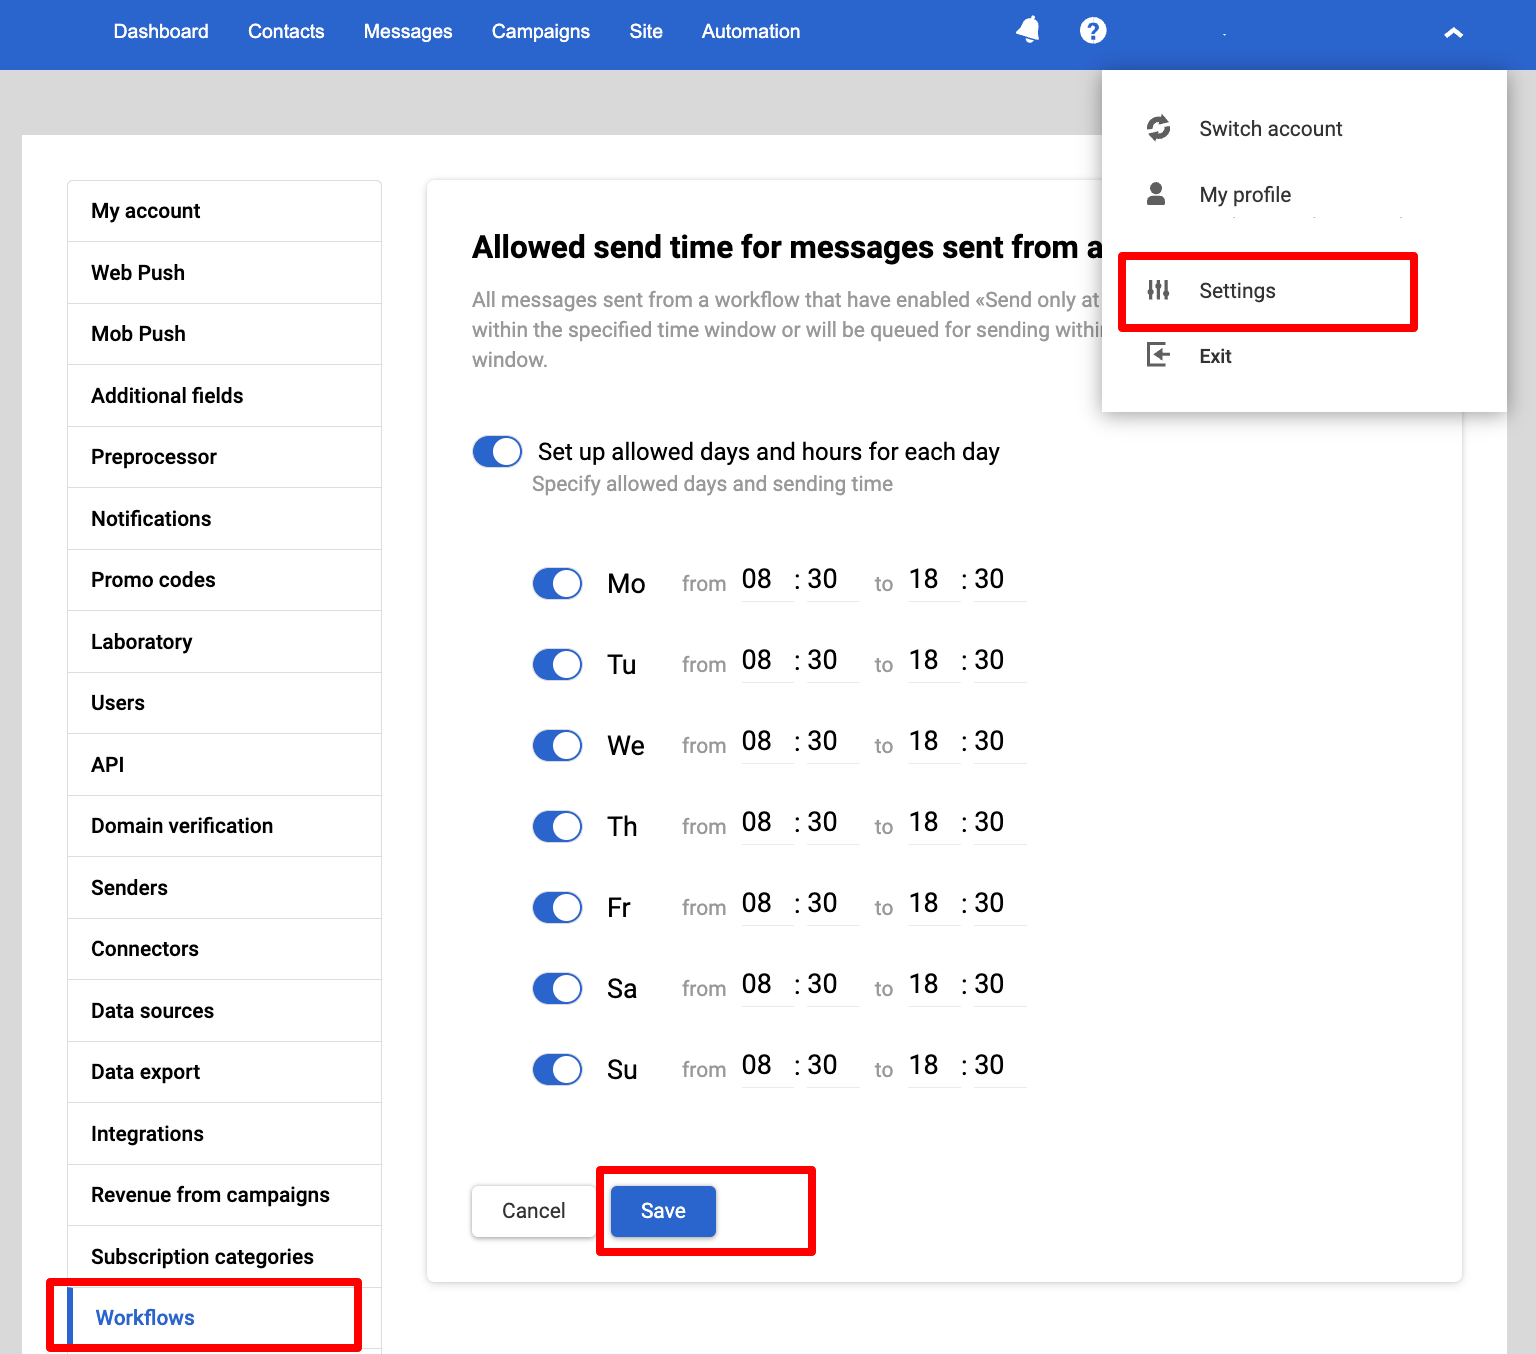
By default, day hours from 8 a.m. to 8 p.m are set as send hours. Such a setting allows not to annoy recipients at an inappropriate time and schedule send at permitted hours. To change specified hours or change allowed hours for each day, go to your profile > Settings > Workflows.
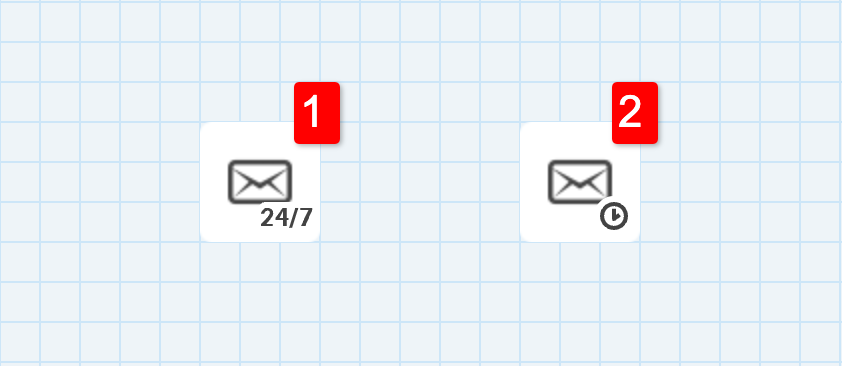
The corresponding marks on the block show whether this parameter is enabled for a particular email:
- 24/7 means the email can be sent at any time;
- Сlock mark means the email can be sent only at specified hours.
SMS
The block sends one SMS to one contact.
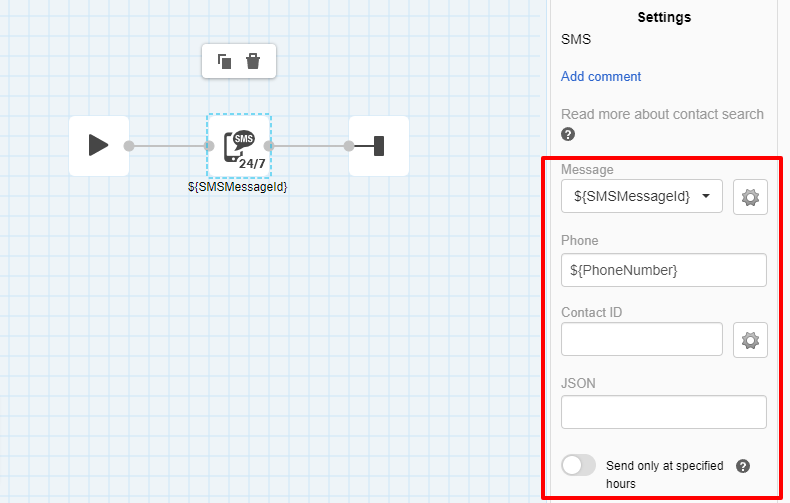
The block parameter:
- Phone: required parameter, a phone number of the contact or event parameter containing it. The variable ${PhoneNumber}_is specified by default. In your event, the variable may be called ${SMS} ,${PhoneNumber} ,${Phone}. To check the exact title, go to_Automation > Event history, and click the event that triggers the workflow. A phone number is specified in digits, for example,12018627991, only for testing.

Viber
The block sends one Viber message to one contact.
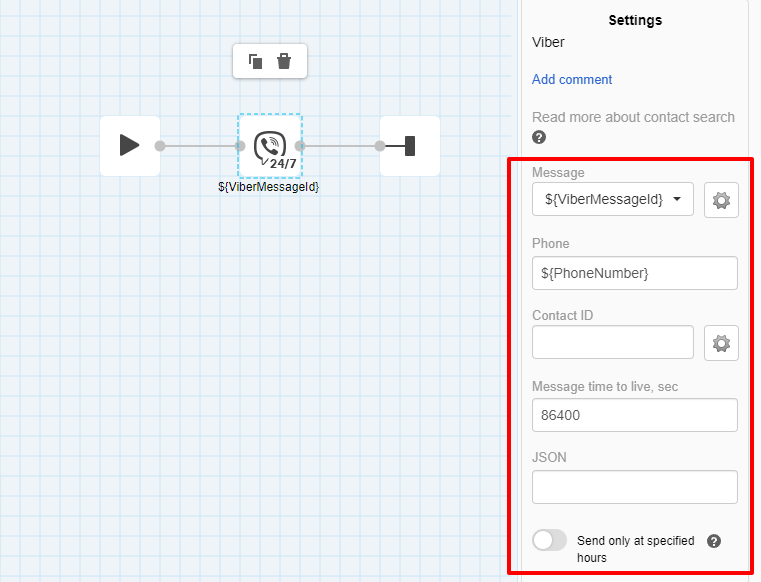
The parameter Phone is the same as for SMS block.
Viber messages are sent only to contacts with a phone number specified in the contact card. If the contact doesn’t have a phone number, the workflow will ignore the block Viber, and the Viber message won’t be sent to this contact.
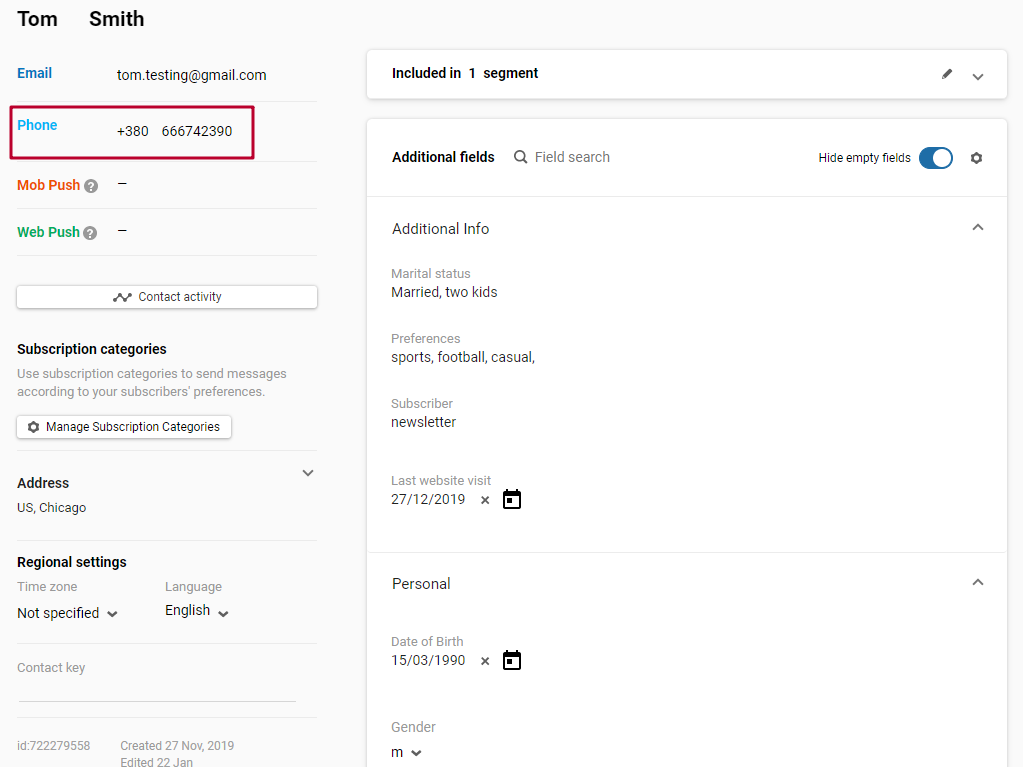
ImportantThe block Viber will be ignored for contacts without a phone number if it’s included in a workflow with multiple blocks.
- Message time to live, sec: leave the default setting. After the specified time, the message will be deleted from the phone.
Web Push
The block sends one web push notification to one contact.
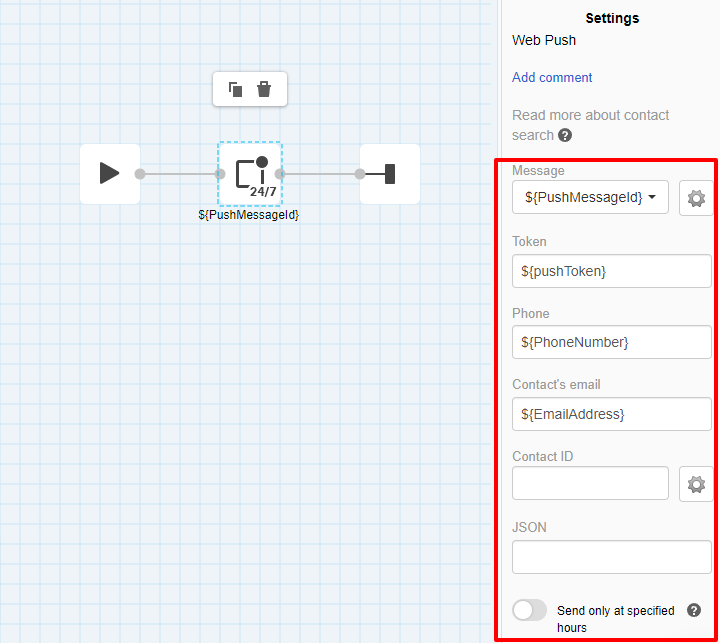
The block has such parameters:
- Token: token of the contact. The variable ${pushToken} is specified by default.
- Phone: phone number of the contact. The variable ${PhoneNumber} is specified by default.
- Сontact’s email: email address of the contact. The variable ${EmailAddress} is specified by default.
ImportantTo send web pushes, the system needs a token of the contact. If the data in the contact card is combined (email address+phone number+ID+token), the token can be found by other parameters, not necessarily ${pushToken}. The system will search in turn if the contact with a specified email, phone number or ID has a token.
Mob Push
The block sends one mobile push notification to one contact.
Note. To send mobile pushes, you need to have an app that you need to connect to eSputnik.
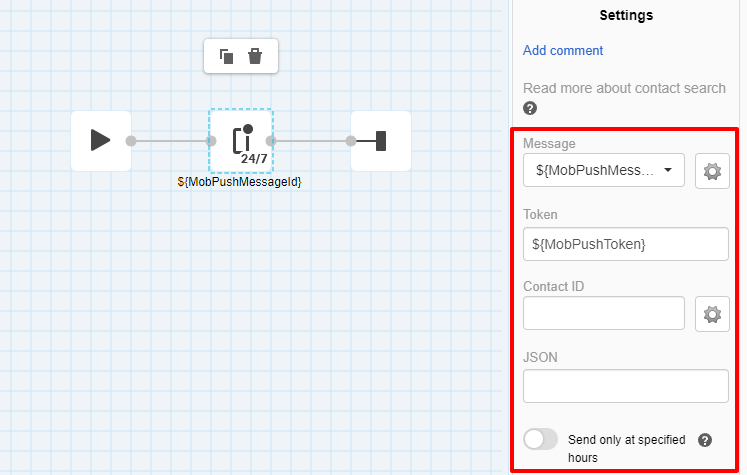
Block parameter:
- Token: mobile token of the contact. The variable ${pushToken} is specified by default.
ImportantTo send mobile pushes, the system needs a token of the contact. If the data in the contact card is combined (email address+phone number+ID+token), the token can be found by other parameters, not necessarily ${pushToken}. The system will search in turn if the contact with a specified email, phone number, or ID has a token.
- Application: an app identifier for accounts with more than one app. You can select the app to send notifications from the dropdown list or specify dynamic parameter ${AppId}. The system extracts the app ID from the event that has triggered the workflow. When sending events through the SDK, this parameter is passed automatically.
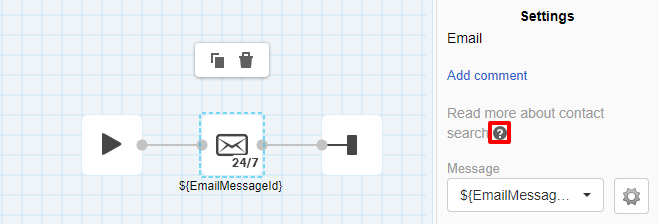
To read more about contact search, hover over the question icon in the settings panel:
ImportantWhen searching contacts for Email, SMS, Viber, Mob Push and Web Push blocks, the following rules apply:
- Contact ID has the highest priority among all parameters.
- Entered contact email, phone number, or token are used for sending.
- If exteralCustomerId is specified, the sending is made to the contact it belongs to; among those contacts that were found by email address, phone number or token.
- If exteralCustomerId is not specified, the sending is made to the contact found by email address, phone number or token.
- If contact is not found, new contact will be created for sending.
App Inbox
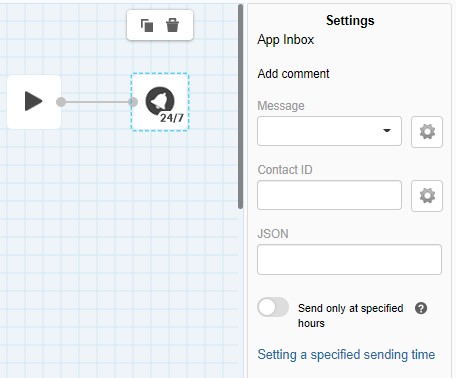
The block sends one app inbox notification to one contact.
Note. To send App Inbox messages to your customers, you first need to get an authentication token and install a web tracking script on your site.
Message to Segment
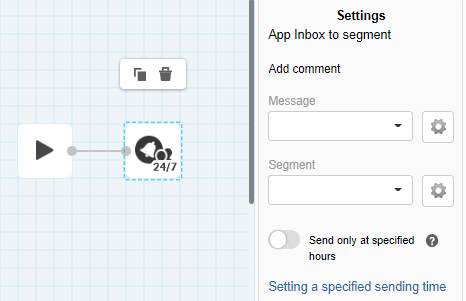
The block sends one message to a segment. It’s used in a workflow after contact import or to launch a series of messages. Typically, one workflow includes either the block with one message to one contact (Channels blocks) or the block with the message to segment.
ImportantDo not use these blocks for triggered messages. If the event passes the token or contact ID, use one of the Channels blocks (one message to one contact).
The blocks Message to segment are only used for events that pass the segment ID, or for workflows that are launched for a selected segment (for example, dynamic).
Even if you set Regular in Trigger configuration and select a segment, you still need to use the block with one message to one contact, because this trigger type doesn’t pass a segment group ID to the workflow. Instead, it launches the workflow separately for each segment contact and passes the email address and contact ID at each launch.
Each block Message to segment has a required parameter Segment. Select the segment from the drop-down menu or specify the segment ID (select ${GroupId} from the drop-down menu or click the gear icon and enter in both fields the name of the parameter that contains a segment ID in your event, without ${}.
ImportantEach segment in the eSputnik system has its own ID. For example, if you send an event and with an ID value pass the GroupId parameter
{
"name":"GroupId", "value":167039898
}
167039898 will be substituted into the workflow instead of GroupId, and the workflow will be launched to this segment.
You need to know what the ID corresponds to so as to control the campaign, indicating what to send to which segment.
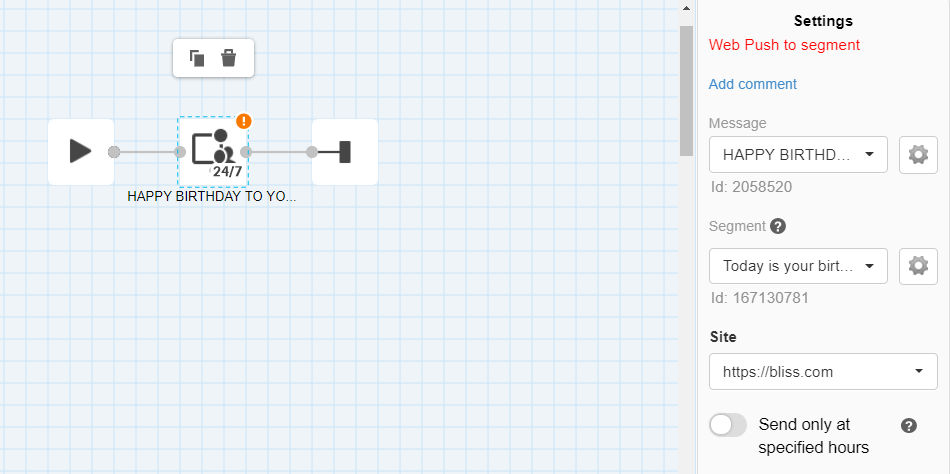
The block Web Push to segment has a parameter Site: the website that collects tokens is specified by default. If you have several websites, choose one from the drop-down menu.
Special blocks
Add to Segment
The block adds a contact to a list segment after they perform a specific action on the website or in the message.
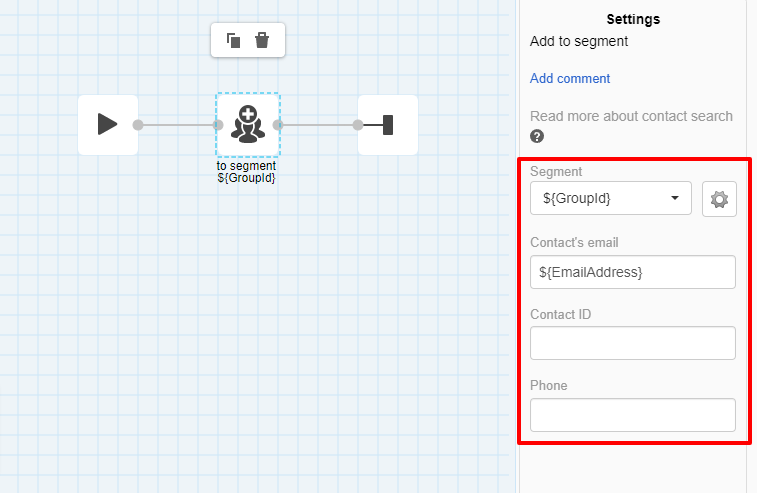
The block has 4 parameters:
- Segment: required parameter. Select the segment in the drop-down menu or specify the segment ID.
- Contact’s email: email address of the contact.
- Contact ID: contact ID in the system.
- Phone: phone number of the contact.
By default, the contact is identified in the system by email address. The variable that contains a contact’s email address is already specified in the field. Change it only if you change the variable that passes it.
ImportantYou can add a contact only to a list segment. You cannot add contacts to dynamic segments.
Webhook
The task of this block is to request the specified URL (use only the HTTPS protocol). Available request types are GET and POST. Data format: JSON, XML, text.
Using webhooks, you can access the data source by reference to return a promo code or authorization token, and then display this data in a message within a workflow. With this block, you can also transmit to the specified address:
- parameters from the event that launched the workflow,
- (additional) fields of the contact on which the workflow launched.
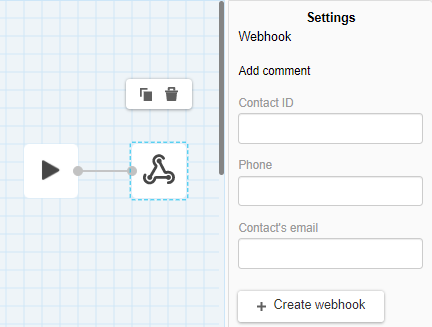
To correctly set up the block, in one of the fields, enter the name of the corresponding variable from the event, by which the contact is identified.
The table below shows examples of the parameters that should be used in these fields:
| Launch method / Field in the workflow | Contact ID | Phone number | |
|---|---|---|---|
| By event | ${parameter} | ${parameter} | ${parameter} |
| For a dynamic segment | ${ContactId} | ${PhoneNumber} | ${EmailAddress} |
| By field change | ${ContactId} | ${PhoneNumber} | ${EmailAddress} |
, where instead of a parameter you should enter the name of the parameter, containing the value of the contact ID, phone, or email in the form in which you transmit it in the event. Enter it without spaces and with preservation of case.
NoteThe Webhook block is used only in combination with the block for sending a single message in any channel, and also with the Variable matches regular expression block. For workflows where a message is sent to a group, the Webhook block does not apply.
Read detailed instructions on setting up, testing, and managing webhooks in workflows.
Remove from Segment
The block removes a contact from a list segment. After removal, the contact remains in the system.
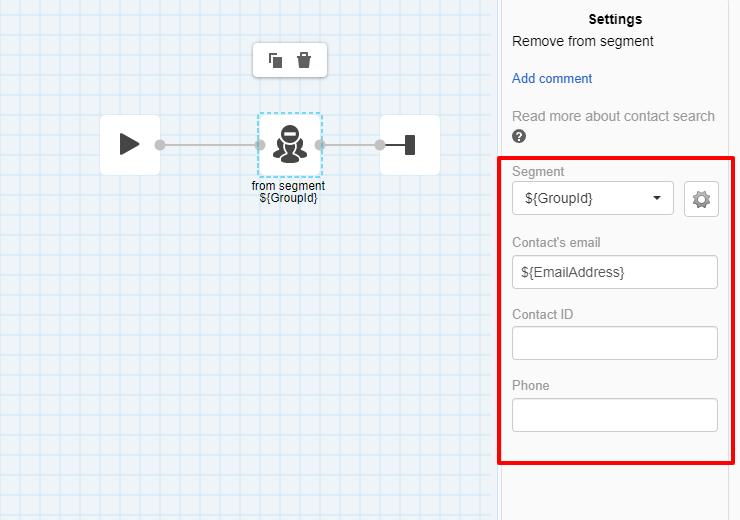
ImportantYou can remove a contact only from a list segment. You cannot remove contacts from dynamic or combined segments.
The block has the same parameters as Add to Segment block.
ImportantWhen searching contacts for Add to Segment and Remove from Segment blocks, the following rules apply:
- Contact ID has the highest priority among all parameters
- If externaiCustomerId is specified, contact search will be performed by externaiCustomerId.
- If externaiCustomerId is not specified, contact search will be performed by email address or phone number.
Check Point
The block does not perform any task except that it fixes in the log the passage of the checkpoint in the workflow. If you have a complex workflow with paths, add this block at any point in the workflow to see if it ran a particular path. Check point can also be used to bridge multiple paths. Not all blocks allow connection to several paths, and this block solves this issue.
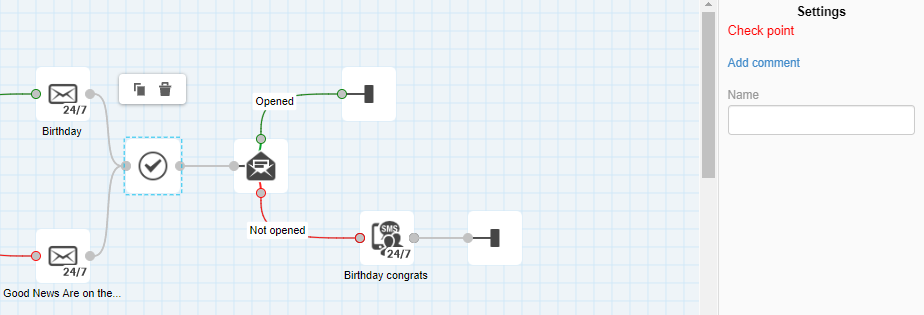
The block has 1 parameter:
- Name: specify the name of the check point.
In Automation > Event history, use Check point’s name to track whether the workflow has passed this point or not. This helps debug the workflow.
Sprayer
The block creates events for each contact of the selected segment.
As a rule, if the workflow is launched for a segment, you cannot add there blocks designed for contacts. Sprayer enables to do so.
It works as follows:
- The workflow for a segment has been launched (the segment ID was passed in the event, or the segment is selected in the Sprayer settings).
- The workflow reaches the block Sprayer.
- A separate event for each contact is created (transition from segments to contacts).
- This event launches a workflow for each contact.
The events created by the block contain an email address and contact ID. This makes it possible to launch a different workflow with these events and use contact blocks.
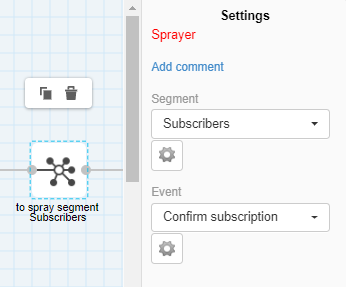
The block has 2 parameters:
- Segment: required parameter. Select the segment in the drop-down menu or specify the segment ID (select _${GroupId} _from the drop-down menu or click the gear icon and enter in both fields the name of the parameter that contains a segment ID in your event, without ${}).
- Event: required parameter. Select the event you want to create. Events must be created beforehand in Automation > Event types.
Update Custom Fields
The Update custom fields block updates static data in the fields that you specify. You also can use dynamic values, but the main purpose of the block is to make changing a specific field easier.
The need to update a contact’s custom fields may result from the execution of a previous block. When the block activates in a workflow, it searches for a contact in the system and updates the specified fields.
NoteFirst, the system uses contact ID, if it's not specified, then by externalCustomerId to search for a contact, if this is present in the event parameters.

The block contains the following parameters:
- Contact ID. The ID of a contact in the system.
- Contact’s email. Email address of a contact.
- Contact’s phone. Phone number of a contact.
- Contact update. Specified fields to update.
To configure the Update custom fields block:
-
Select the Update custom fields block in your workflow. The block’s Settings menu opens in the right-hand side menu.
-
In the Contact search section, enter the value into the following fields:
- Contact ID
- Contact email
- Contact phone
- In the Contact update section, click + Add fields to add the fields you wish to update.
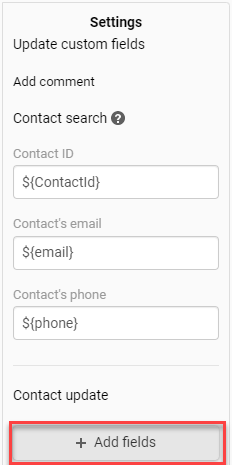
- In the Contact update slide-out menu, expand the Add field dropdown list and select the field you want to update.
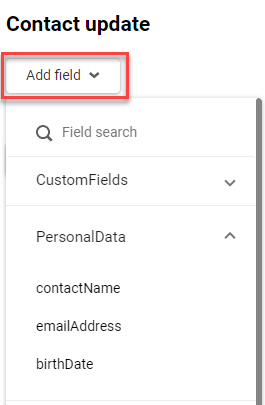
NoteAdditional fields are grouped in the lists you created.
- In the Value line, enter the value for the selected field.

- To add more fields, repeat steps 4 and 5.
- Click Done.
After clicking Done, the system validates the added fields and their values, and shows an error message if the validation is not passed.
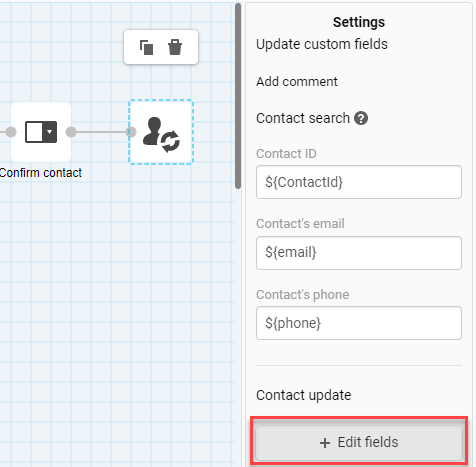
If you need to edit the added fields, select the Edit field button in the Contact update section and then edit the fields or values in the slide-out menu.
Updated 5 months ago