
How to Apply for Sending AMP-Powered Emails
Gmail has finally announced support of the AMP technology in emails. This technology enables to send interactive emails and get subscribers more involved with your company. To take a survey, complete an order, react to a document comment in real time or RSVP to an event, a user no longer needs to download extra pages or open a new browser window, as the AMP technology allows to take these and many other actions straight in the email body. It opens up limitless potential for email campaigns, yet you need to put in a little effort so as to take full advantage of it.
How to Get Started with the AMP Technology
There are three main conditions you need to meet in order to send emails with AMP elements:
1. The email client of the recipient should support AMP
Apart from actually Gmail, the following providers also support the AMP-powered content:
Follow the link to see the current list of mailers and mailing services.
Note though that AMP-powered emails may look differently in different clients, depending on their characteristics and functionality.
2. Your email provider service should support AMP
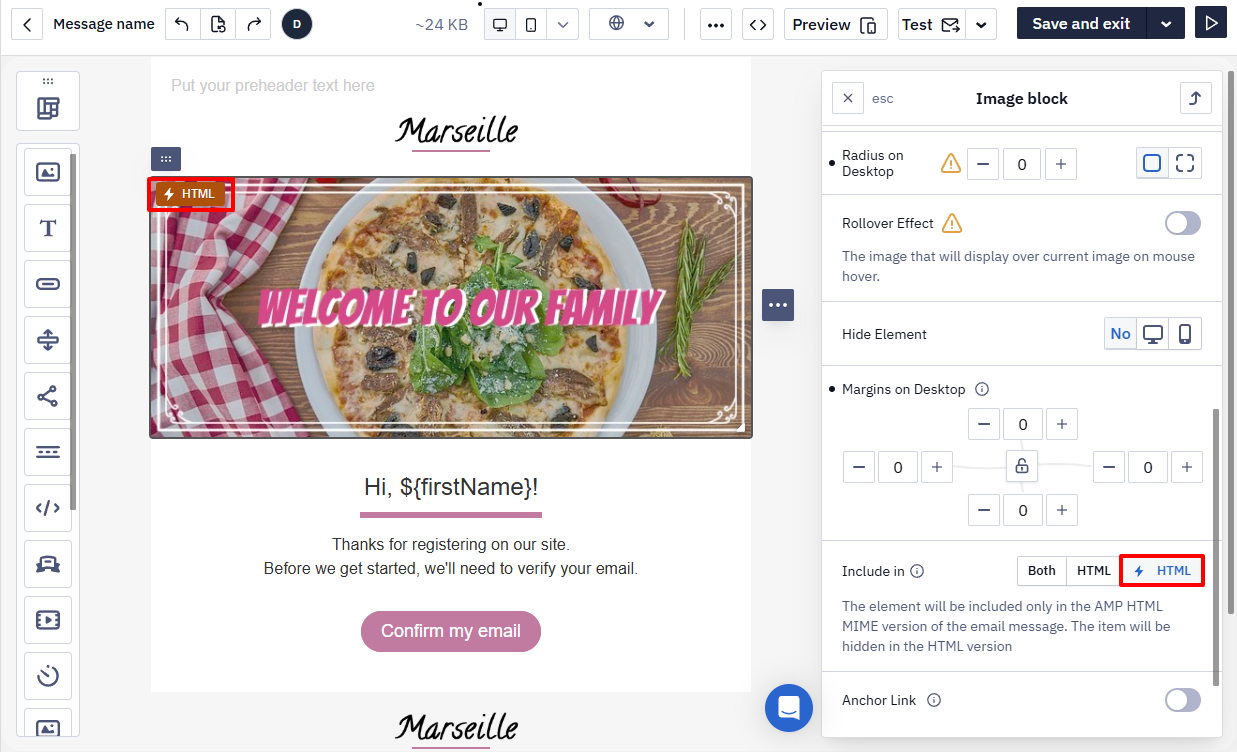
Our platform has been one of the first providers (Stripo, Litmus, Amazon Pinpoint) to announce support of AMP and incorporate it into the system. When creating an AMP-supported email in the editor, enable AMPHTML for a block that would include an AMP element.
3. You should register with Google as a dynamic sender
Before sending AMP-powered campaigns, each email address should be whitelisted by Google. Google has issued the registration guidelines with consistent steps you need to meet to launch dynamic emails. Despite the explicit explanation, each step has its own peculiarities: below, we’ll guide you through all of them and provide the necessary insight.
AMP for Gmail Guidelines
Before applying, make sure you comply with the basic requirements:
- Your email campaign content corresponds to your website content.
- Your email campaign content is consistent.
- Your email campaign content contains accurate information.
- Your domain is authenticated with SPF, DKIM and DMARC (for at least 3 months).
- You have been sending regular campaigns for more than 3 months.
- You send at least 5,000 emails per month from your domain.
- A list-unsubscribe link is added to the header of your campaigns. The recipients should be able to opt out of your emails without scrolling for the unsubscribe link
- Your domain is registered with Postmaster.
- Different types of campaigns are sent from different addresses (recommended).
If you meet all of them, move on to the below steps.
1. Create an email in two versions
Broadcasts are automatically created in two versions: HTML and Plain Text. Now you need to create one more - AMP HTML.
Different versions are created so that the subscriber can view the campaigns regardless of whether their email clients support or don’t support certain versions. If AMP is not supported, they will see HTML; if HTML is not supported, they will see Plain Text.
Create an HTML email and add there and AMP components. You can take AMP components from the amp.dev catalogue or use ready AMP Blocks and Modules in our editor.
You can also create AMP elements in other services and then insert the code in the editor:
- Email on Acid;
- Freshinbox;
- Emailmonks (paid option), etc.
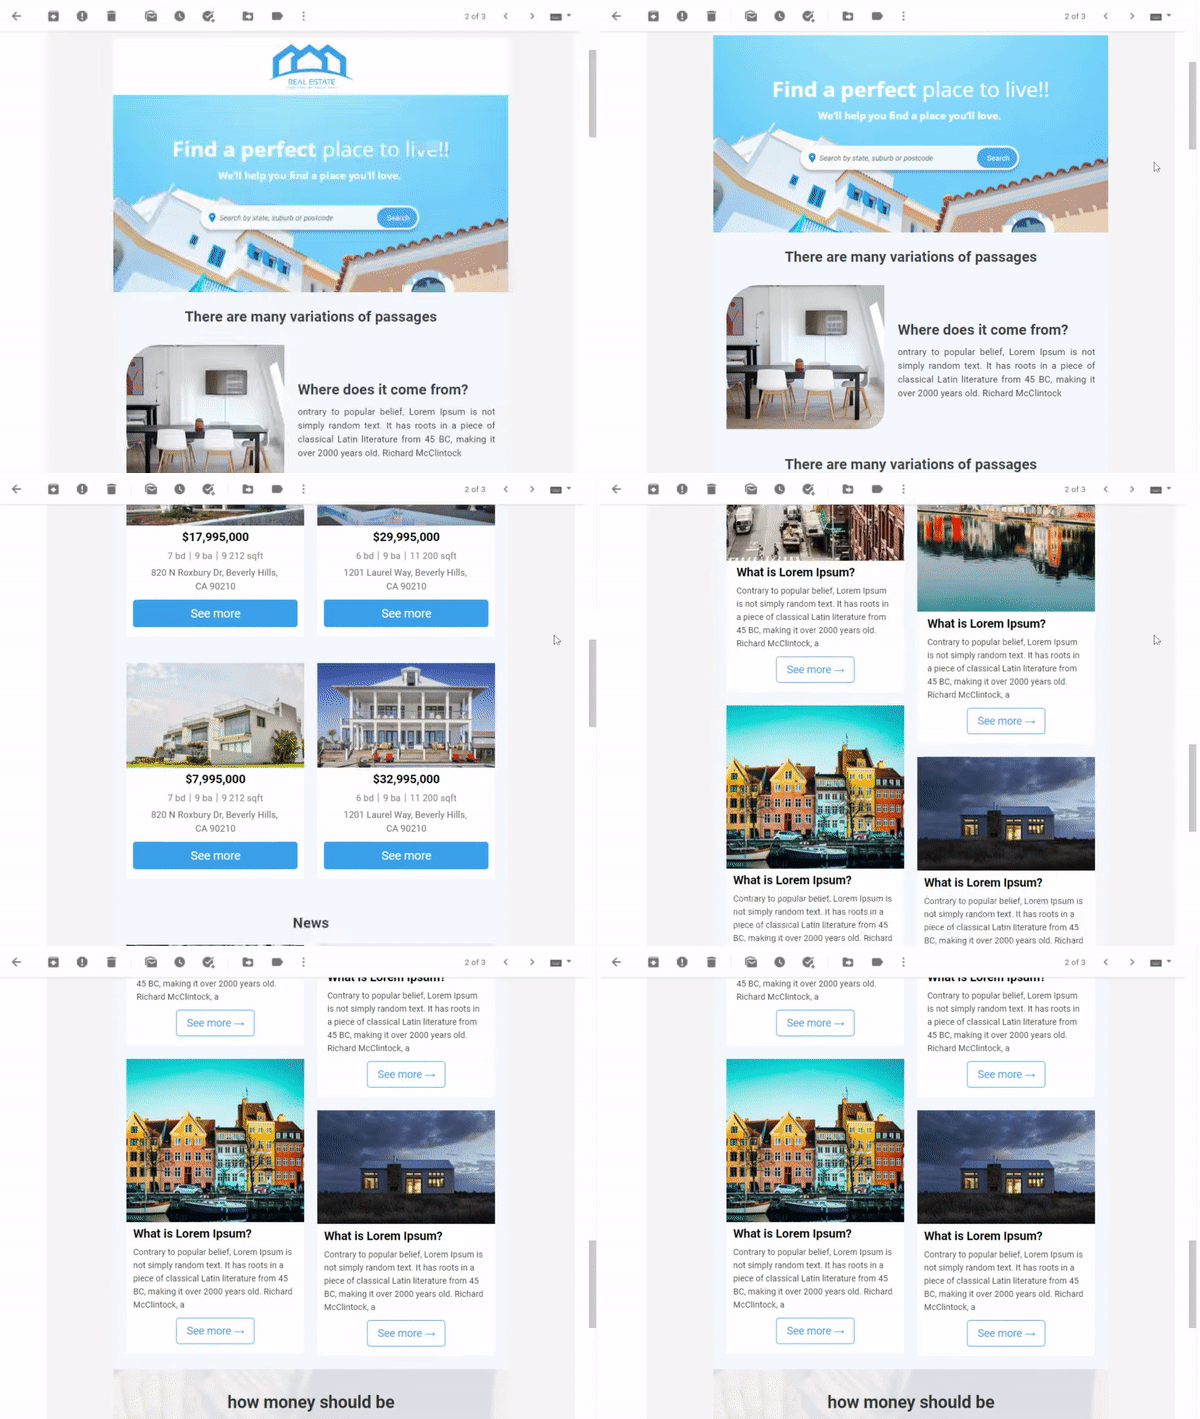
HTML email example:
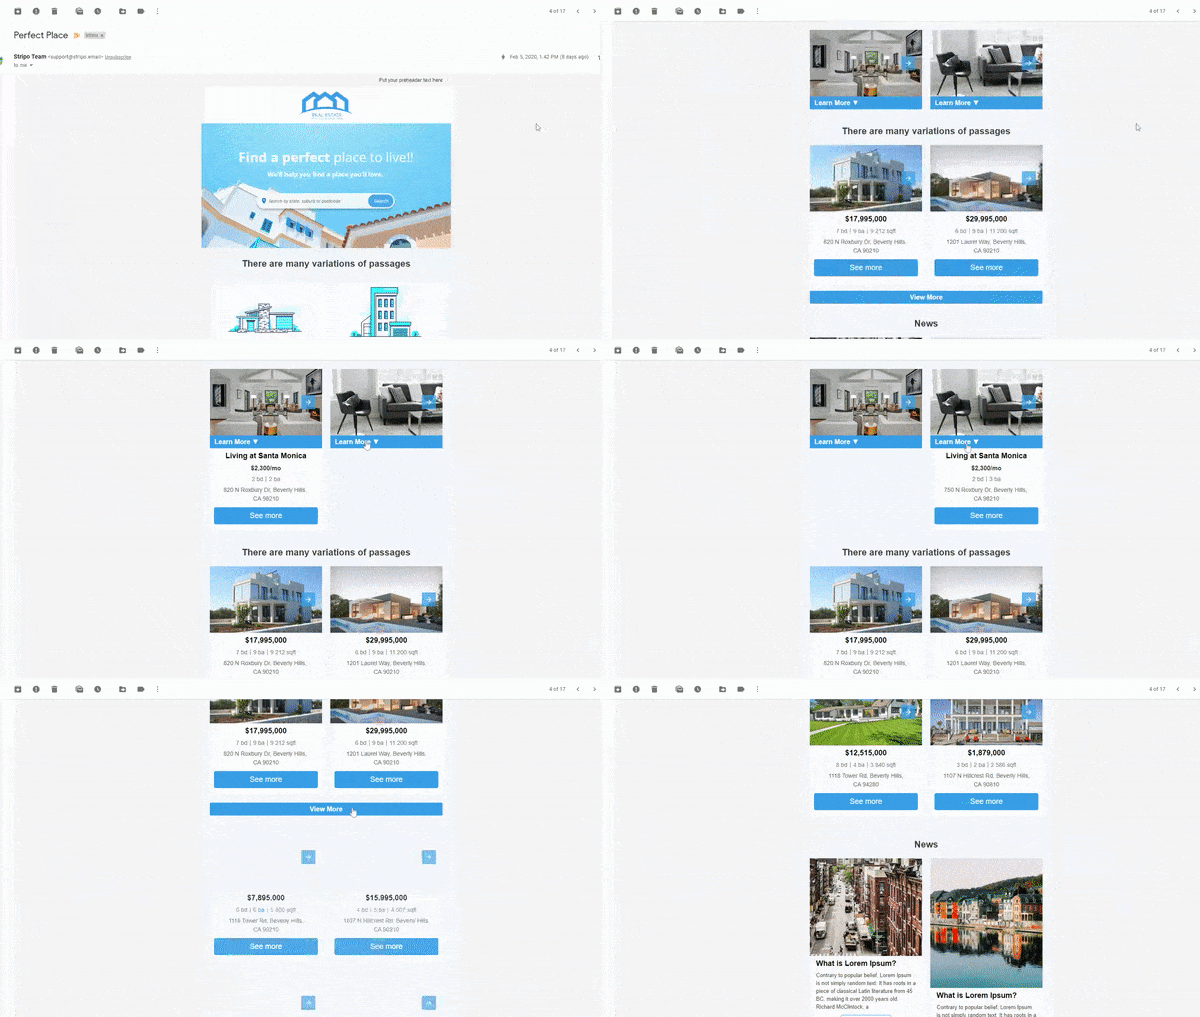
AMP email example with an accordion component:
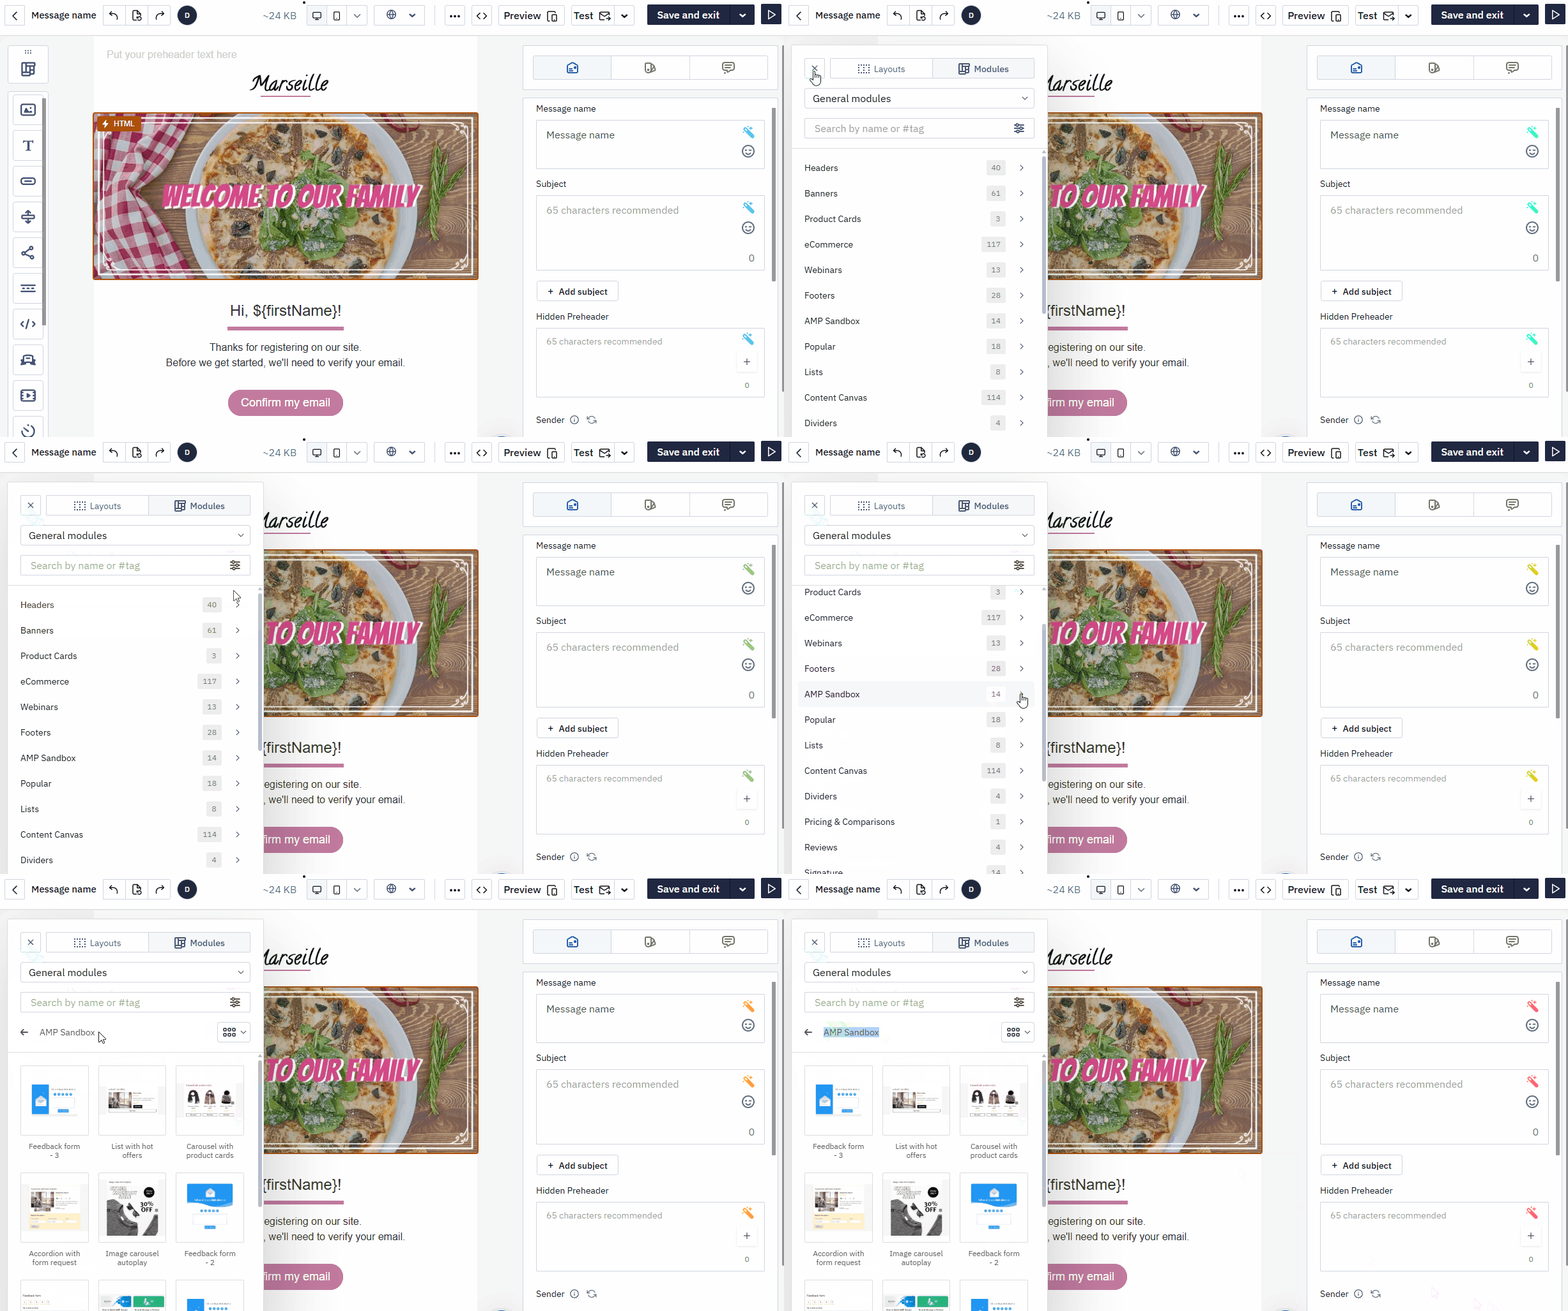
In the editor, you can preview both versions and switch between them in a click. Click on Message view to see how both emails would look on different devices.
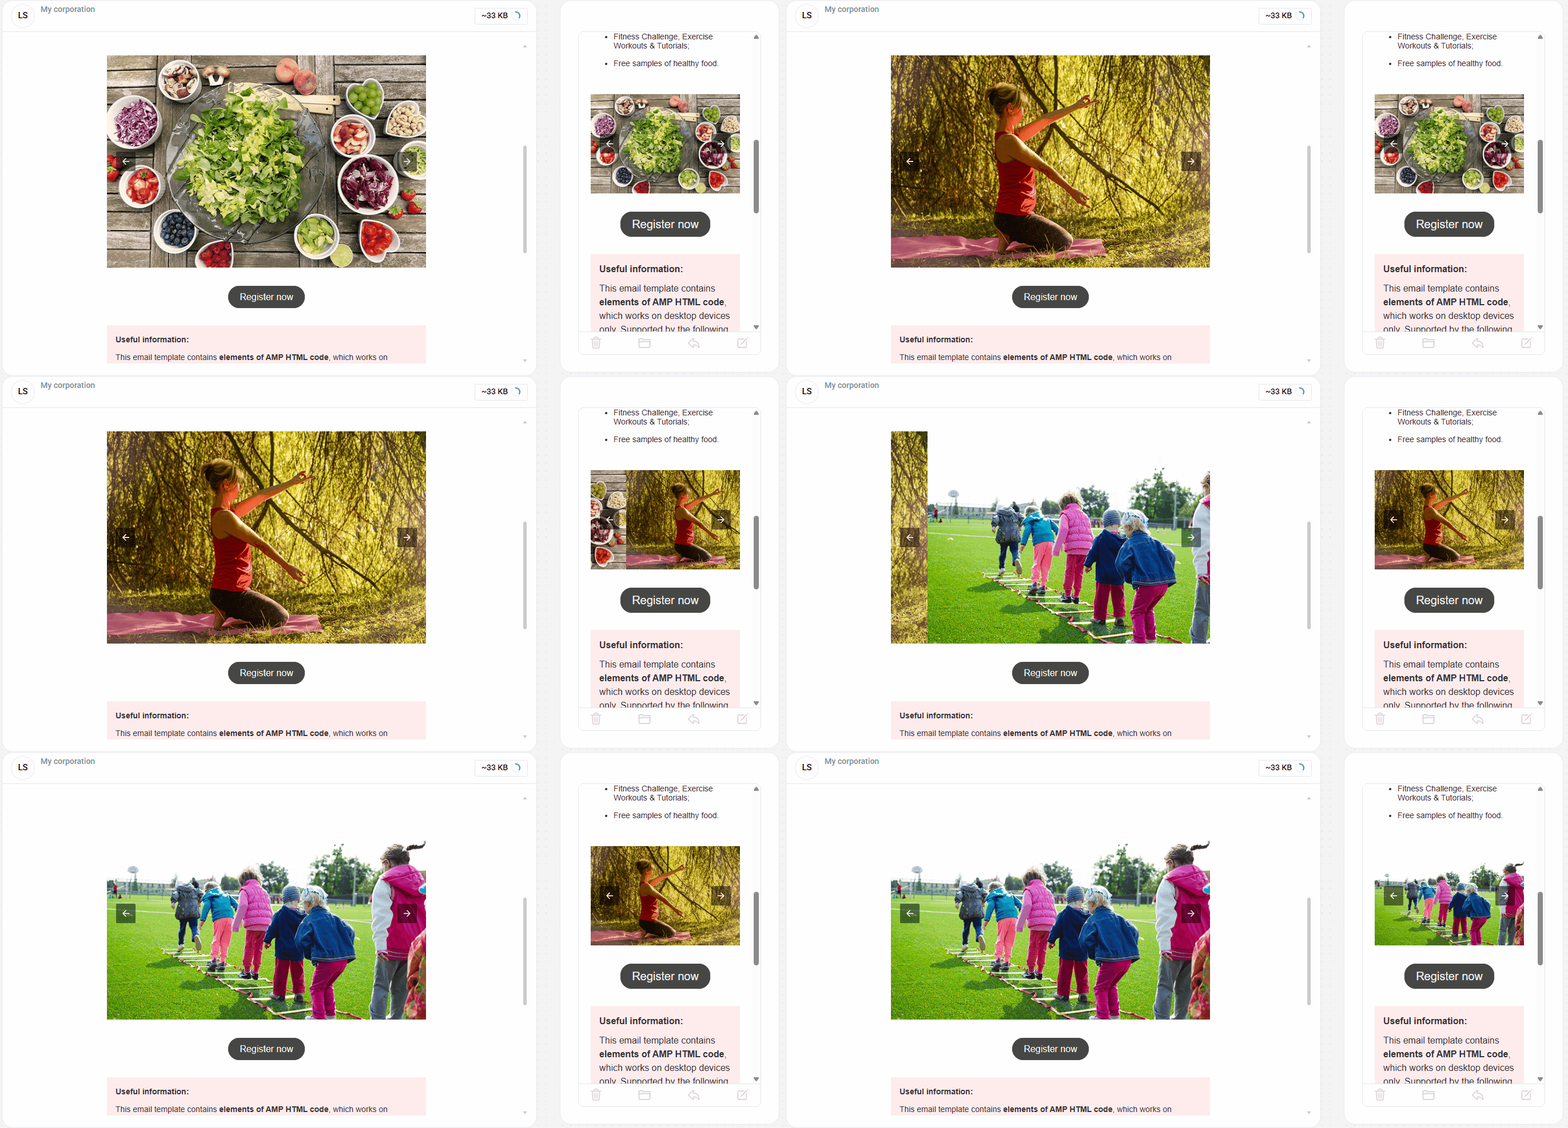
2. Test the email layout.
In our platform:
To check AMP emails for errors straight in our builder, click View message.
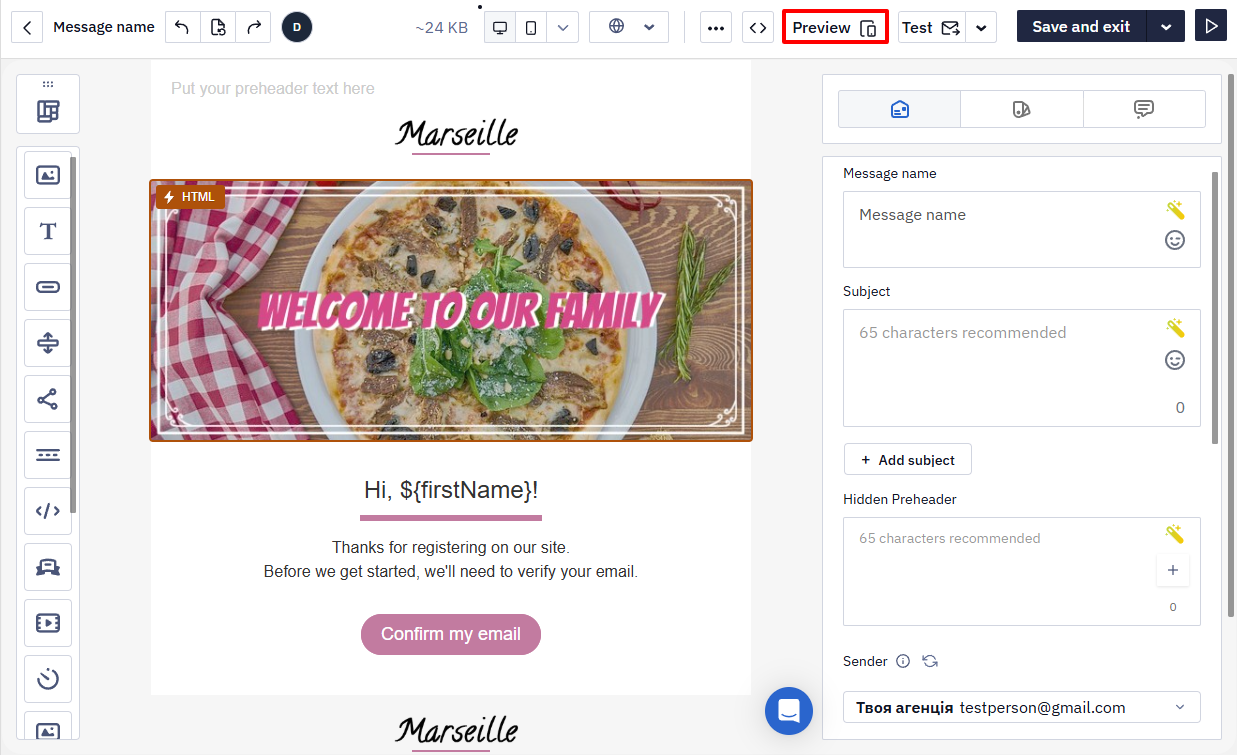
Hover over the errors to see their description. You can fix them straight in the builder, or copy the code for validation in Google Playground.
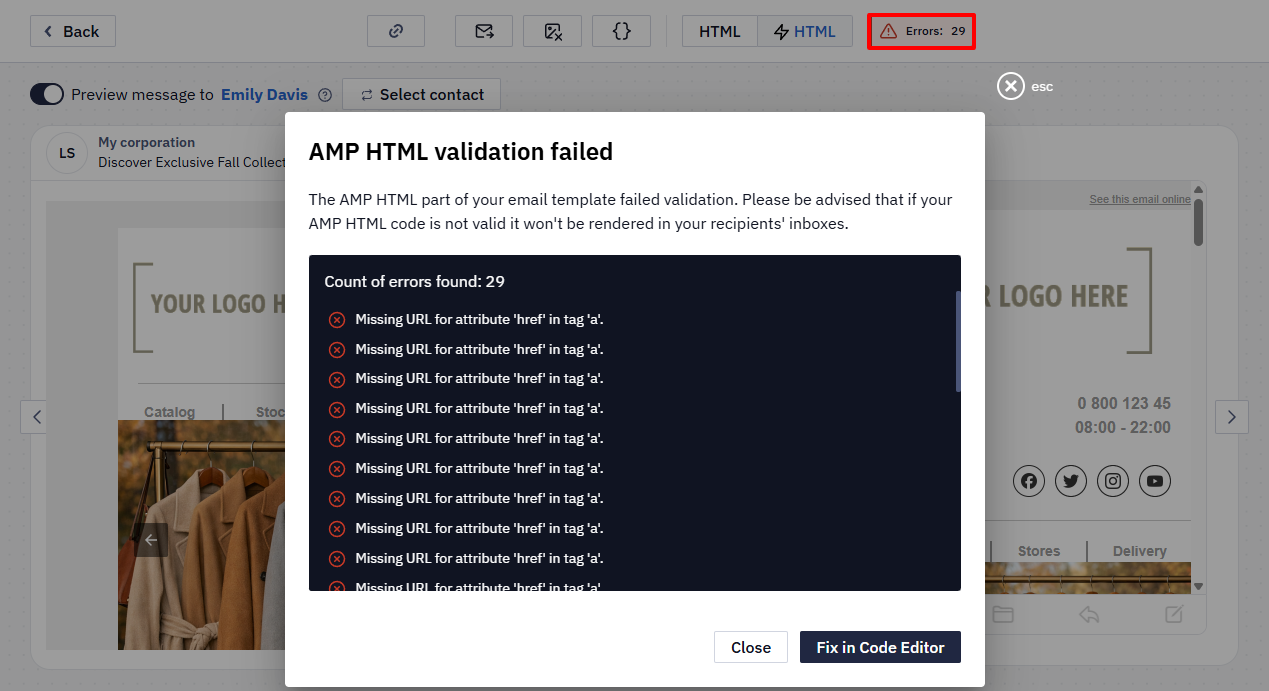
In Google Playground:
Use AMP Gmail for Email Playground to test your emails. Gmail users automatically enter the site under their Gmail account; other users need to register with Gmail.
To start testing, copy your email code from the eSputnik editor. Then add an HTML version to the appropriate AMP Gmail for Email Playground box.
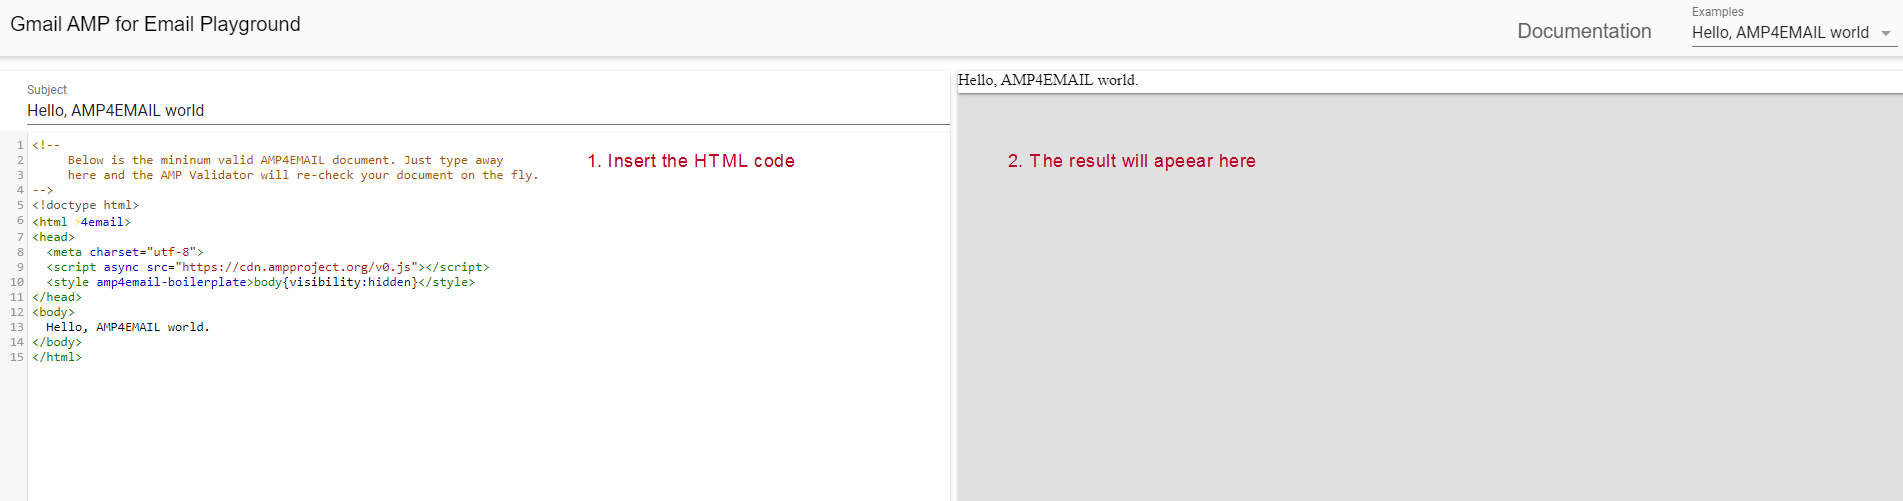
All possible errors will be highlighted, and you can immediately correct them.
As long as your email has errors, the Send button will be inactive and you won't be able to send it to your email address.
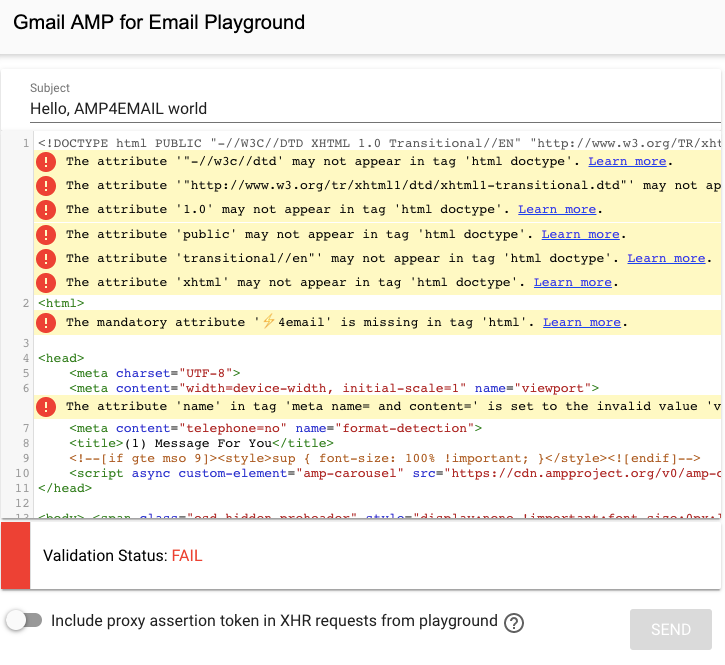
Once all the errors are fixed, you can send a test email to the email address under which you entered the site.
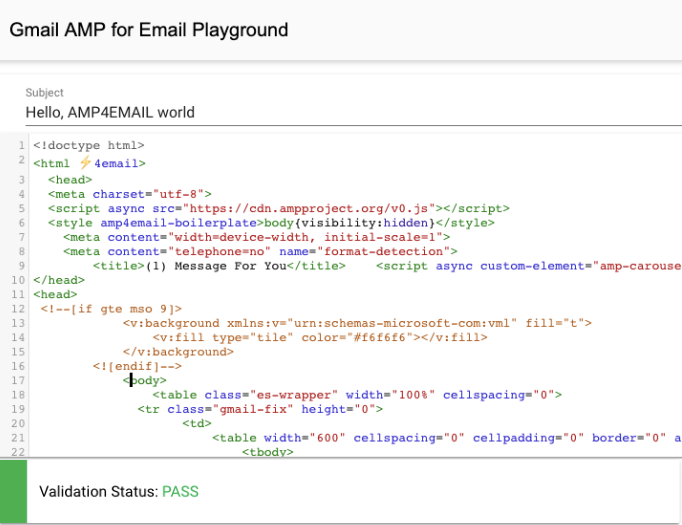
If you use our editor, contact our support, and we’ll help test your emails and fix errors, if any.
3. Send the AMP-supported email to your email address.
In your Inbox, the AMP-supported email will be marked with a tooltip on the dynamic email content.
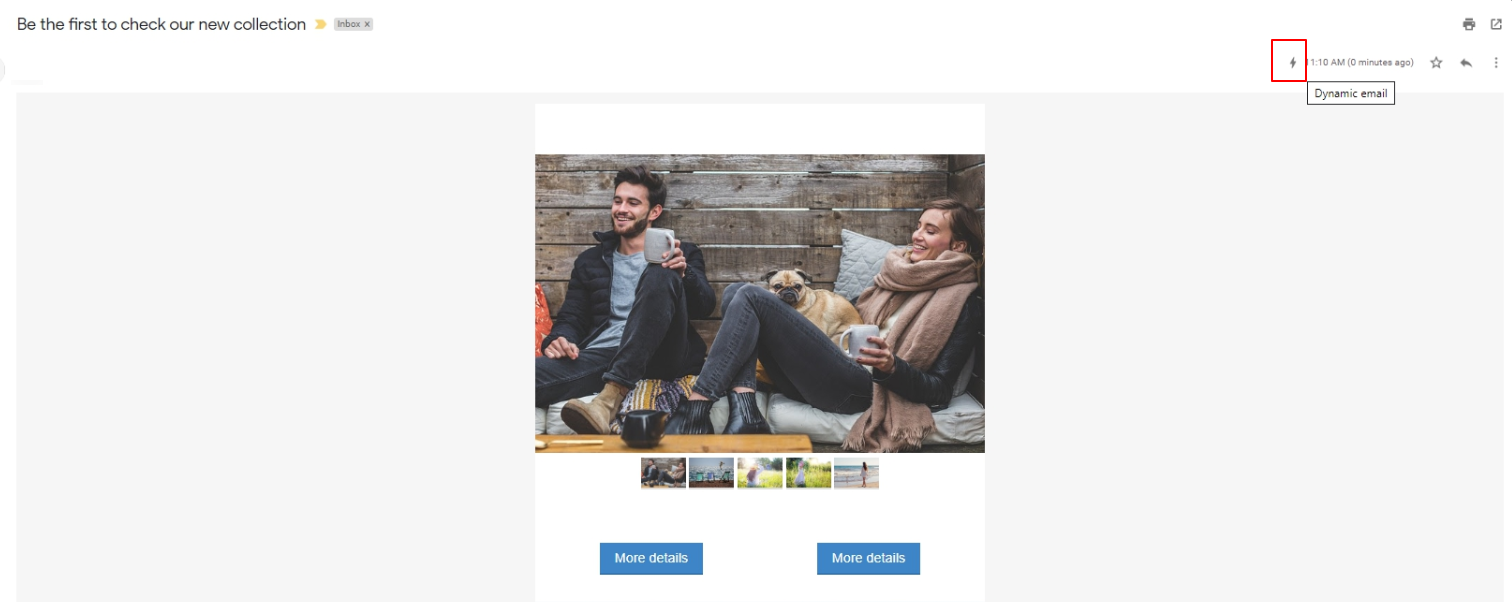
Check the email for the correct content display, broken images and broken links, including the unsubscribe option.
For a private email address
If you plan to use this account for further testing, you need to allow dynamic emails from this sender:
- Go to your Gmail Settings → General → Dynamic email. It’s enabled by default, but it is better to double-check. This feature is available only for email addresses within the gmail.com domain.
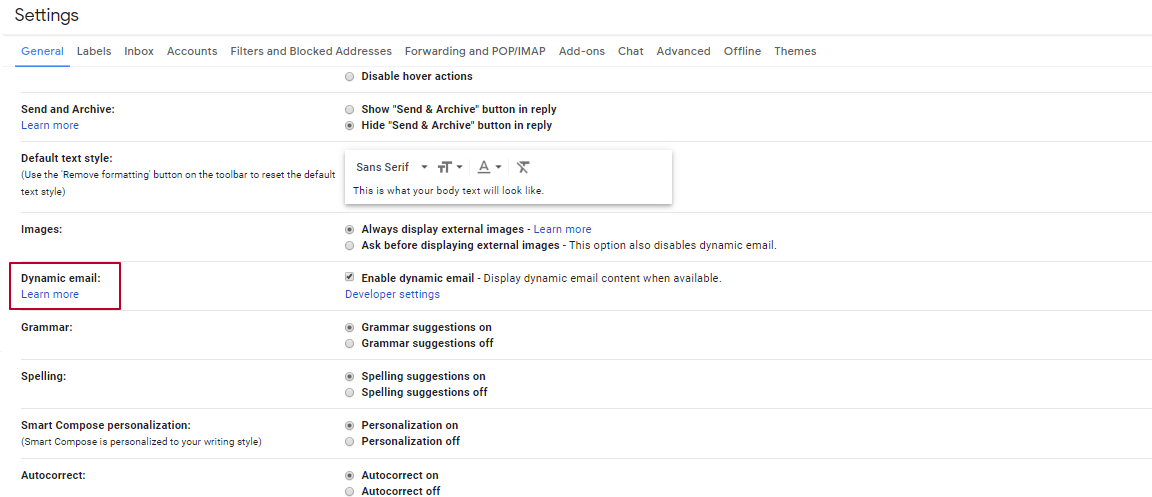
- Click Developer settings and specify the sender's email from which test dynamic emails would be allowed. You may also enable Always allow dynamic emails from [email protected] if you plan to use AMP Gmail for Email Playground for testing.
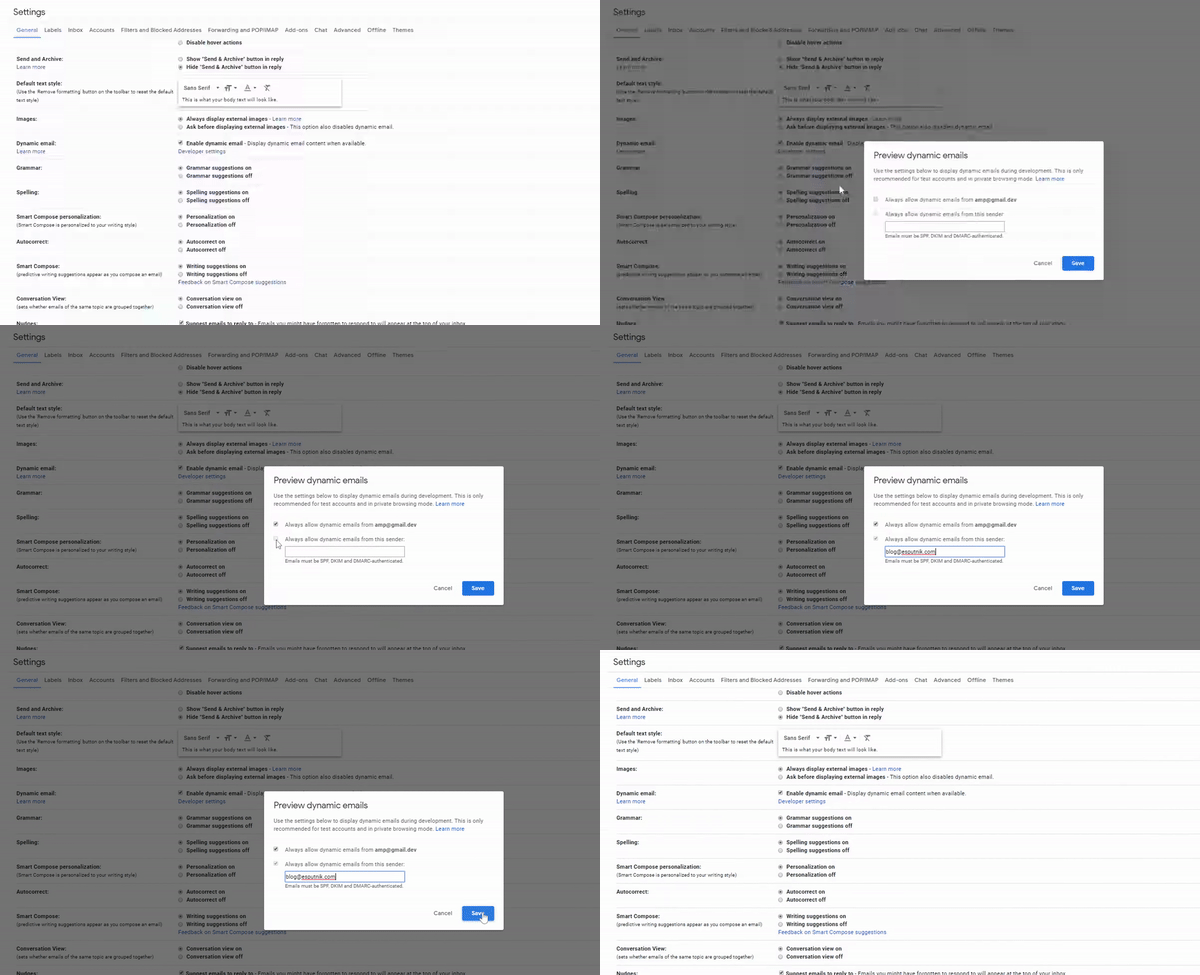
After Google approves your application, your users won’t have to configure these settings for their accounts.
P.S. If your domain isn’t authenticated with DKIM, you will see the warning that the dynamic content isn’t rendered.
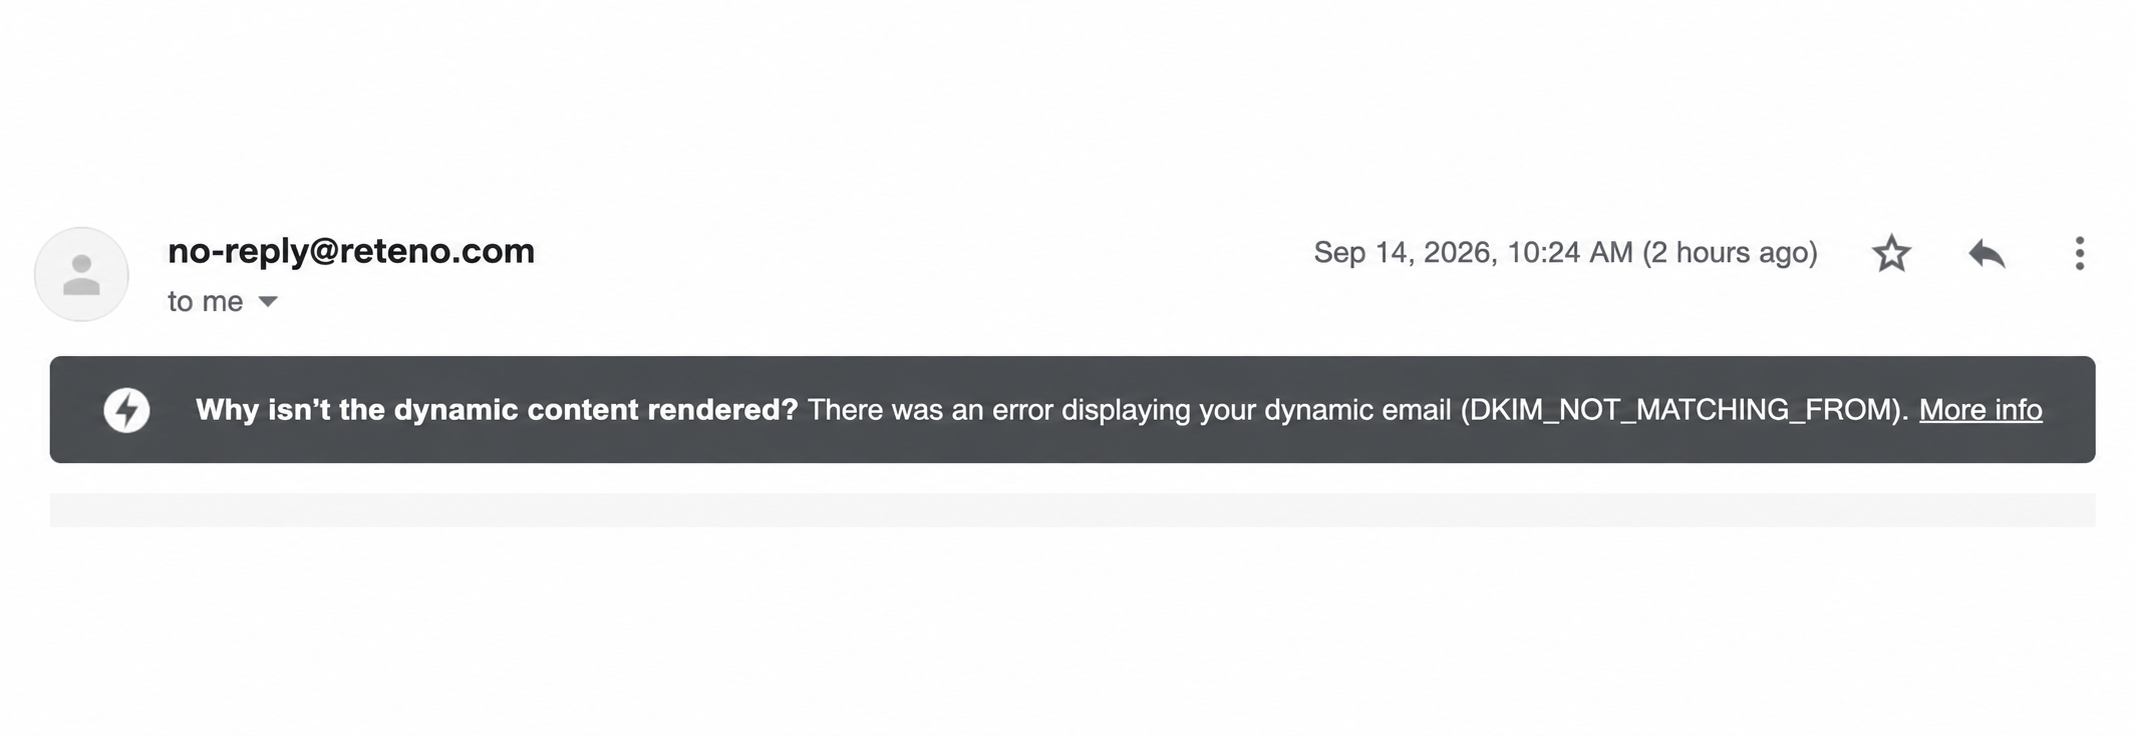
See Step 4 for how to set up DKIM authentication.
For a corporate email address
In the beta release, dynamic emails are available for all G Suite users, but you need to enable the corresponding feature manually. Go to G Suite → Settings for Gmail → User Settings and Enable now.
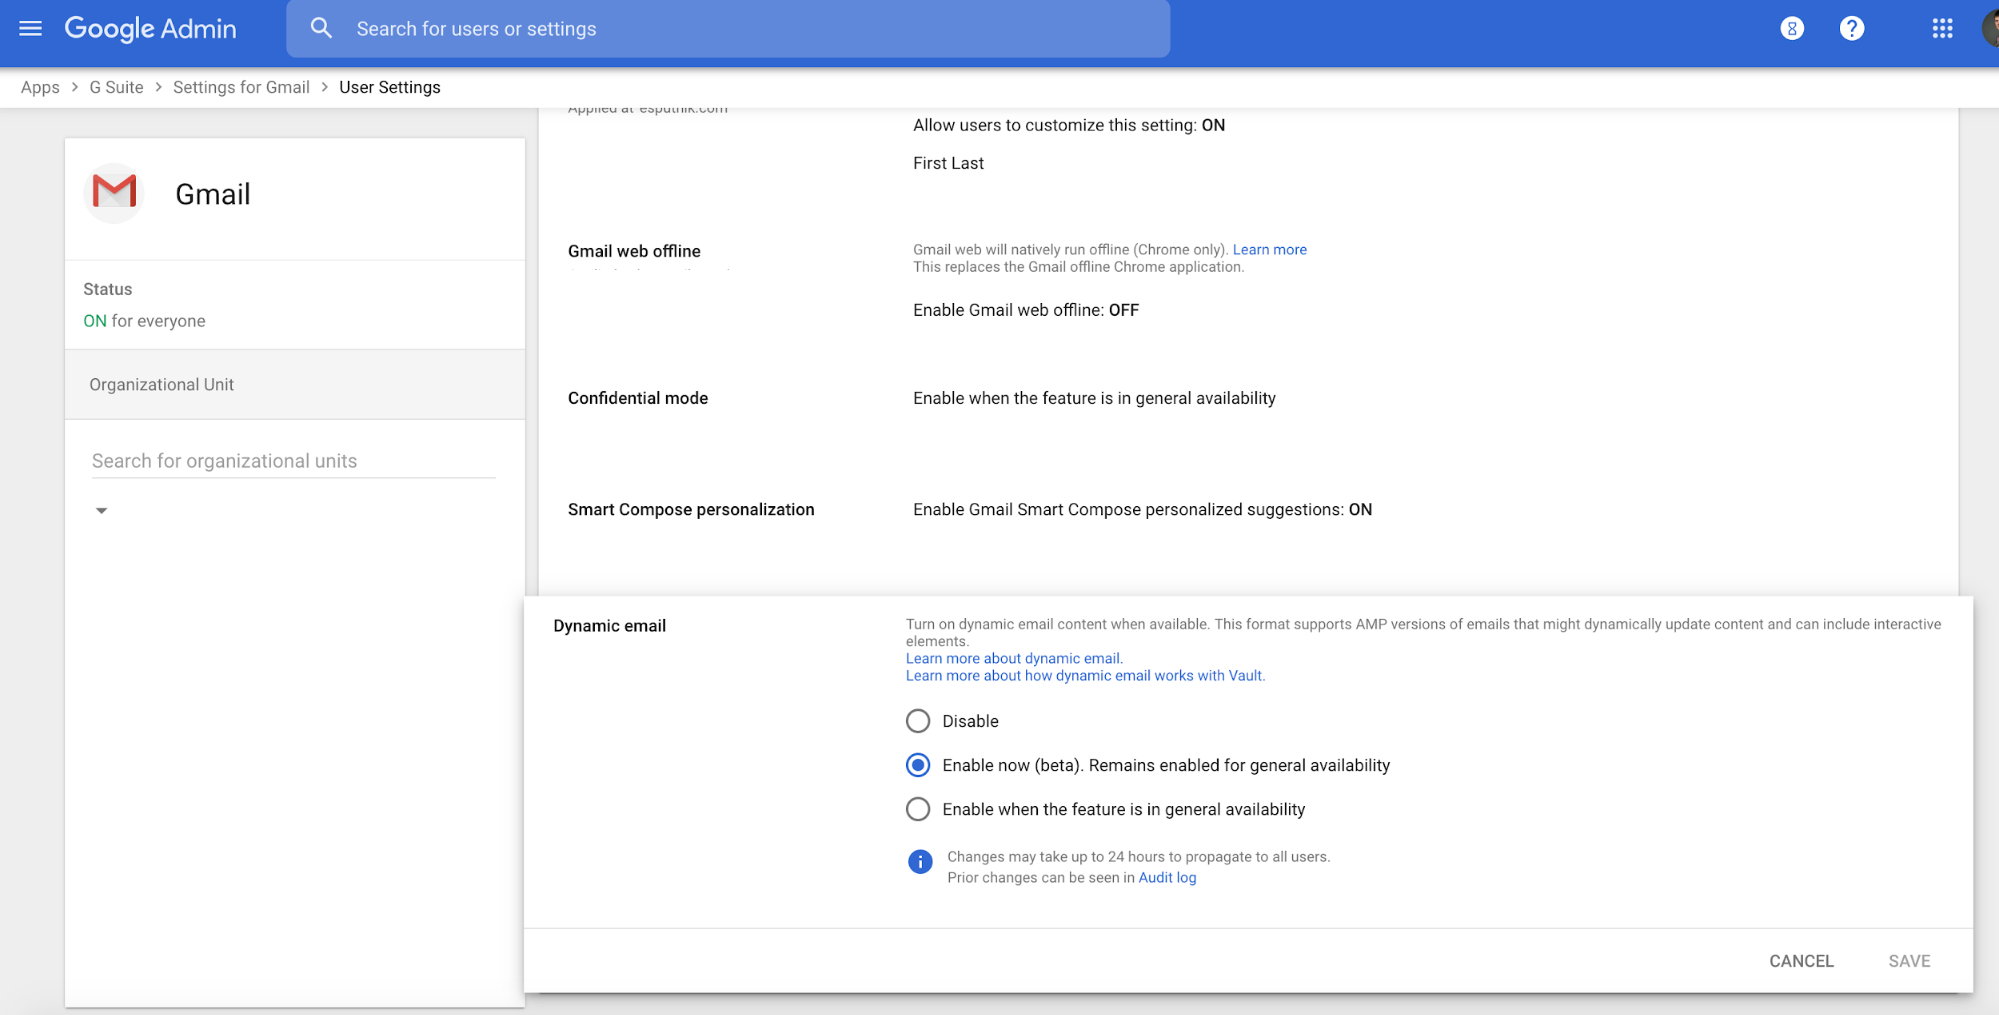
Please note that in G Suite the changes may take 24 hours to be enacted.
4. Check your reputation.
To send dynamic content in Gmail, your emails must be authenticated. Make sure you’ve authenticated your domain with
- SPF (Sender Policy Framework);
- DKIM (DomainKeys Identified Mail);
- DMARC (Domain-based Message Authentication, Reporting, and Conformance).
See Google documentation to make sure you meet all the message authentication requirements.
To send dynamic emails within Gmail, you must have a consistent history of bulk sending, a good reputation and a low % of spam complaints.
How to Check Digital Signatures
- In the email.
In the Inbox, enter the corresponding email and click Show details.
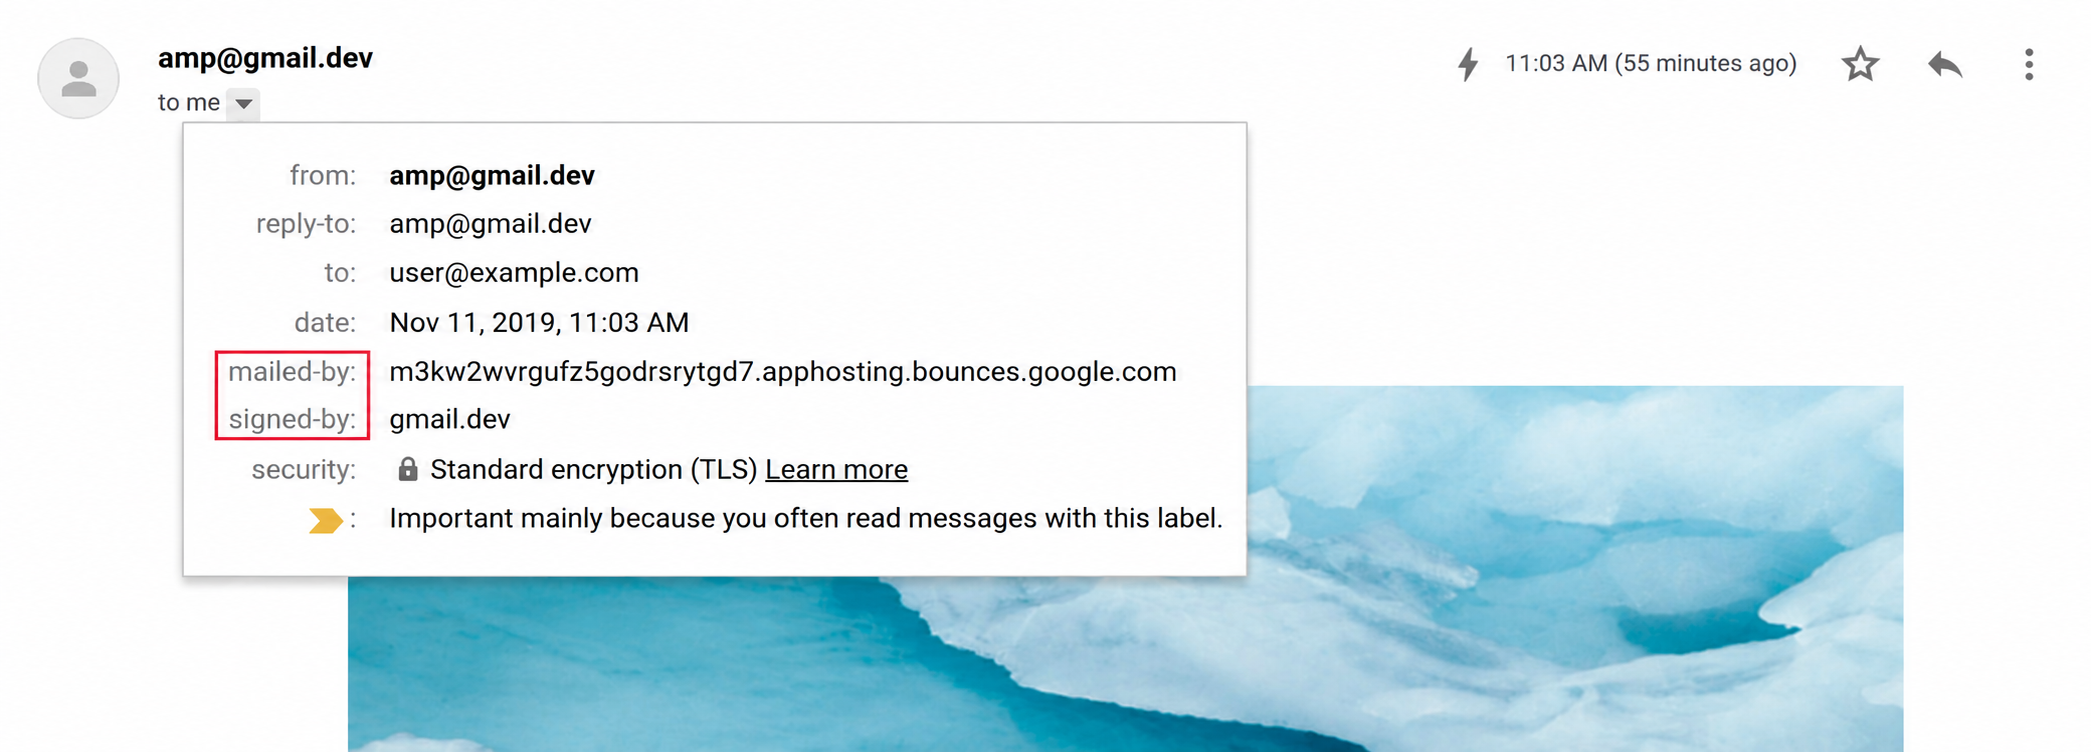
The message is authenticated if
- mailed-by indicates the domain name, for example, google.com;
- signed-by indicates the sender’s name.
The message is not authenticated if it has a question mark ? next to the email address.
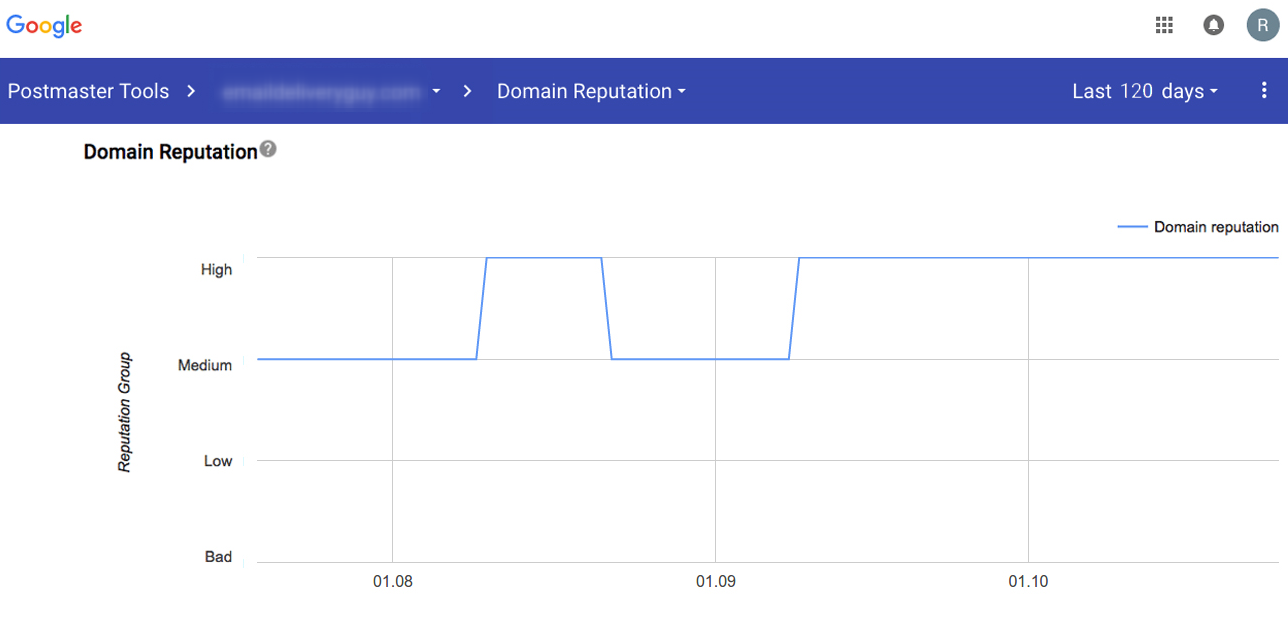
Postmaster will show how many emails have been delivered to the Inbox or blocked by spam filters and how many recipients send your emails to spam. It also shows delivery errors, if any, and check the sending settings for correctness.
In Mail Tester.
Your attention should be brought to the following:
- proper authentication;
- blacklists.
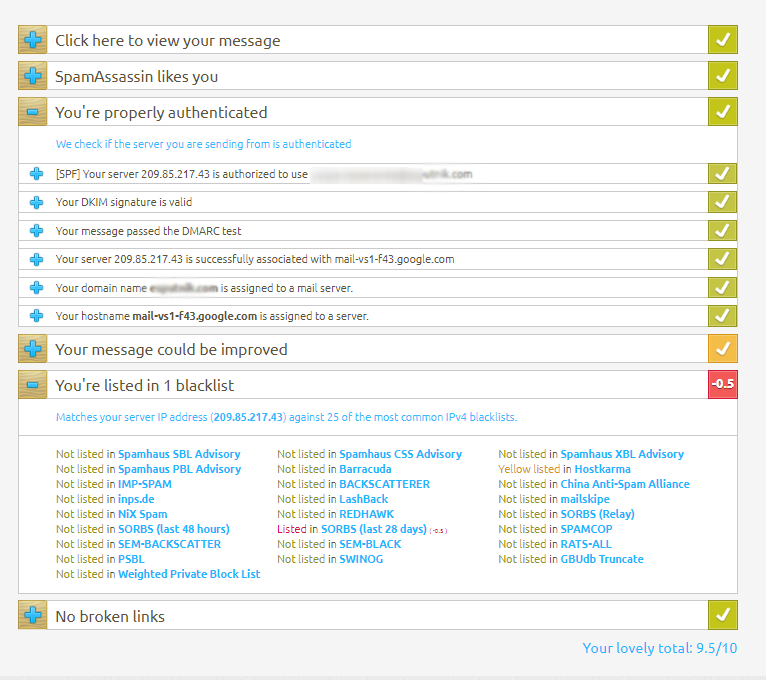
Fix the errors, if any, before proceeding with registration.
5. Specify a corporate email address as a sender.
If for any reason you've sent emails from public addresses before (for example, for testing), change it for a corporate email, and specify it, while registering with Google.
Register as a Dynamic Sender
Step 1. Send prepared emails.
Send two versions of the email to
from the email address you would further use for AMP sending. We recommend sending a direct email rather than forwarding or running a test, as dynamic blocks are cut off when forwarded.
Step 2. Fill in the registration form.
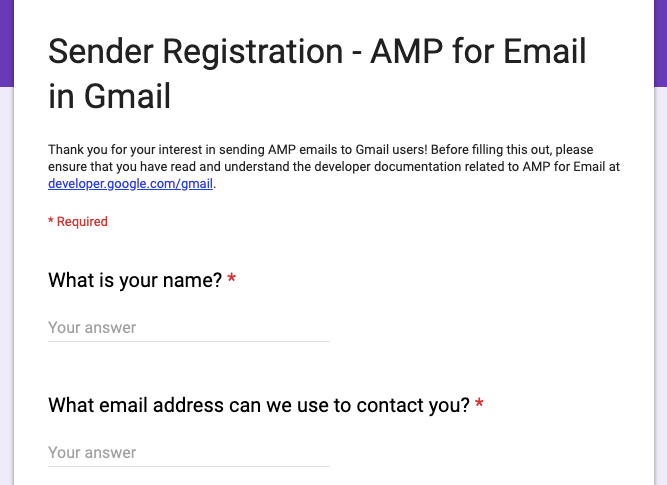
The registration process consists of 5 stages. Among other questions, you’ll have to specify
- your name;
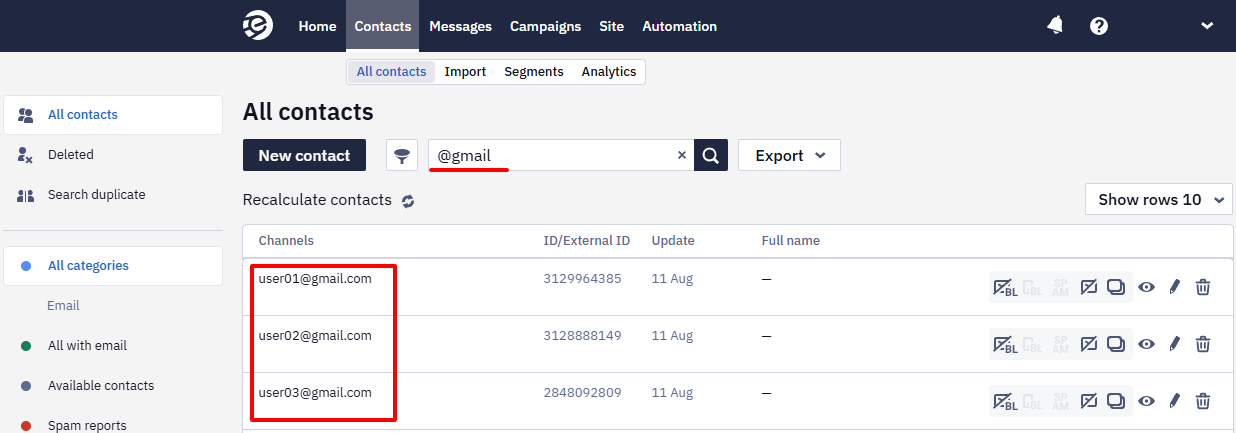
- The number of contacts in the database with gmail addresses. You can find out the exact number in Contacts → All Contacts by searching for @gmail.
- use cases you plan to deliver using AMP for Email;
- email address and domain you use to fill the registration form;
- exact date and time of sending emails to [email protected].
Once you've filled all the fields, you'll be forwarded to the Expect our answer page. The approval may take up to several weeks. Once you’ve been whitelisted by Google, you’ll receive the confirmation email:
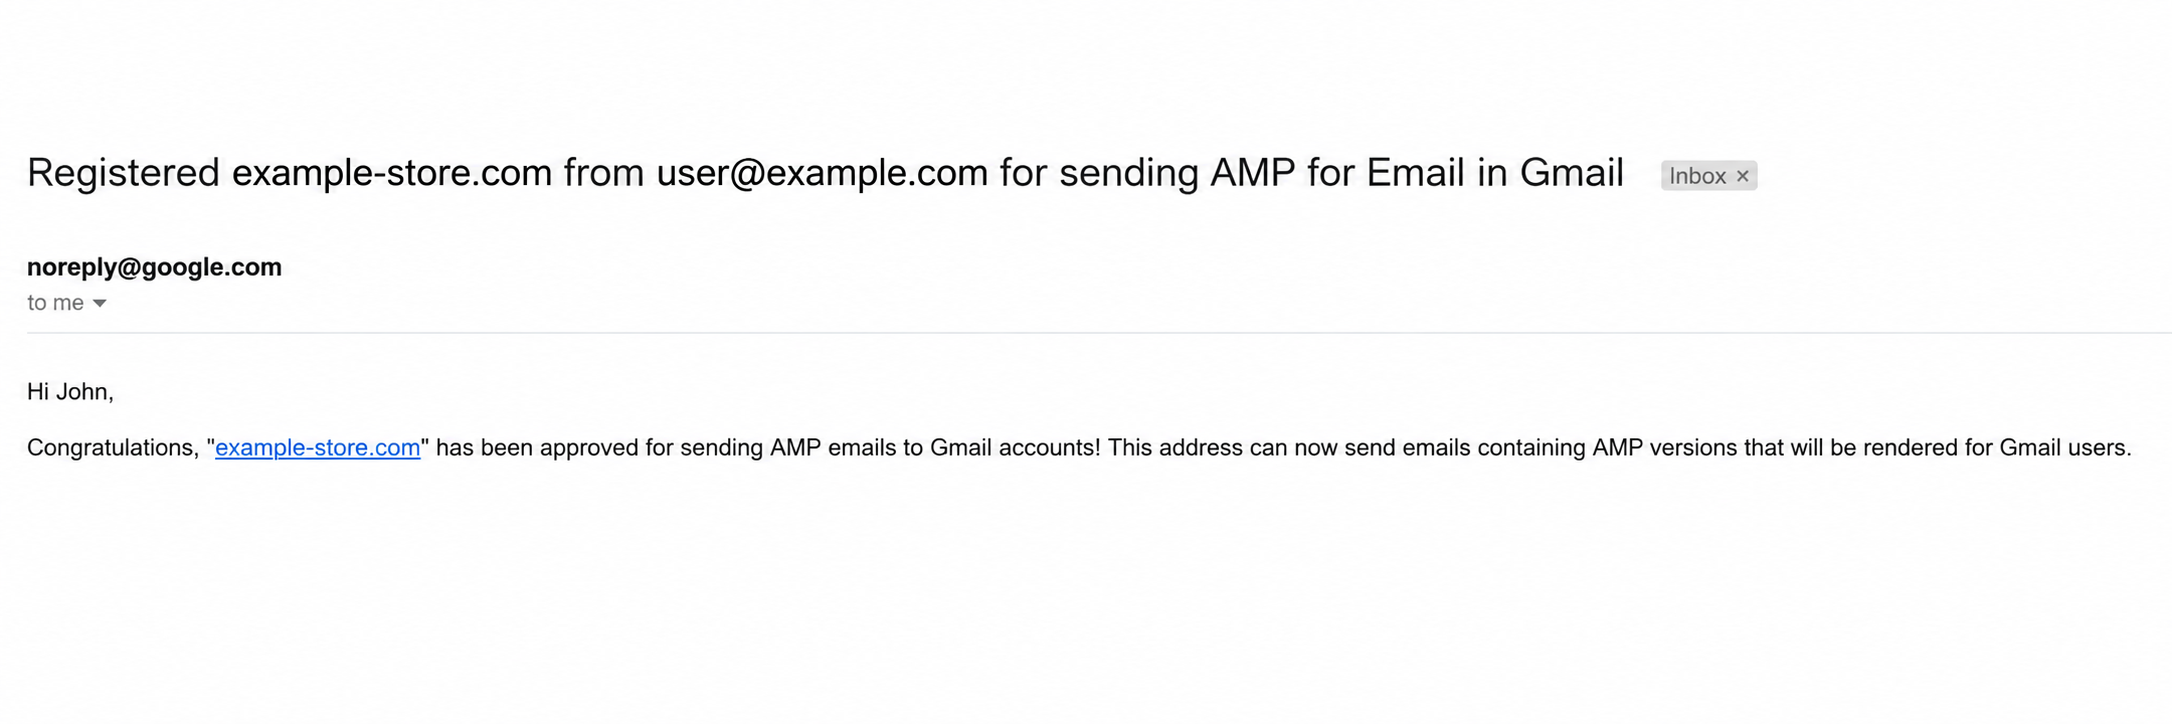
Gmail will also notify that:
- You won't be able to send AMP emails for a few days until the changes take effect. You won’t receive a notification on when it happens.
- The registration only applies to Gmail addresses only. Other email clients may have different registration requirements and procedures.
- You must comply with the delivery requirements for AMP emails.
If AMP Elements Fail to Load
- Check if you've enabled dynamic emails in your Gmail settings (see Section 3 of current AMP for Email Guidelines).
- Check the email code and styles for correctness.
- Make sure the recipient’s email client supports AMP. If not, the email would be displayed in the HTML version or as a plain text.
- Check if the sender address is the same address that has been enabled in the Gmail settings and whitelisted by Google.
If you need any assistance to get started with AMP-supported emails, please contact our support, and we’ll be happy to help.
Updated 9 days ago