Managing the Contact Profiles
Learn how to view and edit contact profiles
The contact profiles keep all the records of each contact in our system. These records include:
- Input contact data.
- The data collected from the contact’s activities, such as interactions with your website, mobile application, campaigns, orders, and others.
In the contact profile, you can do the following:
- View and edit the profile details.
- View the contact activity.
- Edit the contact’s subscription and assign additional fields. Read this article to learn more about additional fields.
Viewing the Contact’s Profile
To open the list of your contacts in our system, go to Contacts → All contacts.
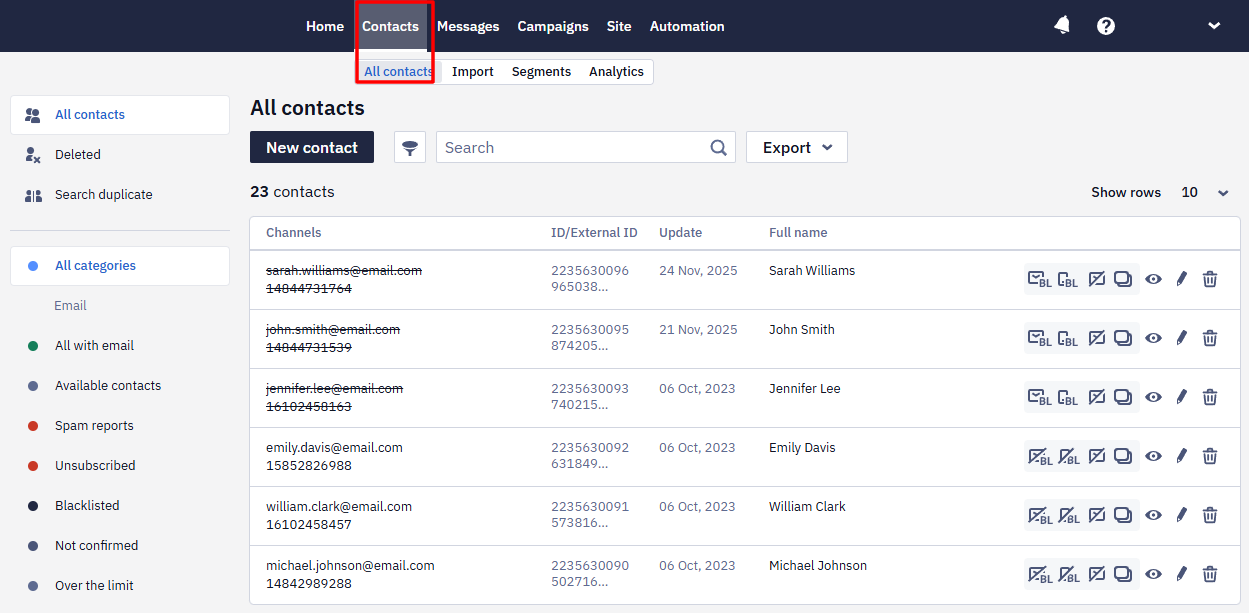
To open the contact’s profile window:
- Click the Contact preview icon on the right-hand side of the table.
Or,
Click any blank space in the corresponding contact row. The contact profile window opens.

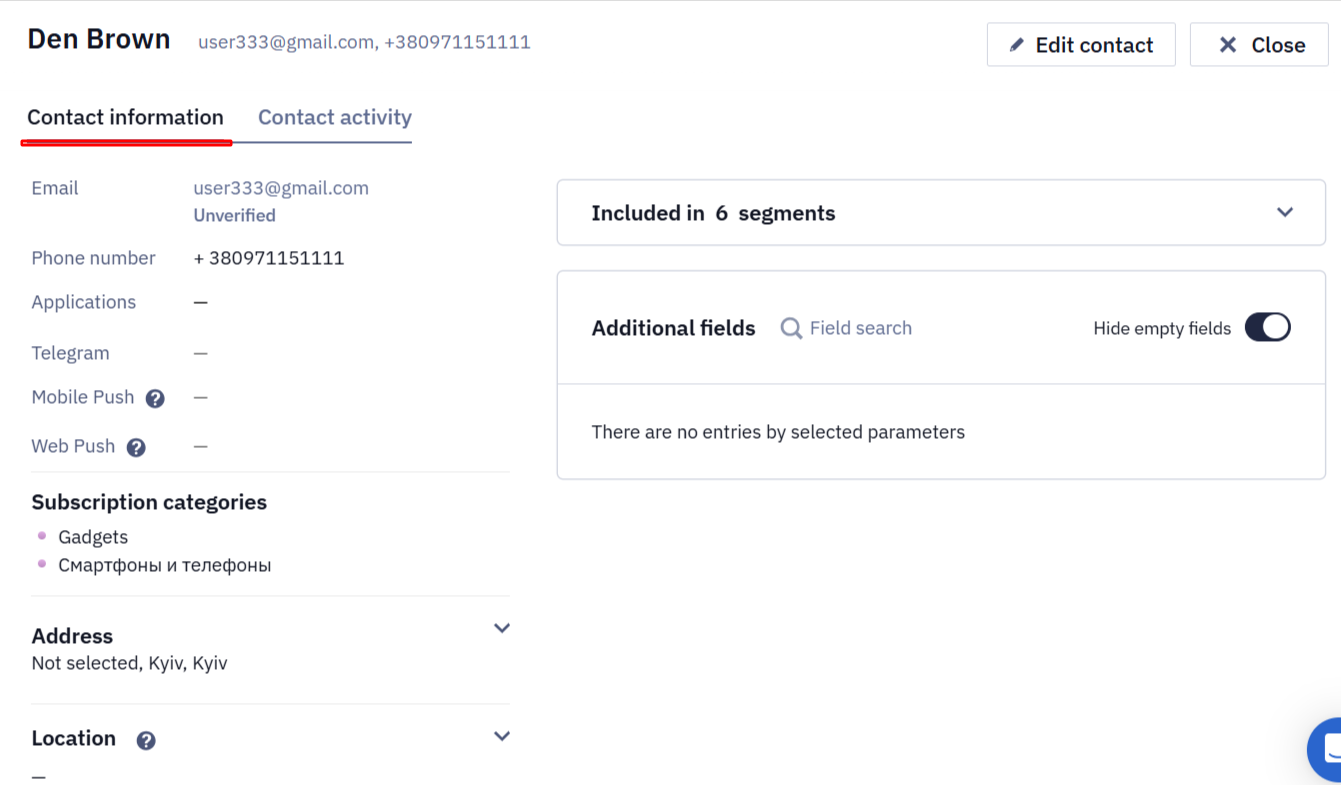
The contact profile window has 2 tabs:
- Contact information
- Contact activity
Contact Information Tab
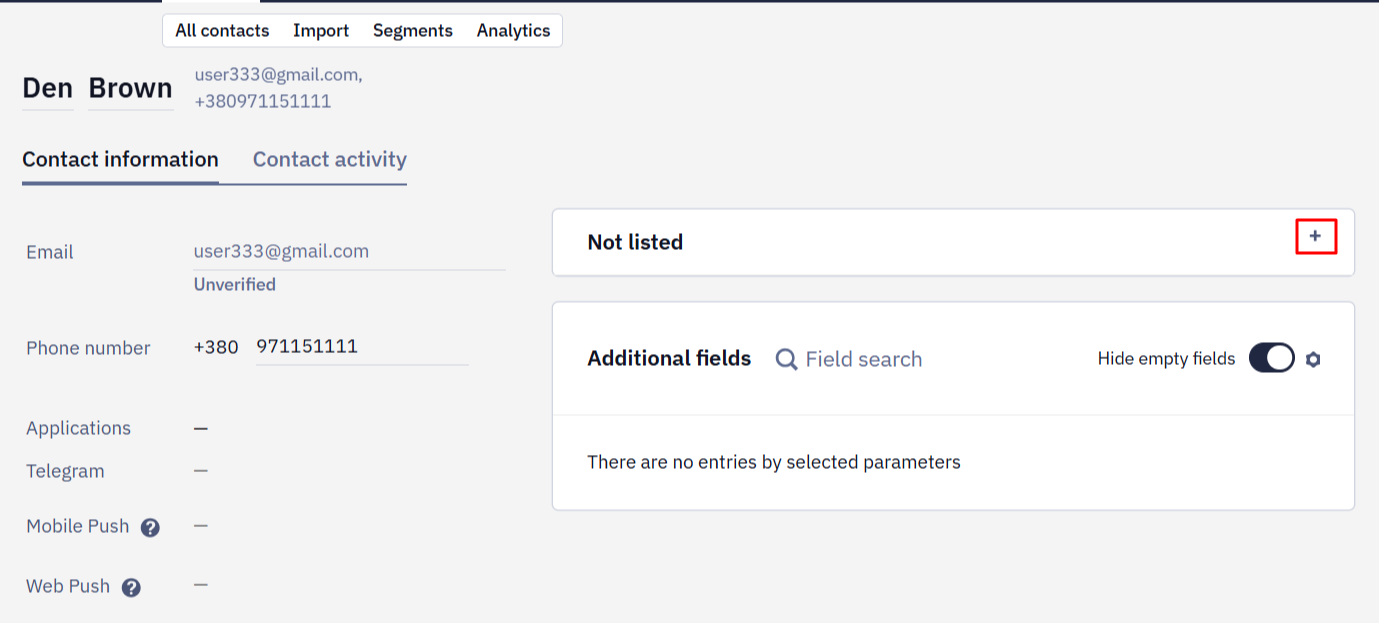
This tab displays all the information about the contact entered manually or collected by our system.
You can add or update contact information using our API methods. Read API Methods for Adding Contacts to learn more.
The following table lists the information type displayed on the Contact information tab and its description.
| Type | Description |
|---|---|
| Name and Surname | Contact’s name and surname. They are displayed on the top of the contact’s profile. |
| Contact’s email address. It is possible to add only one email address. | |
| Phone number | Contact’s phone number. It is possible to add only one phone number. |
| Applications | Applications that the contact installed on their devices. Point to the application name to view IDs and connected devices. |
| Mob Push | Mob push tokens of the contact. There can be several tokens for the same contact. |
| Web Push | Web push tokens of the contact. There can be several tokens for the same contact. |
| Tekegram | Telegram bot ID. |
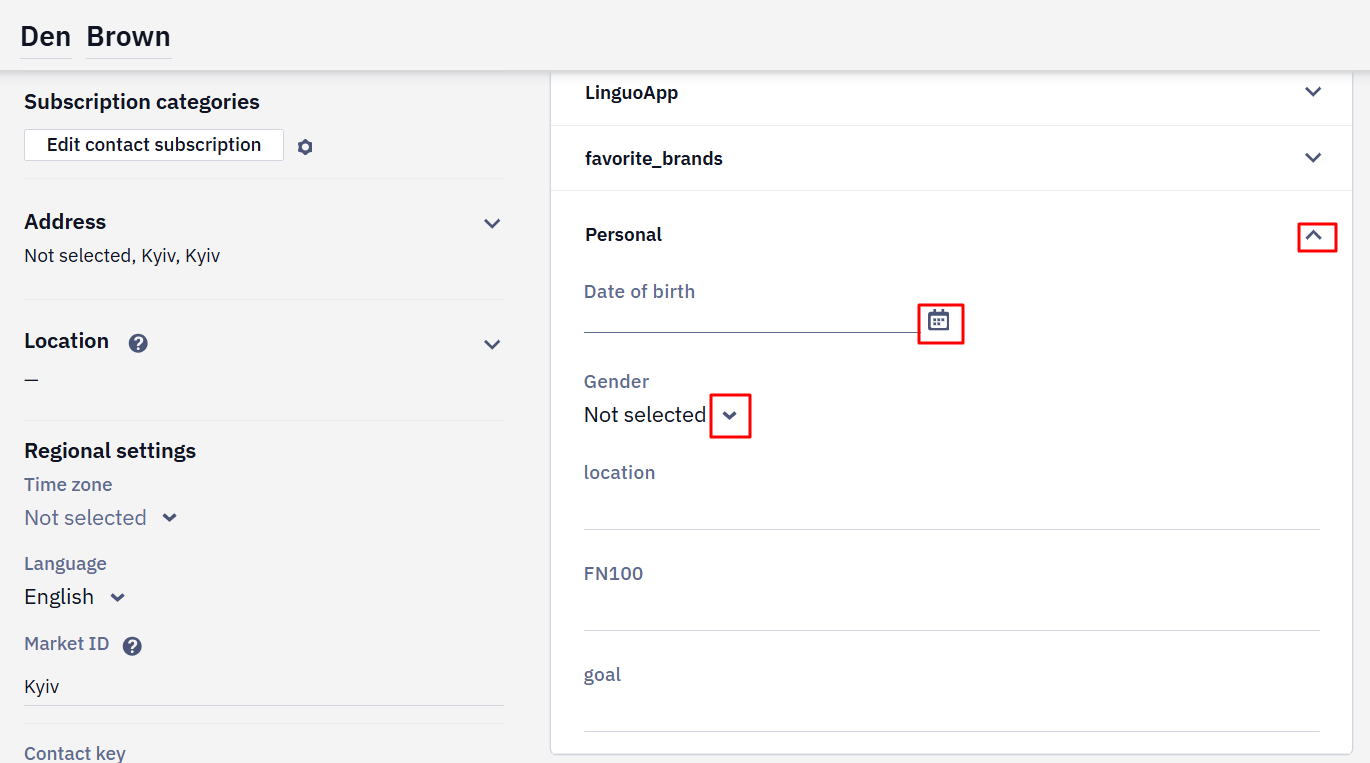
| Subscription categories | Contact subscription categories. To learn more, read this article. |
| Address | Contacts address. You can pass the contact address from an order. |
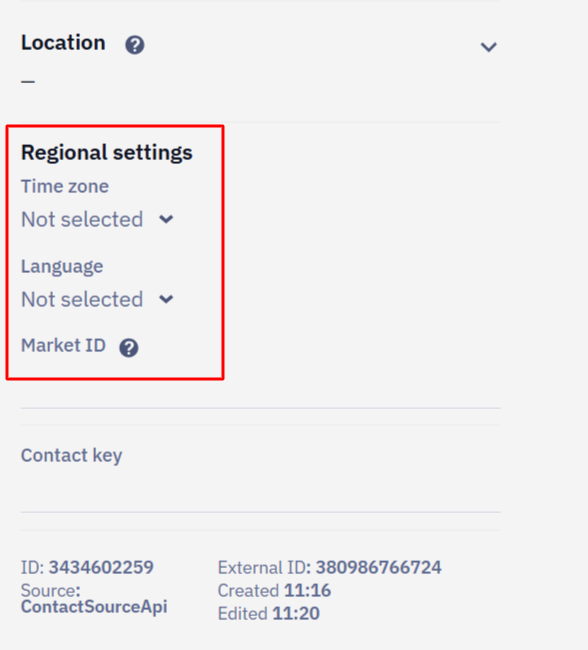
| Location | This item contains geo-tracking data. Read the Setting up Geotargeting article to learn more. |
| Regional settings | Contact’s timezone and preferred language. See this article to learn more. |
| Segments | Segments to which the contact has been added. |
| Additional fields | Additional fields assigned for the contact. |
This tab also contains information on the email address and phone number status. If the contact has been blacklisted, the system automatically records the date and the reason for blacklisting.
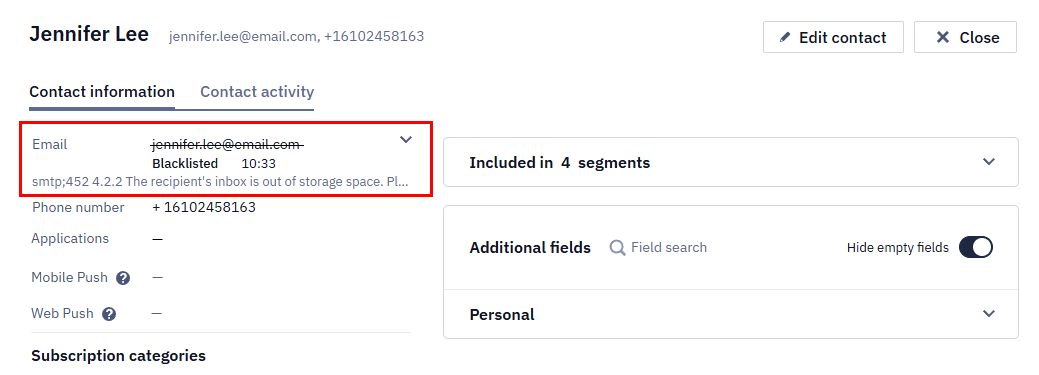
To learn more about blacklisted contacts, read Contact Blacklist.
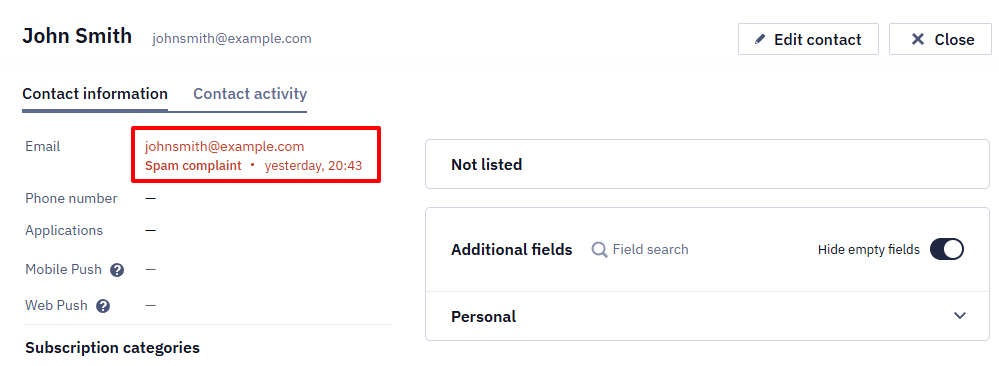
If the contact has reported spam or unsubscribed, the system automatically records the date and reason in the contact profile.
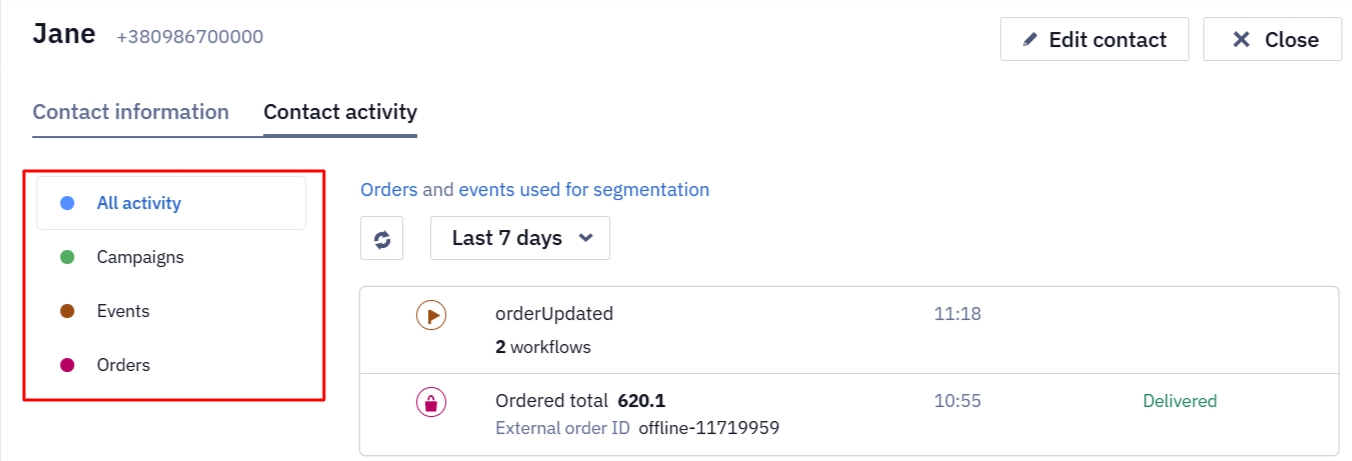
Contact Activity Tab
The tab displays the contact's activity history in the following categories:
- All activity
- Campaigns
- Events
- Orders
To view the activities that occurred during a specific period, expand the period dropdown menu and select the corresponding period from the list.
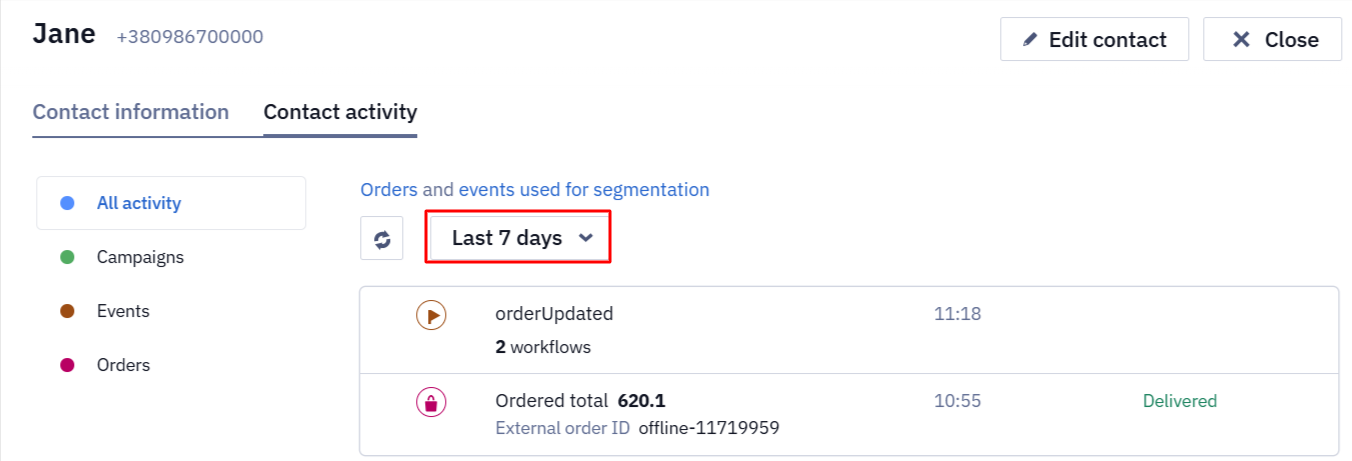
NoteFor the Orders category, the history is available for the entire contact activity period
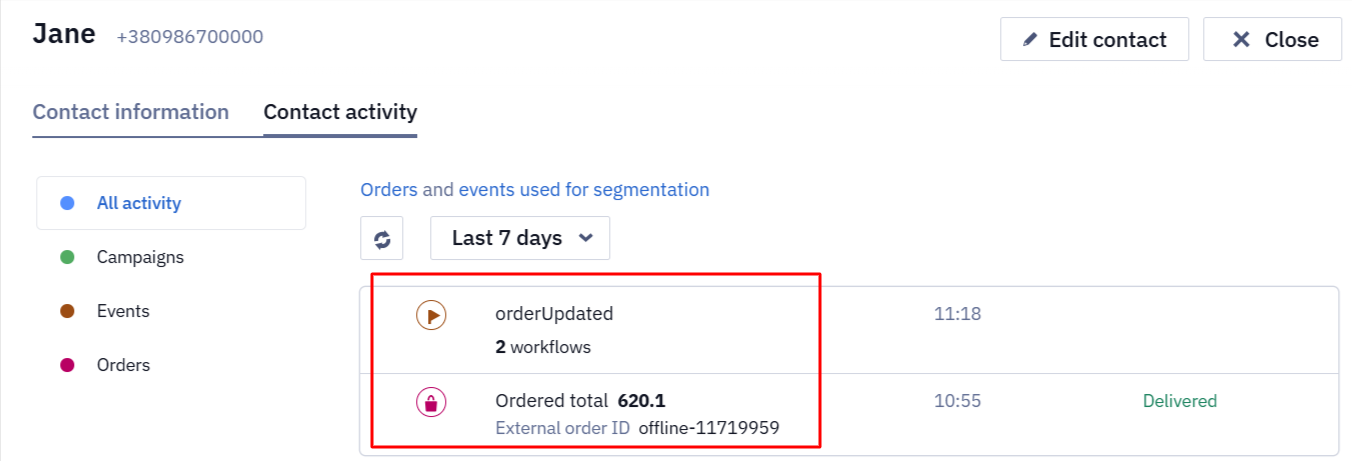
Each activity contains the following information:
- Sent message, date, and status – Campaigns category.
- Event names and assigned workflows – Events category.
- External ID, amount, date, and order status – Orders category.
The marking on the left-hand side of the activity indicates its type and contains the following elements, which are explained in the following table:
- Color bar
- Icon
| Activity type | Color bar | Icon |
|---|---|---|
| Campaigns | Green | Channel name |
| Events | Brown | Flag |
| Orders | Red | Shopping bag |
Editing the Contact Profile
To edit the contact profile, click the Edit contact button on the top right-hand side of the profile. The editing window opens.
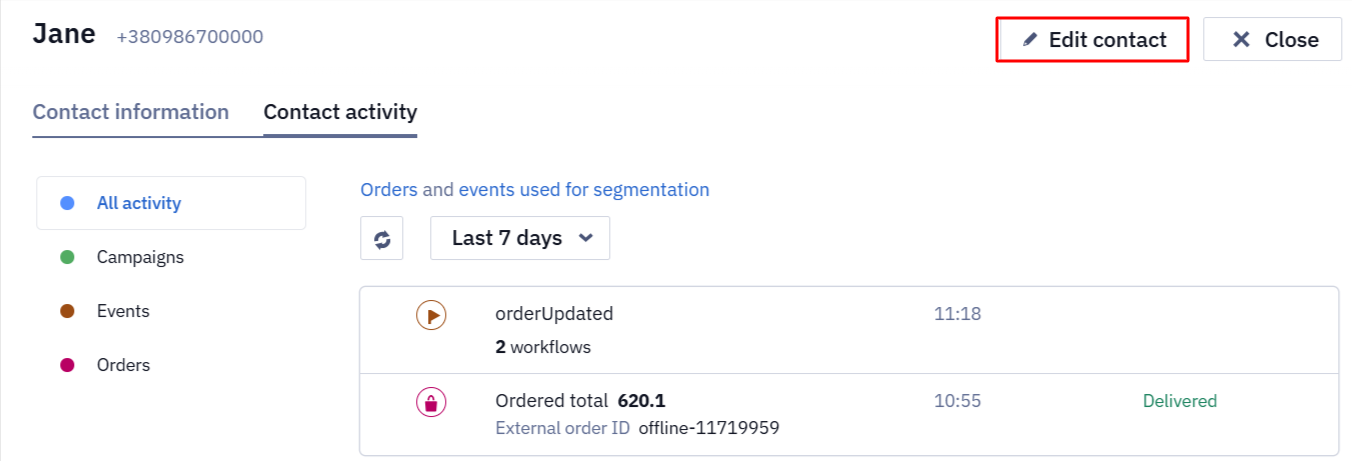
In the editing window, you can do the following editing, as described below.
Select the following fields and add or edit their information:
- First name and last name
- Phone number
- Contact key
Expand the Address and Location sections and enter or edit information in their fields.
NoteYou can use geotargeting to get and update the information about contact’s location. To learn more, read Setting Up Geotargeting.
In the Regional settings section, expand the following dropdown menus and select the values from them:
- Time zone.
- Language. Read this article to learn more about setting the contact’s language.
To add a contact to one or several segments:
- Click the plus icon in the top bar on the right-hand side.
- Select or clear the checkbox beside the segment name to add or remove the contact from the segment.
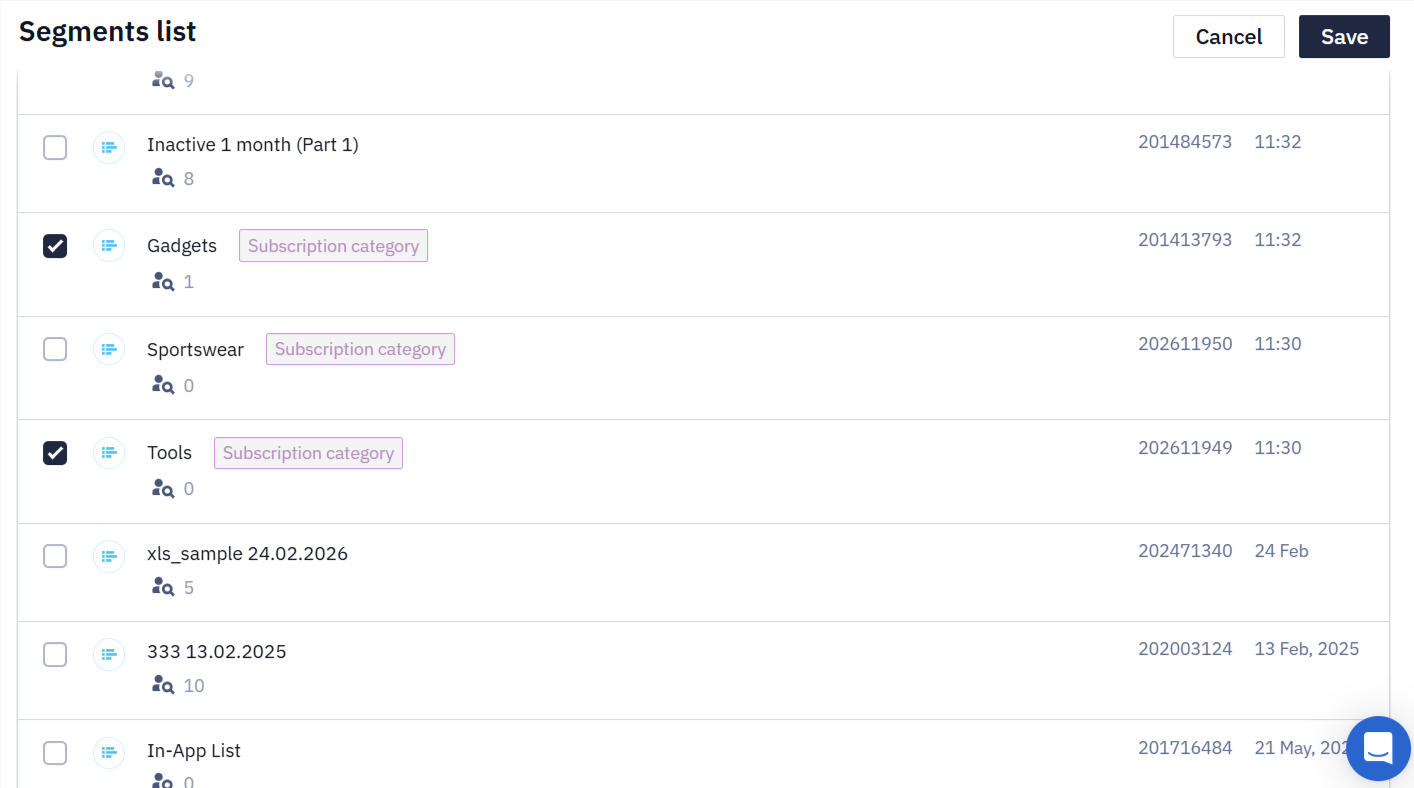
- Click Save.
You can manually edit the contact information in the Additional Fields section.
To edit the contact information in Additional fields:
- Expand the list of fields by selecting the upward-pointing arrow icon.
- Add or select the values for the contact fields in the list.
Read How to Add Additional Contact Fields to learn more about creating and adding additional fields.
Updated about 1 month ago