
Regular Workflow for a Segment
A regular workflow is a series of automated messages sent to a contact segment based on determined conditions. Most often, regular workflows are used for dynamic segments, but it’s possible to launch a regular workflow for a list segment.
A regular workflow differs from a one-time workflow in that it automatically runs for all new contacts added to the assigned segment after the workflow has been started.
An important condition for launching a regular workflow for a segment is that you must have a contact database with whom you have been interacting for a long time.
In this article, we will describe the process of creating a regular workflow for contacts who show certain activity/inactivity in your messages.
You can build both single-channel or multichannel workflows with any type of message in an unlimited number – Email, Web push, Mob push, SMS, Viber or App inbox.
Messages in workflow work together to accomplish a particular goal. It can be
- birthday greeting;
- event invitation;
- reactivation, etc.
1. Create a Dynamic Segment
Dynamic segments can include contacts based on one or more parameters (conditions). The number of contacts in the segment varies depending on how many current contacts match specified conditions.
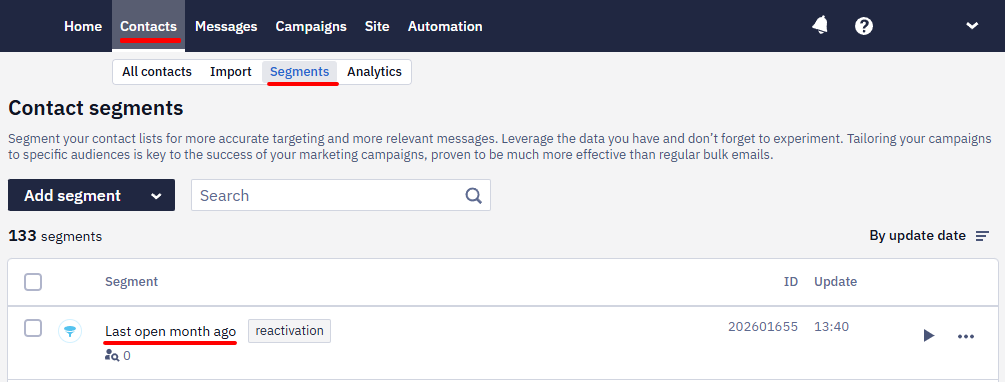
Let’s create a dynamic segment that includes contacts who opened your messages a month ago.
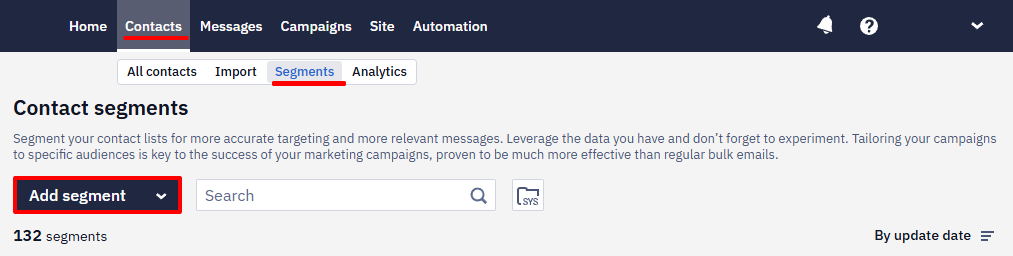
- Go to Contacts → Segments, click the Add segment button.
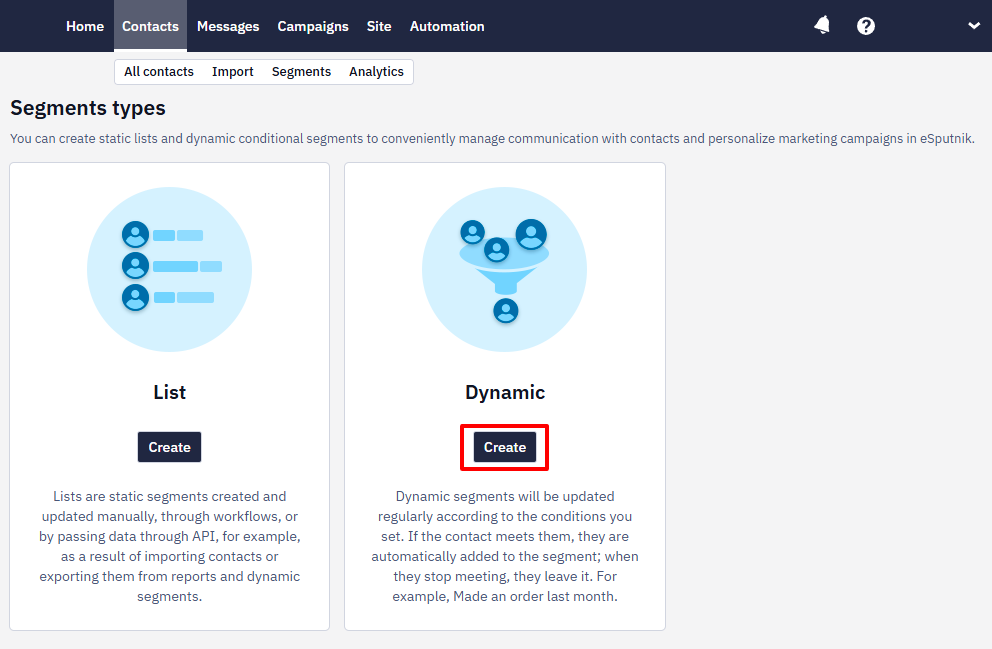
- Select Dynamic segment and click Create.
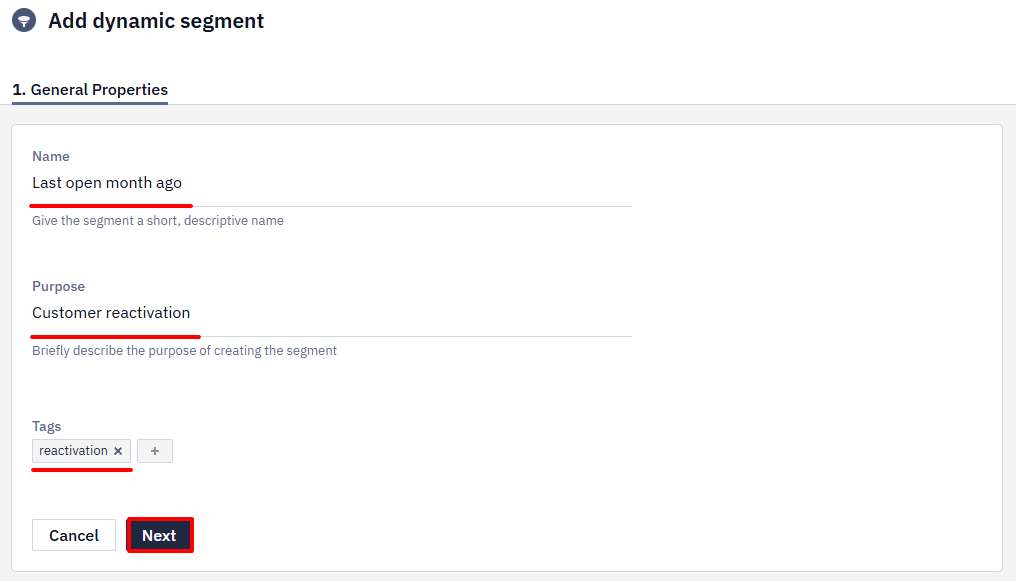
- Fill in general properties:
- Name (required) — displayed in the general segment list.
- Purpose (optional) — specify how the campaigns will be used. For example, for triggered emails, regular promo campaigns, etc.
- Tags (optional) — select from the list or add a new one for quick filtering and segment search.
- Click Next.
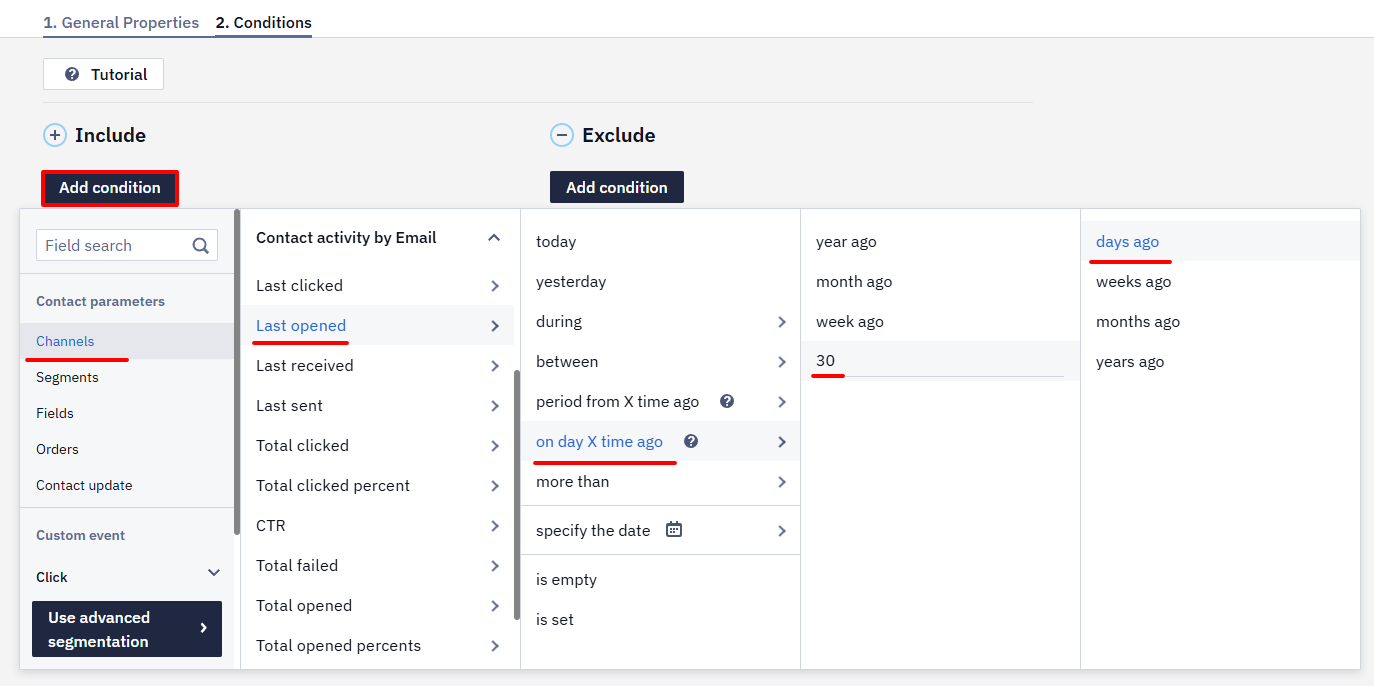
- To select conditions click Add condition.
- Go to Channels → Contact activity by Email → Last opened → on day X time ago → 30 → days ago.
- Click Done. The created segment will appear in the general segment list.
Segment recalculation and workflow launch are two separate mechanisms, and they run on different schedules:
- Segment recalculation decides who is in the segment. For dynamic segments it runs daily from 3 a.m. to 4 a.m., and you can change the time in the workflow start settings.
- Workflow launch decides when the workflow starts for those contacts. Workflows triggered by a segment or a group are started in batches once an hour, so a contact can wait up to an hour after entering the segment before the workflow starts for them.
Workflows triggered by an event behave differently — they start as soon as the event is registered, without waiting for a batch. If you need an immediate reaction to a user action, launch the workflow by an event rather than by a segment.
2. Create a Workflow
You need to create corresponding messages before getting started with a workflow.
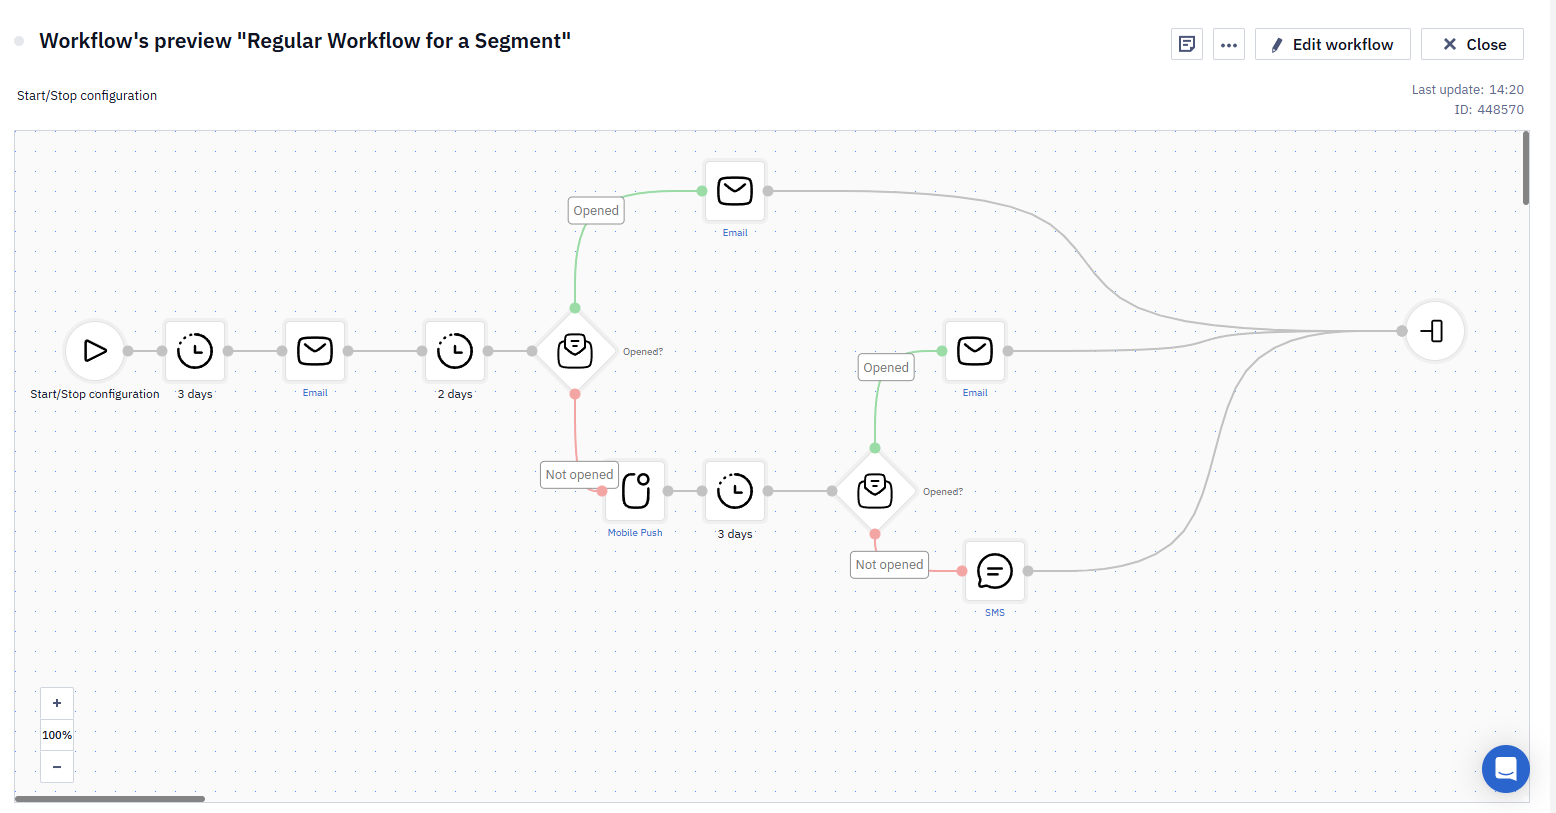
Let’s create the following workflow that consists of two emails, timers and conditions.
Learn more about building and editing workflows >
- Go to Automation → Workflows and click New workflow. Enter its name and tags (optionally). Build a workflow with the following blocks:
- Start. A required block that starts every workflow.
- Timer 1. The workflow starts sending messages straight after contact recalculation. Since contacts are recalculated from 3 a.m. to 4 a.m., set the timer so as not to bother your recipients at night.
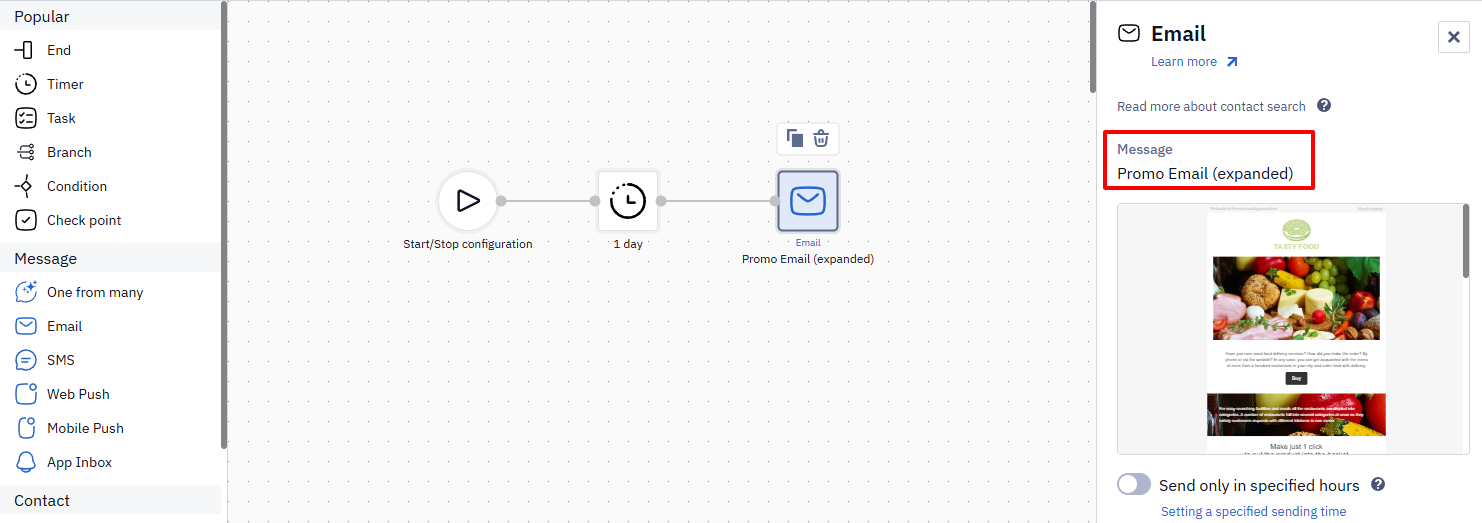
- Email. In Message, select the previously created email. Repeat this for each Email block in the workflow.
-
Timer 2/3. Specify a time gap between the sends. You can also select on what day and at what hour the message should be sent. The timer starts counting down after contacts have been recalculated but not after the workflow has been activated.
-
Condition Opened/Not opened. After a specified timer expires, the system checks whether the contact has performed the target action. The workflow continues to run depending on the result:
✓ Opened: The workflow sends a follow-up and ends.
✓ Not opened: The workflow repeatedly sends the 1-st email. Depending on the response, it sends a follow-up message or ends. -
End. The required block that must end every workflow brunch.
- Click Save.
The workflow will look like this:
3. Configure Trigger
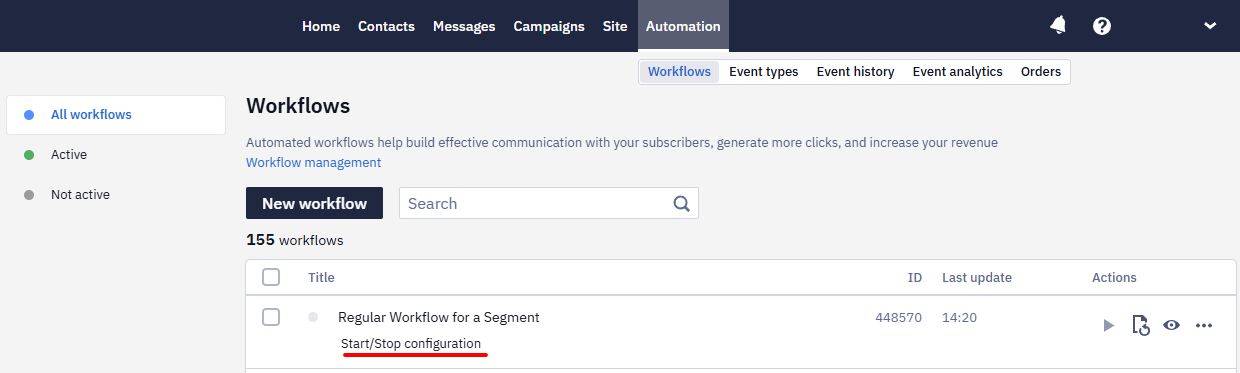
- In Automation → Workflows, choose the created workflow and click Start/Stop configuration.
- Activate Start configuration switcher
- In the Regular tab,
- In Segment, select the created segment.
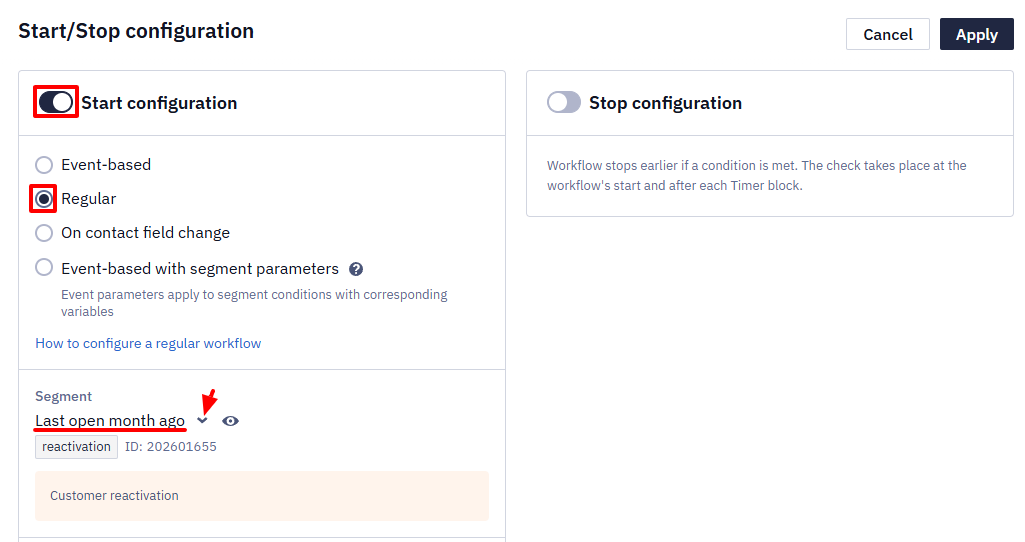
- In Starts on, select the current date.
- In Start schedule, select once a day.
- Select allowed start days.
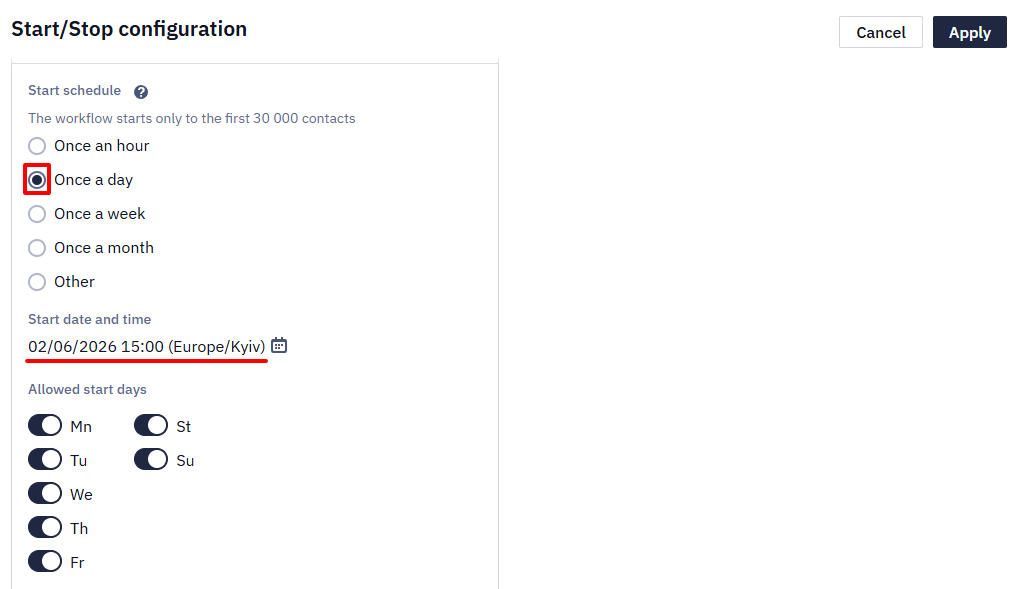
- Set the Start time and set the End date of the workflow;
- In Process unique events, select Each time.
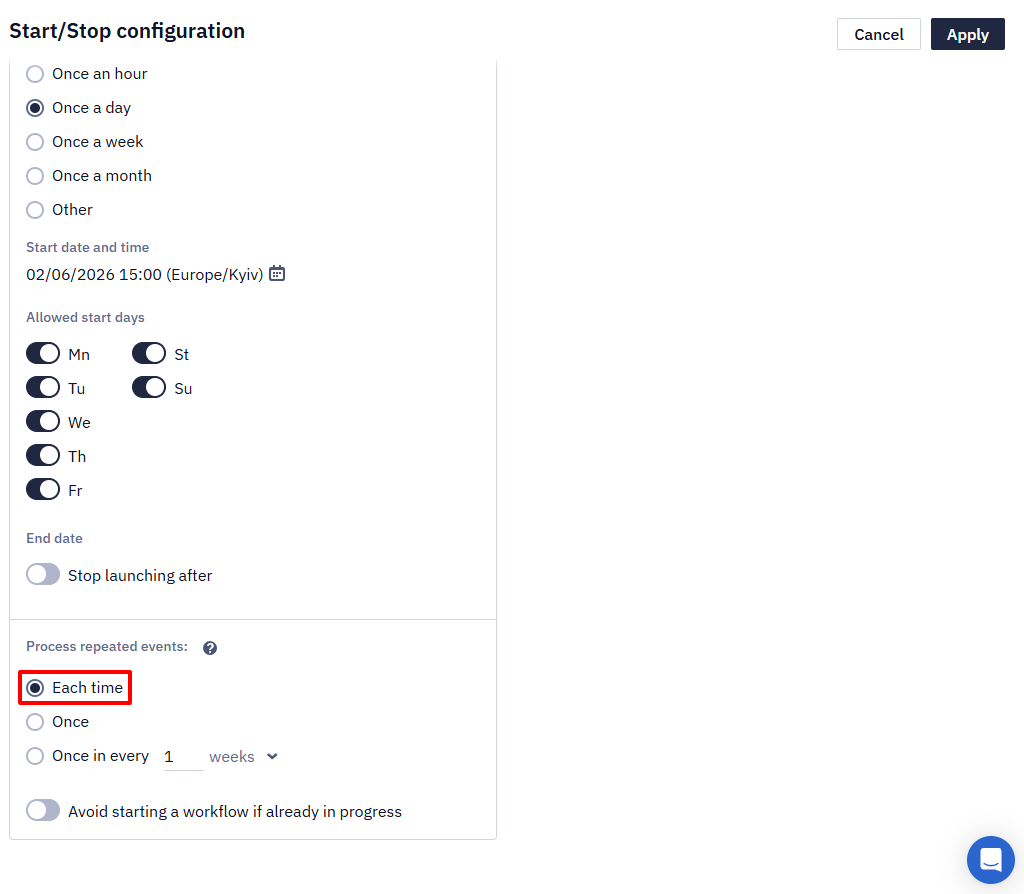
- Click Apply.
NoteA scheduled (segment-based) workflow is limited to 30,000 contacts, and the limit works differently depending on the start schedule. With Once an hour, the workflow runs only for segments that hold fewer than 30,000 contacts — if the segment is larger, the run doesn't happen at all. With a less frequent schedule, such as Once a day, the workflow starts for the first 30,000 contacts, and the rest are not processed in that run. Start/Stop configuration states which of the two applies right under Start schedule.
If launches stop because a segment on the hourly schedule is over the limit, select a less frequent schedule to let the first 30,000 contacts through. Contact support to raise the cap for your account, and keep the trigger segment within the cap by excluding contacts you have already messaged.
The system doesn't send a notification when a workflow reaches this cap.
- To start a workflow, click Activate on the right and confirm the action.
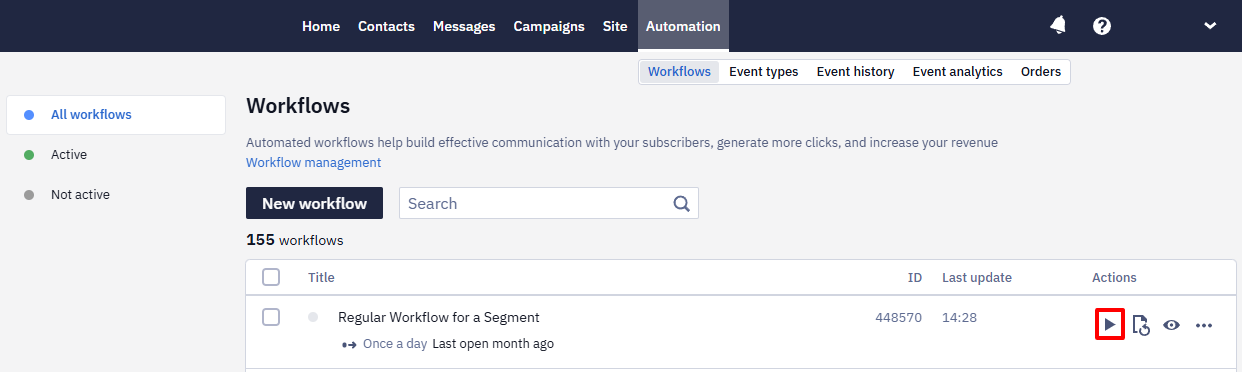
The workflow status will change to active. The first message will be sent when all the conditions specified for the segment are met.
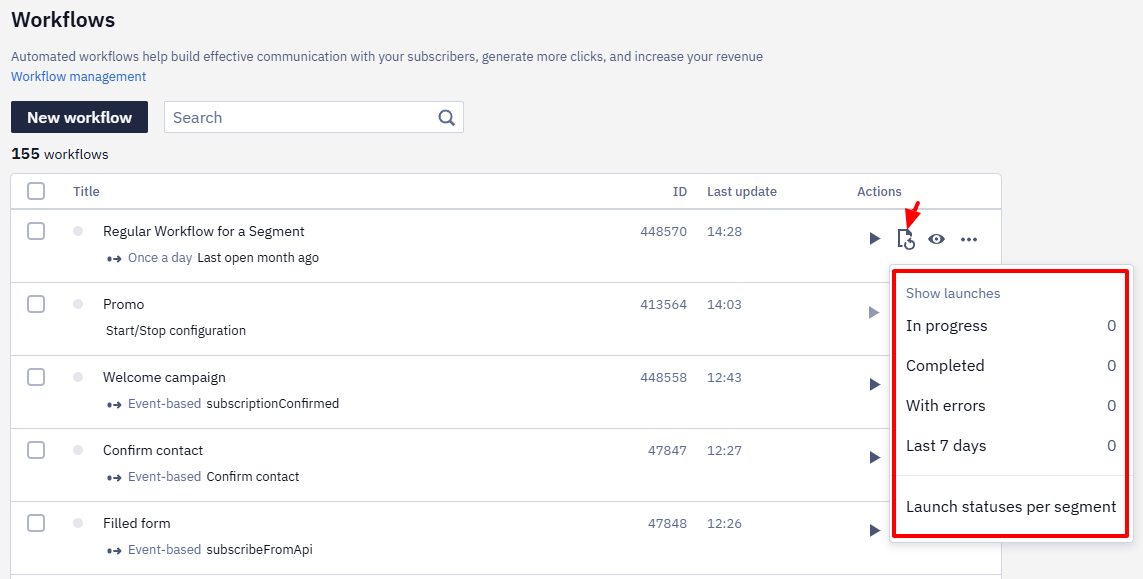
To track the workflow launch history, click the Launches icon. For more details, see the article.
Updated about 1 month ago