
Creating an AMP Form
You can add a ready block Form to the email template to conduct surveys and collect reviews and feedback straight in the email.
NoteTo send AMP emails, you need to register with Google as a dynamic sender.
Step 1. Create a new data service.
A data service is where your users' feedback and responses will be stored.
So far, the service can be created in two ways:
- In Stripo;
- In Zapier.
As an example, let's see how to create a service in Stripo.
- Create an account in Stripo and enter it.
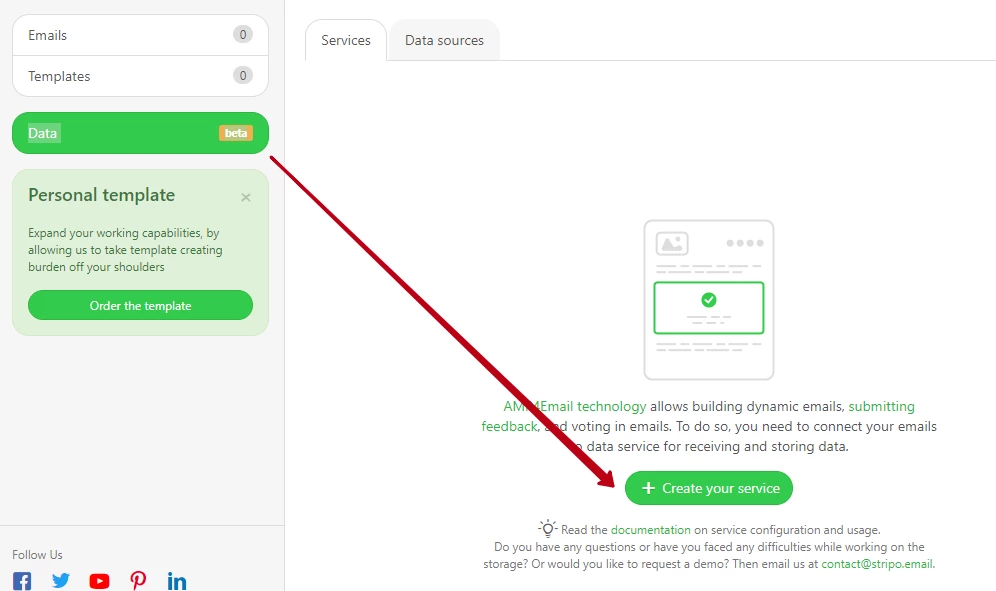
- In the toolbar on the left, click Data → Create your service.
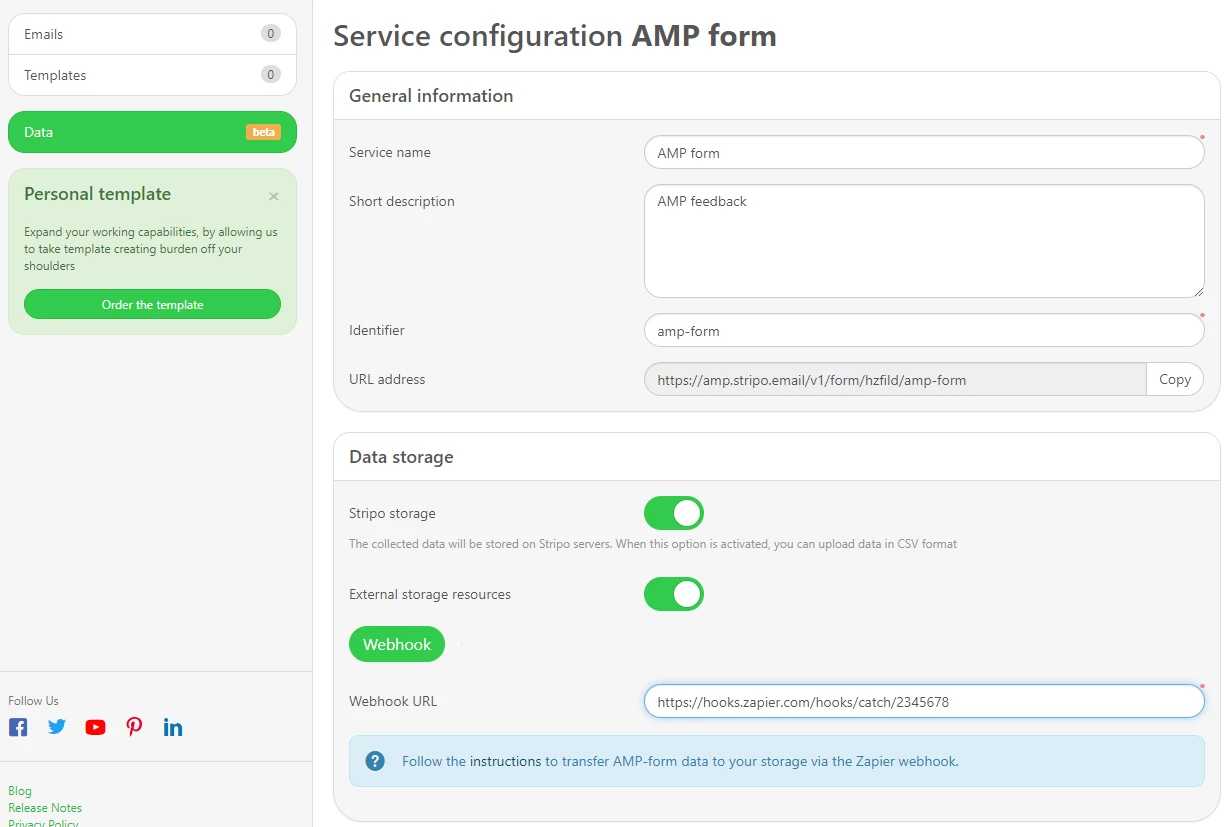
- Enter the service name and description.
- Identifier and URL address will be filled automatically.
- Stripo storage is enabled by default. This means that the data collected will be stored on Stripo servers, and you can download the data as a
CSVfile. - If you plan to use external resources for data storage, enable External storage resources and add a link to the resource. This will allow you to store the data in Zapier, Google Sheets or any other data storage assigned to emails via Zapier.
Step 2. Create an AMP form in the email.
- Go to Messages → Messages and click the necessary email or create a new one.
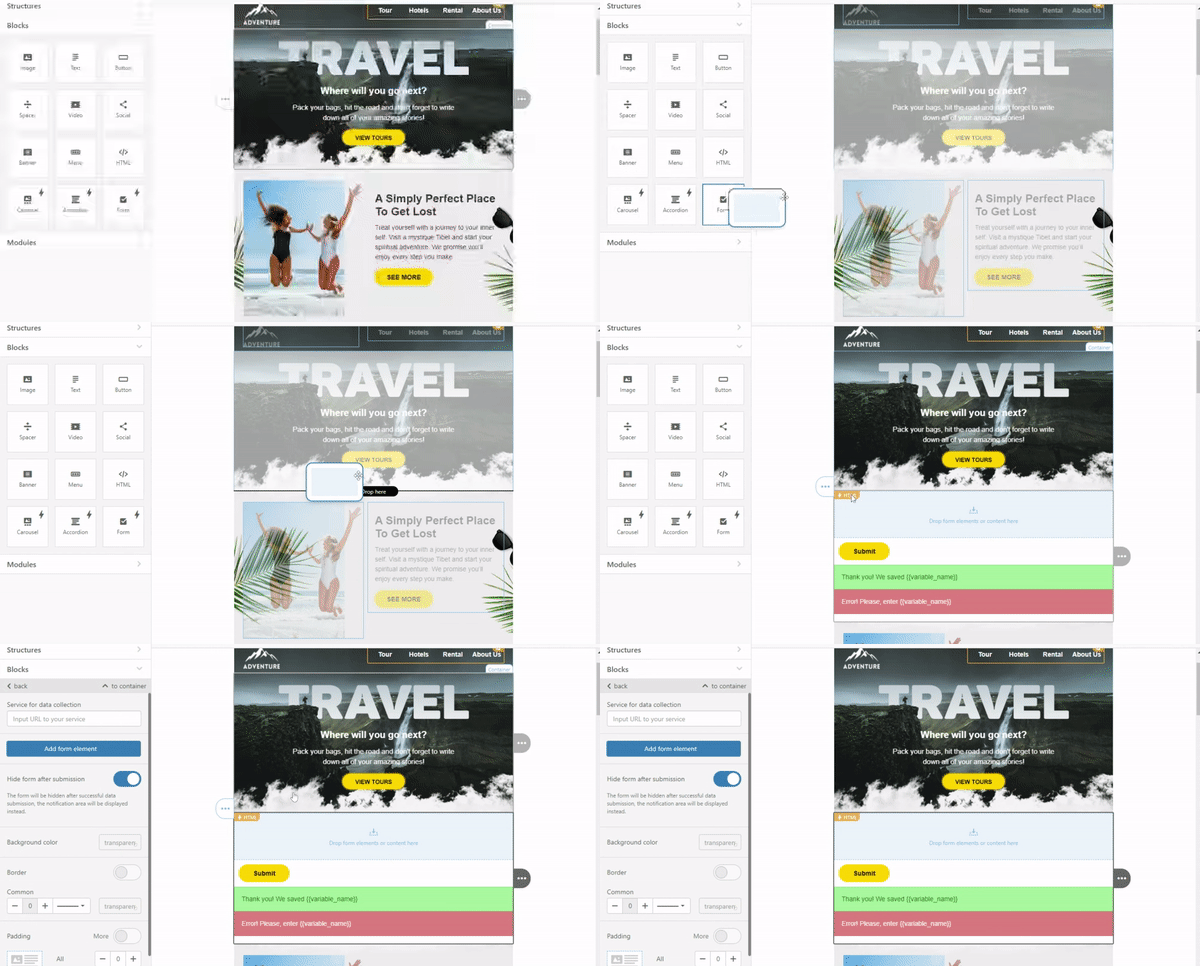
- In the settings on the left, click Blocks and drag Form to the necessary place in the template. Click ϟHTML to open the general settings.
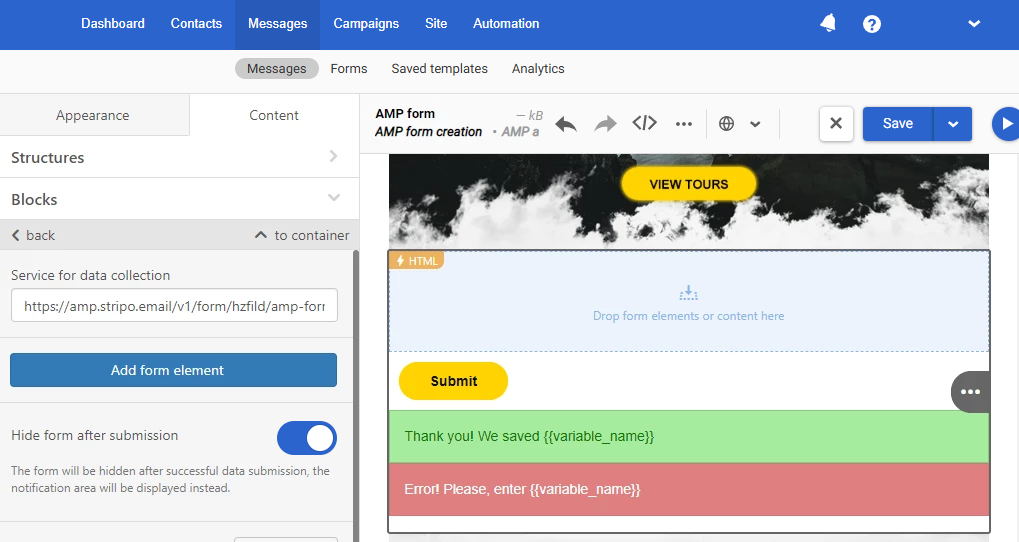
- In Service for data collection, enter the corresponding URL.
- Click Add form element and select one of the options:
- text input;
- hidden field (used to transmit data without user's input, for example, send the email address or name of the respondent which are already in the database and need no new request);
- switcher;
- multiple choices;
- dropdown select.
We select Text input.
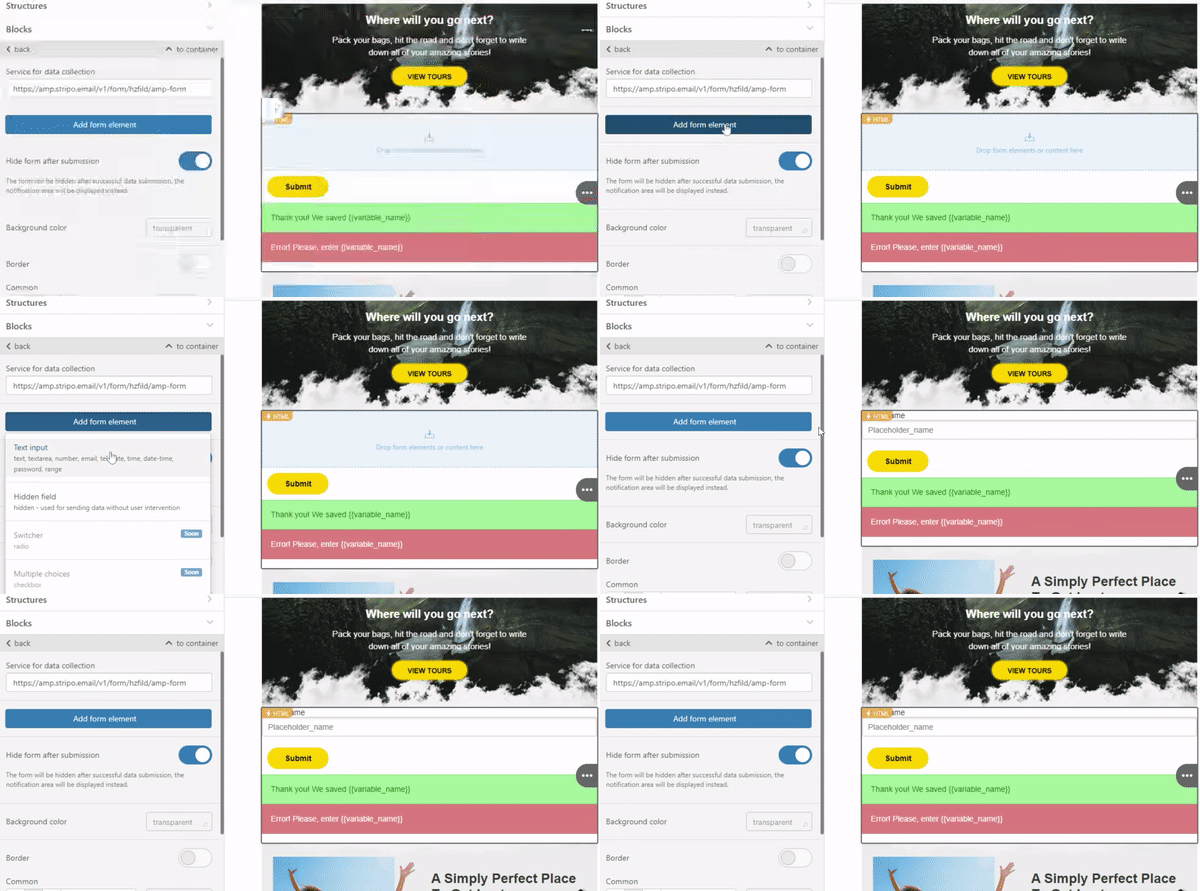
Configure general settings of the structure.
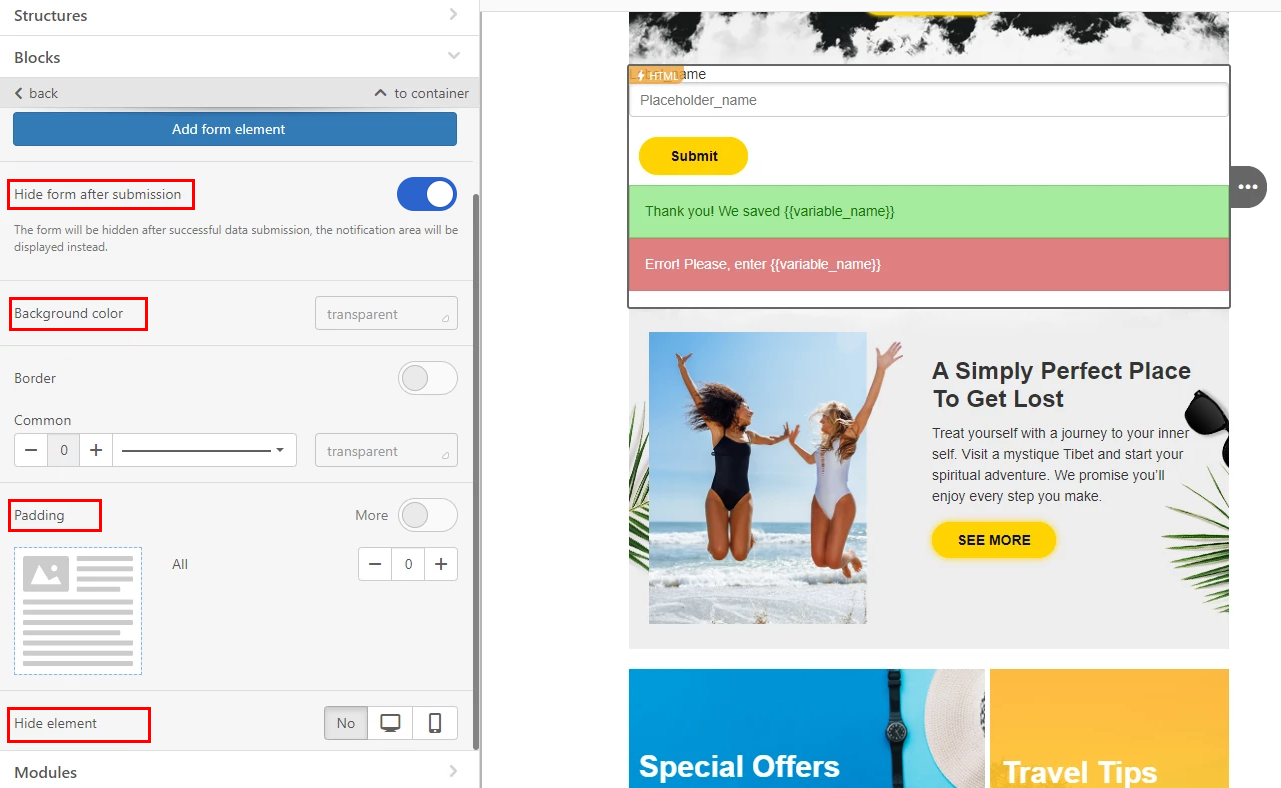
- Hide form after submission;
By default, the form in the email will be hidden after the data is successfully submitted. A notification about successful submission will be displayed instead (for example, Thanks for your answer). You can disable the option.
- Background color;
Choose the color in the box menu or enter your code.
- Border;
By default, you configure common settings. Slide a toggle to configure each side separately. You can also choose the type of lines.
- Padding;
By default, you configure common settings. Slide a toggle to configure each side separately.
- Hide element.
This feature is disabled by default. You can enable it to hide the structure on desktop or mobile.
Edit block elements.
Input field
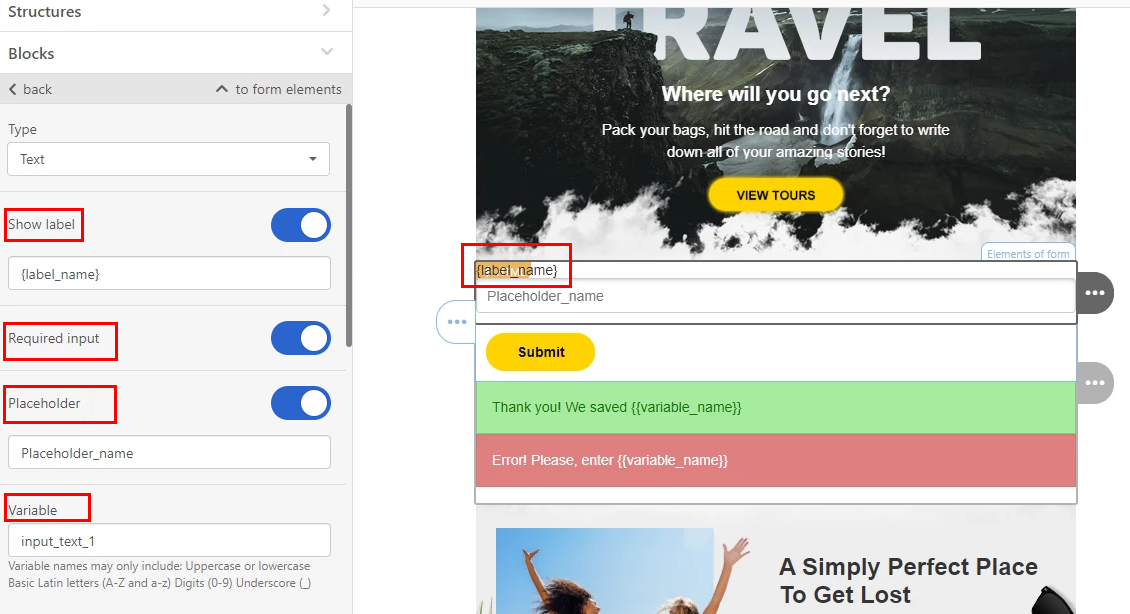
- Click Label name to start editing.
- In Show label, enter the main form text. Characters are unlimited. If you only need an input line, slide the toggle left.
- Apply Required input if you use several questions and some of them are required.
- In Placeholder name, enter an example of the answer.
- In Variable, enter a variable that will help find this particular data faster, for example, in a
CSVfile. The field supports Latin characters (uppercase/lowercase), numbers and underscore.
ImportantTo find out which subscriber has submitted a review, go to the structure settings by clicking the ϟHTML:
- In Add form element, select Hidden field.
- Enter the value in Default value. We enter
%EMAIL%(the responded email address will be inserted).
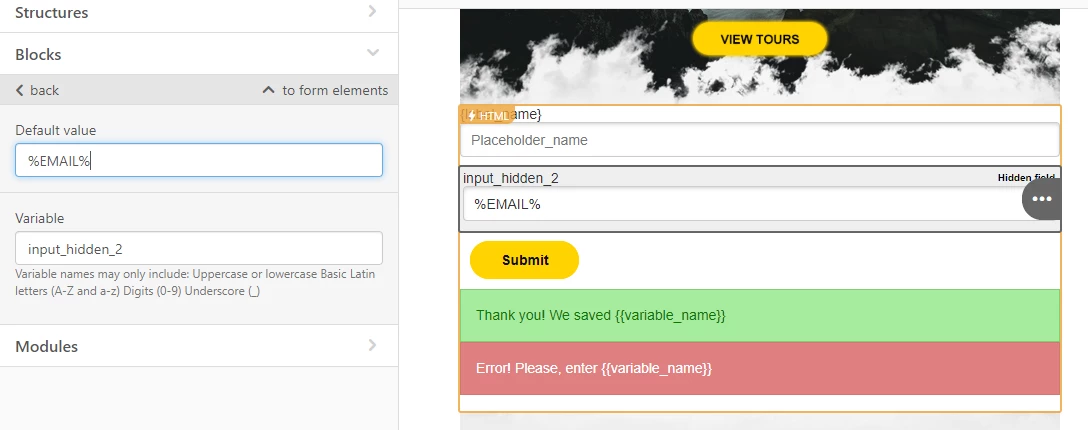
This field will be hidden for email recipients.
Button
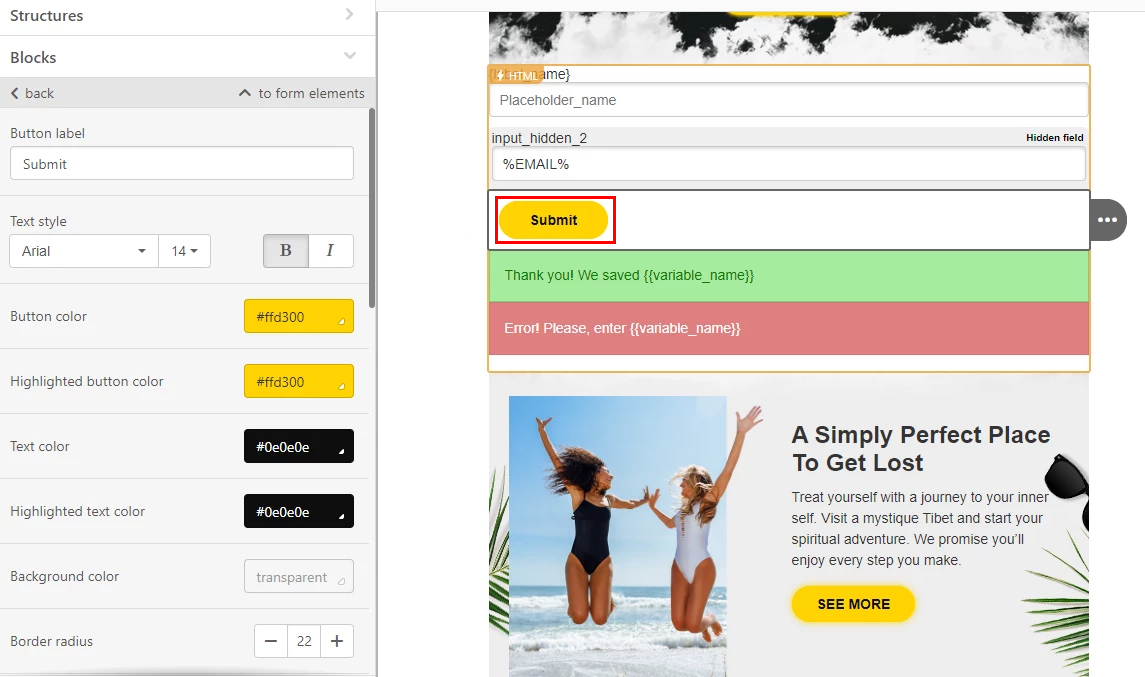
Click the button and configure its parameters:
- Label;
- Text style;
- Color;
- Highlighted button color;
- Text color;
- Highlighted text color;
- Background color;
- Border radius;
- Alignment;
- Button with icon;
- Adjust to width;
- Border;
- Padding.
The difference between a regular CTA is that this button doesn’t require a link. When clicked, it will show a notification about successful/unsuccessful submission.
Response to submission
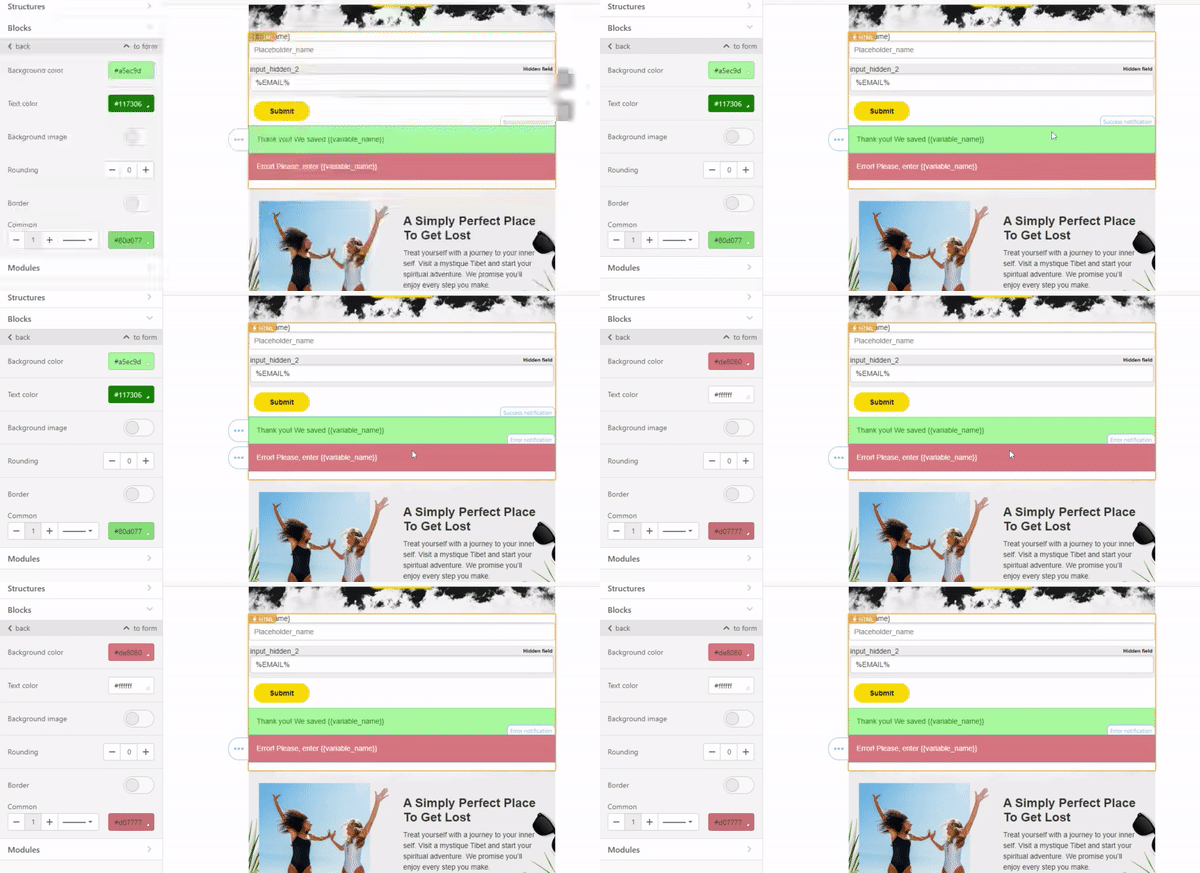
There are two types of response notifications:
- Green for successful submission;
- Red for failed submission.
Click each container to configure its settings.
Add an alternative form.
You can add an alternative form so that recipients whose email clients don’t support AMP can also leave feedback.
The easiest way is to create a Google Form or survey in SurveyMonkey. See how to do it.
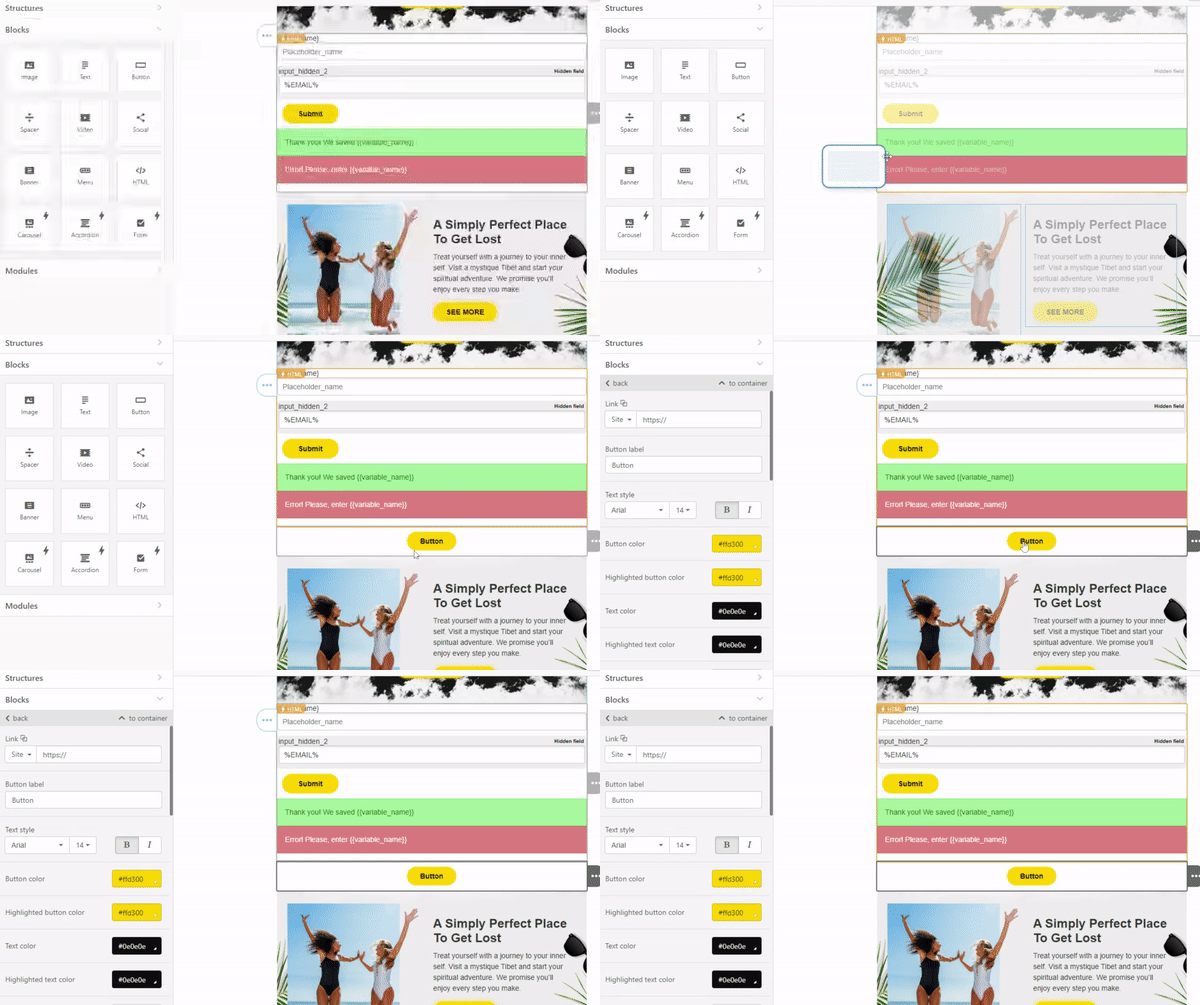
You can add a link to the created form to any element in the email. As an example, we'll add a link to the button.
- Drag a Button block to the template;
- Edit it and add the link.
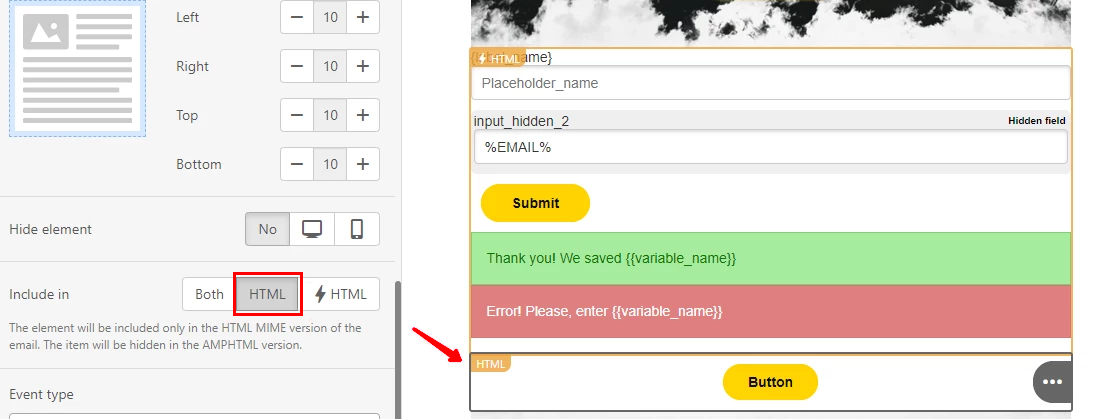
ImportantEnable HTML for this block to make sure the button is displayed only if the AMP form is not supported.
Step 3. Test your form.
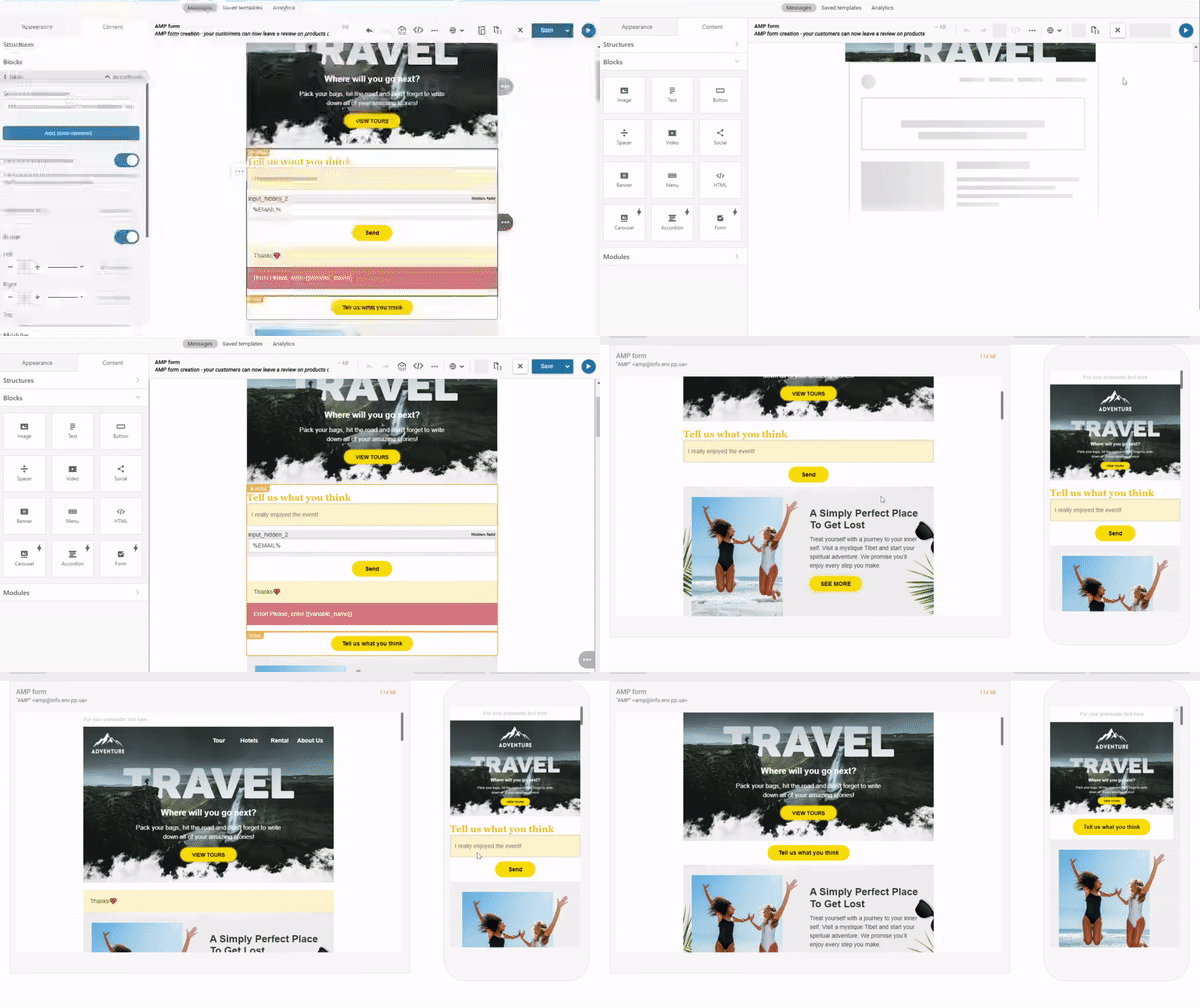
After all editing is done, click View message to see how the form is displayed on desktop and mobile in both HTML and AMP HTML.
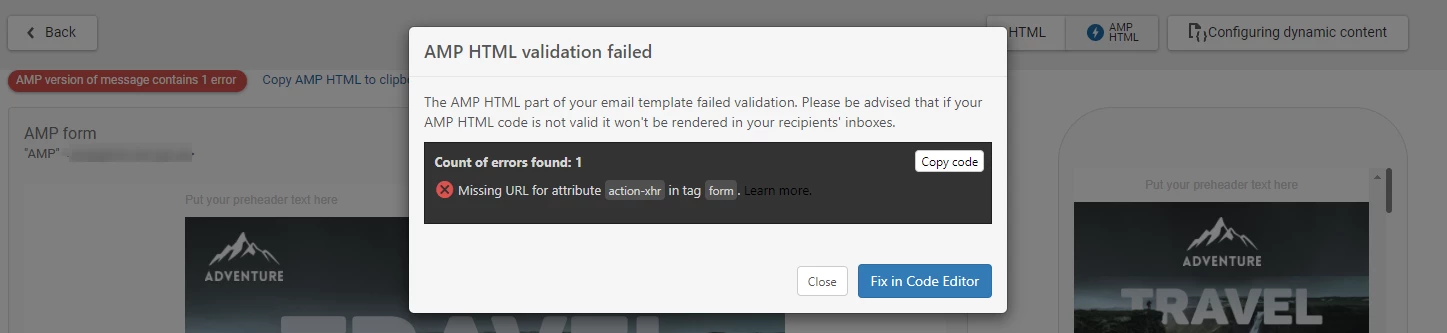
In case of any errors, you will see an error notification. Click it to see the error description and fix it. If there is at least one error in the code, the AMP content will not be displayed.
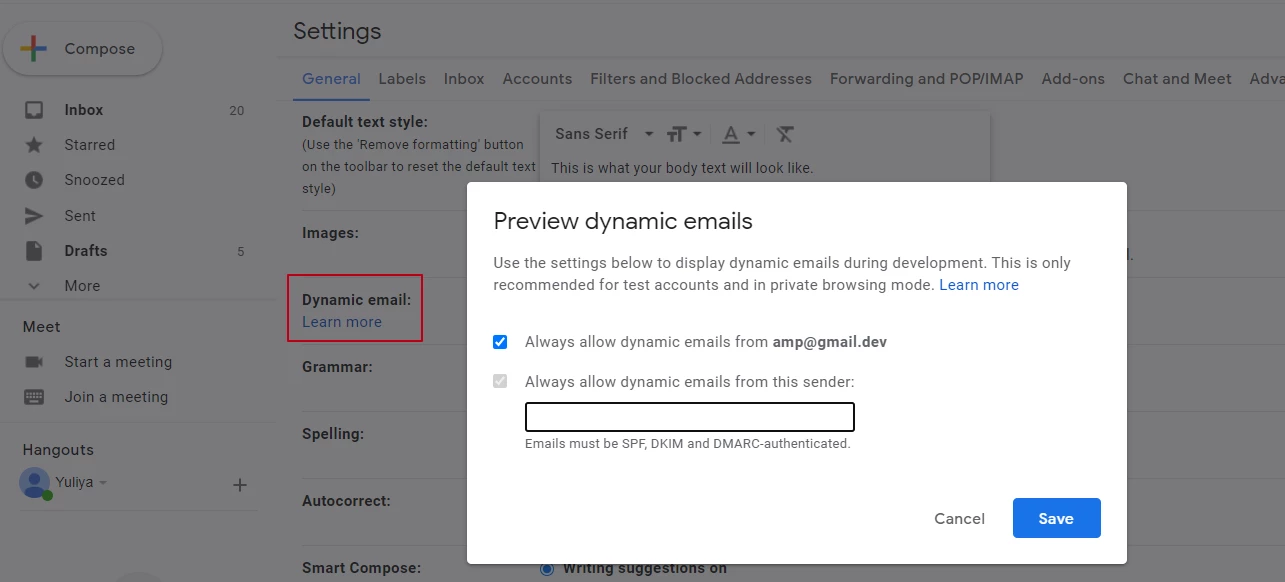
Send a test message to a @gmail address. If you aren’t whitelisted by Gmail as a dynamic sender, allow dynamic emails from your address in the inbox settings.
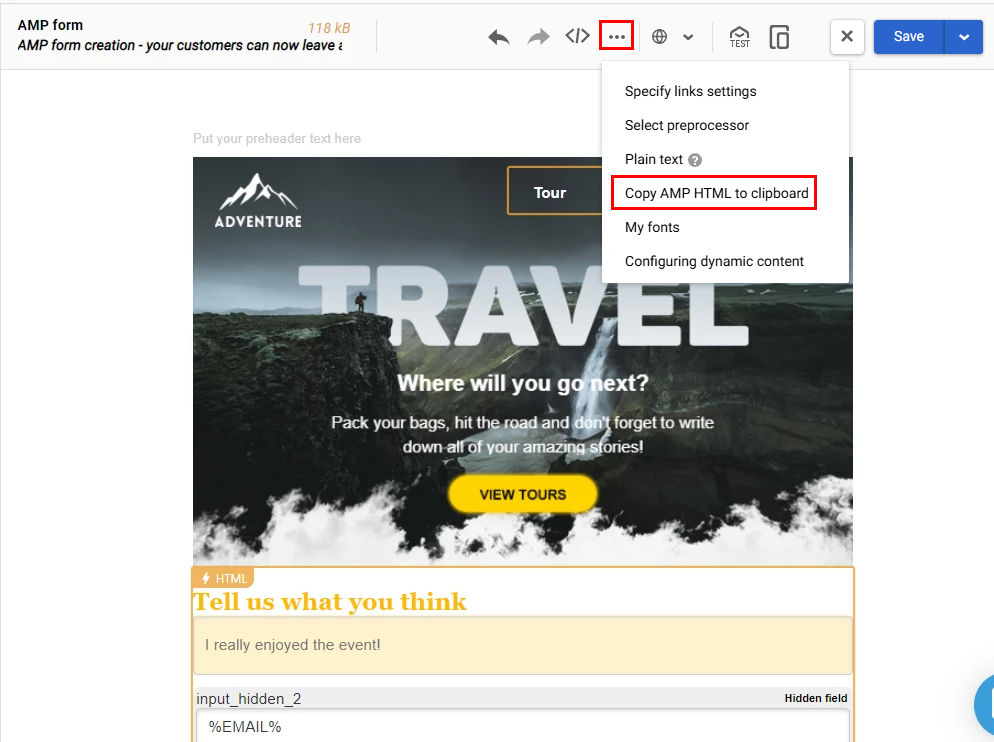
You can also copy the code and send it as a test via Gmail AMP for Email Playground.
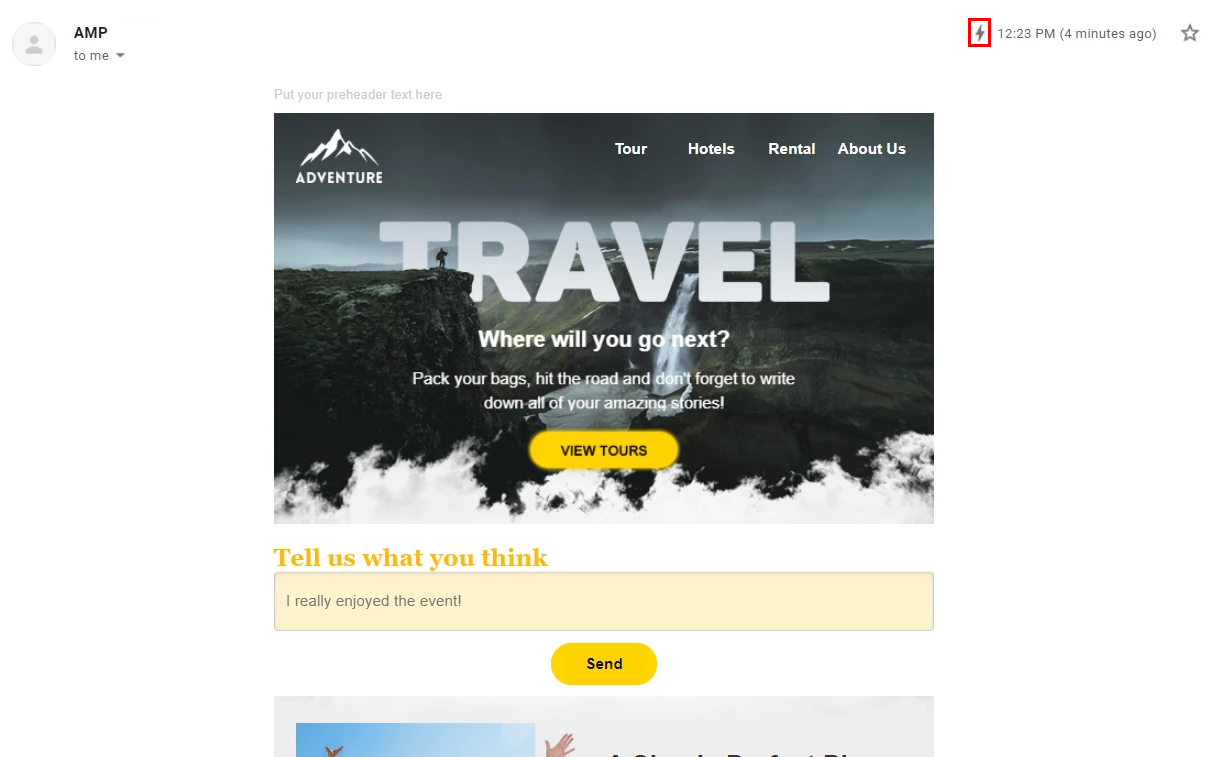
In the Inbox, the email with AMP content will be marked with a thunder icon at the top.
Step 4. Check whether reviews are recorded.
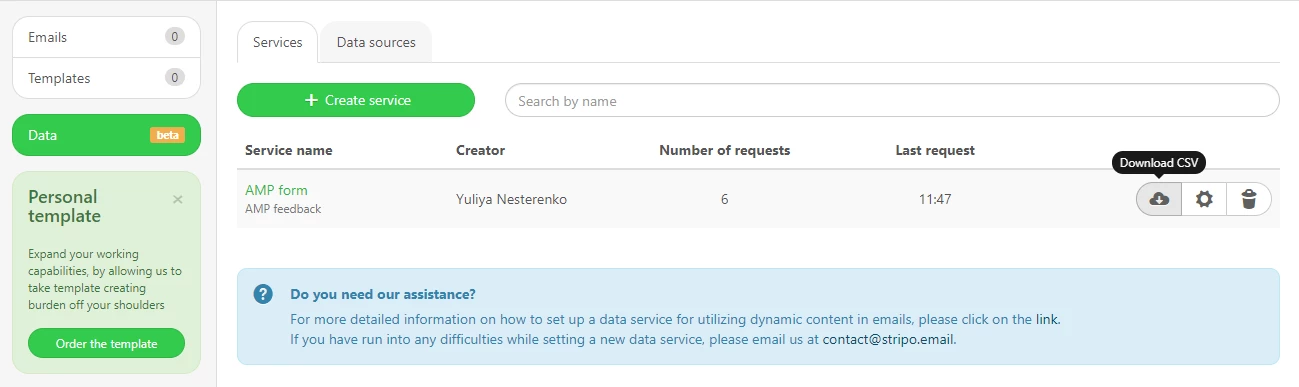
Once you've sent the test, go to your Stripo account → Data, click the necessary service and see the statistics. You can also download this report as a CSV file.
When you start sending AMP campaigns, you can see separate analytics on AMP in the general report. Go to Campaigns → Reports and click the right email. The report will show how many recipients opened the AMP version. More on AMP campaign reports.
Updated 3 months ago