Creating an AMP Carousel
AMP Carousel is one of the ways to add interactivity to an email.

You can create it:
- using the built-in Carousel block;
- or with a third-party service.
ImportantTo start sending campaigns with AMP-powered carousels, you must register with Google as a dynamic email sender.
Creating an AMP-Powered HTML Carousel
Adding the Block
- Create a new email or open an existing one.
- Add the Carousel block to the template.
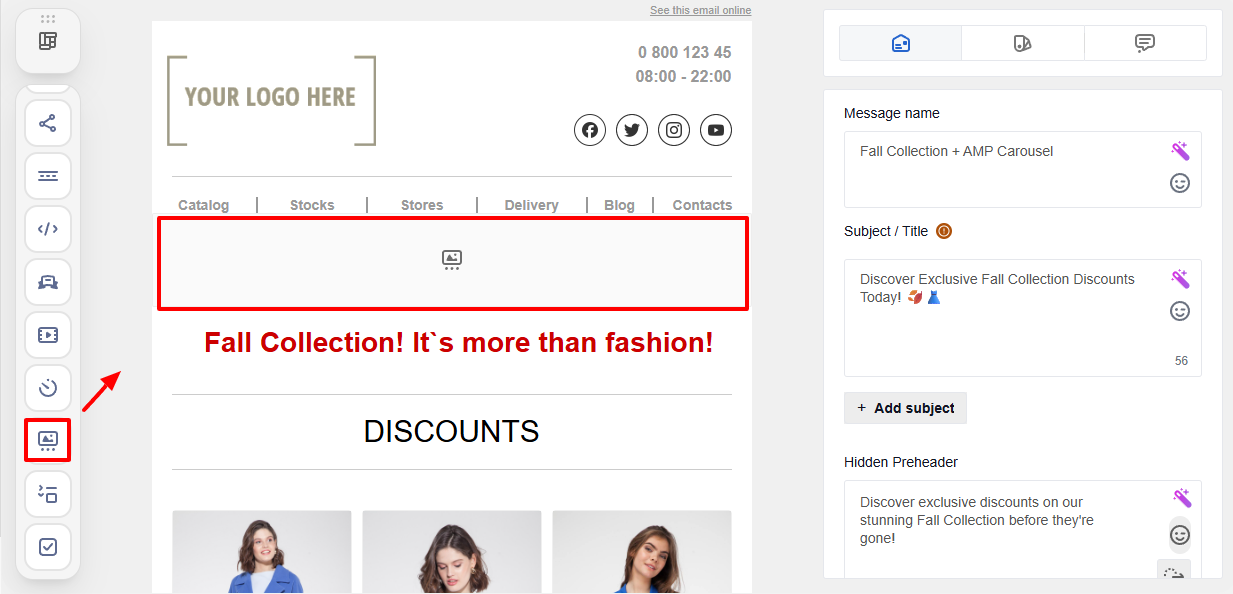
Click the block to open its settings.
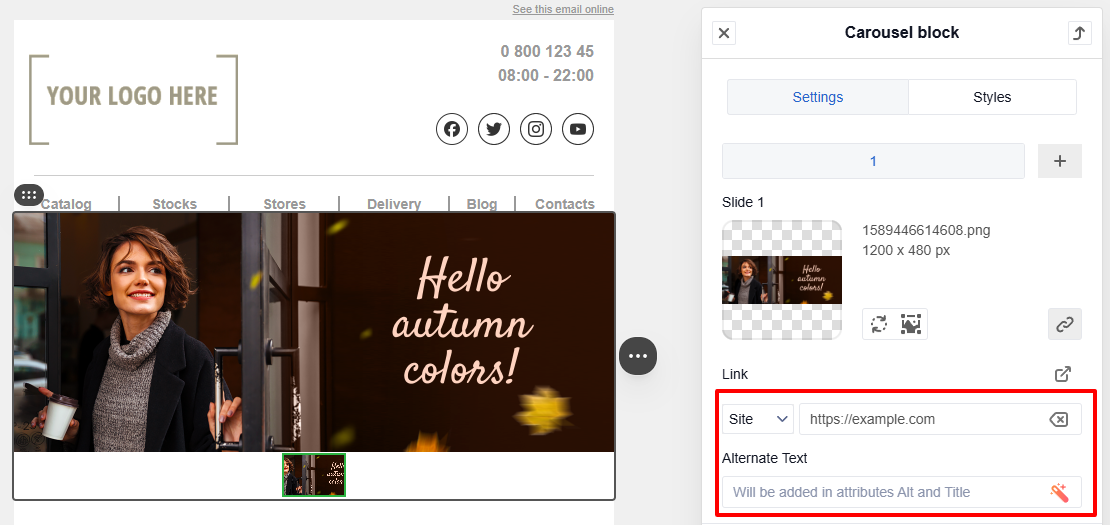
Adding and Configuring Slides
- Add an image for the first slide:
- select an image from the uploaded files;
- or upload a new one.

- Add Alternate text and a Link.
- To create additional slides, click + and repeat the steps above.
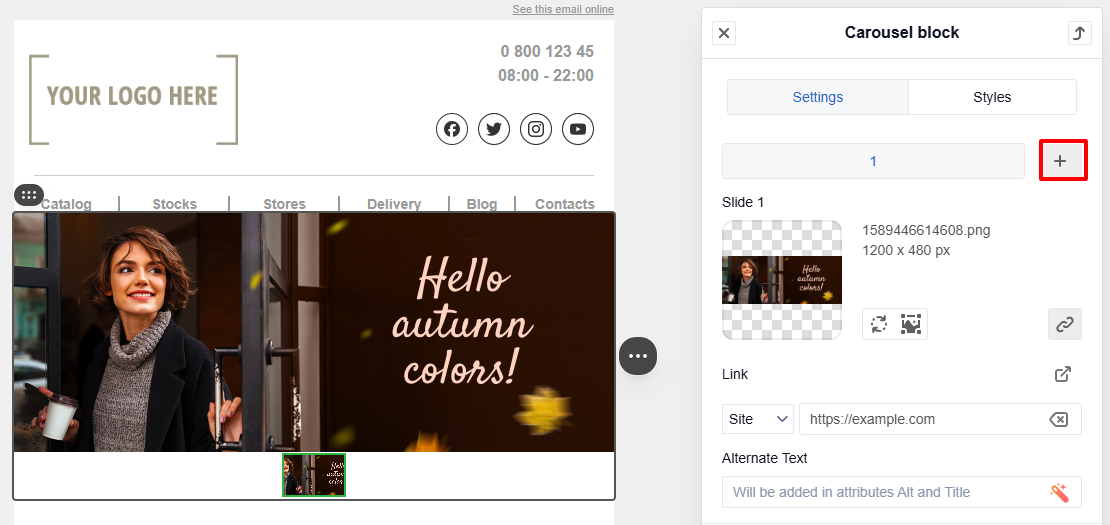
The number of slides is not limited.
RecommendationUse images of the same size for smooth carousel transitions.
If the images have different sizes, edit them in the built-in editor:
- adjust the scale;
- align the proportions.
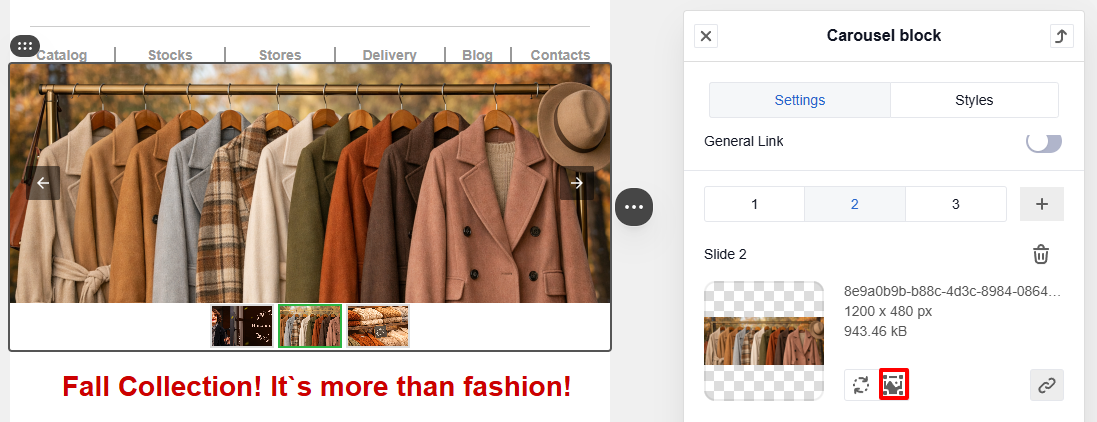
General Carousel Settings
After adding the image for the first slide, the following settings become available:
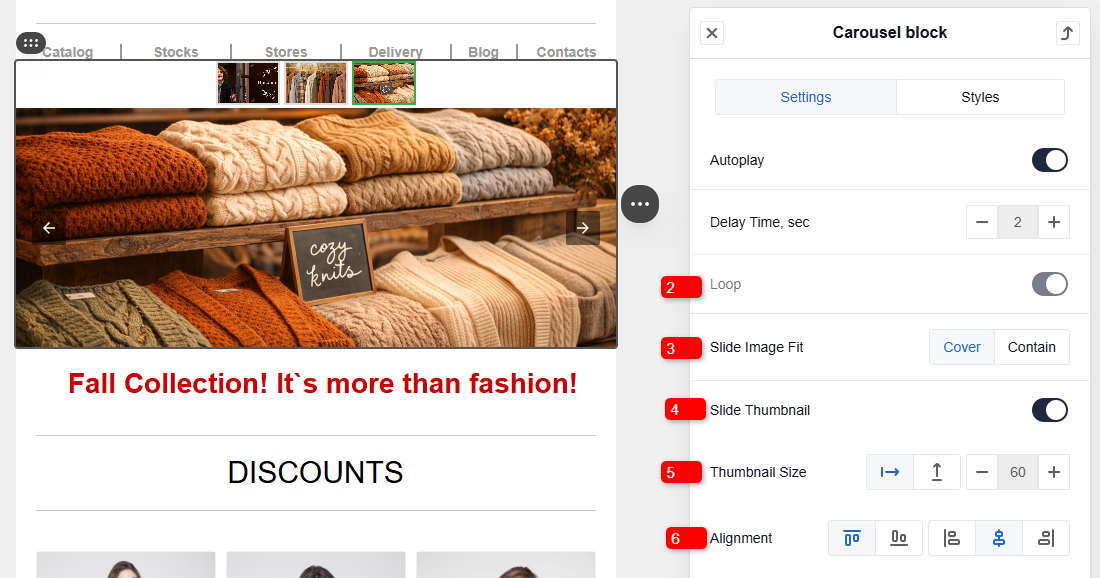
- Autoplay — automatically switches slides with a Delay Time.
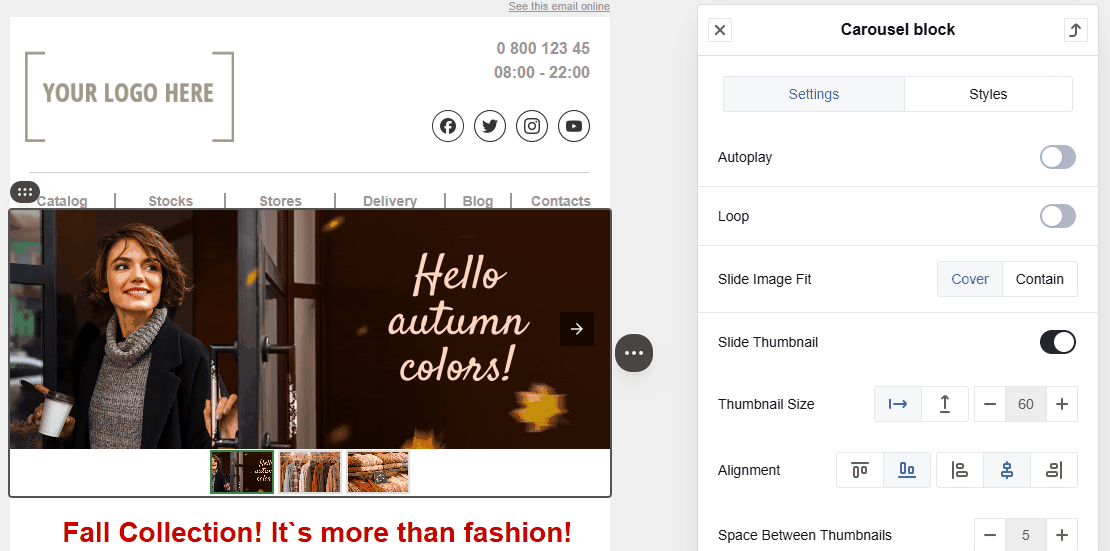
- Loop — continuously cycles through slides when clicked.
- Slide Image Fit — defines how the image is displayed within the slide (Cover or Contain).
- Slide Thumbnail — displays slide thumbnails.
- Thumbnail size — sets the size of thumbnails.
- Alignment — defines the position of the preview block relative to the carousel:
- horizontal — left, center, or right;
- vertical — above or below the carousel.
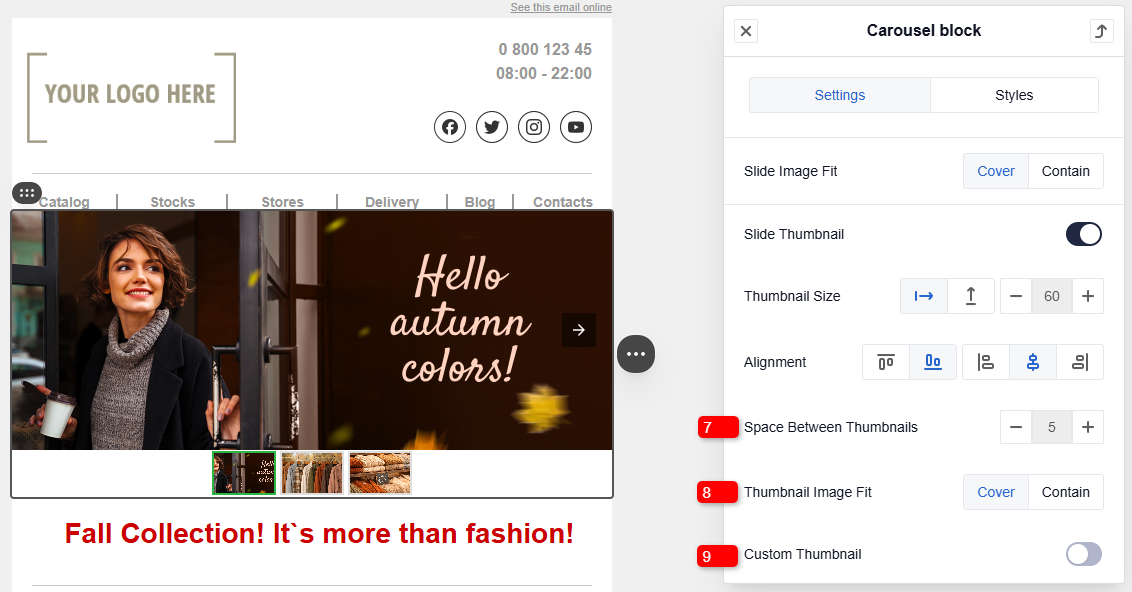
- Space Between Thumbnails – sets the distance between thumbnails.
- Thumbnail Image Fit — defines how the image is displayed within the thumbnail (Cover or Contain).
- Custom Thumbnail — displays either a slide thumbnail or a color indicator.
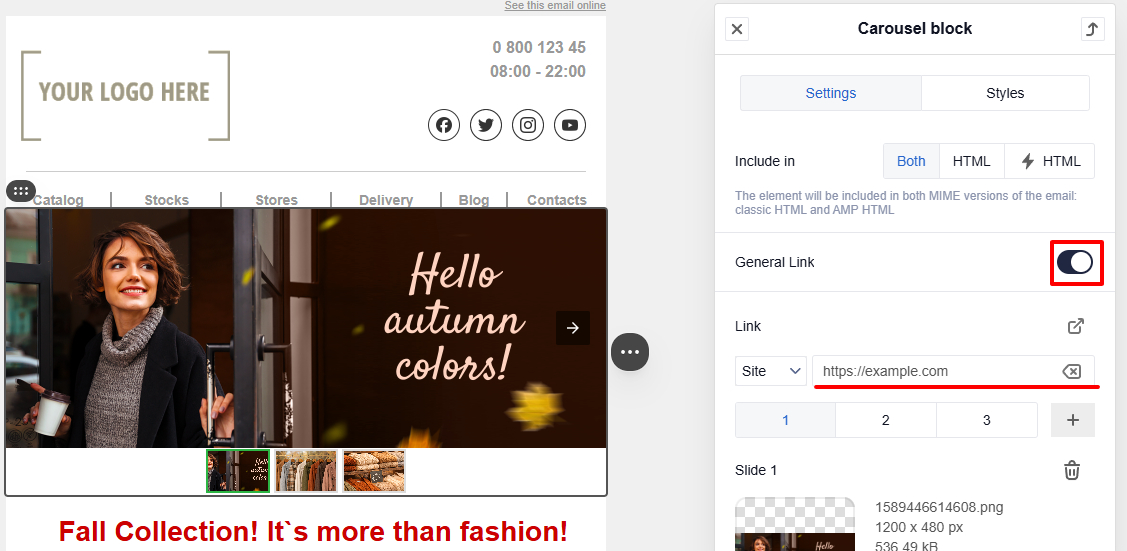
If you enable General link, all carousel slides will use the same URL.
Use this option if:
- the entire carousel links to one page;
- separate links for each slide are not required.
HTML Version for Clients Without AMP Support
Gmail users will see the AMP block. For other email clients, you need to create a carousel using a special HTML block.
Creating a Carousel with FreshInbox
Supported in:
- iPhone Mail
- Android Mail 4.x
- Apple Mail
- Yahoo! Mail
- AOL Mail
In unsupported clients (Gmail, Outlook 2007–2013, Outlook.com), only the first image is displayed.
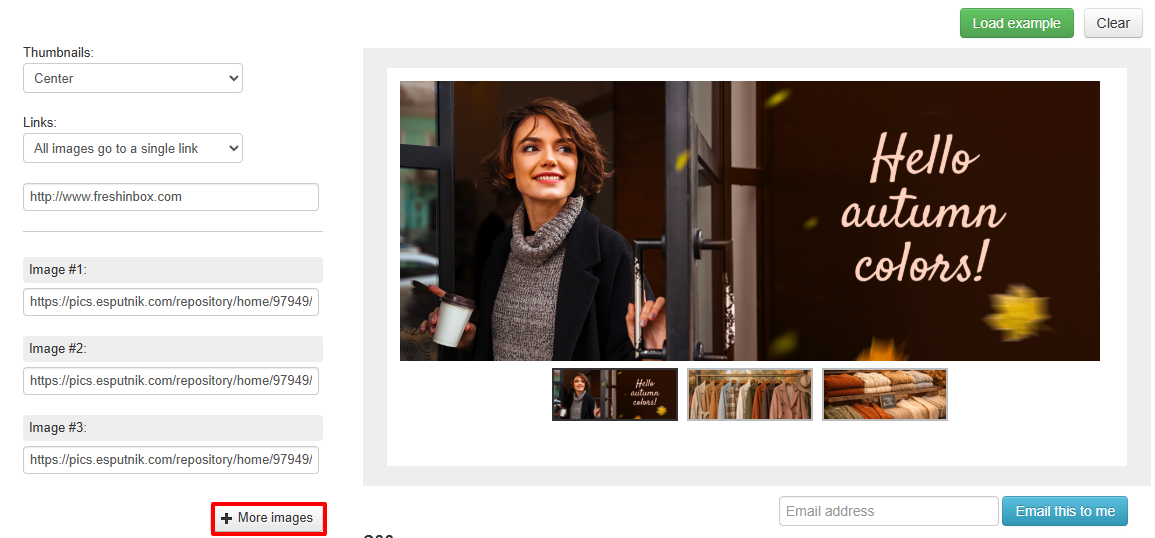
- Go to FreshInbox.
- Add links to images.
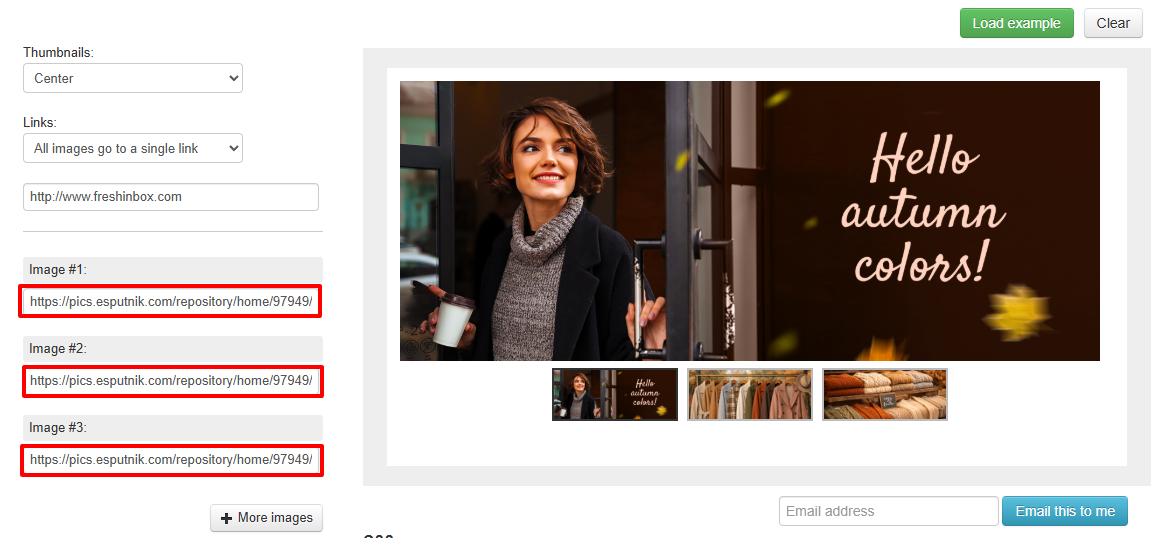
Minimum number of images — 3. Use the + More images button to add additional images.
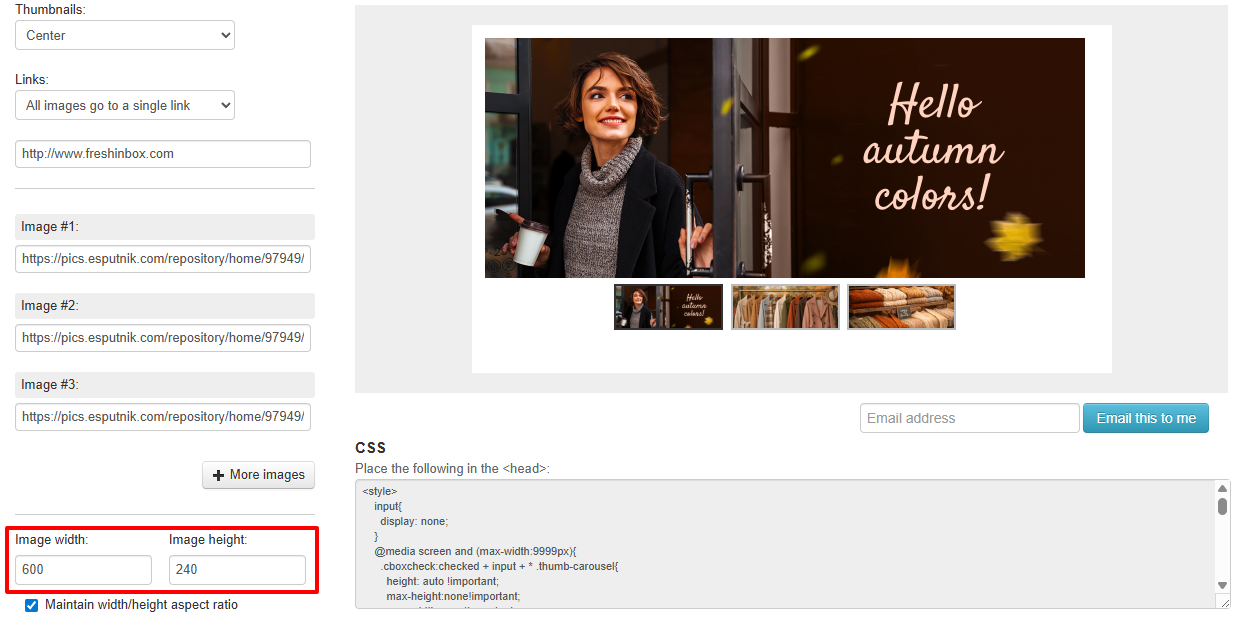
- Configure the block dimensions.
- Send a test to your email address.

Adding the Block to eSputnik
- Add an HTML block.
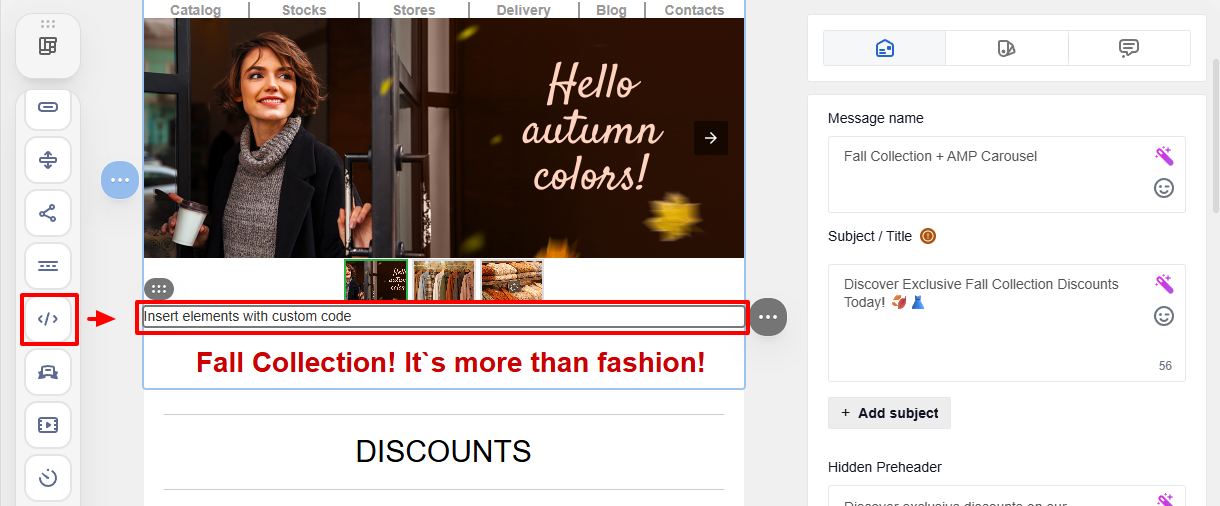
- Click the HTML block to open the code editor.
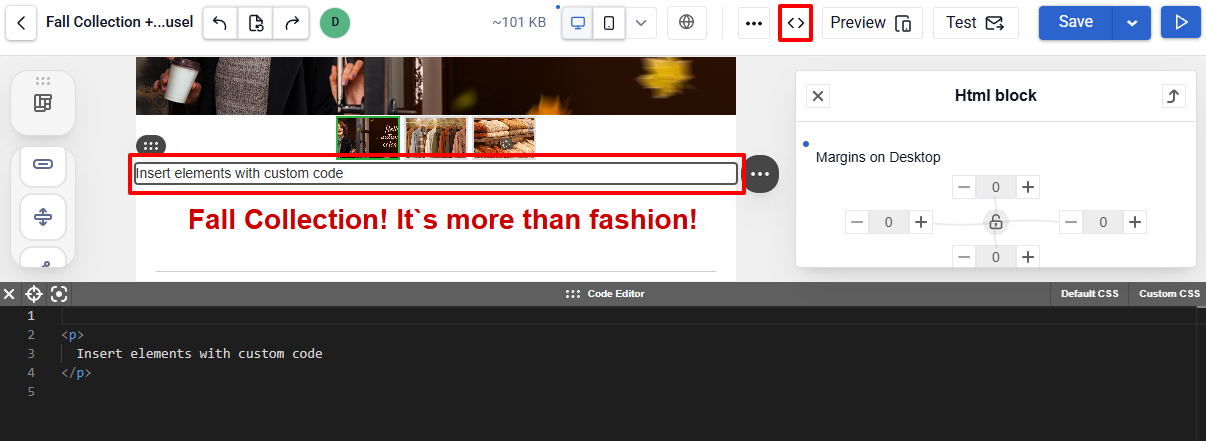
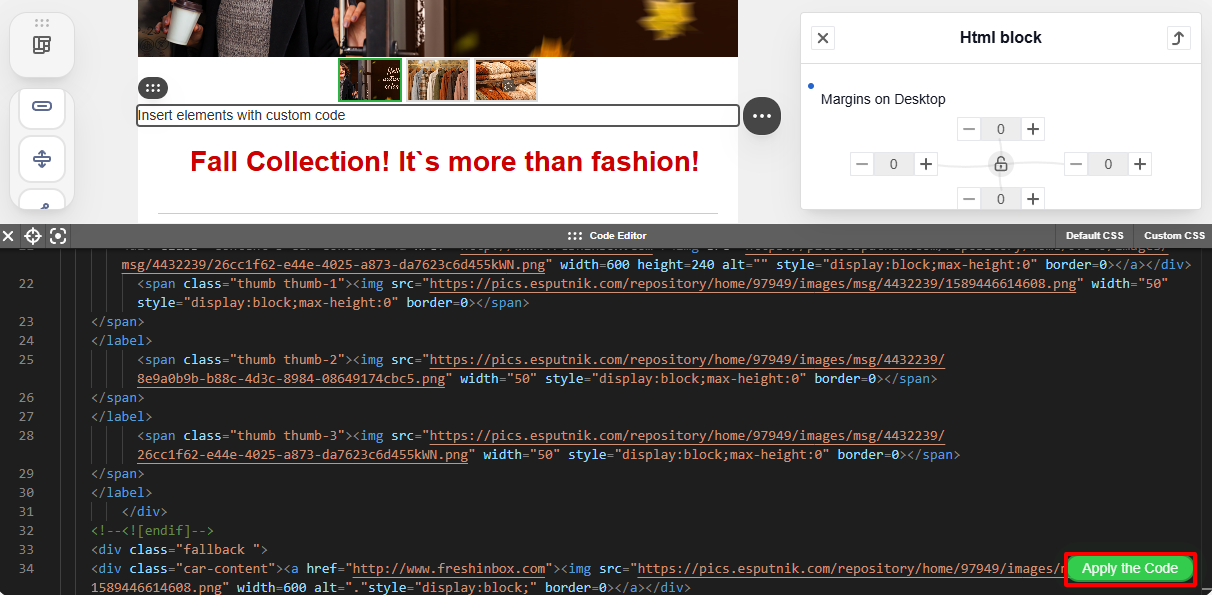
- Copy the HTML code from FreshInbox.
- Paste the code into the editor and click Apply the code.
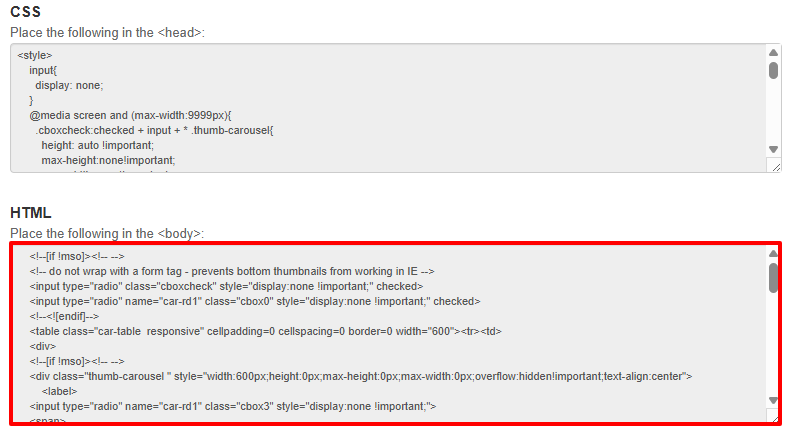
- Copy the CSS code from FreshInbox.
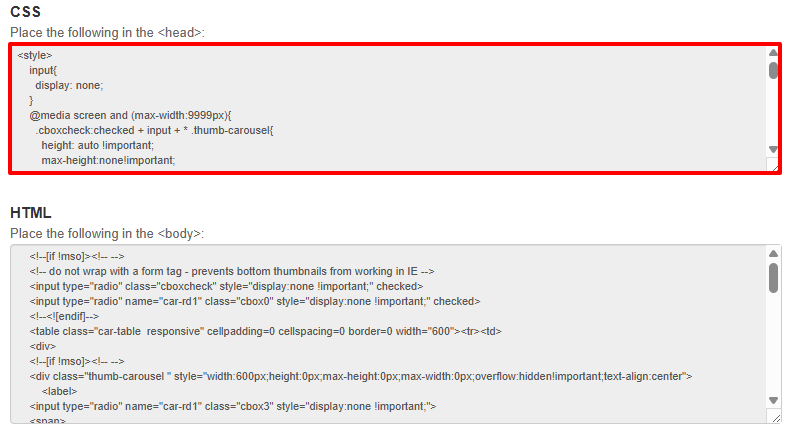
- Open the Custom CSS tab and paste the CSS code.
- Remove the
<style>tag at the beginning and end of the code.
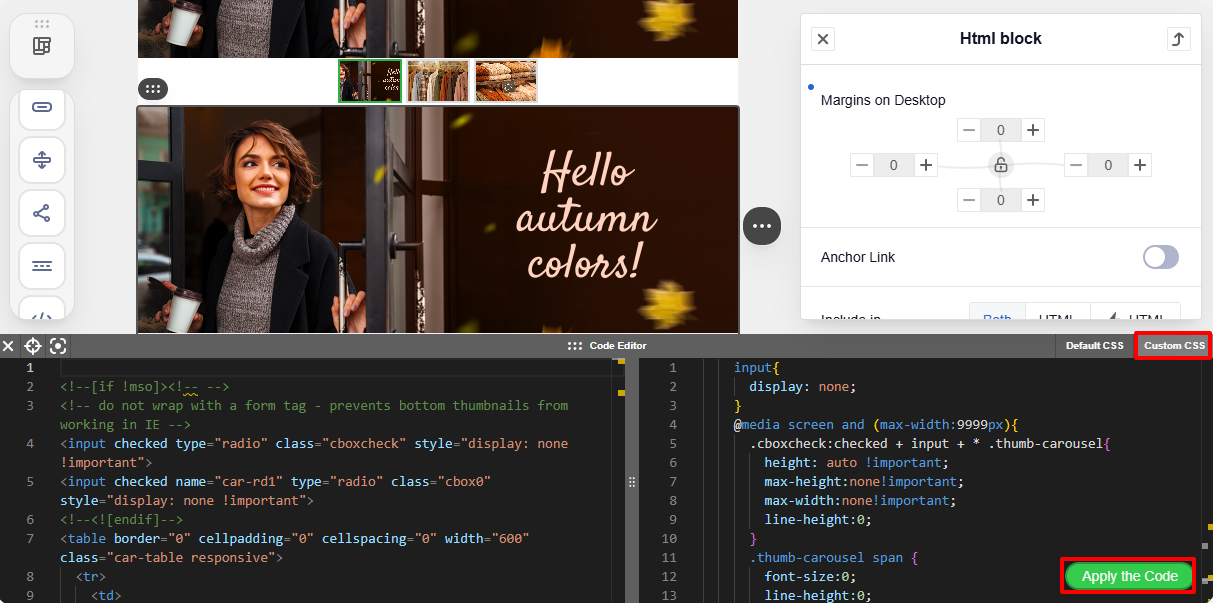
- Click Apply the Code.
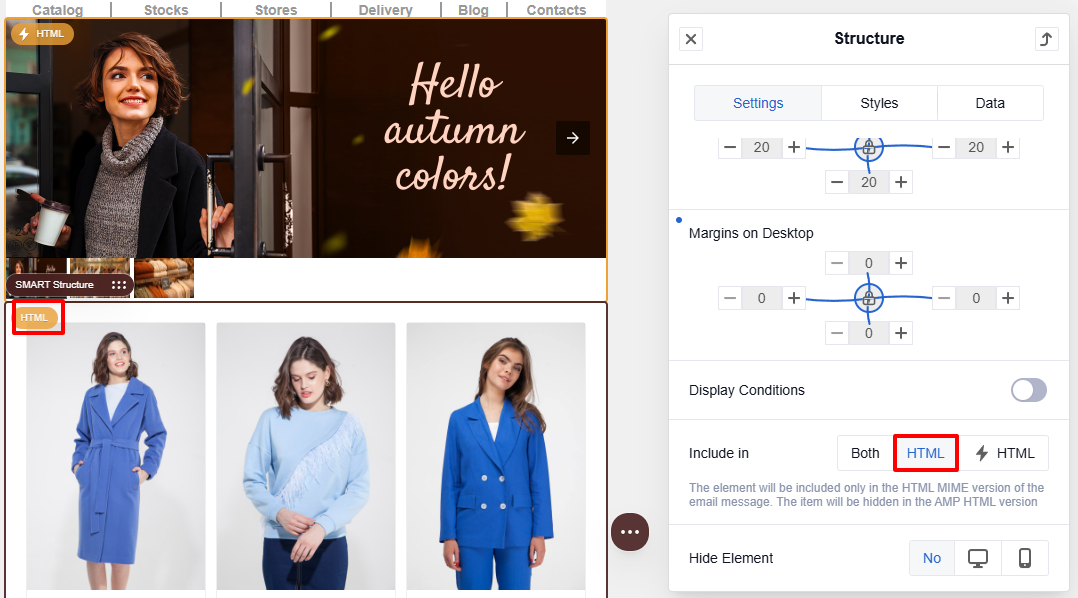
Display Settings
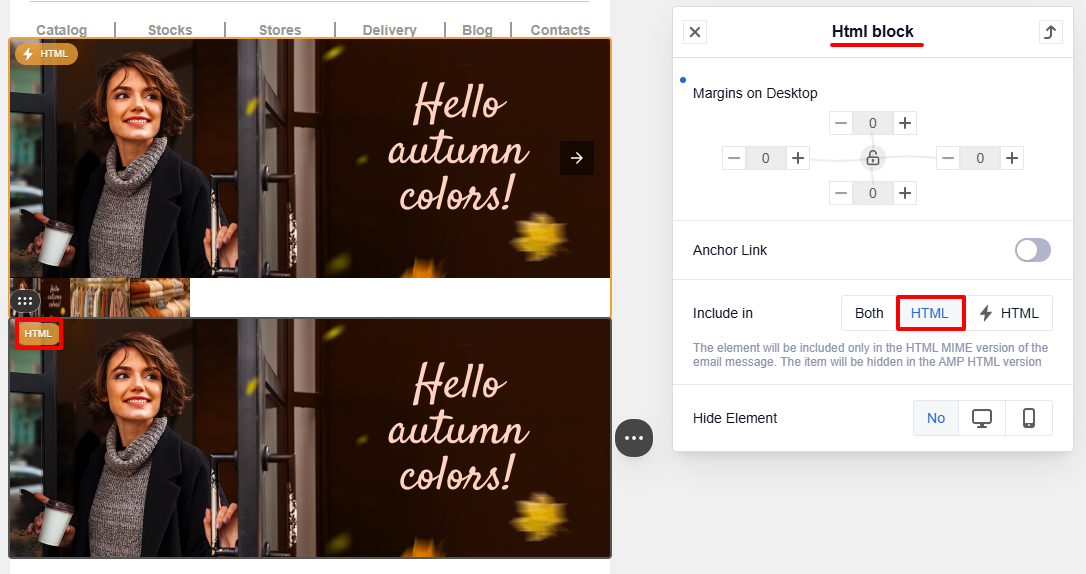
- For the Carousel block
Select Include in ⚡ HTML in the settings.
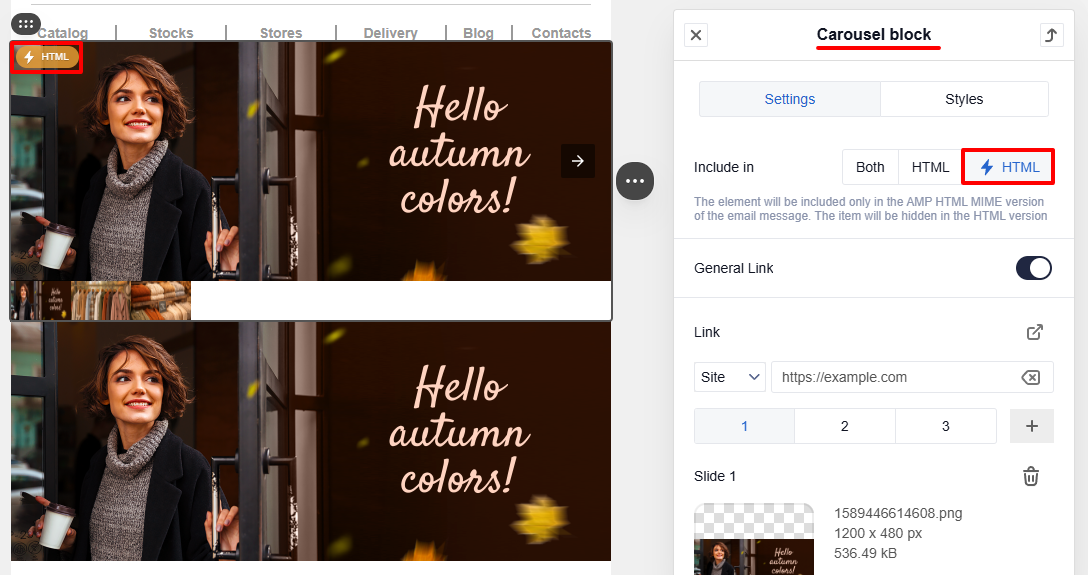
- For the HTML block
Select Include in HTML in the settings.
Check How Both Blocks Appear
To check how AMP and HTML blocks work:
- Click Preview.
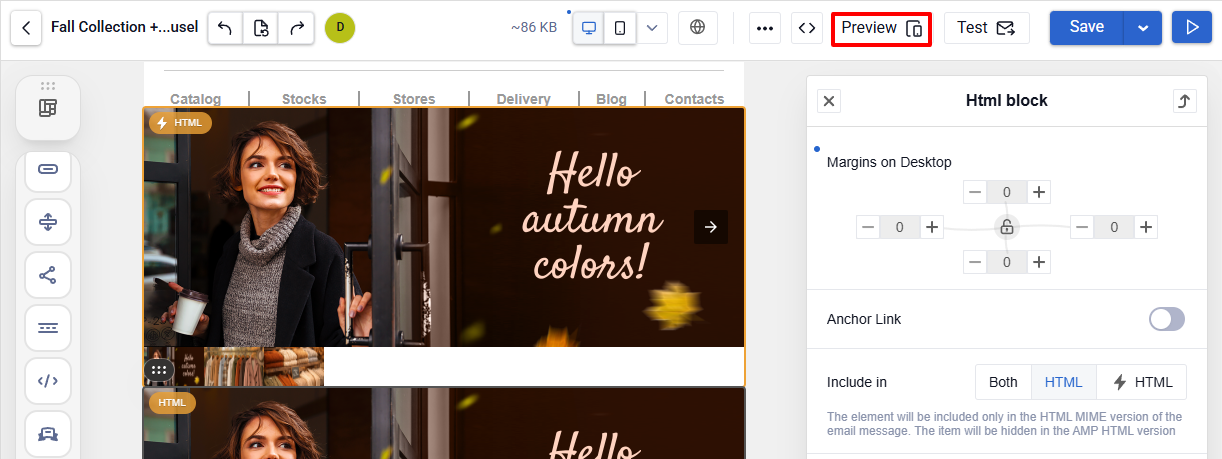
- In the preview window, switch between versions:
- ⚡ HTML
- HTML
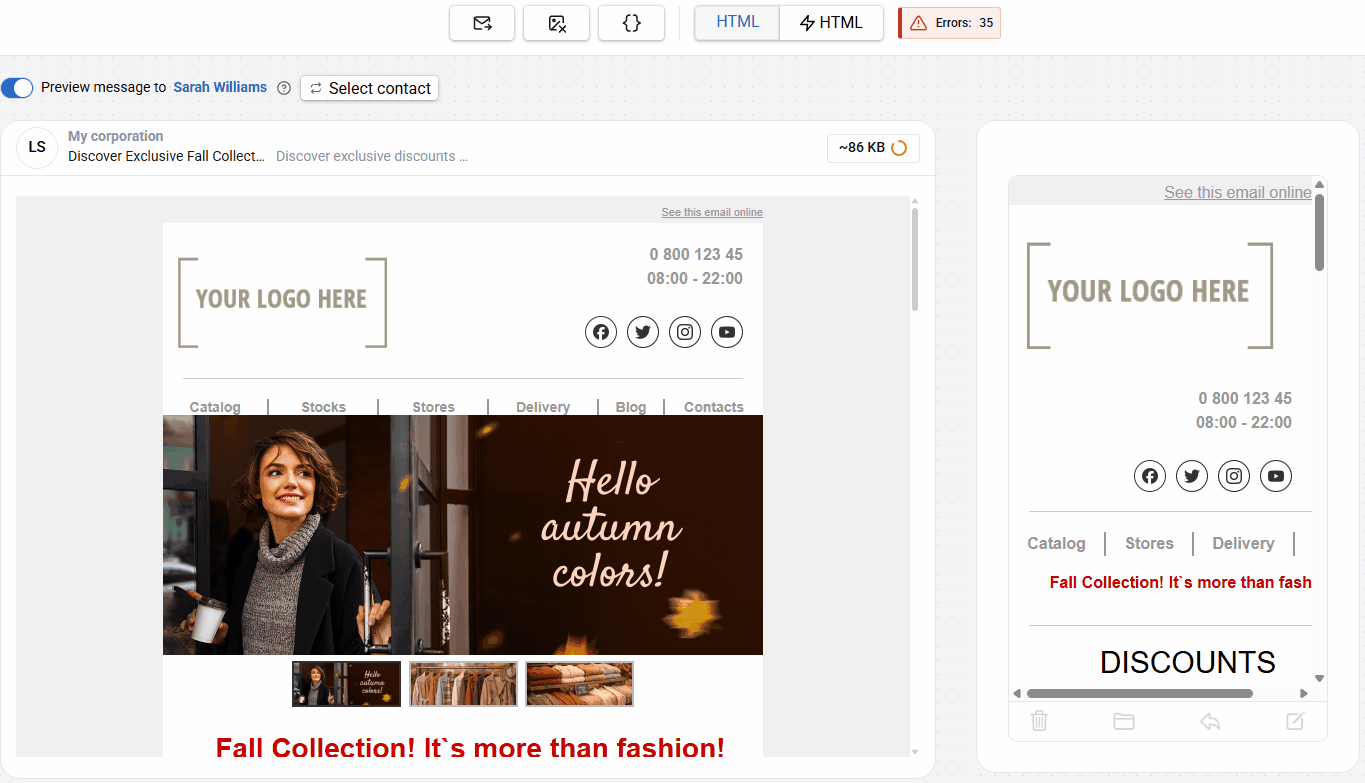
Make sure that:
- the AMP version shows the interactive carousel;
- the HTML version shows the first image.
Instead of an HTML carousel, you can add a regular product card and enable HTML display for it. In this case, it will be shown only in clients without AMP support.
Checking the AMP Email for Errors
In the preview window, click Errors to see the description.
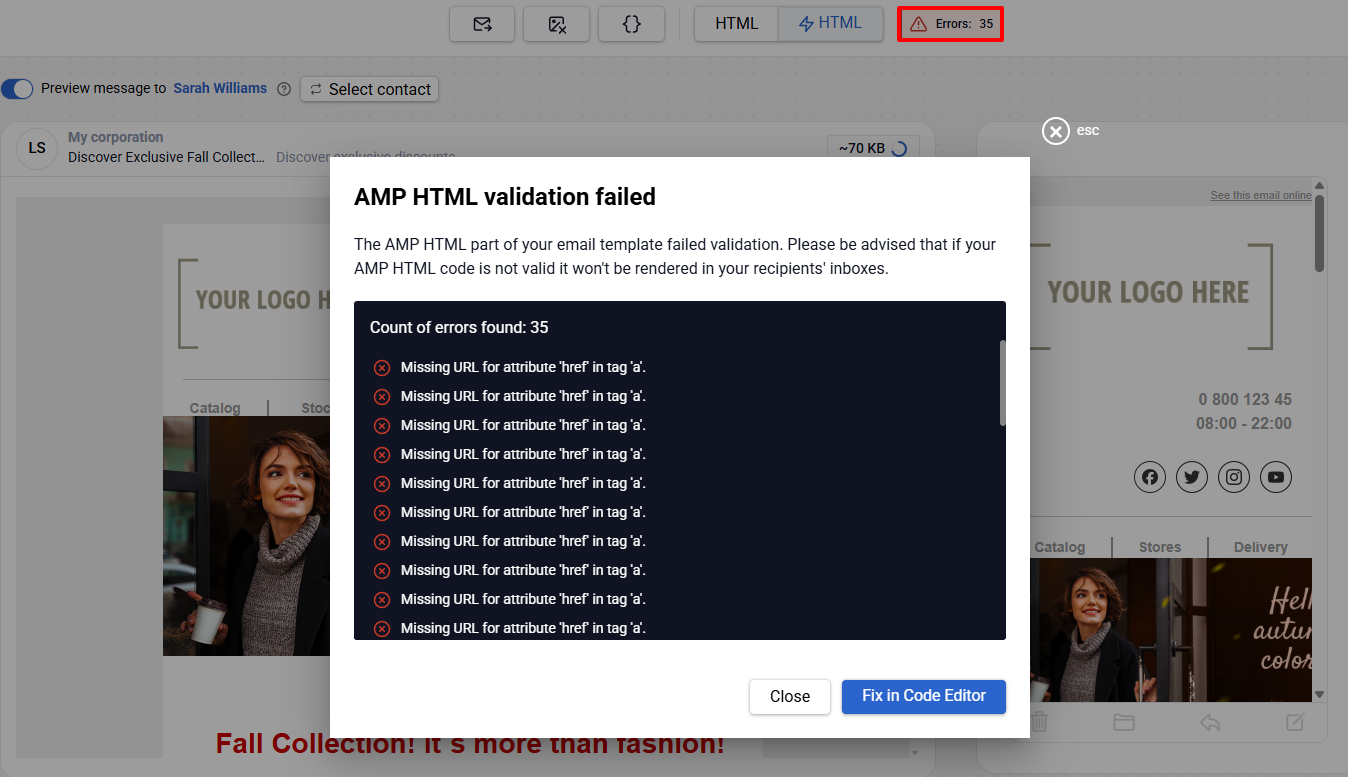
If necessary:
- fix the code in the editor;
- copy the code;
- or open it in Google Playground for validation.
Updated 1 day ago