Multi-Factor Authentication (MFA)
Read this article in Ukrainian ⮕
Multi-factor authentication (MFA or two-factor authentication) provides an additional level of protection for your account.
After enabling MFA, use your username and password, as well as a one-time code from the app to log in.
Preparation
Before enabling MFA:
- Install the Google Authenticator app.

|
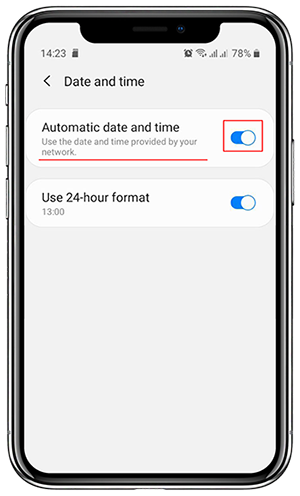
- Make sure automatic time synchronization is enabled on your smartphone.
Set up MFA
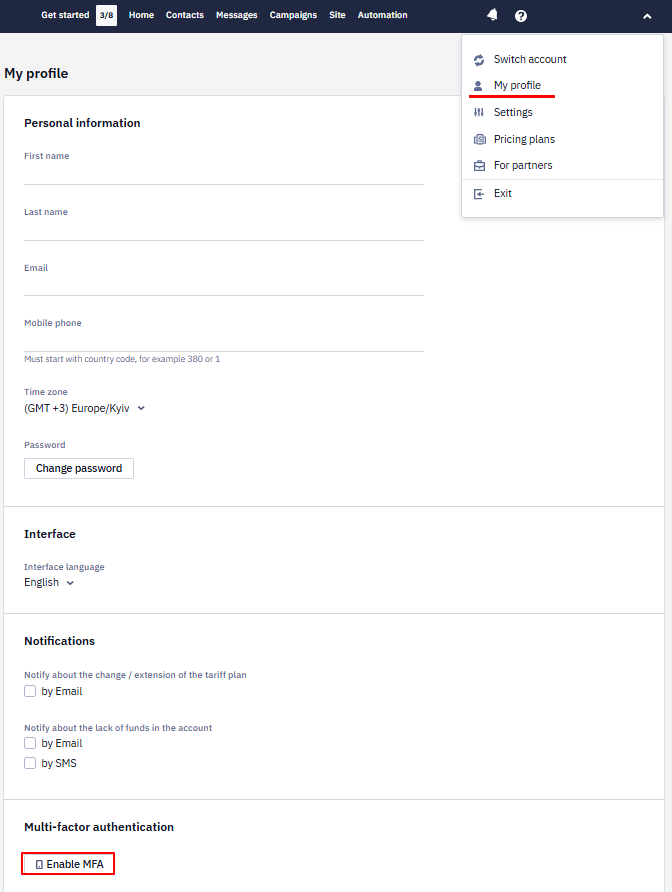
- Go to the My profile tab.
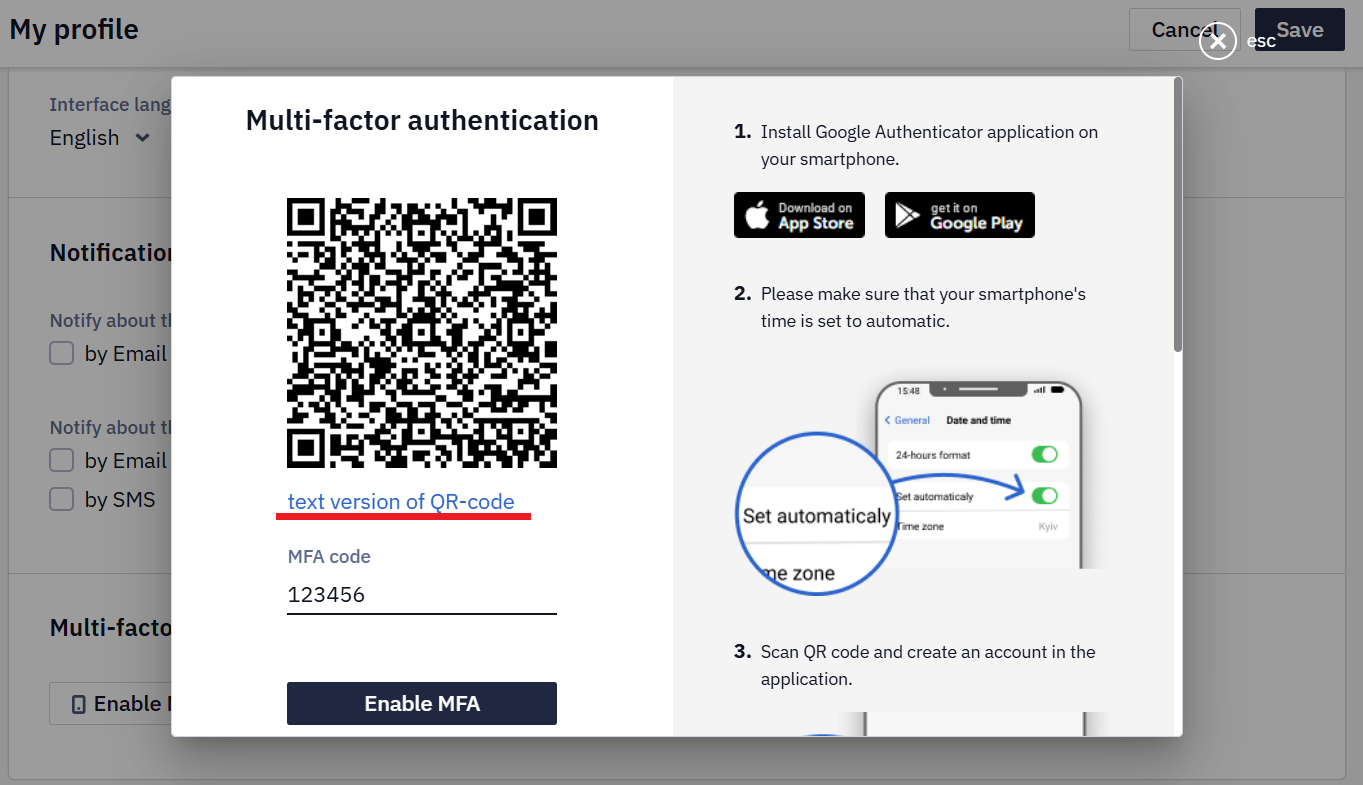
- In the Multi-factor authentication section, click Enable MFA.
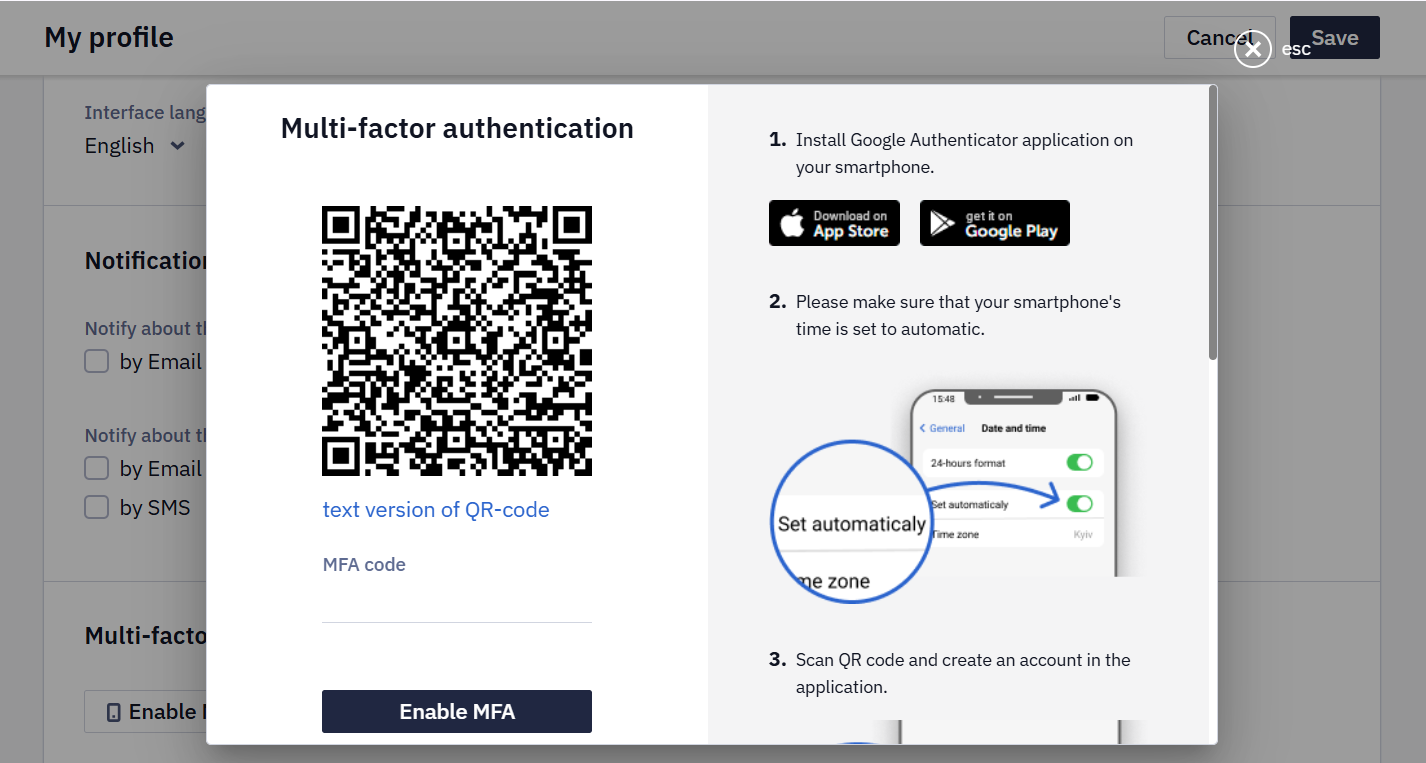
- Open the Google Authenticator app on your smartphone and scan the QR code in the setup window.
ImportantThe QR-code is unique for each user and is generated in the account.
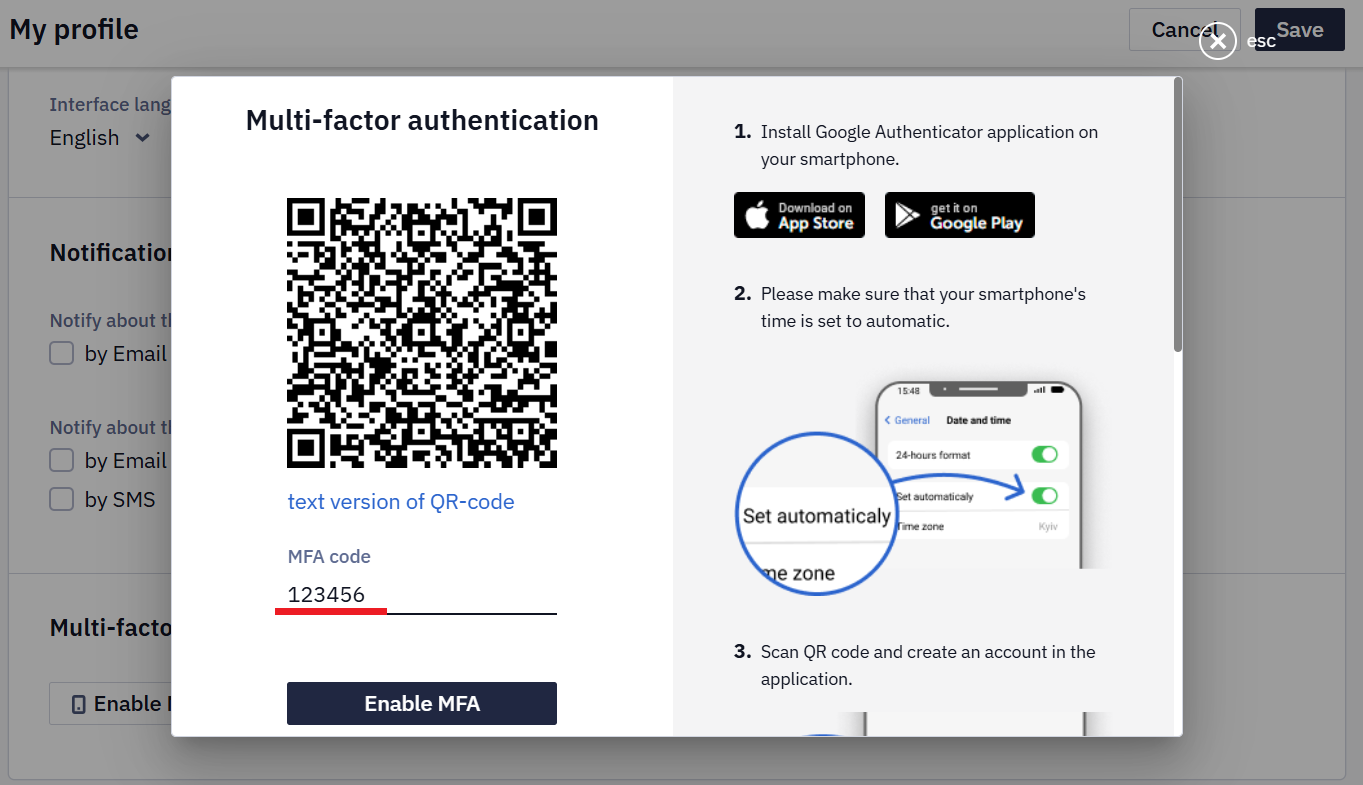
- Enter the 6-digit code from the app in the MFA code field (without spaces).
If you cannot scan the QR-code, use the text version.
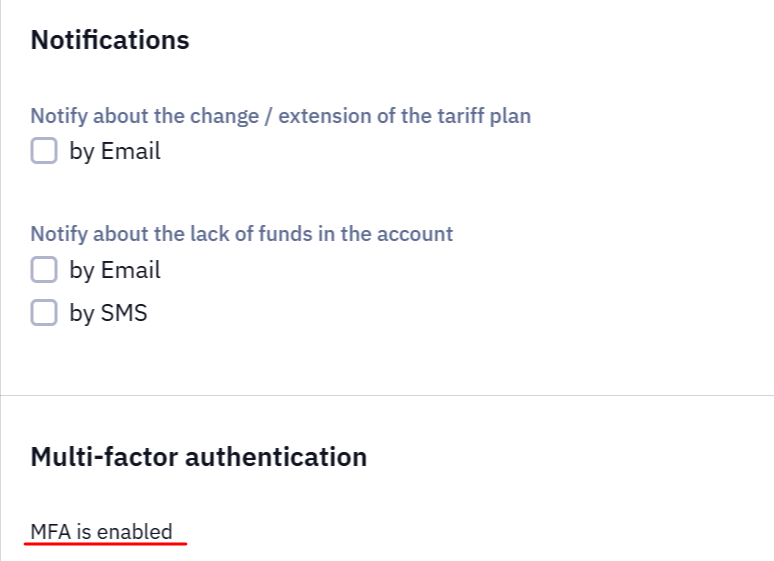
- Click Enable MFA.
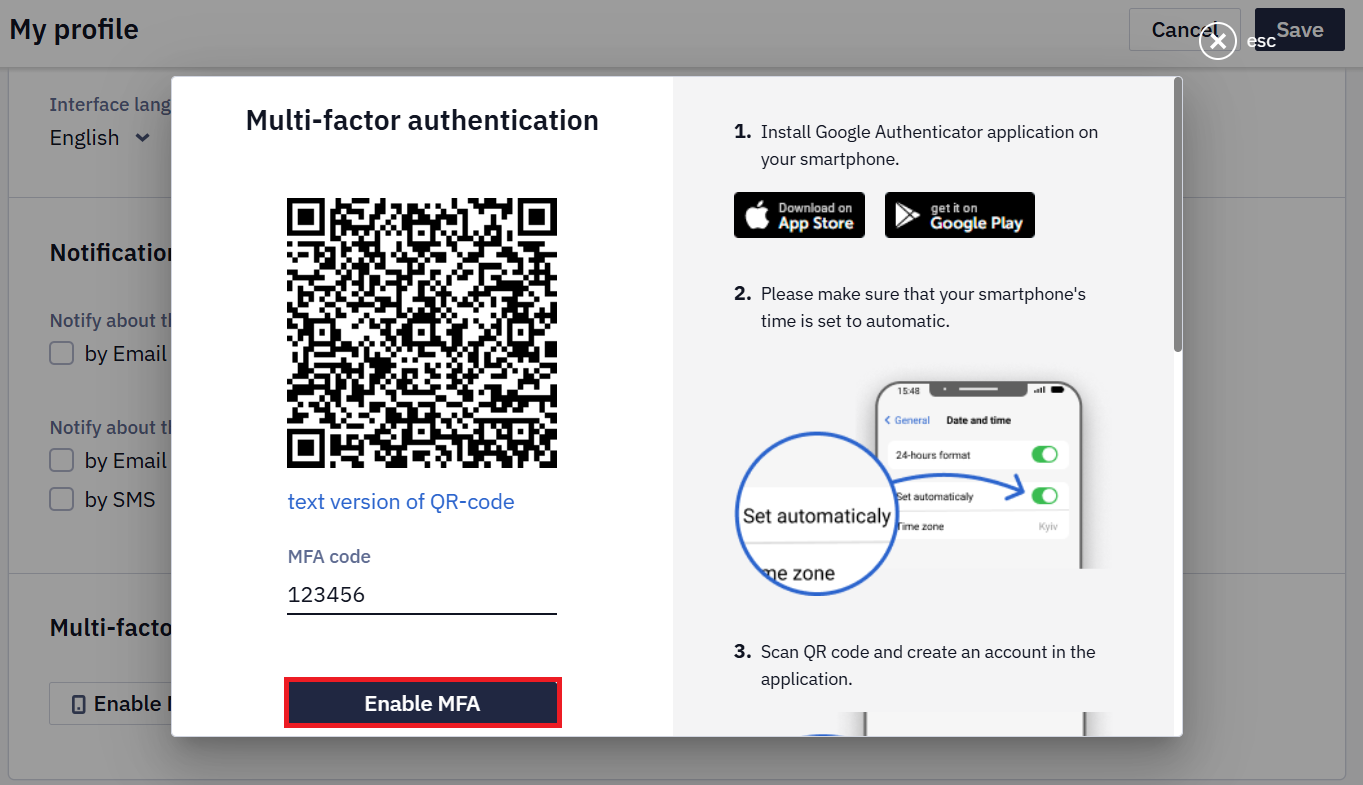
The status MFA is enabled will appear.
Login with MFA
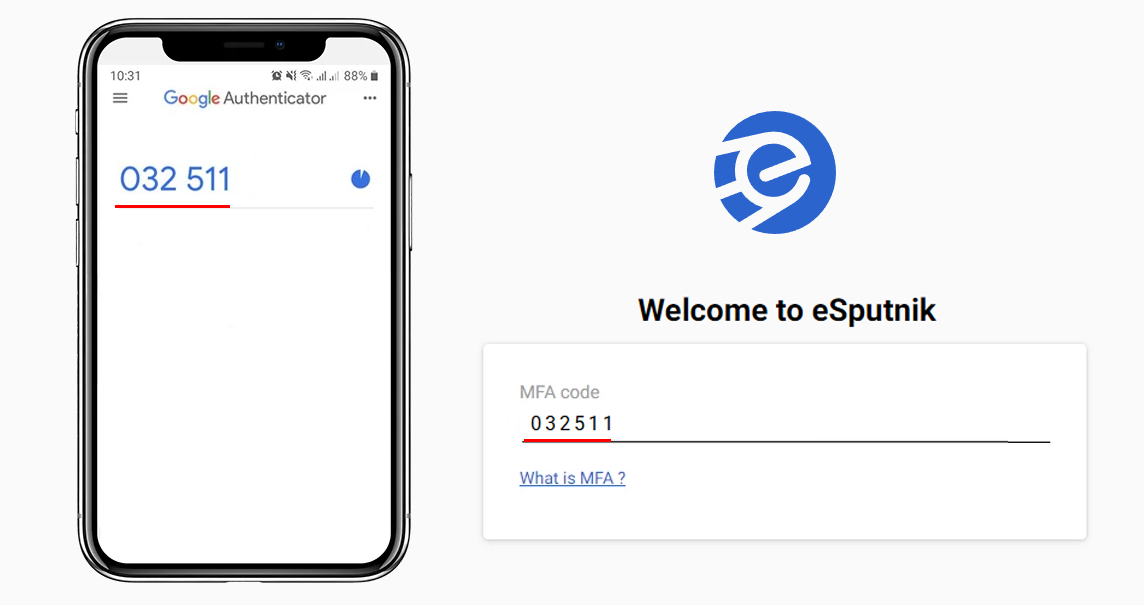
After enabling MFA, during each login:
- Enter your username and password;
- Enter the code from the app in the MFA code field.
Manage MFA
Change device
Transfer data using Google Authenticator settings or contact support to temporarily disable MFA.
Disable MFA
Send an email to [email protected] from the email address used as your account login.
Tips
- Alternative usage
You can use the Authenticator Chrome extension. In this case, access is tied to the device or browser profile.
- If the code does not work
- Check time synchronization on your smartphone and computer.
- Enable automatic date and time detection on both devices.
Updated about 1 month ago