Email Domain Authentication in Cloudflare
We offer three options for domain authentication – Full, Full+ and Subdomain). Read more on these options >
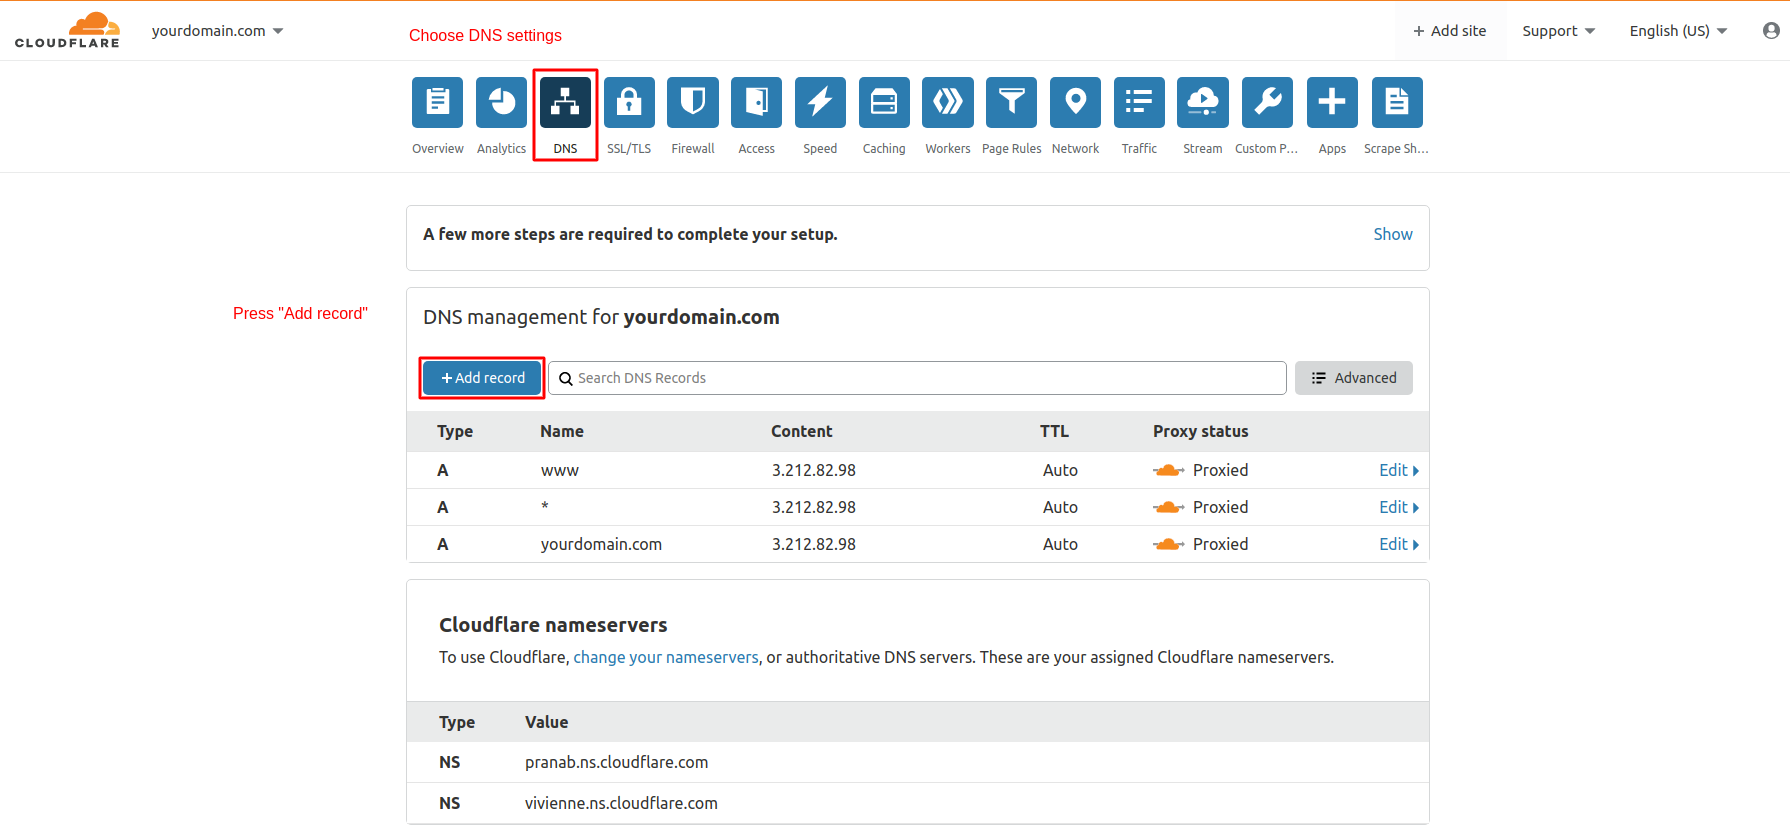
Log in to your Cloudflare account, go to the DNS app and click Add record.
Full
To verify your domain within the Full option, add the following records:
CNAME
- In Type, select CNAME.
- In Name, enter esputnik._domainkey.
- In Target, enter dkim.esputnik.com.
- Click Save.

TXT
- In Type, select TXT.
- In Name, enter your domain name.
- In TTL, select 1 hour.
- In Content, enter v=spf1 include:spf2.esputnik.com ~all.
- Click Save.

Full+
To verify your domain within the Full+ option, add the following records:
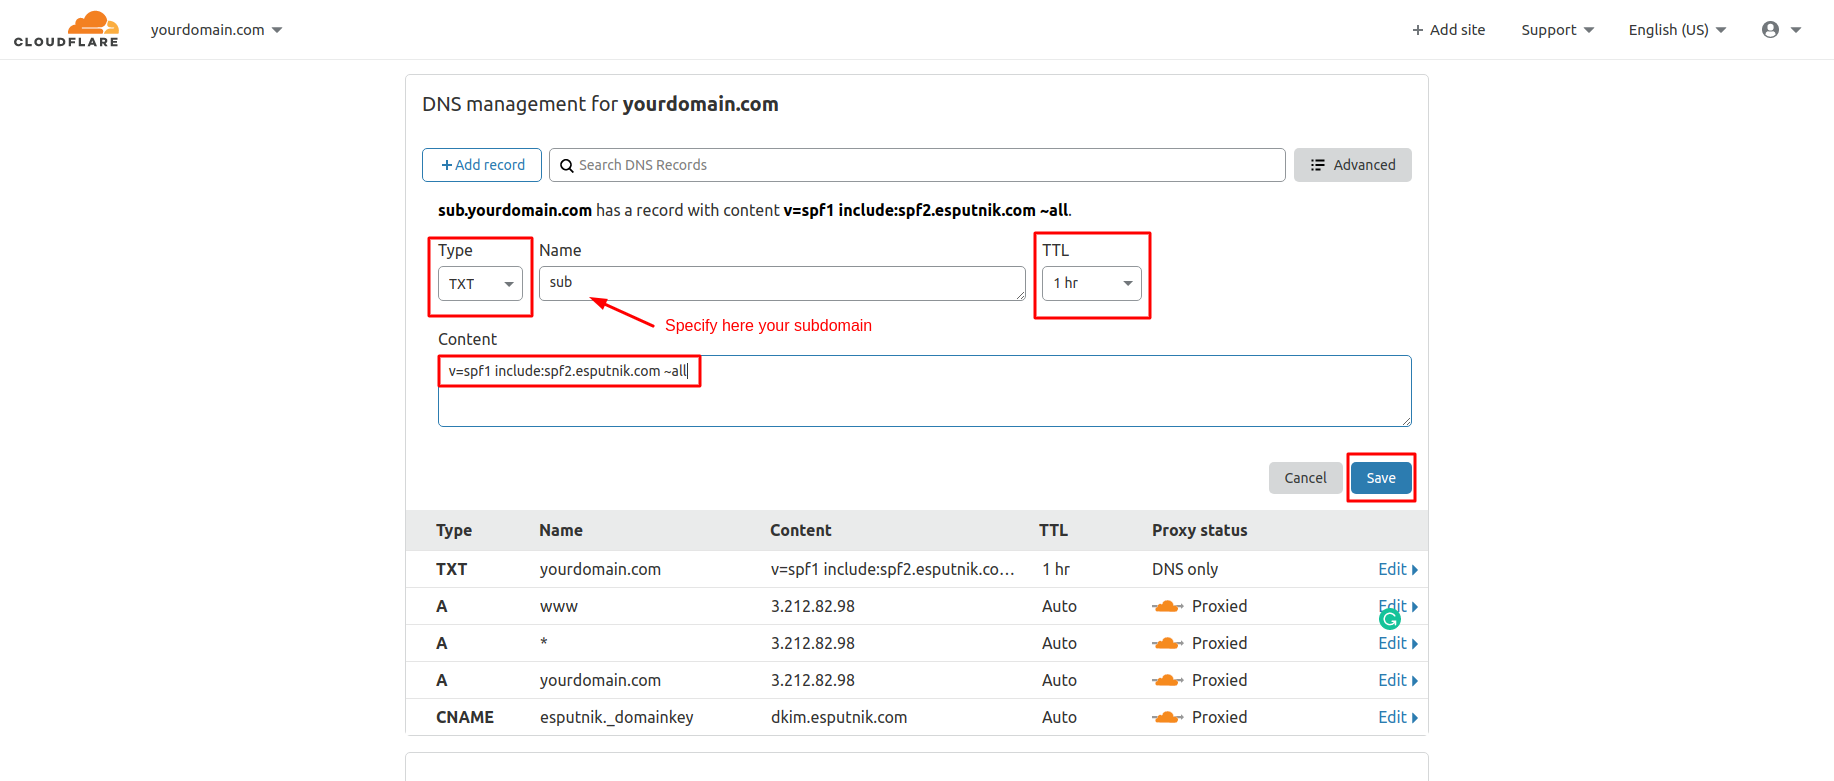
TXT
- In Type, select TXT.
- In Name, enter your subdomain name.
- In TTL, select 1 hour.
- In Content, enter v=spf1 include:spf2.esputnik.com ~all.
- Click Save.
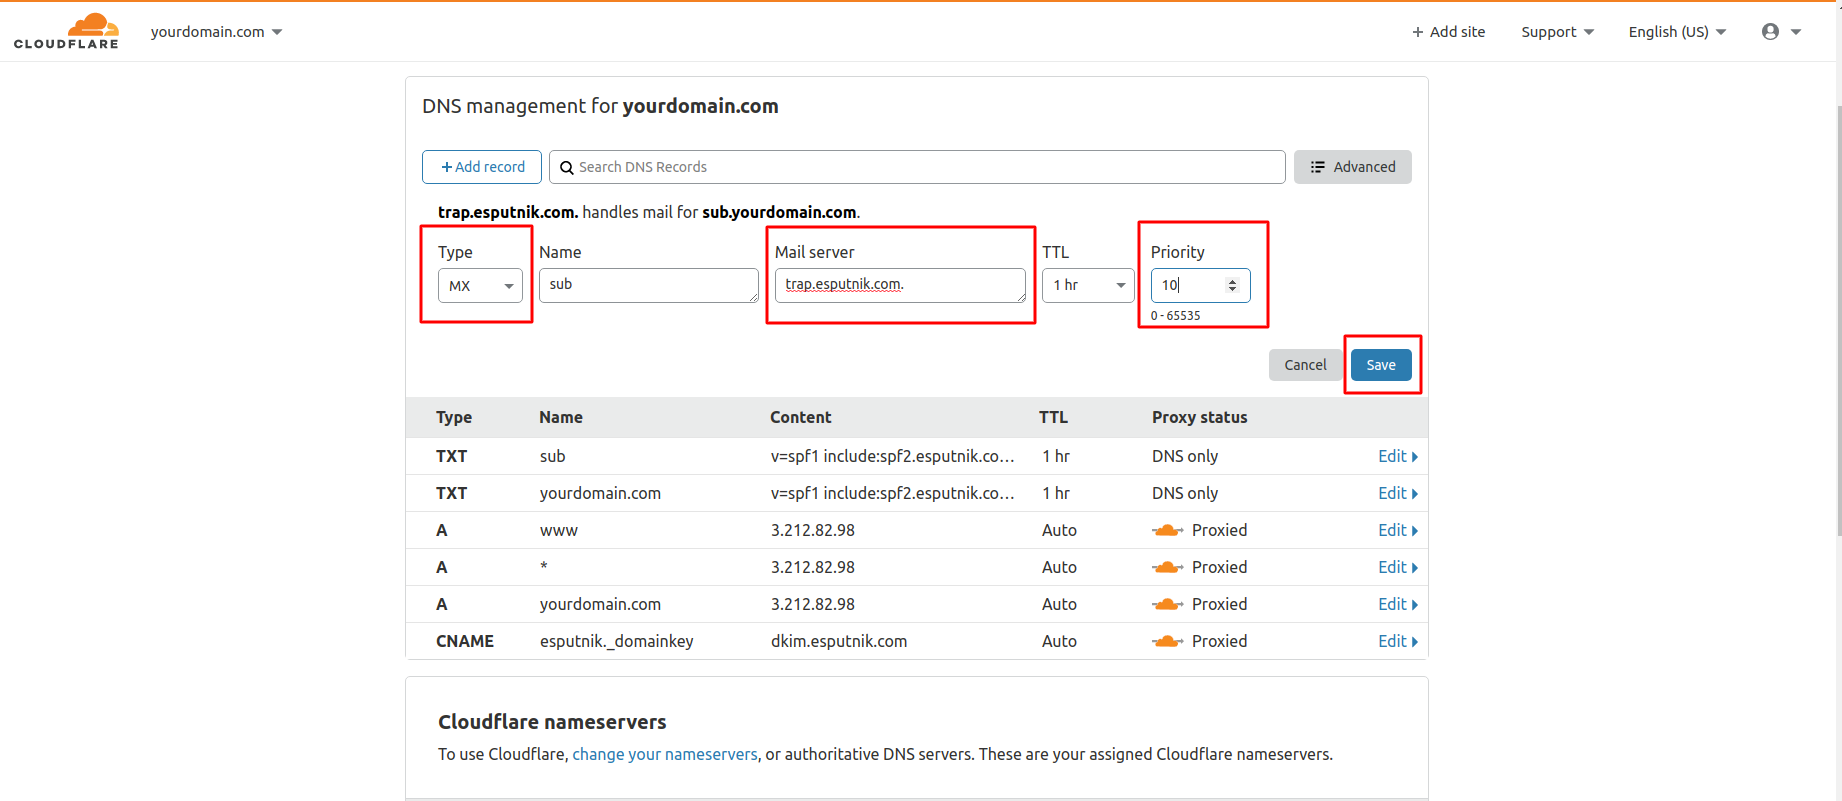
MX
- In Type, select MX.
- In Name, enter your subdomain name.
- In Mail server, enter trap.esputnik.com.
- In TTL, select 1 hour.
- In Priority, select 10.
- Click Save.
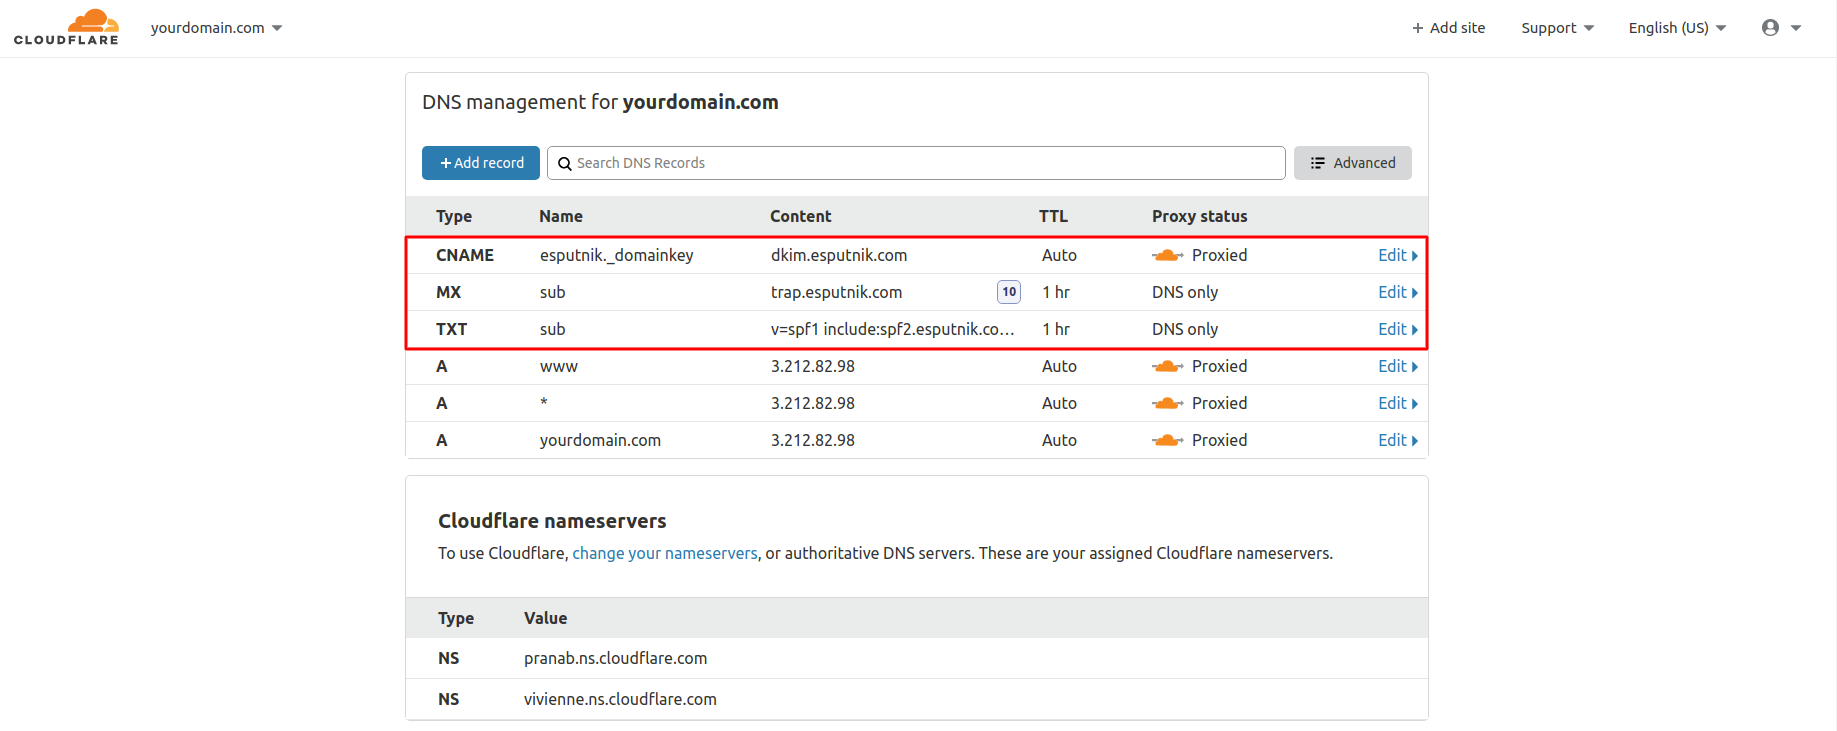
The ready record would look as follows:
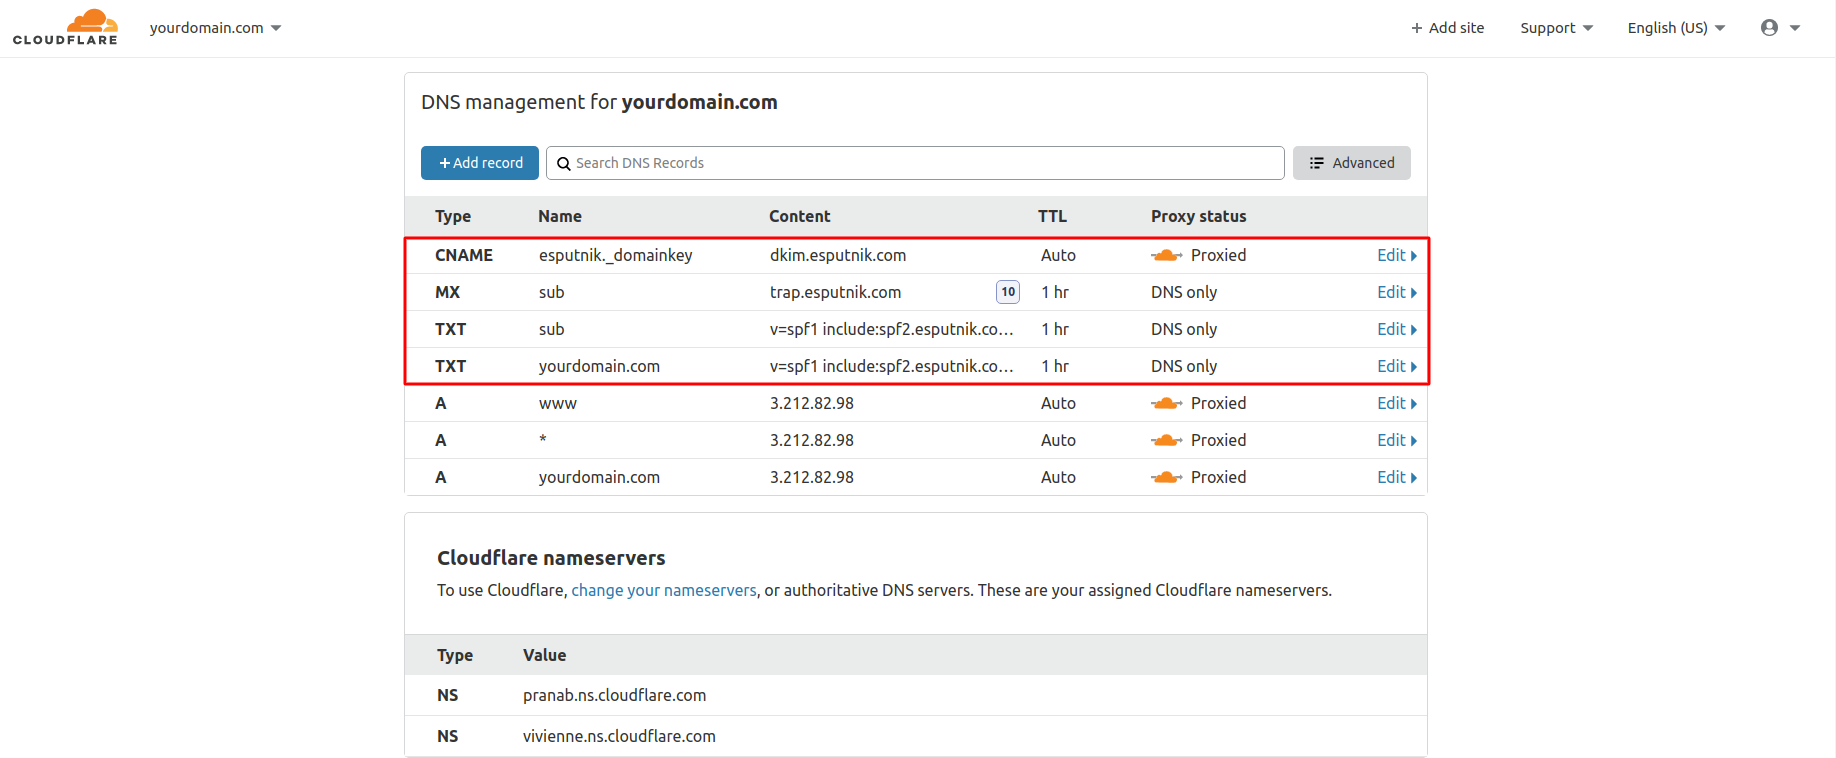
Subdomain
The ready record within the Subdomain option would look as follows:
Updated 4 days ago
Did this page help you?