Using the All Contacts Tab
This article can help you to understand how to manage your contact base.
A well-maintained contact base is paramount for managing contact data, interaction history, and related events.
This article can help you to understand how to manage your contact base.
To open the list of all your contacts, select .
The contacts can be collected by our system in different ways. To learn more, read the articles in Subscriber Data Collection.
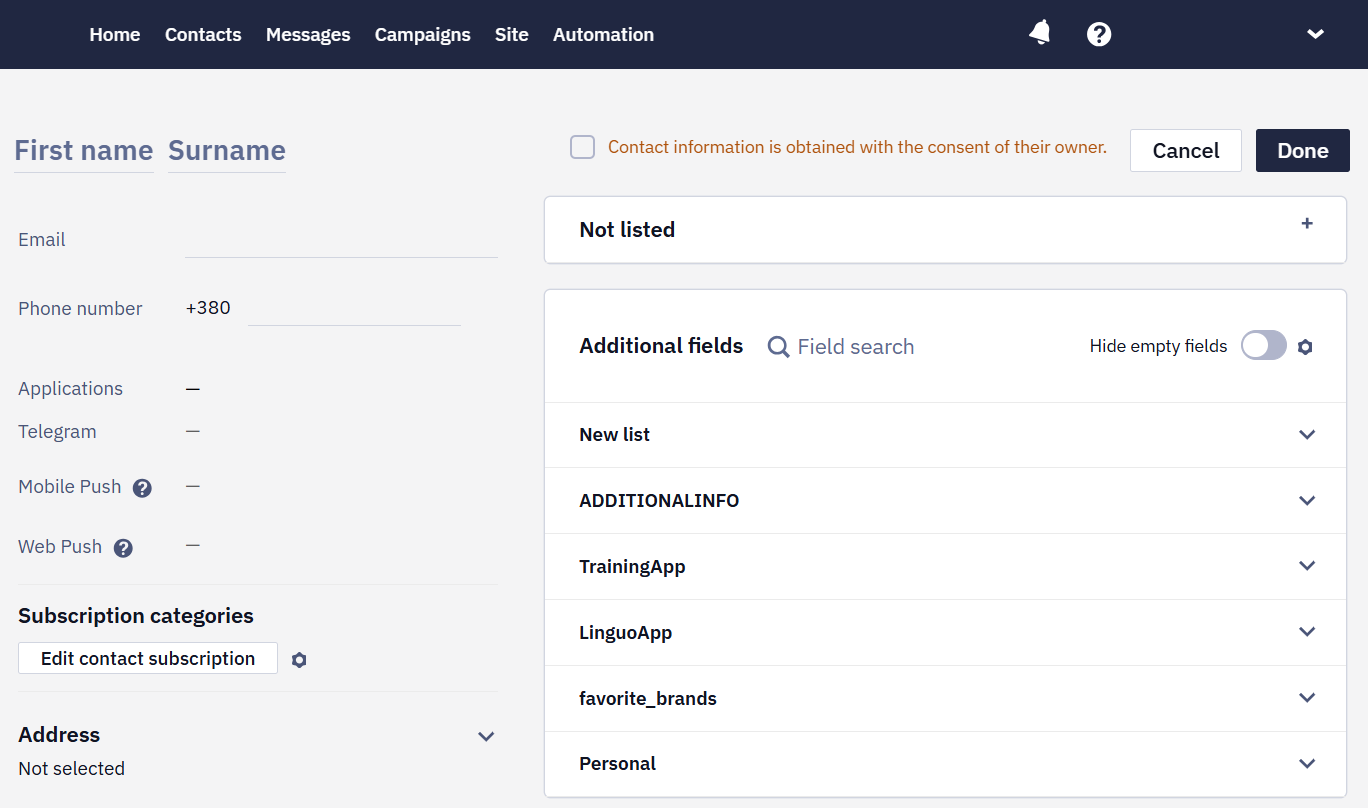
Creating a New Contact
You can manually create a contact profile in our system.
To create a new contact profile:
-
Click the
New contactbutton.
-
Enter the available personal information on the left-hand side and select the segment or segments for the contact on the right-hand side.
-
Select the checkbox beside Contact information is obtained with the consent of their owner.
-
Click Done.
Read Managing the Contact Profile to learn more about how to manage contact profiles.
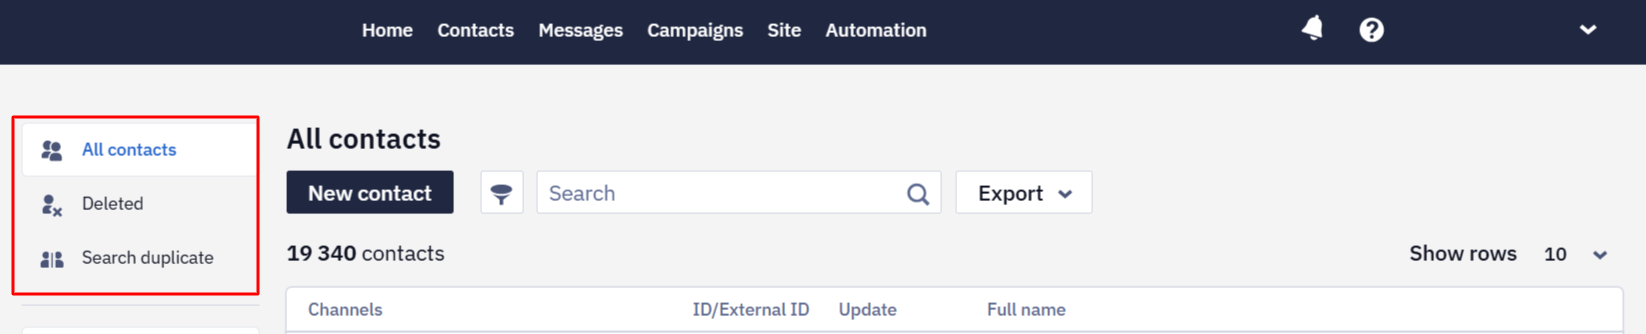
Using Contact Filters
The contact filters menu is located at the top of the left-hand side window. It contains the following items:
- All contacts
- Deleted
- Search duplicates
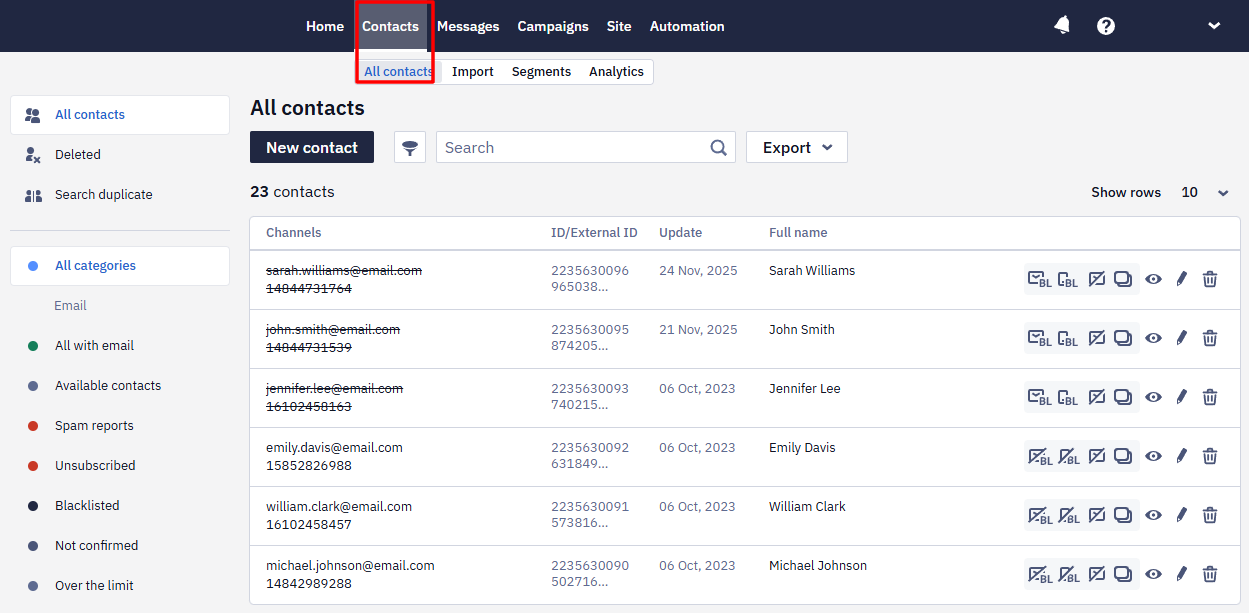
Using the All Contacts Filter
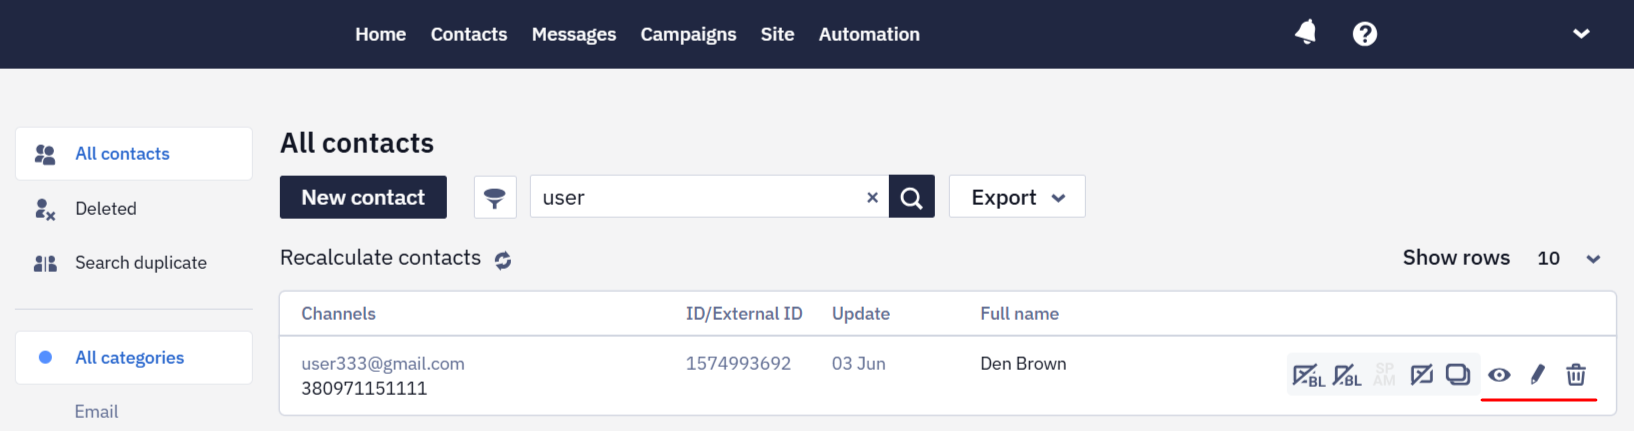
When you select All contacts in the left-hand side menu, the All contacts page shows the list of all the contacts and their associated information:
- Channels
- ID/External ID
- Update
- Full name
The right-hand side of the table contains the contact management options for each contact and the following icons:
- Contact preview
- Edit contact
- Delete contact
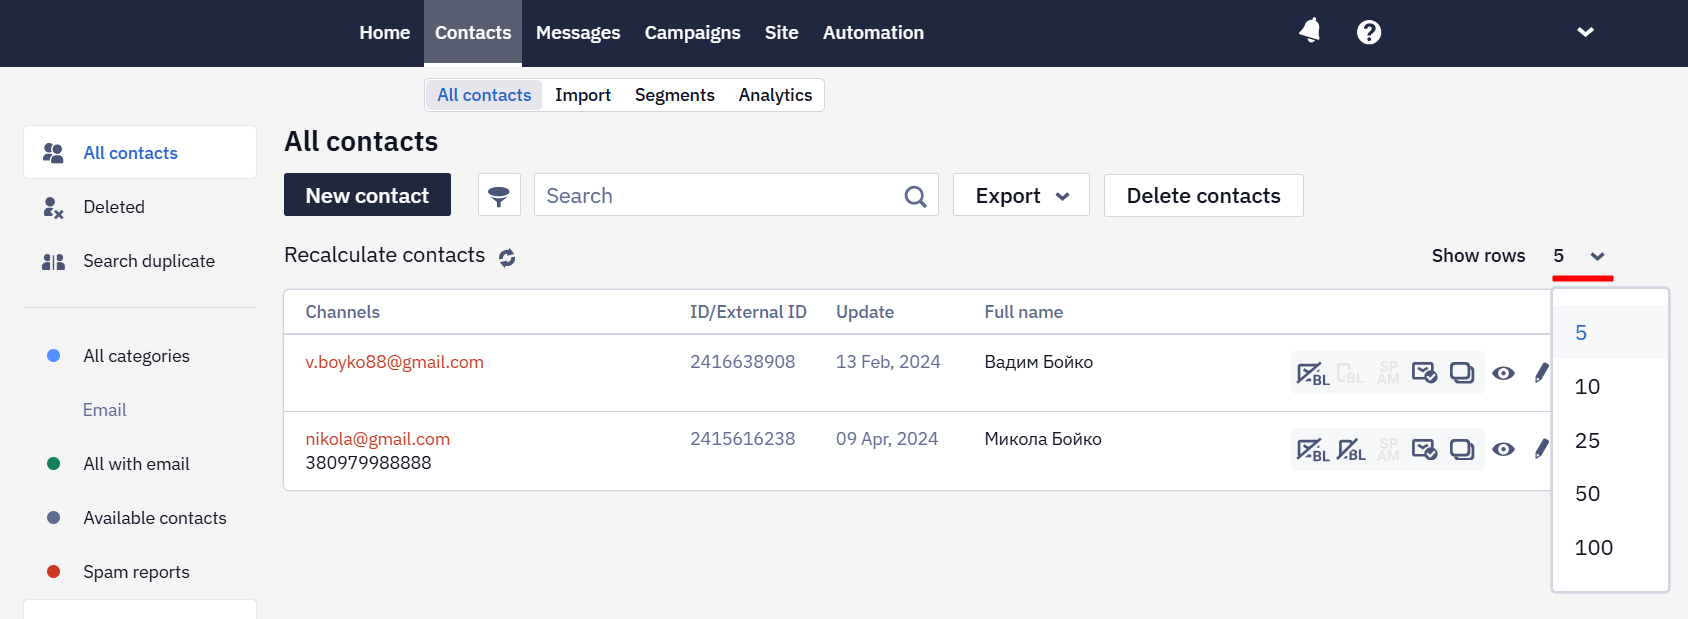
You can set the number of contacts displayed on one page, for that:
- Expand the
Show rowsdropdown menu and select the number from the list.
Using the Deleted Filter
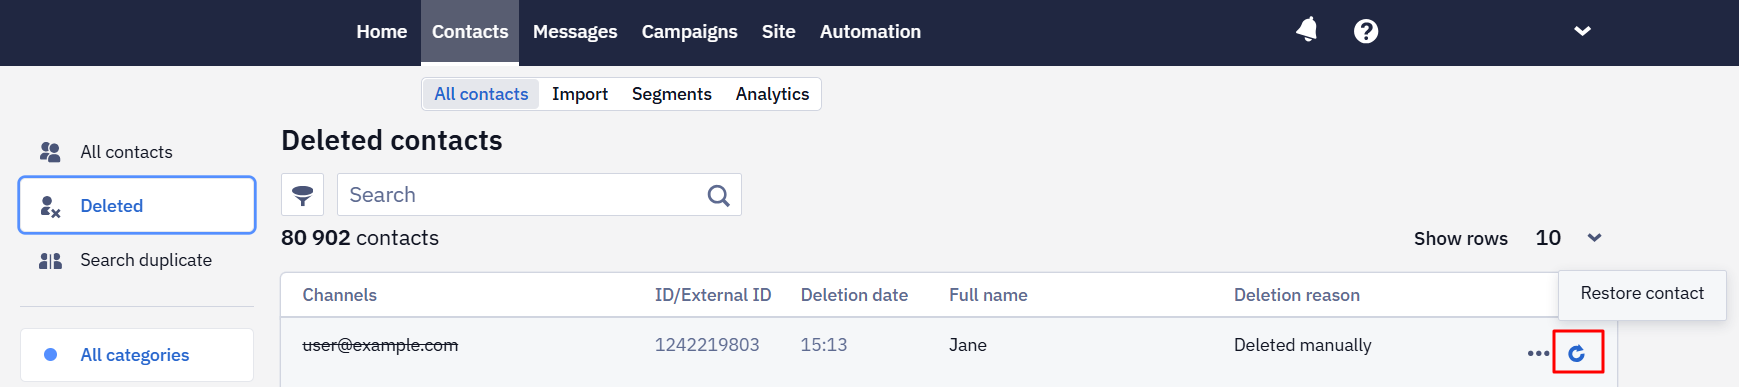
You can view the list of contacts that you deleted.
To open the list of deleted contacts, select Deleted in the left-hand side menu.

To restore a deleted contact, select the Restore contact icon on the right-hand side of the contact row.
Using Search Duplicates
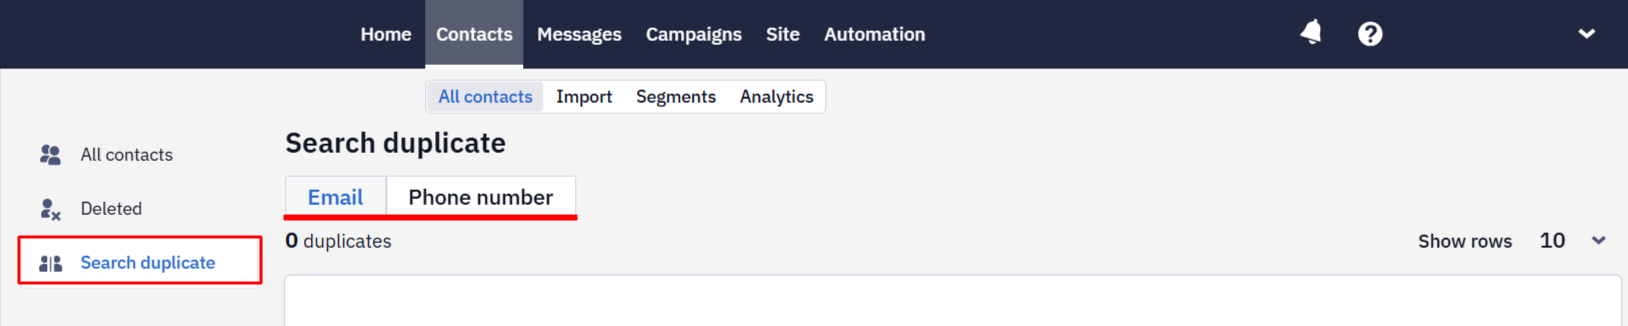
Using the Search duplicate filter, you can view the duplicate contacts in your base.
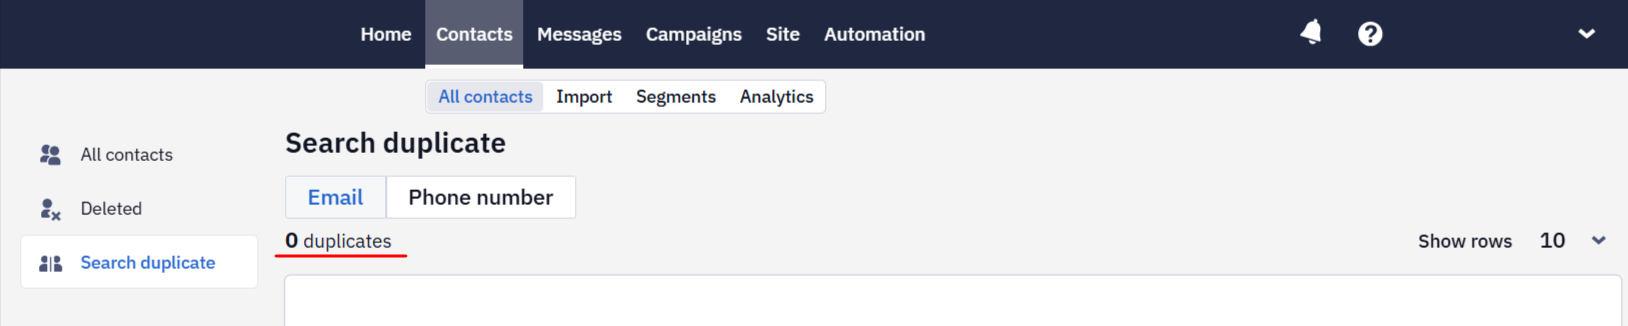
Select Search duplicate in the left-hand side menu to view duplicate contacts.
By default, duplicate contacts are sorted by email address.
Select Email or Phone number to view contacts having the same email address or phone number.
The number of duplicate contacts in the system is displayed on the left-hand side above the list of contacts.
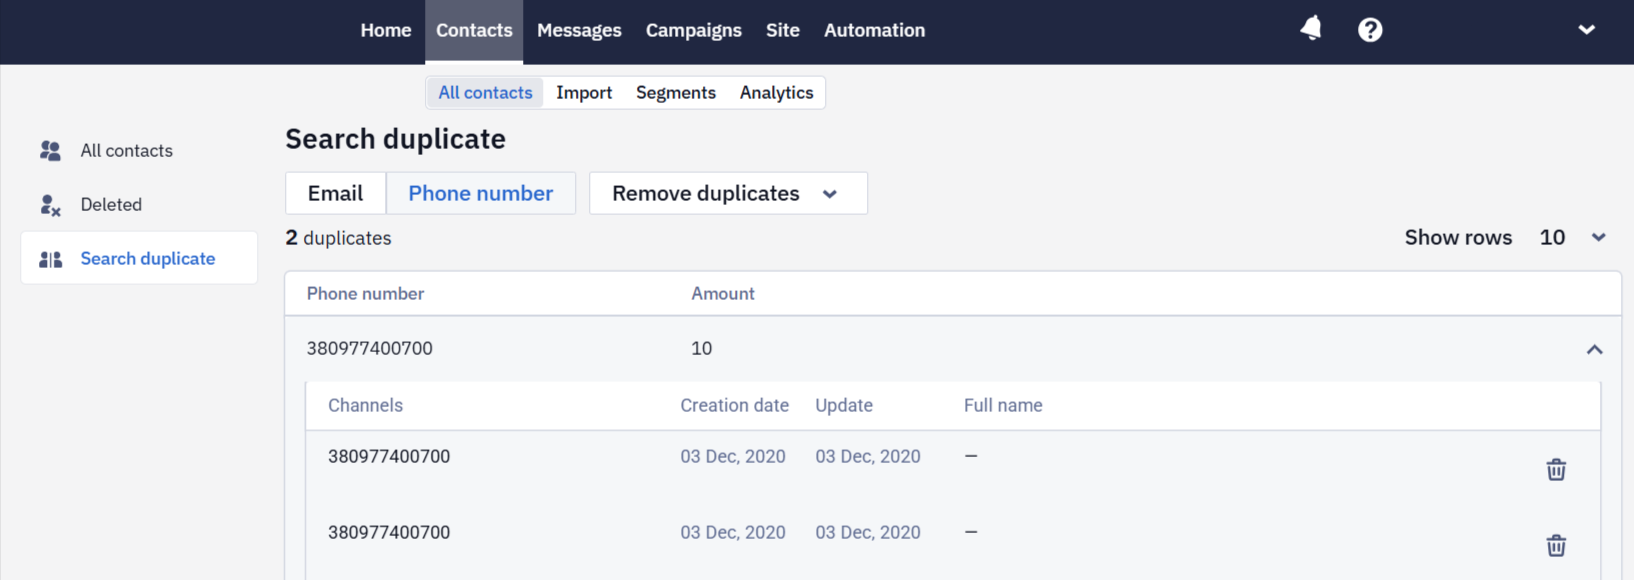
The contacts in the list are sorted alphabetically and contain the following information:
- Channel (Email or Phone number).
- Number of duplicate contacts.
Click the contact in the list to view the following details:
- Channels
- Creation date
- Update
- Full name
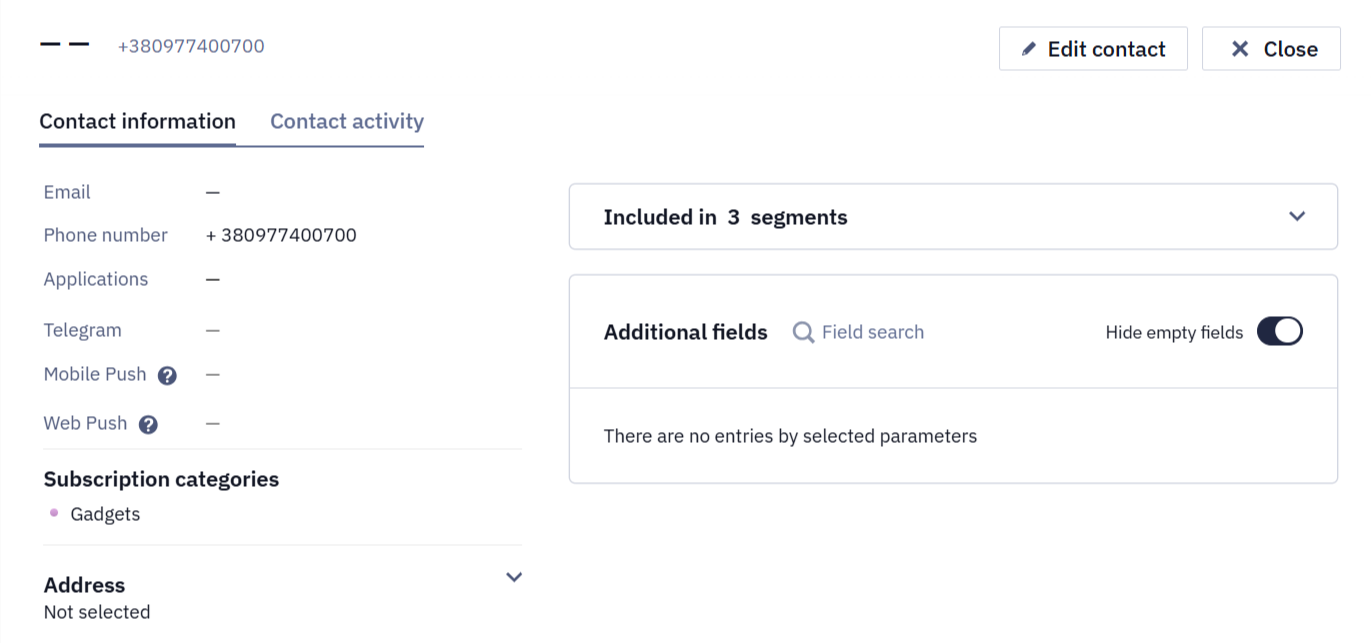
To open the contact's profile, click any blank space in the contact row.
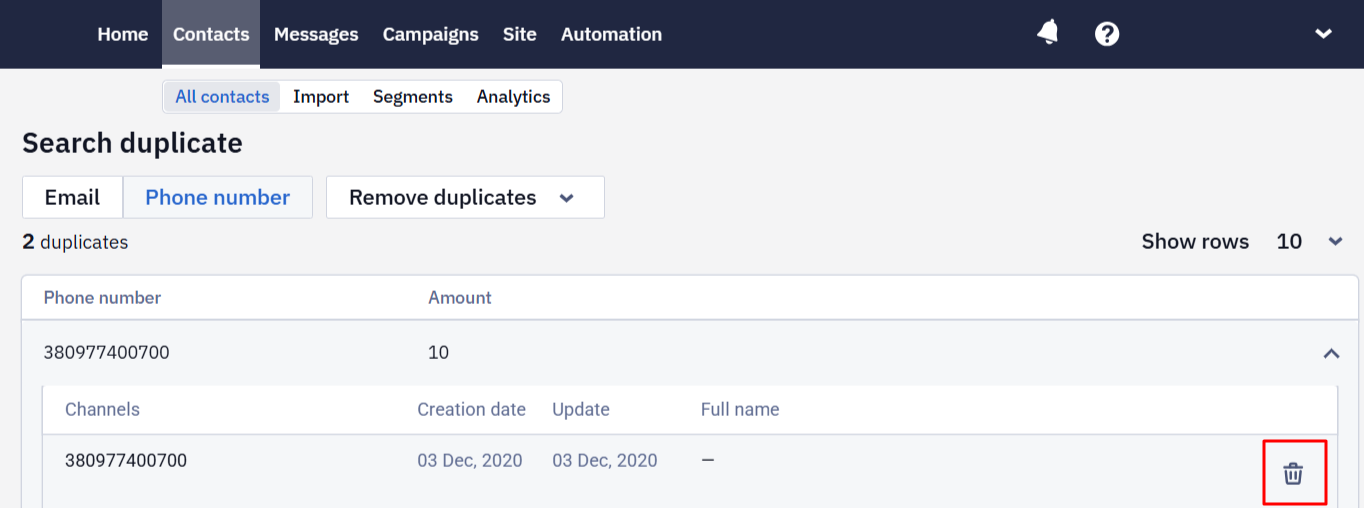
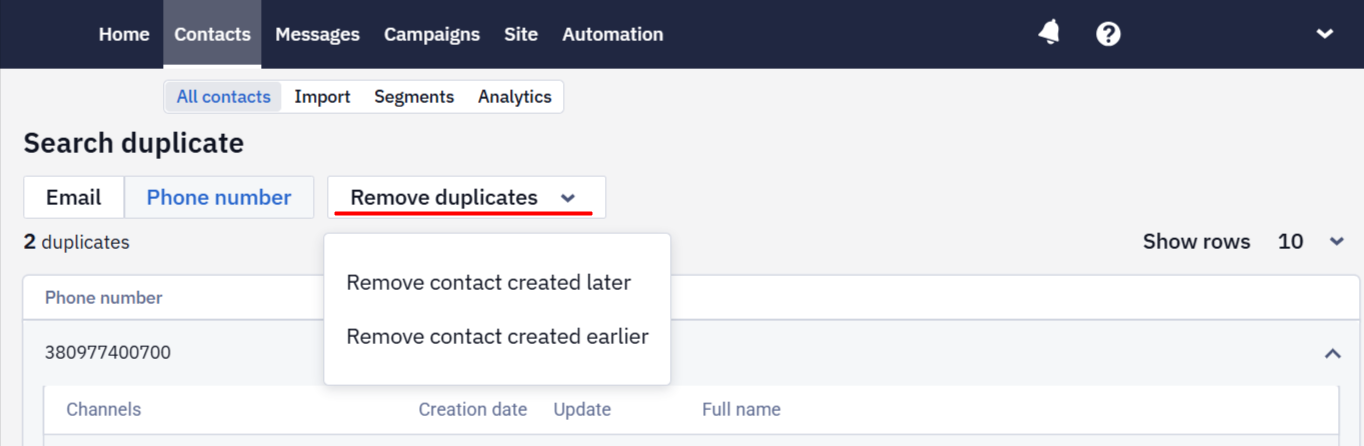
To delete a duplicate contact, select the bin icon on the right-hand side.
You can remove duplicates for all contacts in the list that have either the same email address or the same phone number.
To remove all duplicate contacts:
- Select Email if you want to remove duplicates having the same email address.
Or,
Select Phone number` if you want to remove duplicates having the same phone number. - Expand Remove duplicates and select one of the following items:
- Remove contact created later
- Remove contact created earlier
Filtering the Displayed Contacts by Categories
The bottom section of the left-hand side menu allows viewing the contacts sorted by the following categories:
- All categories: Select this item to view the contacts in all categories.
- All with email: Select this item to view all contacts having an email address in their profiles. The list shows active, unsubscribed, and deleted contacts and contacts who have reported spam.
- Active contacts: Select this item to view contacts to whom you can send emails.
- Spam reports: Select this item to view contacts to whom you sent emails, and those emails were marked as spam by a mail client or recipient.
- Unsubscribed: Select this item to view contacts, which unsubscribed from your email campaigns.
- Blacklisted: Select this item to view contacts having inactive email addresses you can't send messages to. There is one general email blacklist for all accounts in our platform.
- Not confirmed: Select this item to view contacts, which have not confirmed subscription when Double Opt-In confirmation is required. You cannot send messages to these contacts until the subscription is confirmed.
- Over the limit: This filter applies to the Optimal pricing plan with unlimited messages. Select this item to view the collected contacts that are beyond the limit of your pricing plan.
Phone Number
- All with phone: Select this item to view all contacts having a phone number in their profiles.
- Active contacts: Select this item to view contacts to whom you can send SMS messages. Segments are created based on the results of previous campaigns.
- Blacklisted: Select this item to view the contacts added to the blacklist. The phone number blacklist is individual for each account.
The total number of contacts in the selected category is displayed above the table, on the left-hand side.

Searching for Contacts
You can use the following options for searching for contacts in our system:
- Using Advanced filter
- Using the Search field
Using Advanced Filter for Searching
The advanced search allows you to refine your search parameters.
To apply specific conditions to your search:
-
Select the funnel icon beside the Search field.
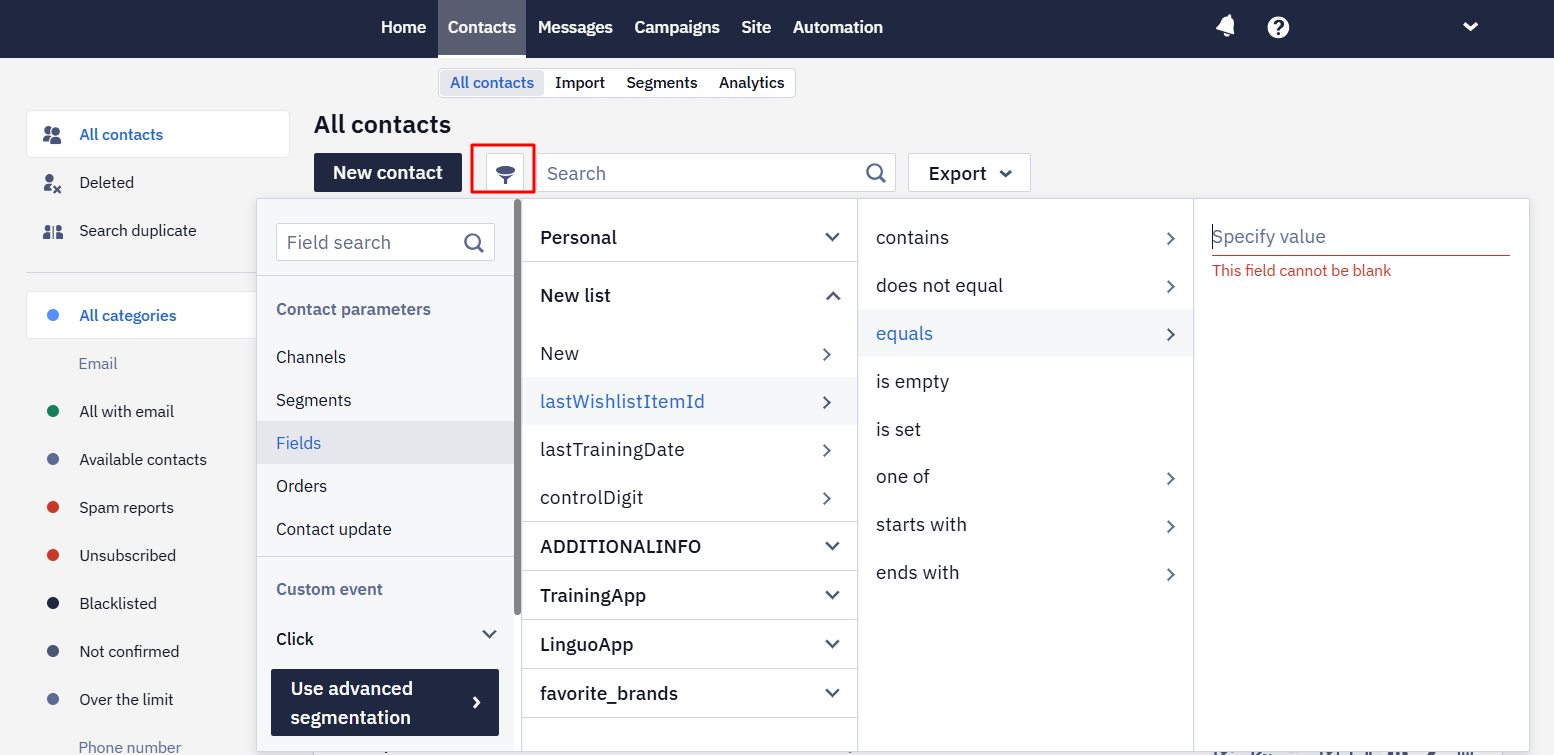
-
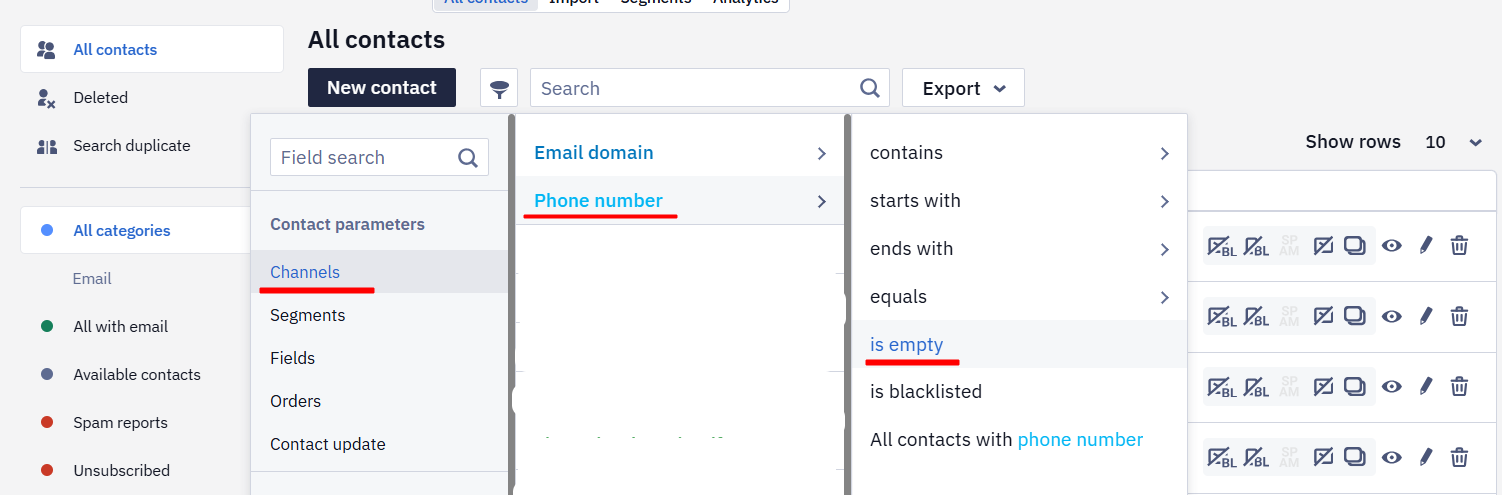
Select the search parameters from the dropdown lists.
The following picture shows an example of how to search for contacts having no phone number in their profiles.
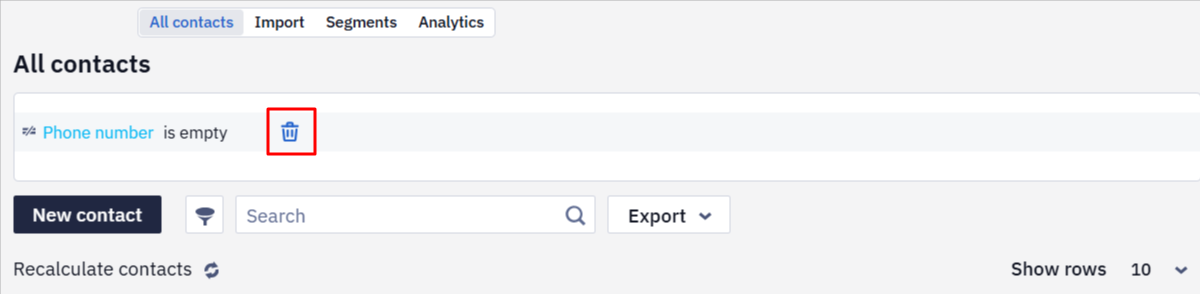
The applied conditions are shown at the top of the All contacts tab.
To cancel the applied advanced search conditions, point at the conditions and click the bin icon.
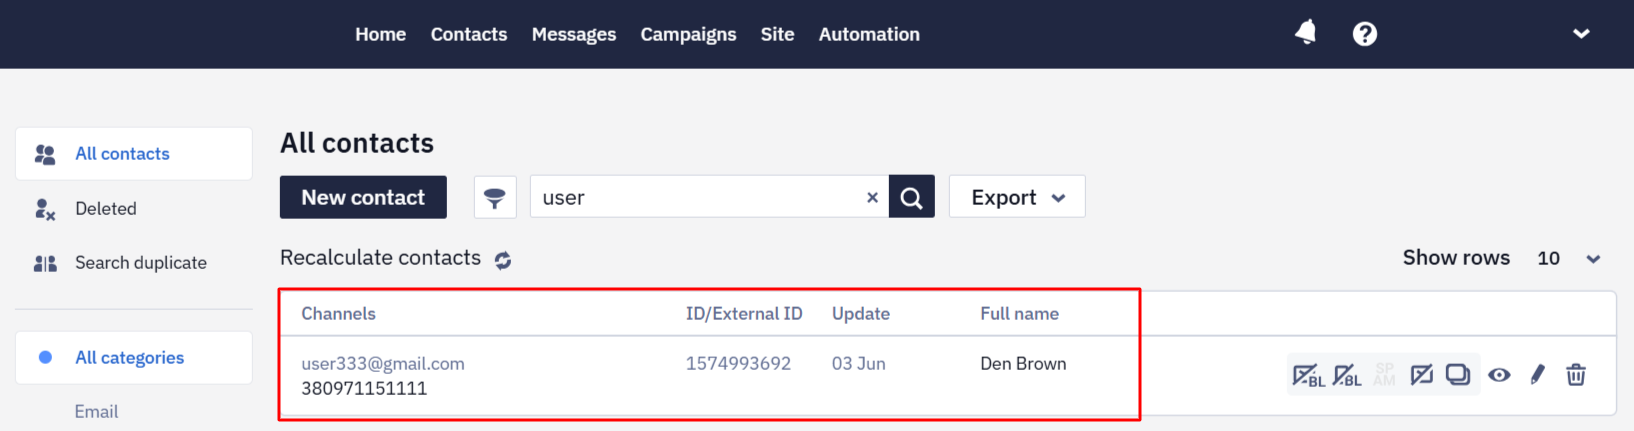
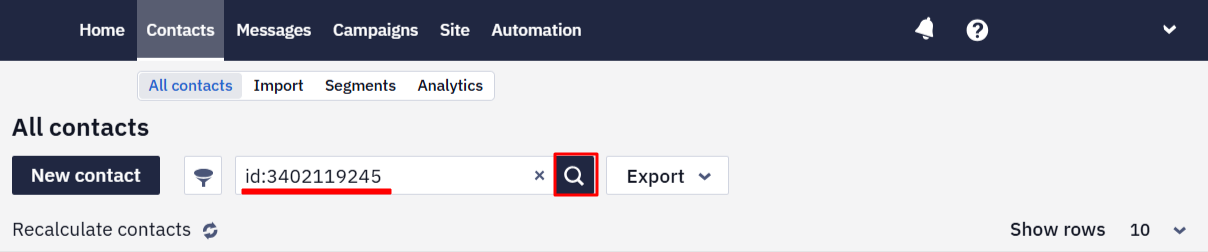
Using the Search Field
You can use the Search field to search for a specific contact. You can use 3 search methods, as described below.
- Type the contact's email address, phone number, and first or last name, then press Enter or select the magnifying glass icon.
- Type id: followed by the contact ID in our system and press Enter or select the magnifying glass icon.
- Type extid: followed by the contact external ID and press Enter or select the magnifying glass icon.
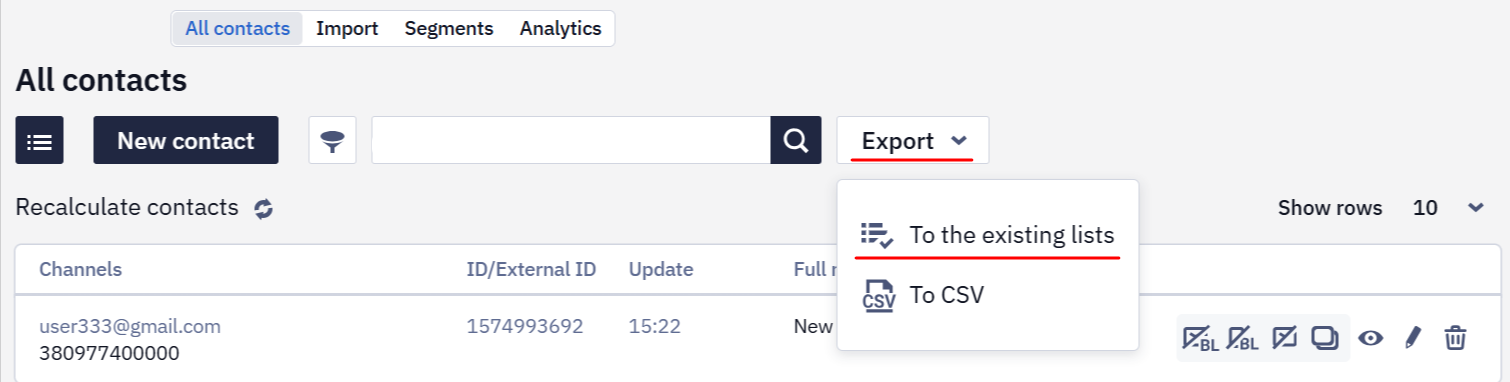
Exporting Contacts
In our system, you have the following options for exporting contacts:
- To the existing lists
- To CSV
Exporting to the Existing Lists
You can export the contacts to the segments you created in our system.
To export the contacts to the existing lists (segments):
-
Select the Export button and select the To the existing lists option from the dropdown menu. The Segments list window opens.
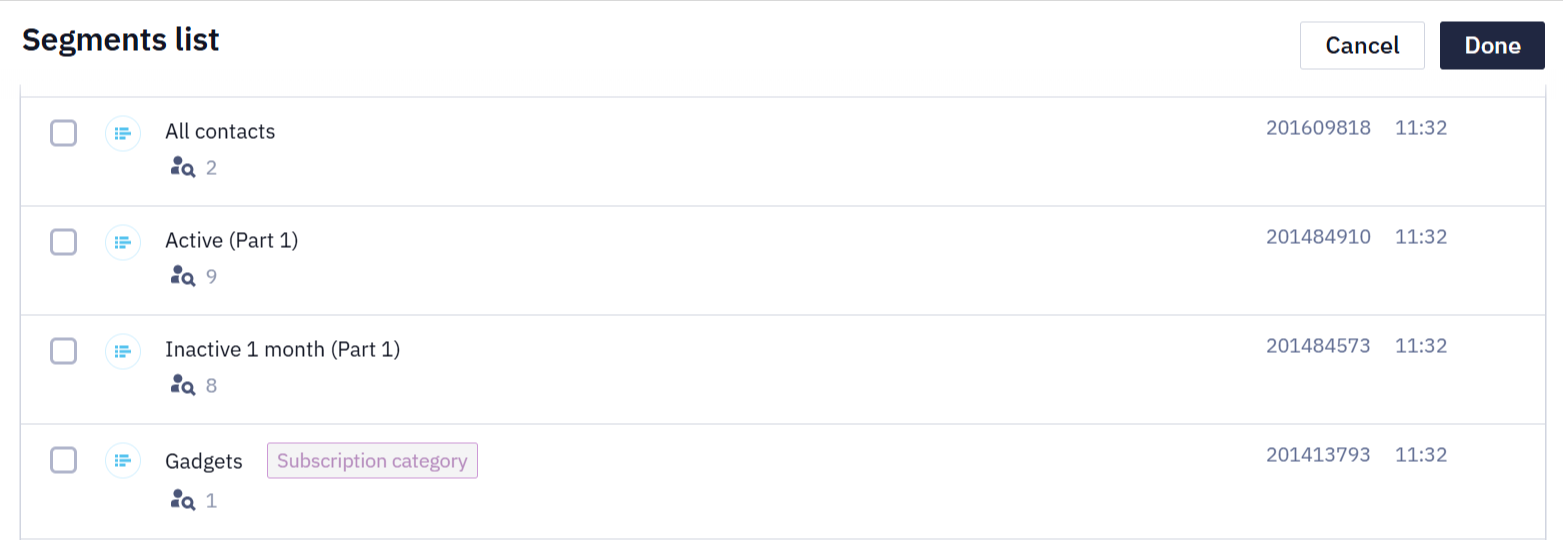
-
Select the checkbox beside the segment or segments to which you want to add the contacts, then click Done.
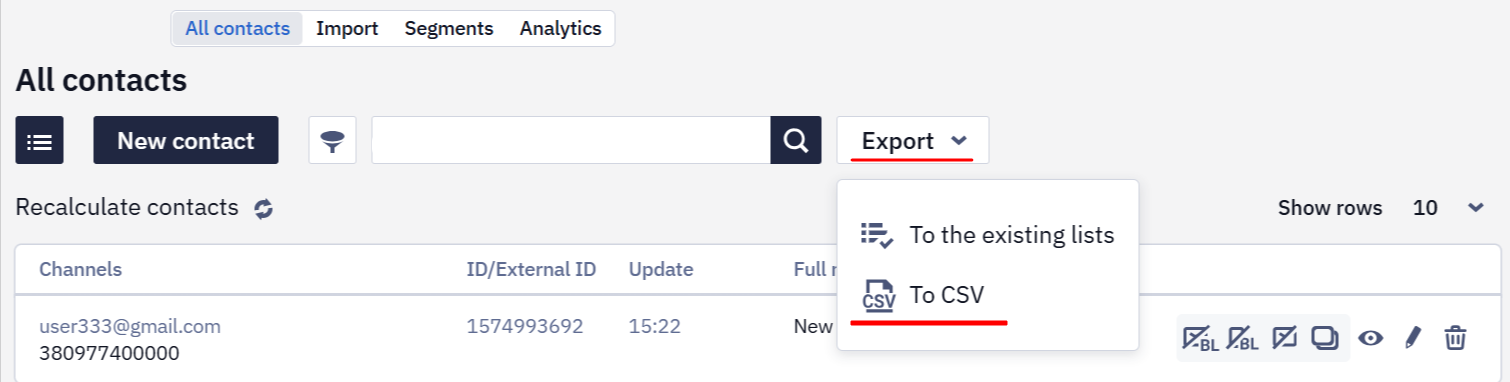
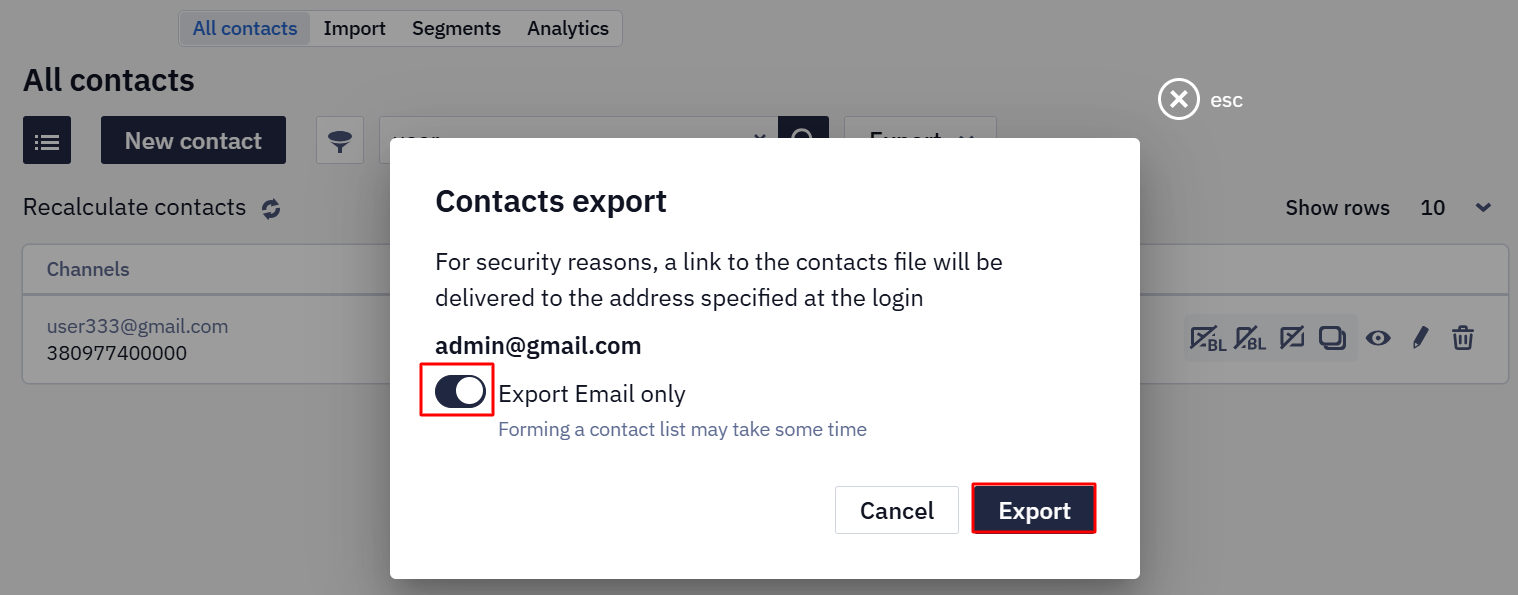
Exporting Contacts to a CSV File
You can export the contacts as a CSV file to the email address you use for logging in to our system.
To export the contacts from our system as a CSV file:
-
Select the Export button and select the To CSV option from the dropdown menu.
-
In the Contacts export pop-up window, select the Export Email only slide button if you want to export only the email addresses of the contacts or deselect it if you want to export all fields.
-
Click Export. When exporting starts, the confirmation message shows in the top right-hand side corner of the window.
- Go to your email account and open the message with the following subject: Your Export for Your Account is Ready.
- In the message, select Download. The
CSVfile downloads to your default downloads folder.
NoteThe link for downloading the
CSVfile expires in 3 days.
How to open a CSV file after export read in a separate article.
Updated 28 days ago