
Adding a Viber Sender Name
Before starting Viber campaigns, you need to register a sender name from which the campaign will be sent.
In eSputnik, two options exist for registering a sender name:
- Creating a new sender name.
- Adding an existing sender.
A sender is registered for one-way service: it delivers campaigns, and recipients can't reply to them in Viber. Two-way integration isn't offered.
Creating a New Sender Name
Use this option if you haven't registered a Viber sender before. In this case, you can create it in your eSputnik account.
- Go to the Pricing plans tab on the main page of your profile.
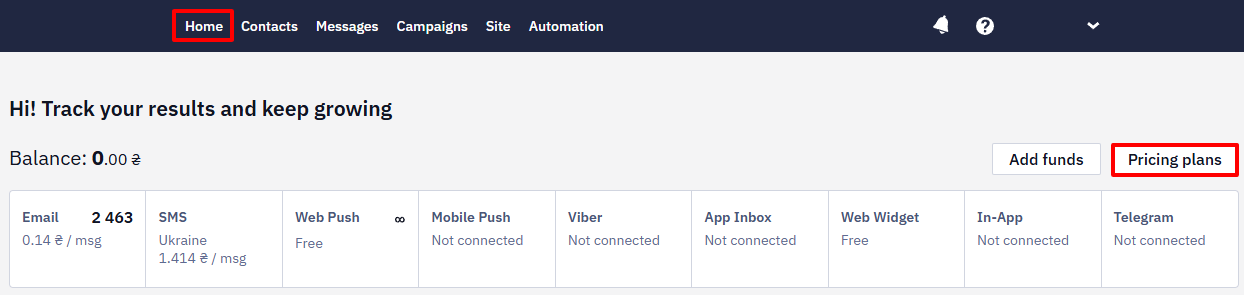
- Select the Viber tab, expand it, and click Apply for adding.
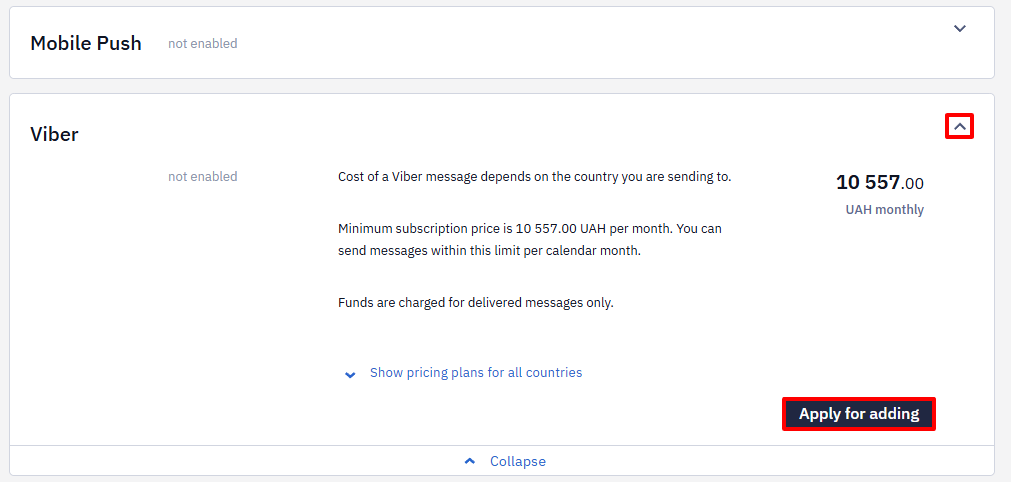
- Send a request.
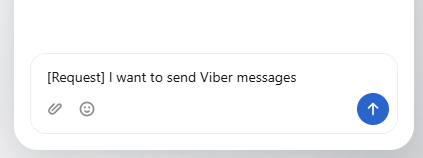
The sales department will contact you and provide information on further actions.
You can find out the cost of a monthly subscription in your eSputnik account or send a request to [email protected]
The money remains in the account and can be used to pay for messages after connection.
Click Show pricing plans for all countries to see pricing by country.

Note
- The registration term of the sender's name can take 7 to 30 days.
- You can’t use SMS Sender ID to send Viber messages.
- Sender name registration for Viber, as well as for SMS, is free. There is no additional fee for using the sender's name in the campaign.
Adding an Existing Sender
Processing allows you to send messages via the service provider you work with.
You can find out the prices here.
A sender name is connected in one place only: it is either registered in the account or kept with another provider. To send Viber messages through your own provider, keep the sender with them — the campaigns then go through processing.
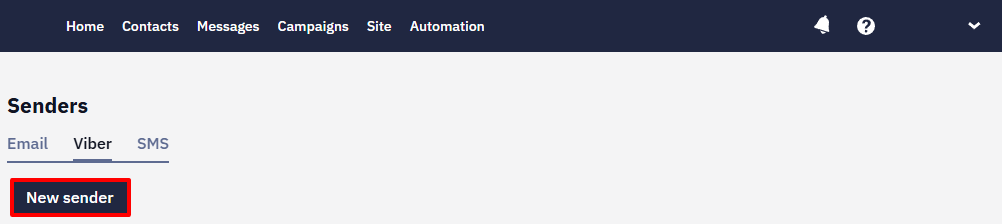
- In your profile, go to Settings → Senders → Viber.
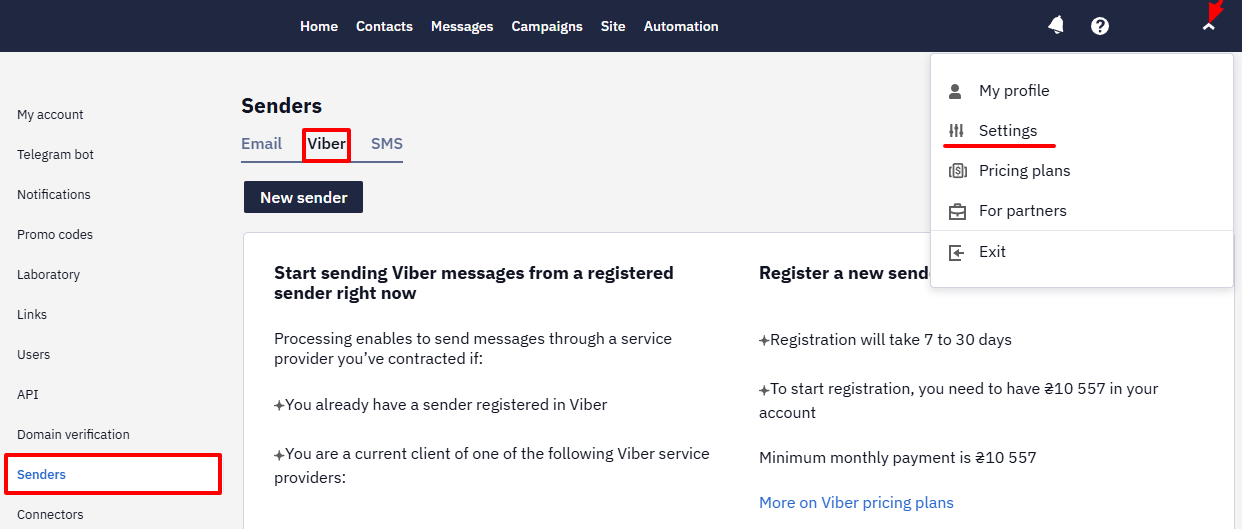
ImportantTo add a sender, you need to be a current customer of one of the following Viber service providers:
- GMS Hyber
- Infobip
- TurboSMS
- Omnicell
- SMS Club
- SMS Club 2.0
- SMSBAT
- Streamtools
- Vodafone
- Intel Telecom
- Decision Telecom
- AlphaSMS
If you have a different service provider, please contact [email protected].
- Click New sender.
- Select the I’ve already contracted a Viber service provider and have a registered sender option and specify the provider you work with.
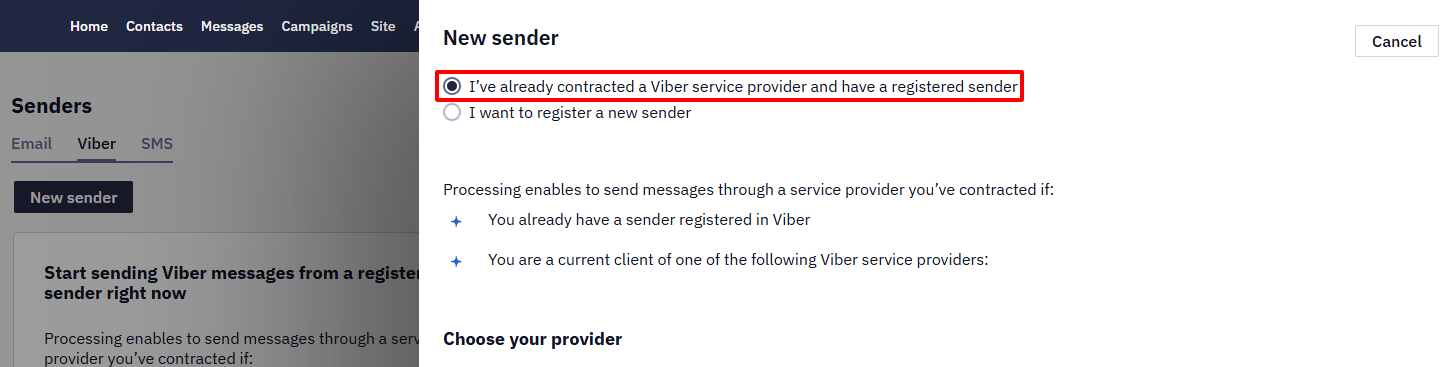
If you select the I want to register a new sender option, the system will offer to do it via eSputnik.
Sender Profile Requirements
Viber sets the rules for a sender's public profile, and every change goes through Viber rather than through the platform.
- Description — 10 to 100 characters, plain text only. Links and emoji are not accepted. Senders registered before the current rules took effect may still carry a longer description, up to 400 characters, but any new text has to fit the current limit.
- Logo — supply the image as PNG in six sizes: 50×50, 65×65, 100×100, 130×130, 360×280, and 256×256 pixels.
Send the new description or logo to support. Viber applies the change in about 5–7 days.
Automatic replies are delivered in the language of the recipient's device, so their text isn't set per sender or per campaign.
Provider's Technical Settings Parameters
ImportantThe sender name in technical parameters is the name you received when registering with your service provider. This name is case-sensitive.

1. GMS Hyber
- Enter the data:
- Sender name.
- Login, password, URL.
- Alpha name — fill it in if the account has several Alpha names, to set which one to send from. It is also required for SMS forwarding.
- Token — a key you create in the Hyber admin panel under Privilege → API keys.
- Click Done.
The token is required for transactional messages: the platform uses it to fetch templates from Hyber and check the message content against the selected template. Leave Expiration date empty when you create the key: a key with an expiry date stops working once that date passes, and the platform can then no longer check whether the template exists or whether the content matches it. The token value is shown only when it is created — if the token is lost, create a new one. When you add the token to an existing sender, leave the other fields as they are: some saved values aren't displayed on the edit page, but they stay in the system.
Ask GMS Hyber to add the IP addresses 52.210.222.17 and 52.16.166.210 to their allow list.
Add eSputnik tags to your messages so that reports uploaded from GMS Hyber show how many messages of a specific type were sent — collecting feedback, installing an application, and so on. Several tags in one message are substituted into the report separated by commas: tag=tag1,tag2,tag3.
Transactional templates
For transactional messages via GMS Hyber, you need to specify the ID of a template approved by Viber.
- In the Hyber admin panel, open Viber → Templates, go to the Templates Viber 2.0 tab, and copy the Viber Template ID of the template you need, with the Approved status.
- Paste the value into the Template ID field in the message settings.
Before sending, the content is checked again — after personalization and dynamic values are substituted. If the substituted content doesn't match the template, the message isn't sent as transactional.
Transition periodUntil 31 October 2026 inclusive, transactional messages without a Template ID are still sent through the previous mechanism. Once you specify a Template ID, the new mechanism is used for that message. From 1 November 2026 Viber discontinues support for the previous mechanism, so messages without a Template ID are no longer sent as transactional — add a Template ID to all active transactional messages before that date.
Don't edit a template in Hyber if its ID is already used in a message. After a change the template is submitted to Viber for approval again and gets a new ID, so the ID stored in the message becomes outdated. If you need to change the template, create a new one, wait for the Approved status, and specify its ID in the relevant message.
2. Infobip
- Enter the data:
- Sender name.
- Login and password are taken from the Infobip account.
- Click Done.
To receive the open rate, ask Infobip to add the webhook link https://esputnik.com/dlr/v1/infobip/status in your account. Without it, the open rate equals the click rate.
3. TurboSMS
- Enter the data:
- Sender name.
- Authorization token: copy it from the API settings in the TurboSMS account.
- Click Done.
4. Omnicell
- Enter the data:
- Sender name.
- Login, password, and sender ID are taken from the Omnicell account.
- Click Done.
To receive statuses, add the handler URL in the Omnicell account settings: https://esputnik.com/dlr/v1/omnicell/status.
5. SMS Club
- Enter the data:
- Sender name.
- Login, password, and sender name are taken from the SMS Club account.
- Click Done.
SMS Club 2.0
SMS Club 2.0 is a new version of the SMS Club API integration. It appears in the system as a separate provider and will gradually replace the previous integration version.
- In SMS Club 2.0, processing is supported for both Viber and SMS.
- To work through SMS Club 2.0, SMS Club must migrate your account from the previous system to the new one.
- After the migration on the SMS Club side, you will need to select the new provider type — SMS Club 2.0 — in eSputnik and update your access credentials.
- SMS Club 2.0 uses an access token instead of a login and password.
- SMS Club 2.0 supports Viber carousels. This option is not available in the previous integration version.
Transactional templates
For transactional messages via SMS Club and SMS Club 2.0, you need to specify the ID of a template approved by Viber.
- In your SMS Club account, open the Viber mailing section and copy the ID of the transactional template you need.
- Paste the value into the Template ID field in the message settings.
Before sending, the content is checked again — after personalization and dynamic values are substituted. If the substituted content doesn't match the template, the message isn't sent as transactional.
6. SMSBAT
- Enter the data:
- Sender name.
- Login.
- Password.
- Alpha name.
- Timeout.
- Click Done.
7. Streamtools
- Enter the data:
- Sender name.
- Login.
- Password.
- Click Done.
8. Vodafone
- Enter the data:
- Sender name (can be any, as it is displayed only in the eSputnik account).
- Login
- Password
- Sender ID — Sender ID from your Vodafone account. Message recipients will see the sender name corresponding to this ID. Please note: Sender IDs for SMS and Viber are different.
ImportantVodafone does not track the Opened message status, so the Clicked and Opened status numbers in reports will be the same.
9. Intel Telecom
Enter the data:
- Sender name: You can find this name in the
Sendersmenu in Intel Telecom. - User name: Your login name to the Intel Telecom account.
- API key: You can create API keys in Intel Telecom in
Developers → API key. - IM sender: See the Intel Telecom API documentation.
10. Decision Telecom
Parameters for sender setup:
- Sender name
- Authorization token — key from Decision Telecom account in BASE64 format
- Alpha-name
To connect Decision Telecom, submit a request at [email protected].
11. AlphaSMS
Parameters for creating a sender:
- Sender name
- API key
Generating an API key
- In your AlphaSMS account, go to Settings → Profile → API.
- Click Generate new.
- In the Comment field, enter a name you will recognize the key by.
- Fill in the IP address whitelist if you need one: IPv4 and IPv6 addresses or subnets, separated by commas. An empty field means the key is accepted from any address.
- Leave the Active toggle on and click Execute.
- In the Your key window, click Copy. The list shows the key shortened, so copy the value right away.
The new key appears in the list with the Active status.
After Adding a Sender
After registration, you’ll see a confirmation:
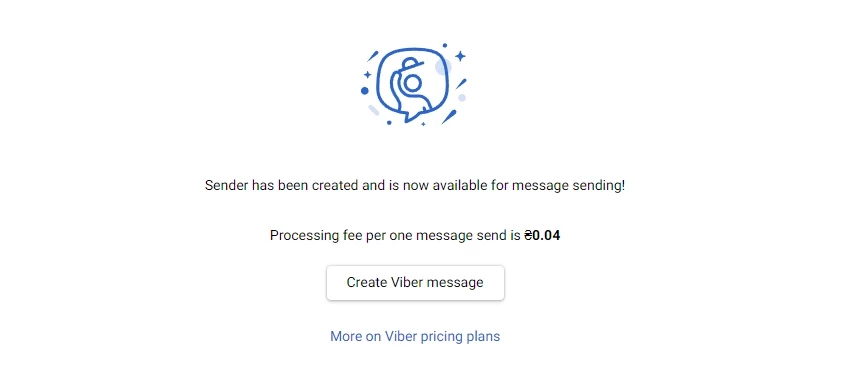
The fee for sending one message is current at the time of publication of the article; the data may change.
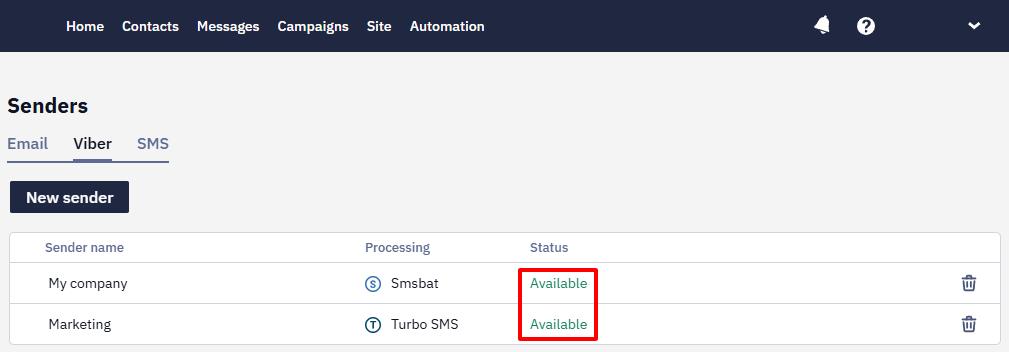
The added sender will be displayed in the general list with the Available status.
Deleting a Sender
ImportantBefore deleting a sender, you need to create or select another one, otherwise, you will be unable to send messages.
To delete a sender:
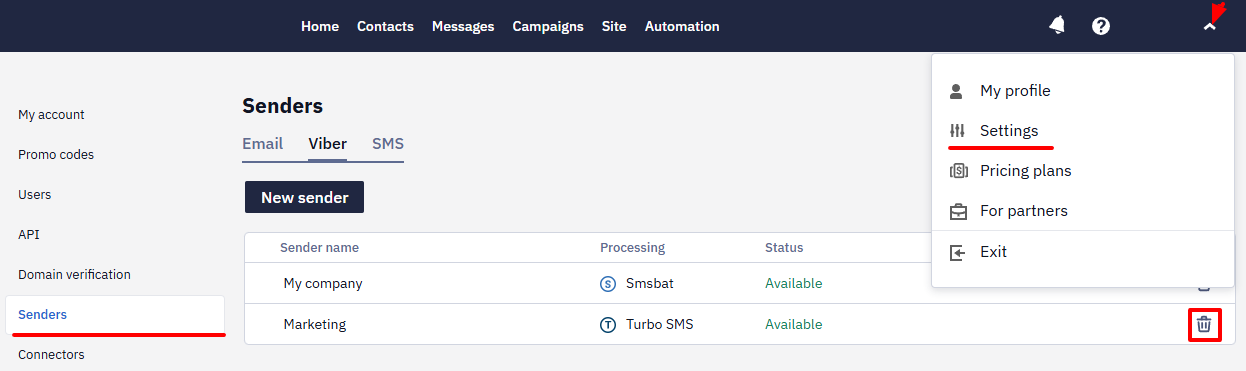
- Go to your profile → Settings → Senders.
- Select the Viber tab and click the trash icon at the right-hand side of the sender name you wish to delete.
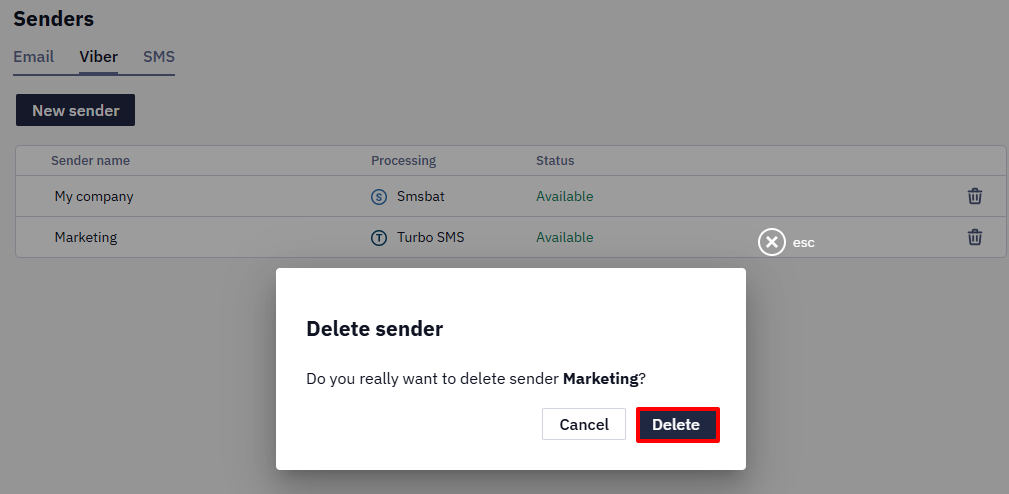
- Select Delete on the dialog window.
Changing a Viber Sender
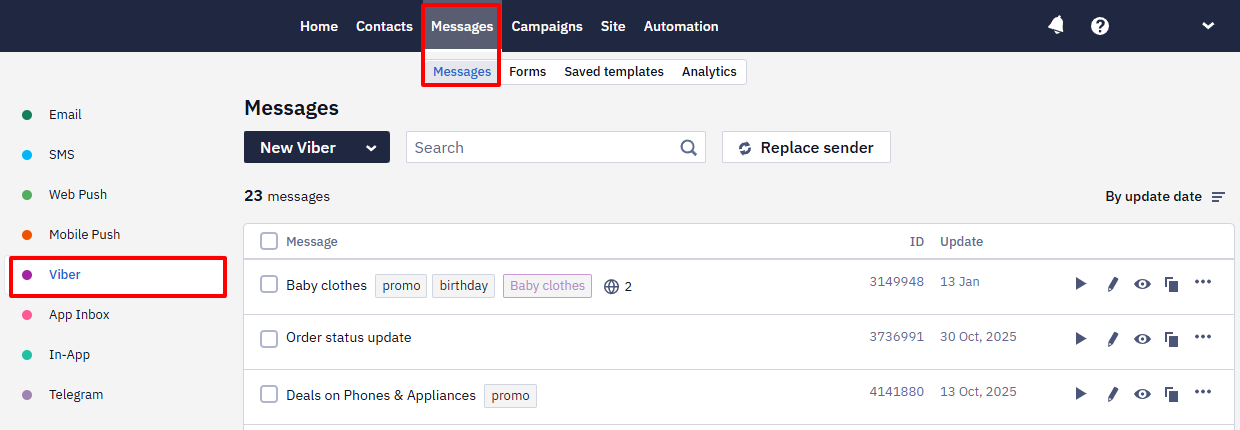
To change a sender in existing Viber messages:
- Go to Messages → Messages → Viber and select Viber message.
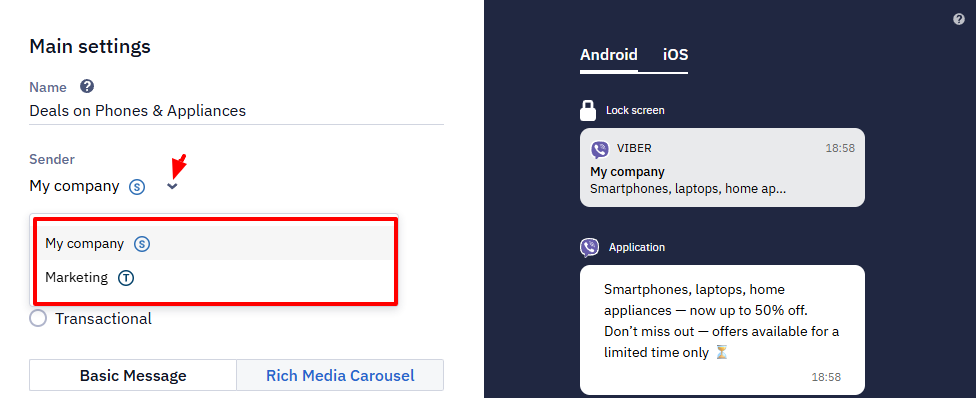
- In the Main settings section, expand the dropdown list below Sender and select another sender for this message from the list.
Sending SMS if there is no Viber
All providers allow you to automatically send SMS to contacts who do not have a Viber account. To do this, you need to activate the corresponding option in the Viber message editor. The sender of such SMS can only be the same as for Viber campaign.
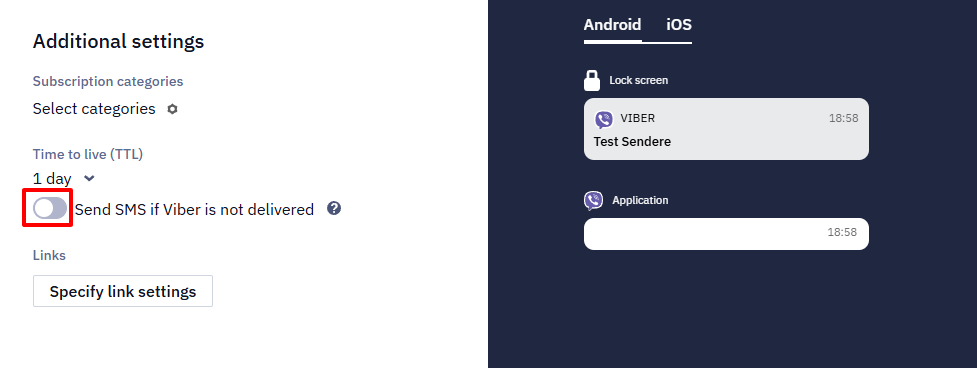
NoteIf your account does not have the Send SMS if Viber is not delivered option, please send a request for activation to [email protected].
Updated about 6 hours ago