
Welcome Series Segmented by Category
In cases where subscribers select a specific subscription category, such as gender, age, city, or product preferences, you may need to set up the appropriate welcome series.
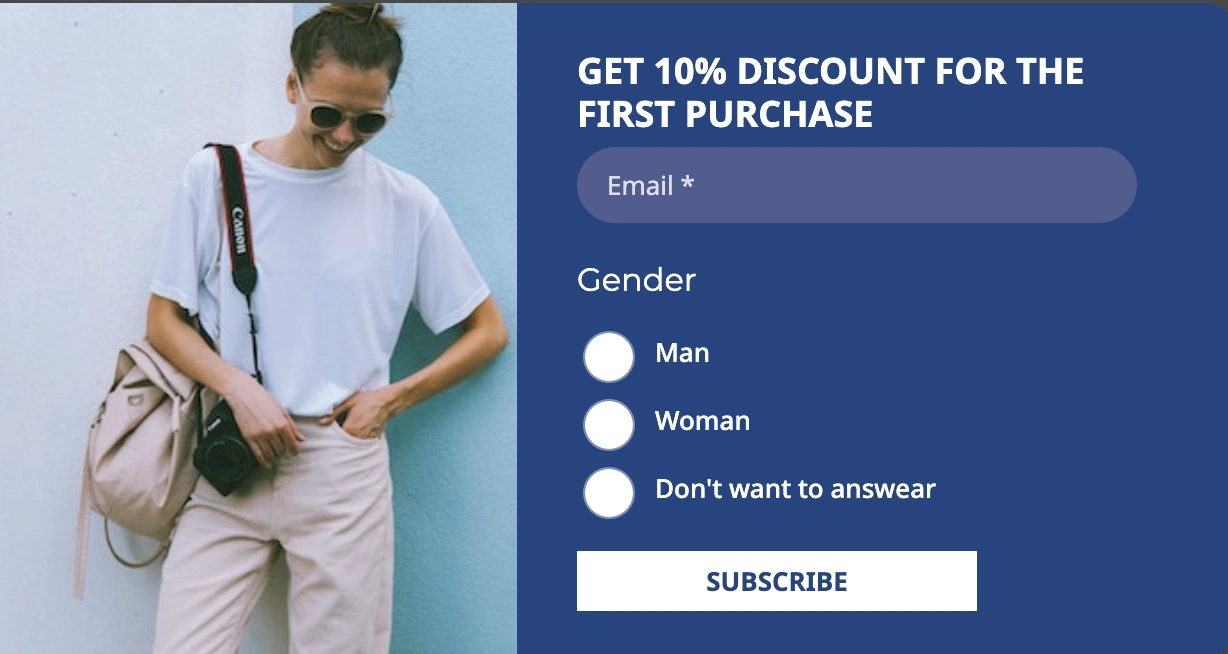
Consider an example of setting up welcome series for male and female.
ImportantBefore creating a welcome series:
- Set up a workflow for double opt-in.
- Create a welcome workflow for each subscription form; then, when you make changes to one workflow, it will not affect the work of others.
- Create welcome emails for different categories of subscribers:
- for male,
- for female,
- for contacts that did not specify gender.
Setting Up a Workflow with Data Validation from the Gender Field
Use the workflow when passing subscriber data by the Subscribe contact API resource. The system saves the data in additional fields and uses it for validation before running the workflow.
You can see additional fields in your account settings on the Additional fields tab.
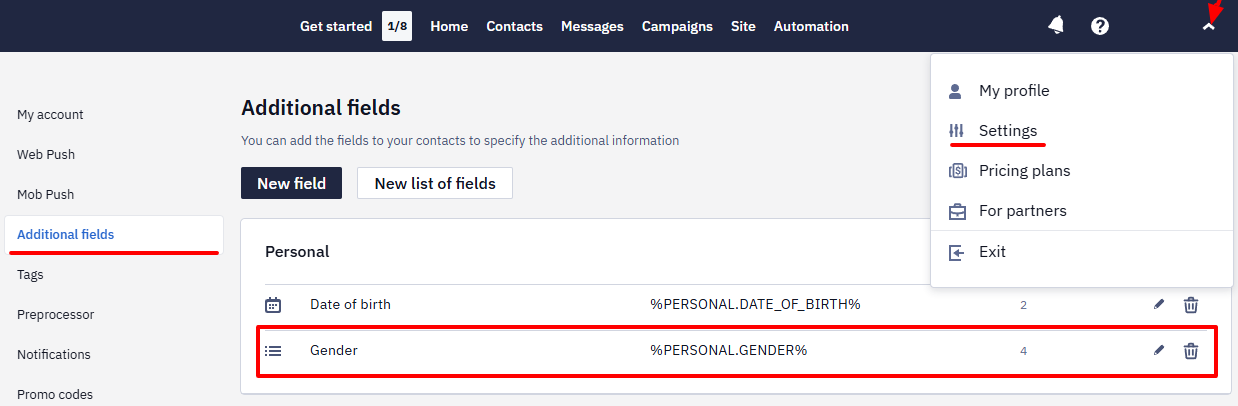
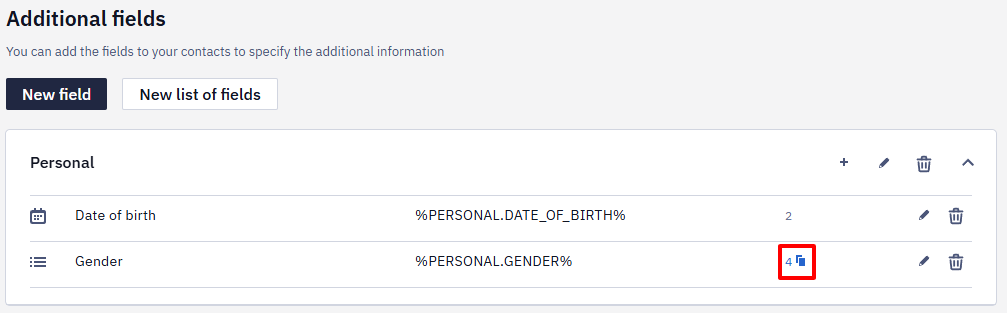
- Copy the field ID.
- Copy the case-sensitive field value to customize the workflow.
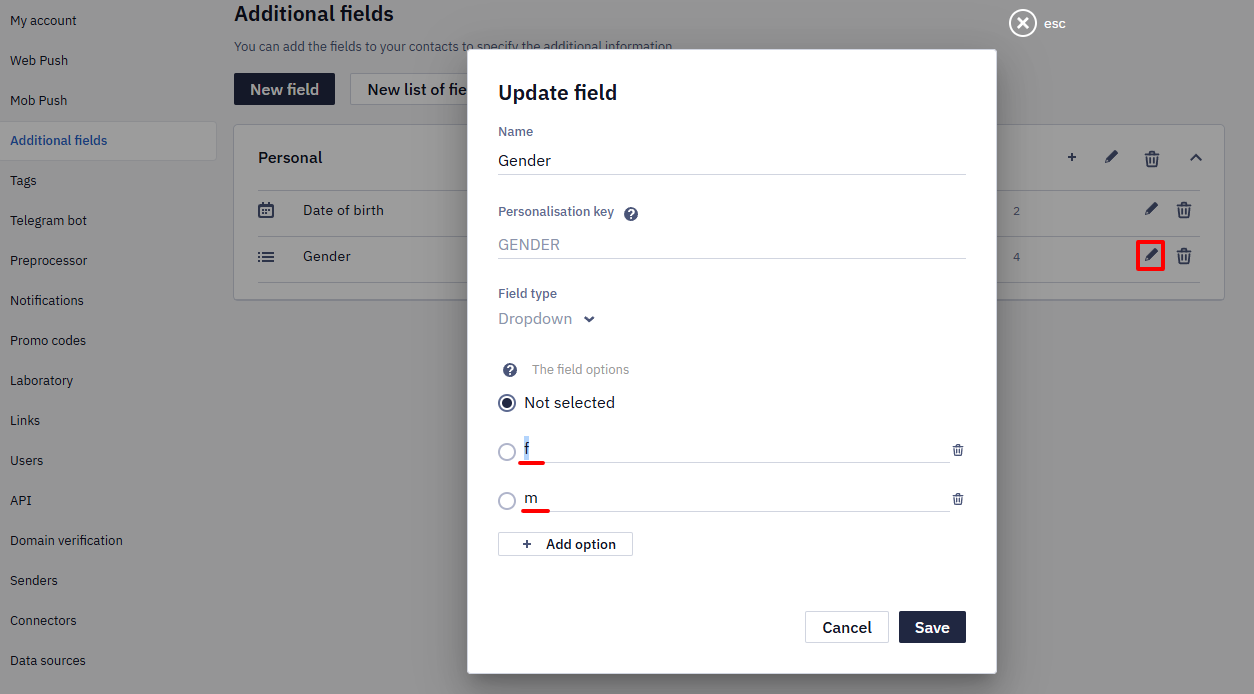
ImportantWhen checking the additional field, the values m and M (f and F) will be considered different. The value in the contact field must match the value in the workflow parameters.
Workflow creation
- Go to Automation → Workflows → New workflow.
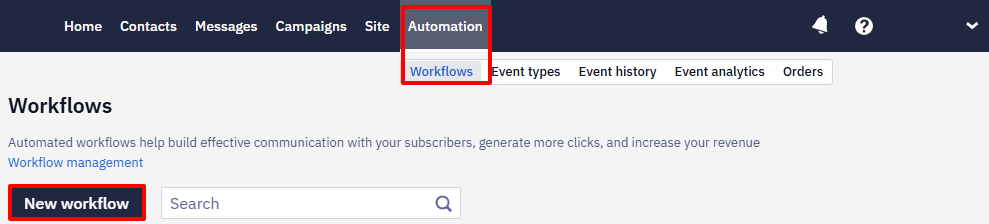
- Put in the workflow’s name and add a tag (optionally).
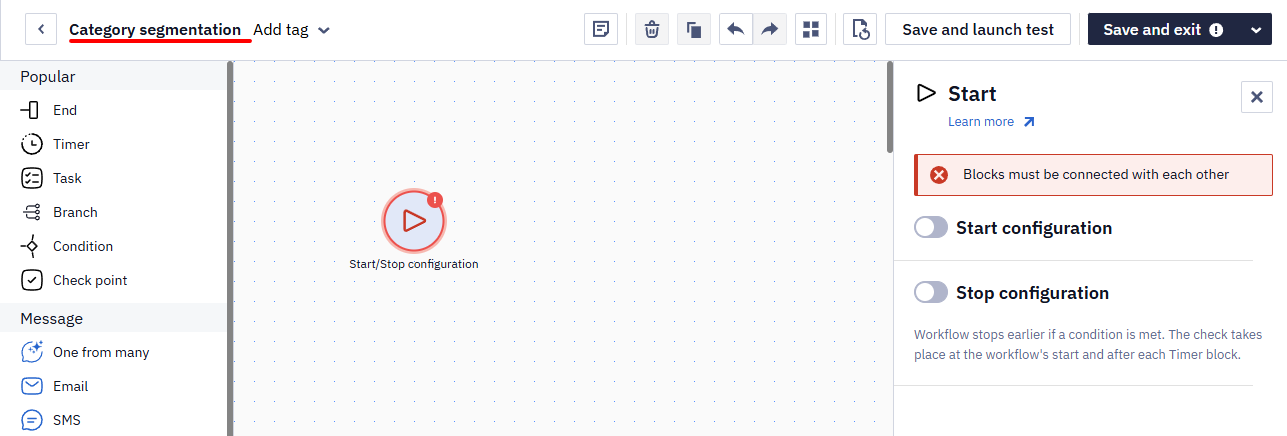
- Add the Confirm contact block. The welcome chain will start after the subscriber confirms their email in the Double Opt-in email.
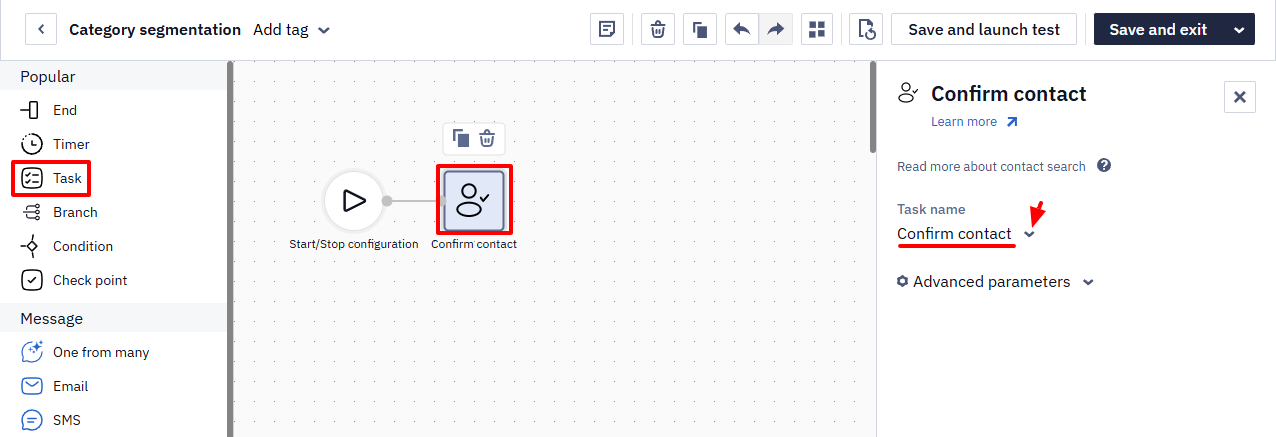
- Add the Get contact block to get contact data.
- Add the Variable matches regular expression block and configure its settings:
- In the name field, indicate the
smartMessageJsonsystem variable, in which information about a contact from the Get contact block is transmitted. - In the pattern field, indicate the value
.*"4":"m".*, where 4 is the gender field ID, and m is a variable corresponding to the male value; the system will check the contact data for compliance with this value.
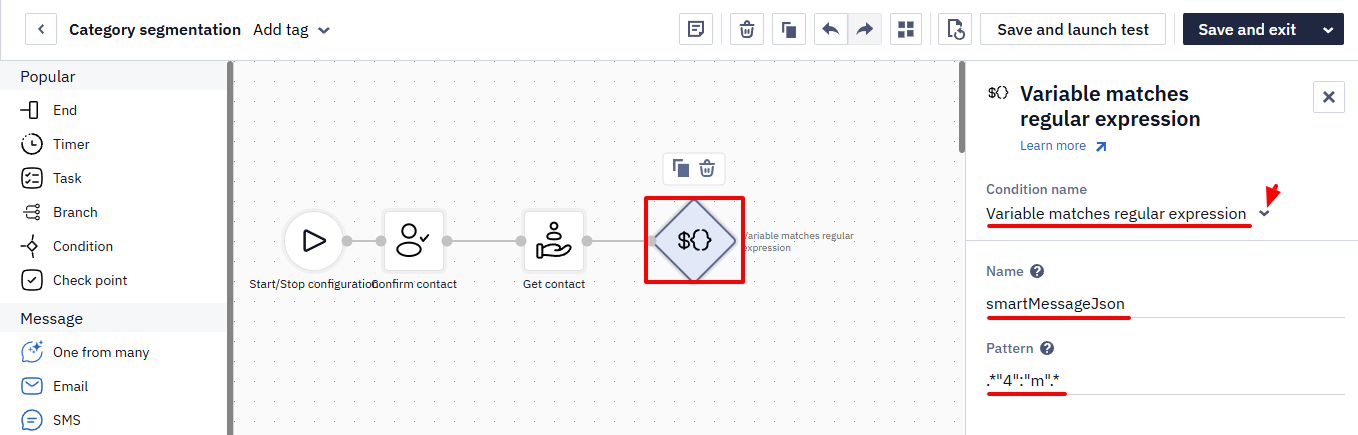
- For the next check of the additional field value, copy the Variable matches regular expression block and indicate the following regular expression in the pattern field:
.*"4": "f".*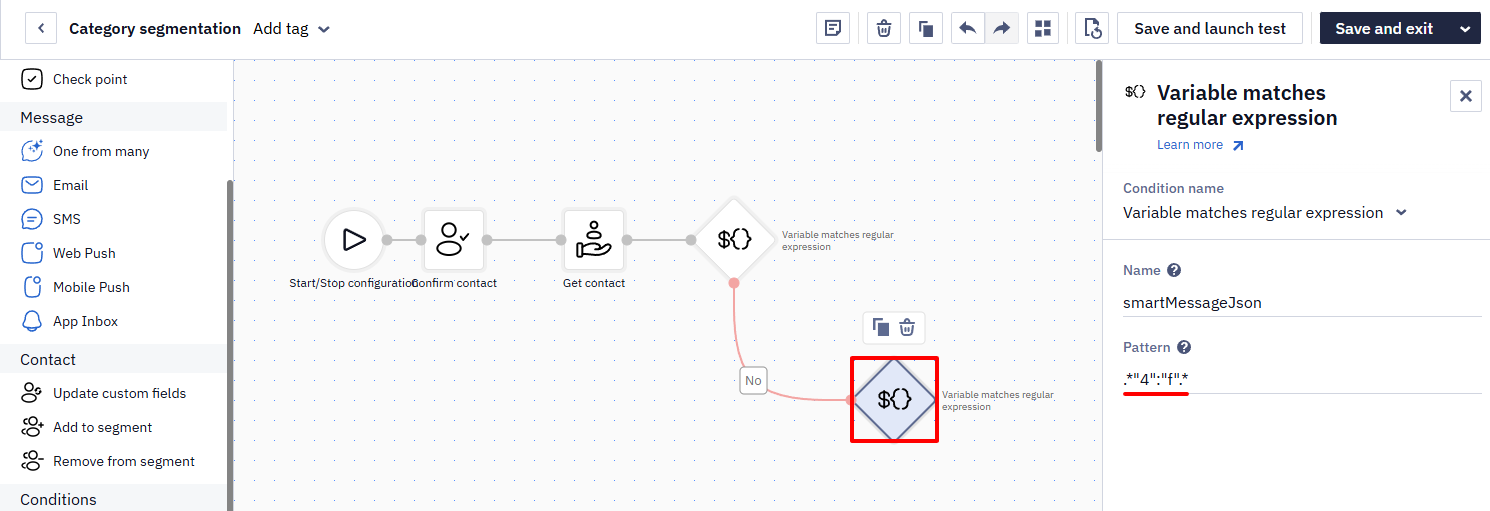
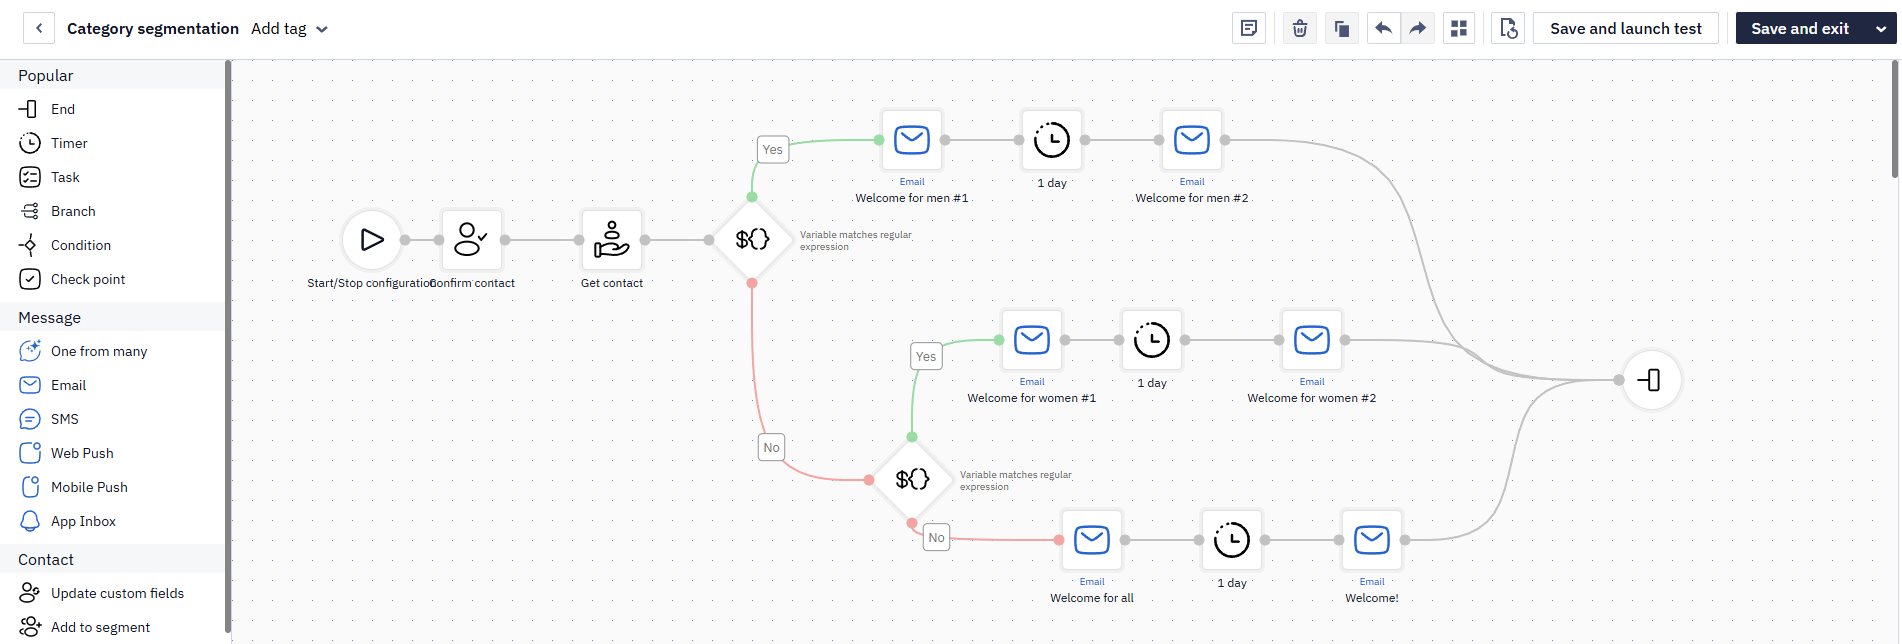
All contacts that do not meet the specified conditions (the value of the field is not equal to m or f) will follow the third branch of the workflow.
-
Add emails (Email block) and a delay in sending messages (Timer block) to each branch, as when setting up a regular welcome series.
-
Finish each branch with the End block.
The welcome workflow for different subscribers’ categories will look as follows:
Similar articles:
- Substituting Email Blocks According to Contact Profile Data
- Splitting the Workflow Depending on the Event Parameters
Updated about 2 months ago