Substitution of Data from the Site in Widgets
eSputnik can use data from your website to personalize widget text and prefill form fields.
Five data types are available for personalizing text with Merge Tags:
- Data layer is a structure that stores data about user actions on the website. For example, a widget can display an offer for the product category that a visitor is currently viewing.
- URL query parameter is a
key=valuepair in the part of a URL after?, for example,https://shop.com/product/123?coupon=PARTNER25. You can use it to pass promo codes, traffic sources, and other values. - JavaScript variable is a variable in the global scope of the page's JavaScript code. It can pass values such as cart total, subscription status, or loyalty tier.
- Cookie stores data in browser cookies that belong to your domain. Cookie values can personalize widgets based on referral source, login status, or previous user actions and persist across sessions.
- Local storage stores data in your domain's browser storage. Its values also persist across page reloads but, unlike cookies, are not sent to the server with every request. Local storage is suitable for storing page-view counts, completed actions, user preferences, and other client-side data.
You can use these values in two ways:
- Merge Tags insert data into headings, descriptions, buttons, and other text elements. All five data types are available for Merge Tags.
- Prefill inserts values into form fields so visitors do not have to enter information that is already known. All five data types listed above are available for prefill. You can also select Static field — a contact field in eSputnik, such as Email.
NoteData layer, JavaScript variable, Cookie, and Local storage are also available as conditions in widget calling rules. Use them to determine when and to whom a widget appears, not only to personalize its content.
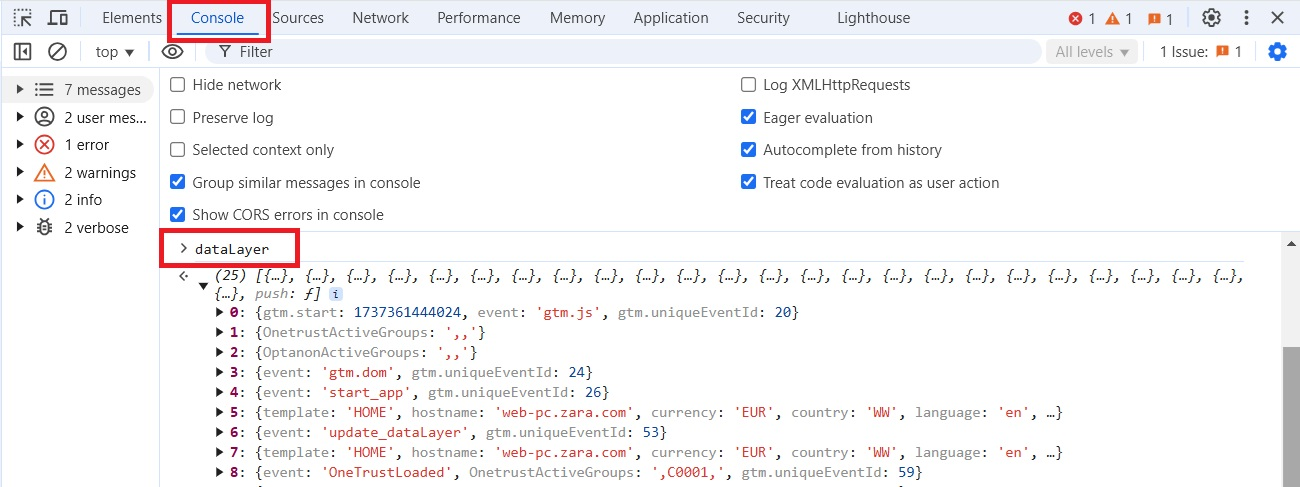
Finding Data in the Data Layer on Your Website
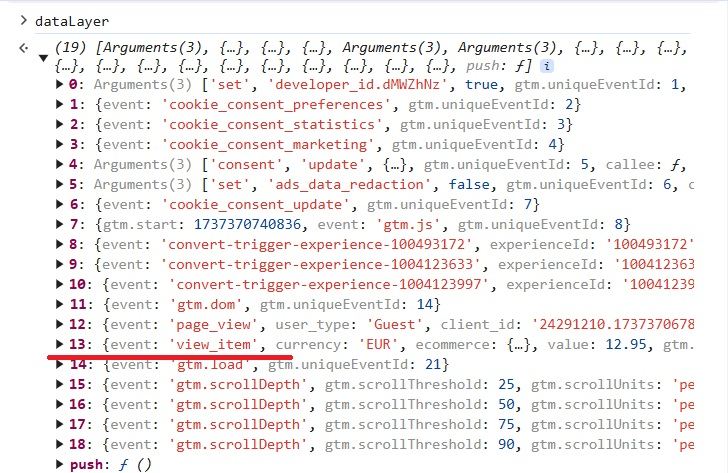
Open Developer Tools in your browser: press Ctrl+Shift+I on Windows or Cmd+Option+I on macOS. You can also right-click the page and select Inspect.
- Open the Console tab.
- Enter
dataLayerand press Enter. - Expand the list to review the Data layer structure and find the required event or parameter.
Using URL Query Parameters
Add the required parameter to a link to your website, for example, https://shop.com/product/123?coupon=PARTNER25. When a visitor follows the link, you can use the parameter value in widget text or a form field. For example: Enter code PARTNER25 — the 25% discount will be applied automatically.
To pass several values, separate the parameters with &:
https://shop.com/product/123?coupon=PARTNER25&source=partnerSetting Up JavaScript Variables on Your Website
To pass variable values to eSputnik, add the script:
- directly to your website code;
- or to a Custom HTML tag in Google Tag Manager (learn more).
Script format:
<script>
  esputnik('addVariables', { variableName: value });
</script>
For example, to pass the subscription status:
<script>
  esputnik('addVariables', { subscribed: false });
</script>
You can also pass several variables at once:
<script>
  esputnik('addVariables', {
    user_age: 25,
    user_status: 'vip'
  });
</script>
Values are stored until the page is reloaded or the visitor navigates to another page, similar to Data layer data.
Adding Merge Tags to Widget Text
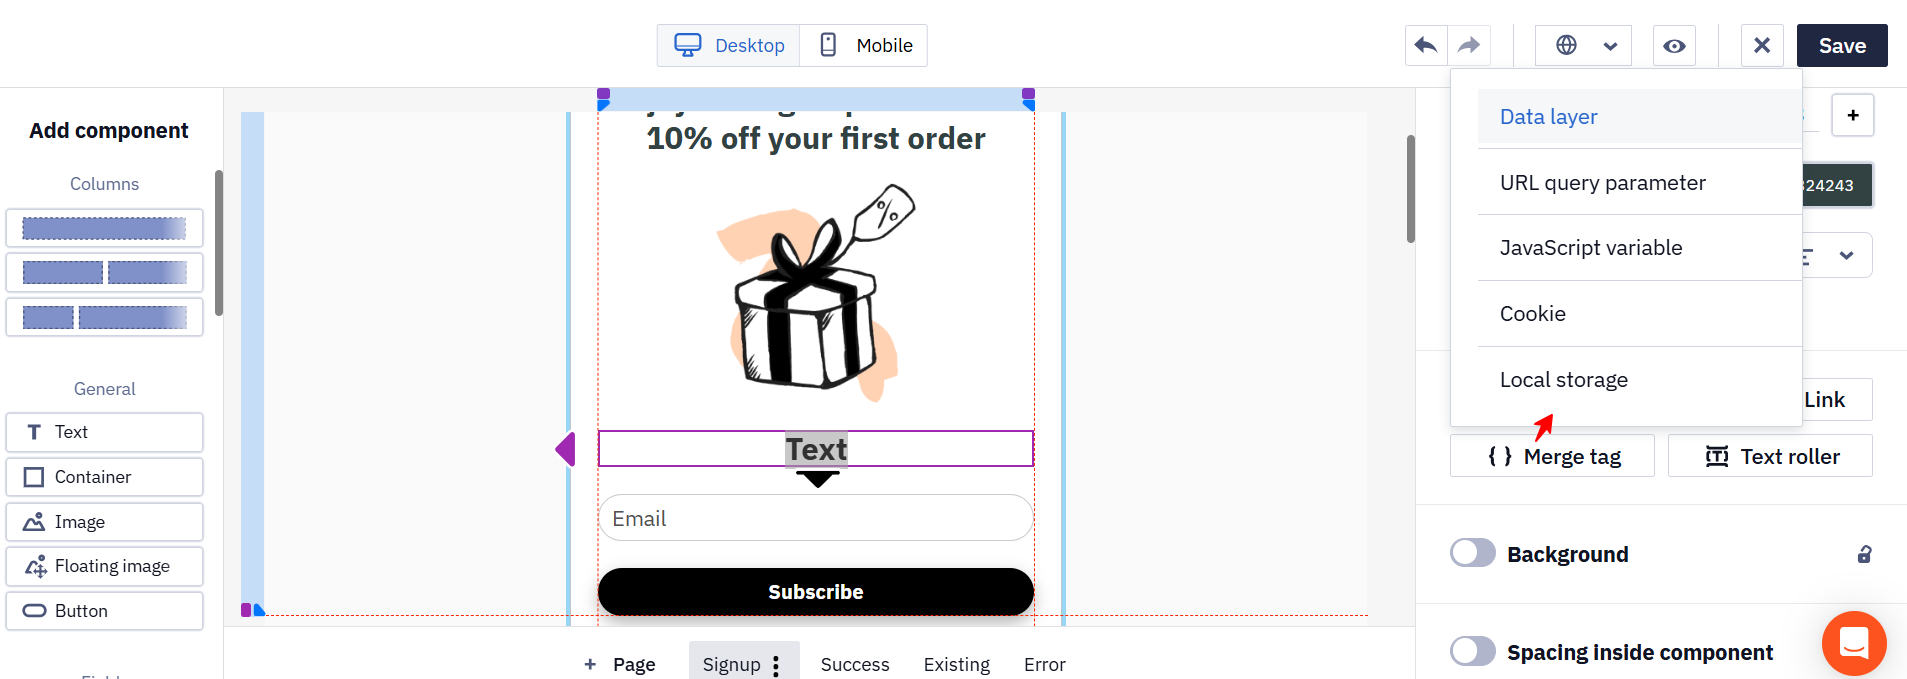
- Go to Site → Widgets, then open an existing widget or create a new one.
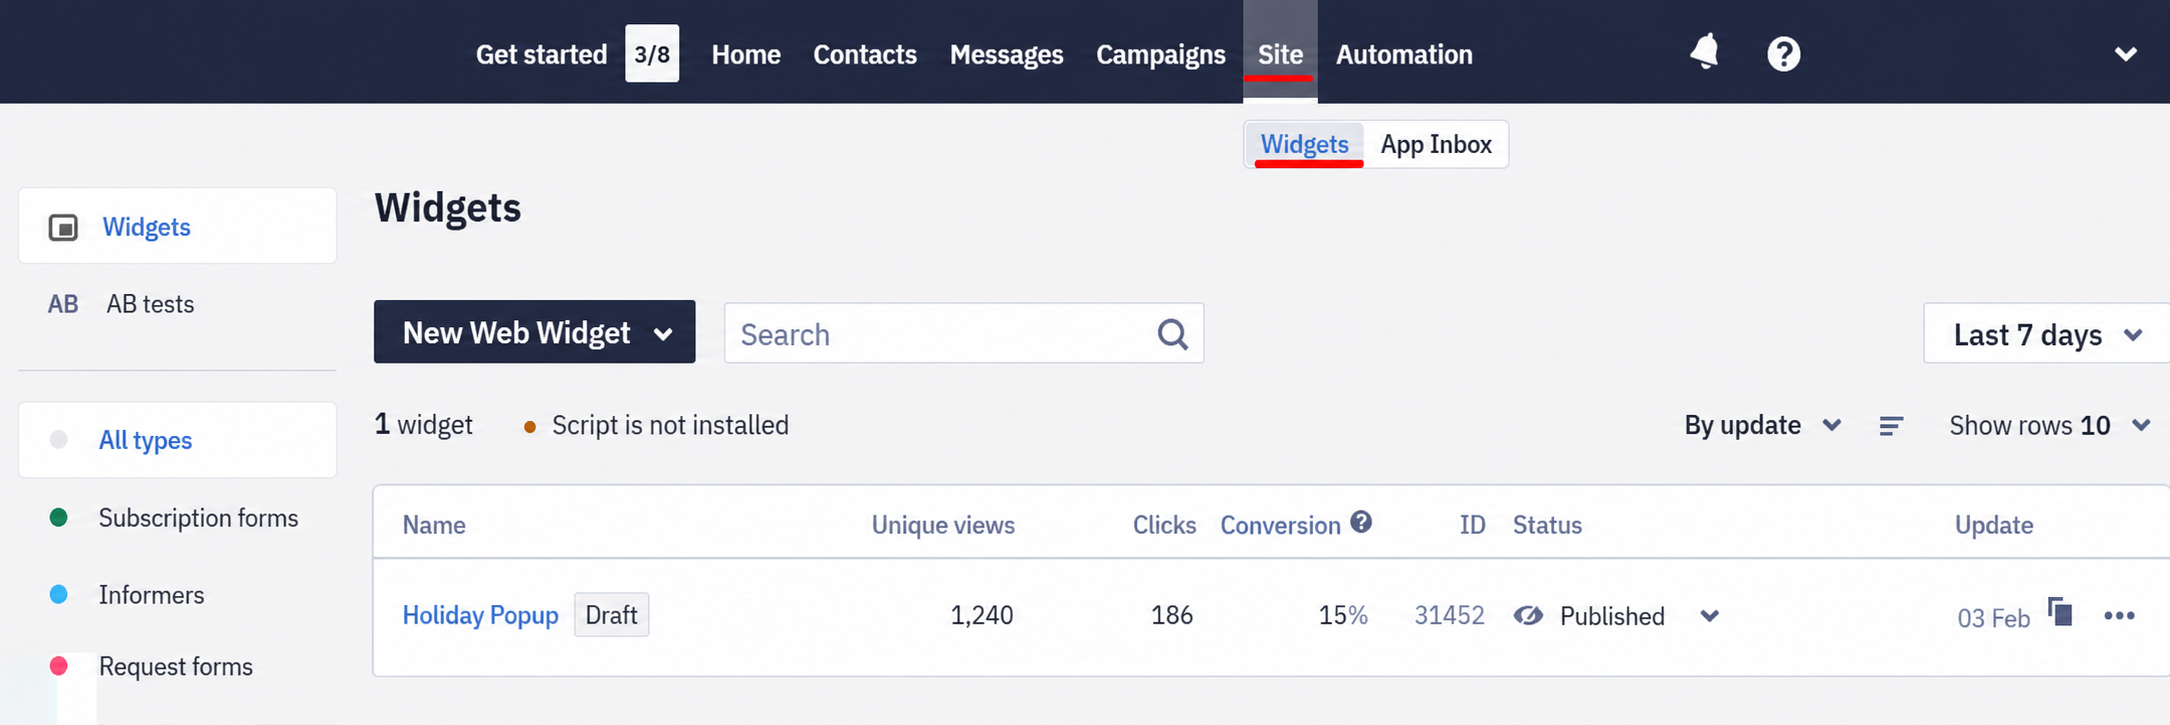
- Select the text you want to personalize, click Merge tag, and choose Data layer, URL query parameter, JavaScript variable, Cookie, or Local storage.
- Configure the Merge Tag according to the selected source.
Data Layer
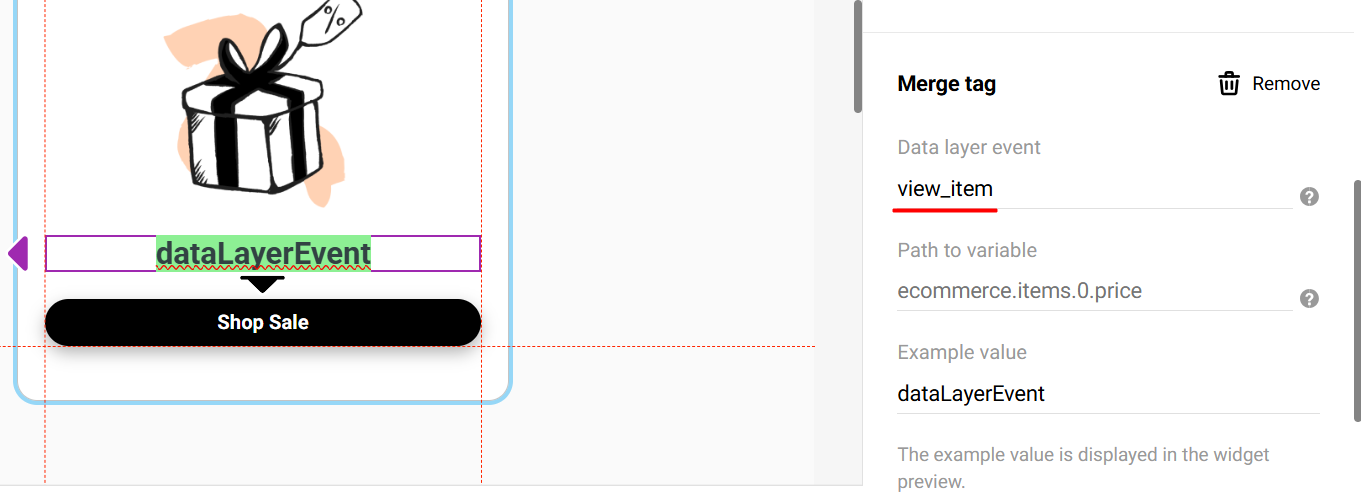
- Data layer event — specify the event name.
- Path to variable — enter the exact path to the required value in the Data layer.
- Example value — add a sample value to preview the widget in the editor.

Note
- The eventName field is optional. It is required only when the Data layer follows Google's recommended structure. If an event has no name, the system can find the required parameter by its path, for example,
ecommerce.items.0.price.- If the Data layer contains several identical or similar parameters, the system uses the last one.
- Parameter names must exactly match the values in the Data layer and meet Google's requirements.
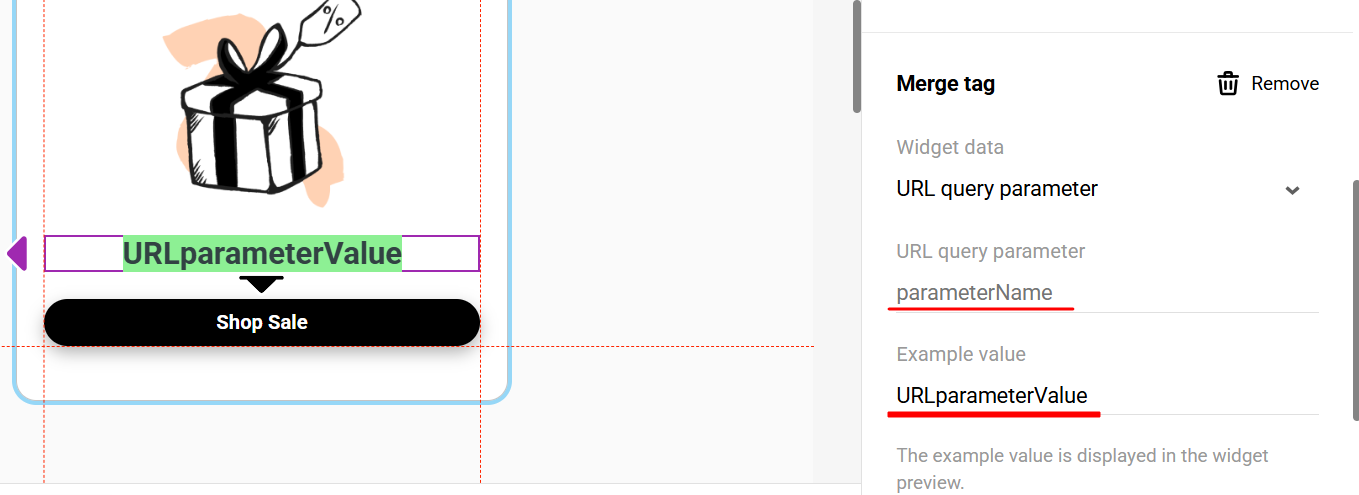
URL Query Parameter
Enter the parameter name and an example value to preview the widget.
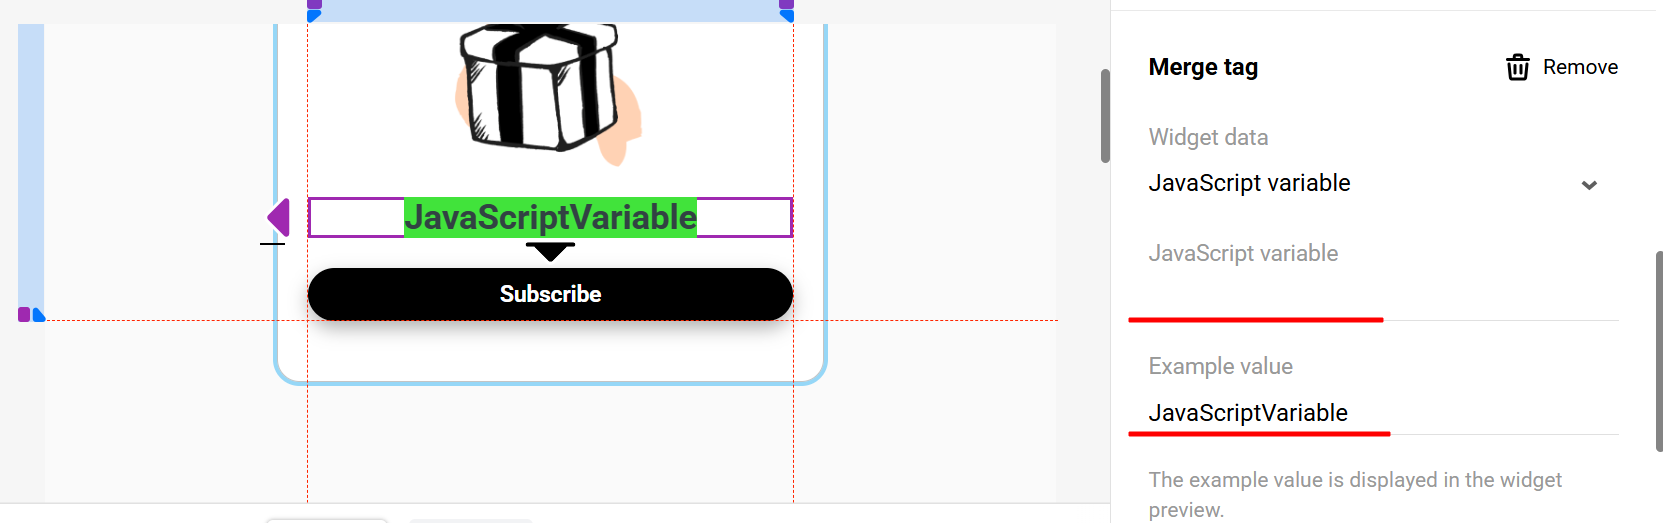
JavaScript Variable
Enter the variable name and an example value to preview the widget.
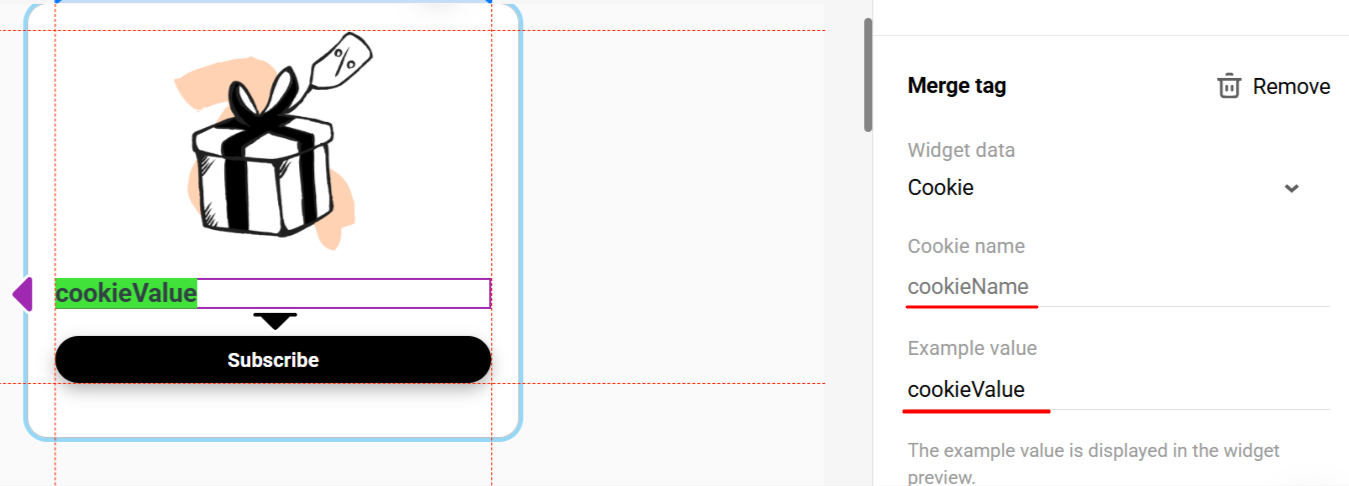
Cookie
Enter the cookie name and an example value to preview the widget.
Note
- eSputnik can read only cookies that belong to your domain. Third-party cookies are unavailable.
- Cookies with the
HttpOnlyattribute are unavailable to JavaScript, so they cannot be used in Merge Tags or for prefill.
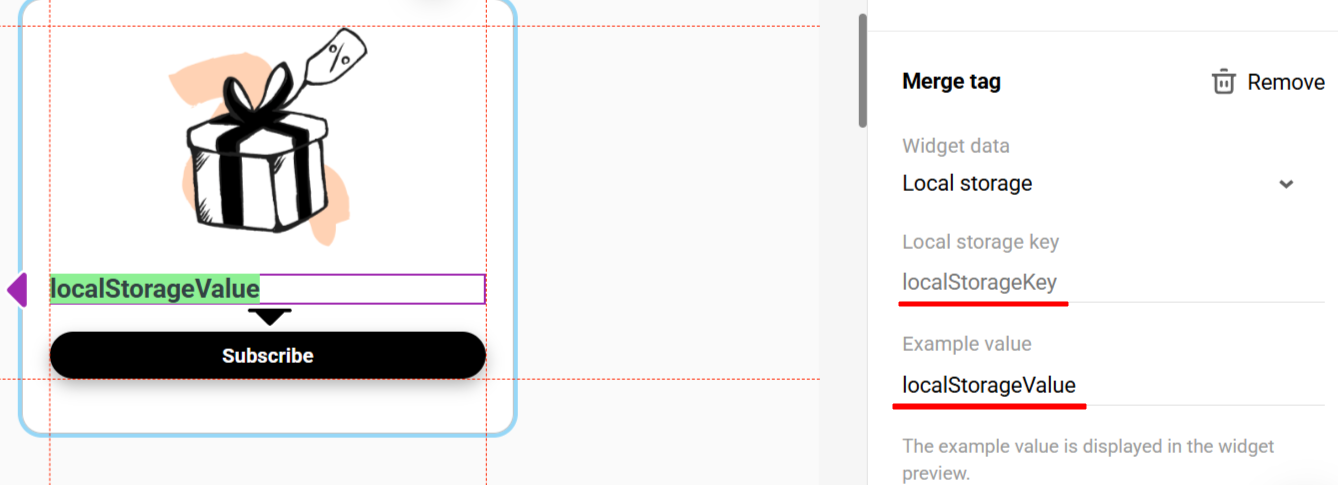
Local Storage
Enter the Local storage key and an example value to preview the widget.
Prefilling Form Fields
Prefill inserts information that is already known about a visitor into a form. For example, you can add the value of the Email contact field from eSputnik, a first name from the Data layer, an email address from a URL parameter, or a phone number from a cookie. The visitor only needs to check the value and submit the form.
Prefill is available for the following fields:
- Email;
- Phone;
- First Name;
- Last Name;
- text fields.
The following options are available:
- Static field — a contact field in eSputnik, such as Email;
- URL query parameter — the value of a URL parameter;
- JavaScript variable — the value of a JavaScript variable;
- Local storage — a value from browser storage;
- Cookie — a value from a cookie that belongs to your domain;
- Data layer event — a parameter value from a Data layer event.
To configure prefill:
- Open the widget in the editor and select the required form field.
- Enable prefill in the field settings.
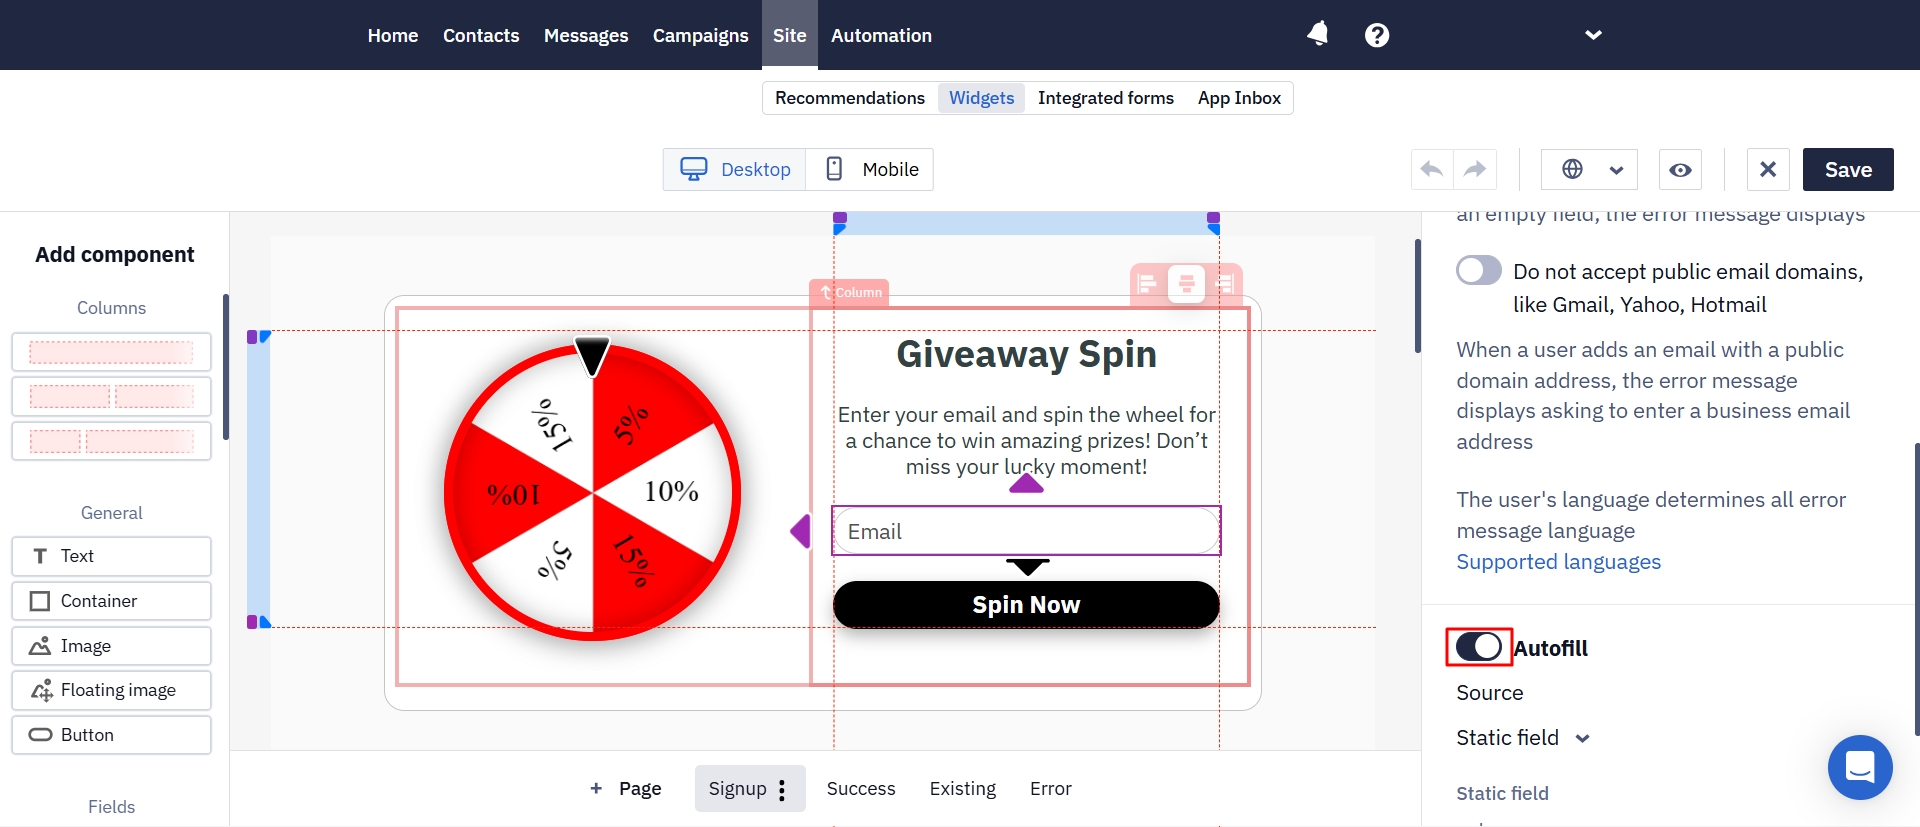
- Select one of the available options.
- Complete the settings displayed for the selected option:
- select the required eSputnik contact field for Static field, for example, Email;
- enter the parameter name for URL query parameter;
- enter the variable name for JavaScript variable;
- enter the key for Local storage;
- enter the cookie name for Cookie;
- specify the event and path to the required value for Data layer event.
- Save the widget and test prefill on your website with sample data.
If the system cannot find a value in the selected source or contact field, the field is not prefilled. It displays its configured placeholder, and the visitor can enter the value manually.
Recommendations
- Make sure the value matches the field format. For example, pass a valid email address to Email and a phone number in a format supported by the form to Phone.
- Do not pass sensitive data in URL parameters. These values may be stored in browser history, server logs, and analytics systems.
- Use cookies in accordance with your privacy policy and consent settings.
Prefill Examples
| Option | Example Setup | Result |
|---|---|---|
| Static field | Contact field Email | The form displays the value of the contact's Email field. |
| URL query parameter | Parameter firstName in https://shop.com/sale?firstName=Olena | The First Name field displays Olena. |
| JavaScript variable | Variable customerName | The field displays the current variable value. |
| Local storage | Key customer_phone | The form uses the phone number stored under this key. |
| Cookie | Cookie user_email | The Email field displays the cookie value. |
| Data layer event | Event and path user.firstName | The First Name field displays the value from the Data layer. |
When values differ between visitors, test the widget with several sample datasets.
Data Layer Use Cases for Merge Tags
Displaying the Viewed Product Category in a Widget
Scenario
A visitor browses products in a specific category. You want to attract their attention with a pop-up offering a 10% discount when they purchase two products from that category.
Setup
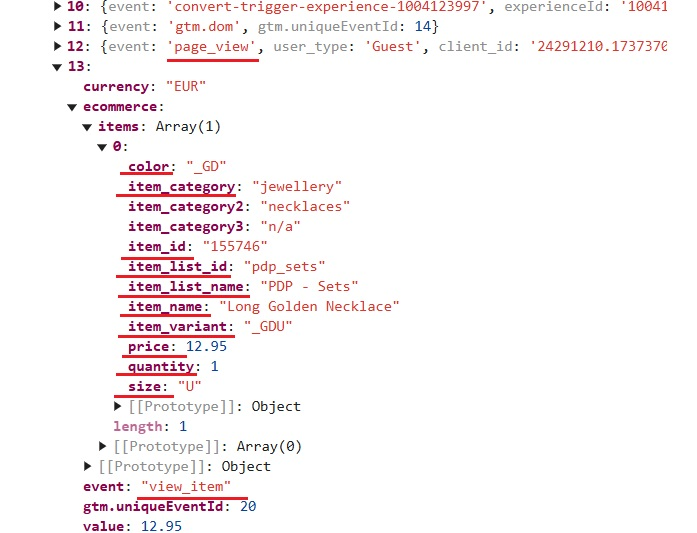
- In Data layer event, specify the
view_itemevent from which the system will retrieve data.
- Open Developer Tools on your website and find the
view_itemevent in the Data layer.
- Find the property that contains the product category name. In this example, it is
item_category.
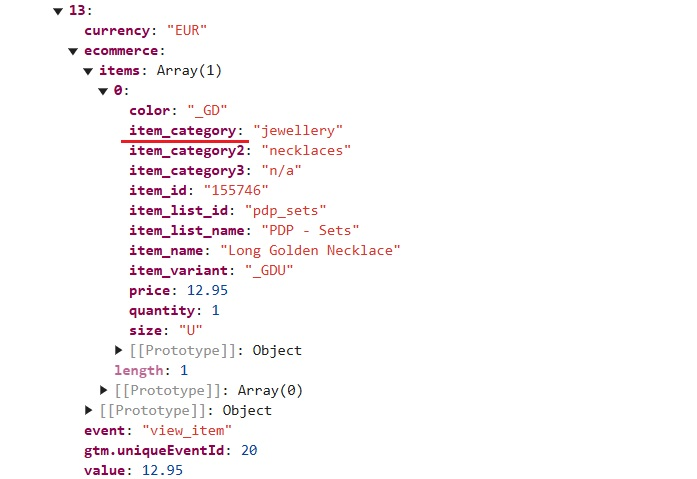
- Right-click the line containing
item_categoryand copy its property path.
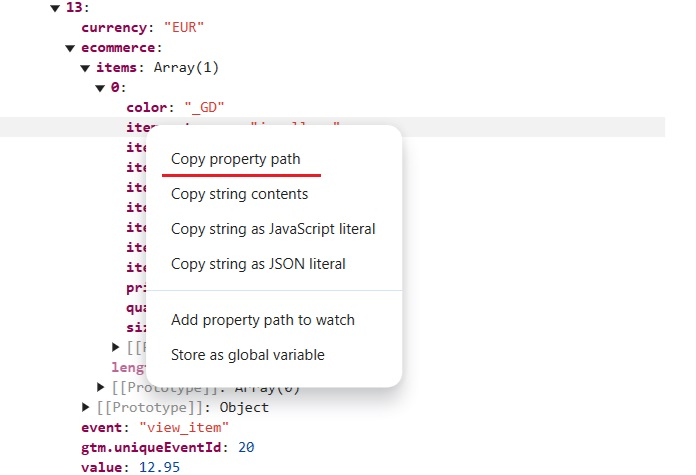
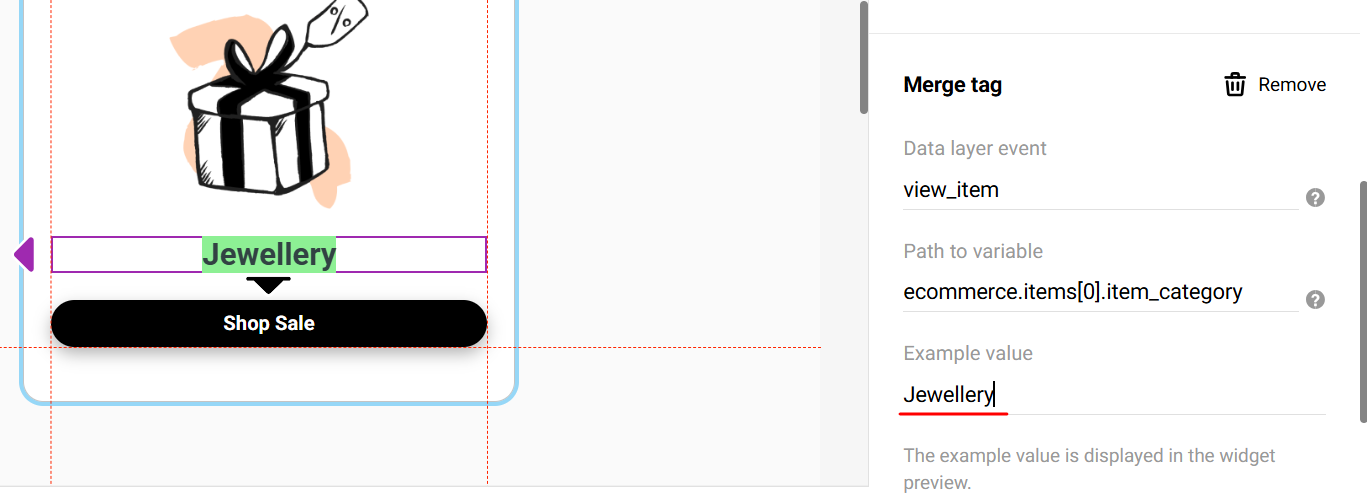
- Paste the path into Path to variable and remove the initial array index and period —
13.in this example.
![Merge tag settings panel with the Path to variable field showing the array index crossed out before ecommerce.items[0].item_category](https://files.readme.io/0ae5ccebc746e85db8d1a0ddaf48ef6128865e662b51023afef666f34967cc64-image.png)
- In Example value, enter a sample value, such as
Jewellery, to preview the widget in the editor.
Abandoned Cart Reminder with a Product Name
Scenario
A visitor adds a product to the cart but does not proceed to checkout. To encourage them to return, show a pop-up with the product name and an additional offer.
Setup
- Data layer event:
add_to_cart. - Path to variable:
ecommerce.items[0].item_name.
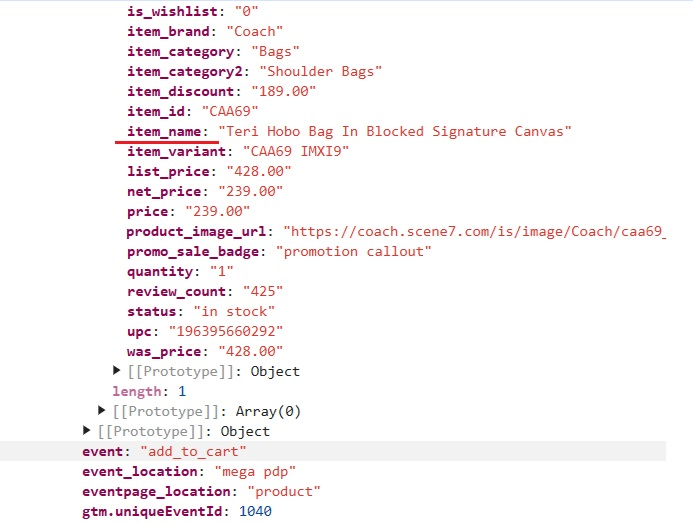
- Example value:
Item name.
![Merge tag settings panel with the Data layer event set to add_to_cart, Path to variable set to ecommerce.items[0].item_name, and Example value set to Item name](https://files.readme.io/b66ab064ef57a95cba5a57082aea82e6b159559a3d7ee7d4da6d59924f6965db-image.png)
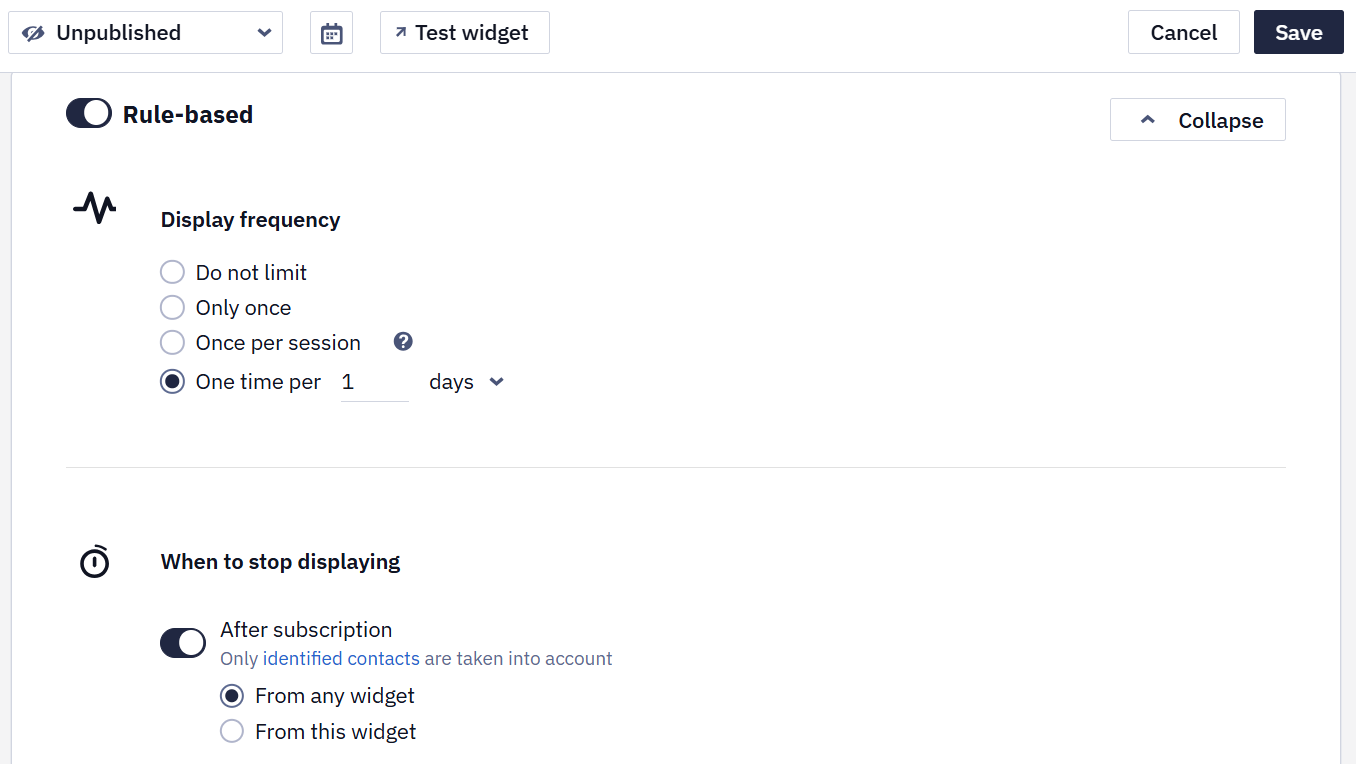
After saving the pop-up, configure its calling rules, such as time spent on the website, inactivity, or an attempt to leave the page.
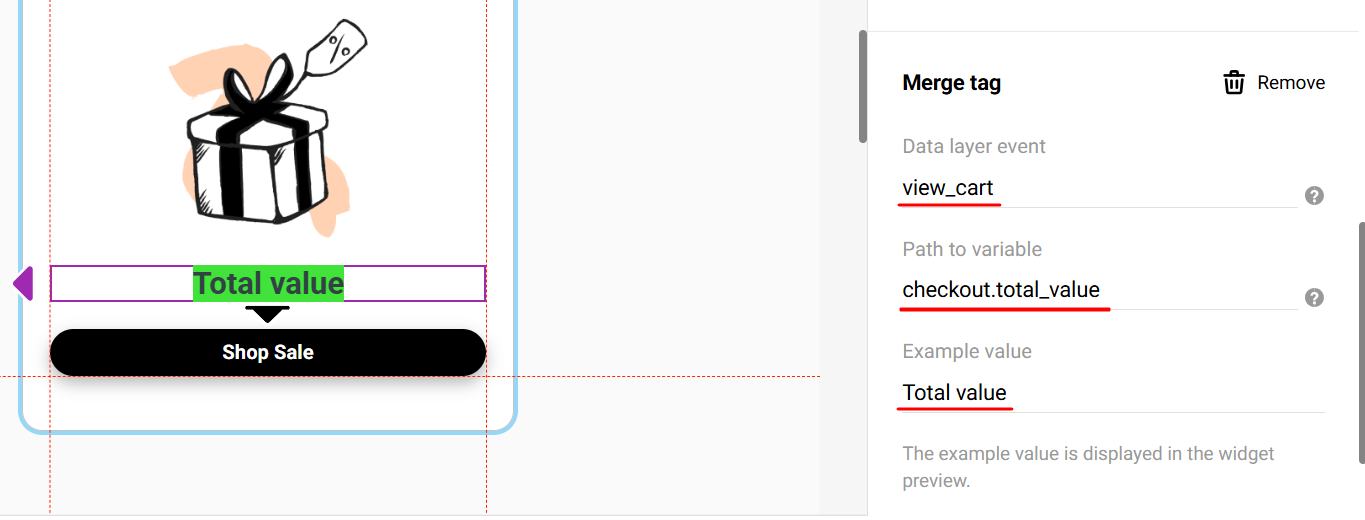
Increasing the Order Value
Scenario
To encourage customers to add more products, display a message such as: Spend $300 to get a 10% discount. Your cart total is currently N, where N is replaced with the current cart value.
Setup
- Data layer event:
view_cart. - Path to variable:
checkout.total_value.
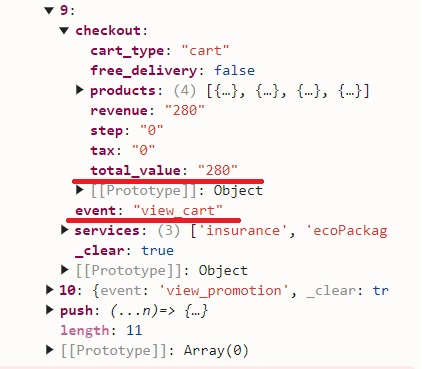
- Example value:
Total value.
JavaScript Variable Use Case
Personalizing an Offer by Loyalty Tier
Scenario
You want to show an exclusive offer to VIP customers and a standard promotion to other visitors. The loyalty tier becomes available after the user logs in.
Setup
- Pass the loyalty tier through a JavaScript variable:
<script>
  esputnik('addVariables', { loyalty_tier: 'vip' });
</script>- Add the variable as a Merge Tag to the pop-up text, for example: As a {{loyalty_tier}} program member, here is a special offer for you.
You can also create a separate pop-up for VIP customers and add the following condition to its calling rules: JavaScript variable loyalty_tier equals vip.
Cookie Use Cases
Offer for Visitors from a Partner Website
Scenario
A visitor comes to your website through a partner link. You want to show a personalized pop-up with a promo code or special welcome message.
Setup
- Cookie name:
referral. - Example value:
partner123.
The Merge Tag inserts the value into the pop-up text: Welcome from {{referral}}! Here is a special 15% discount for you.
Offer Based on a Viewed Category
Scenario
The website stores the last category viewed by a visitor in a cookie. Use this value to display a relevant offer.
Setup
- Cookie name:
lastViewedCategory. - Example value:
Shoes.
The Merge Tag inserts the value into the pop-up text: The new {{lastViewedCategory}} collection is here!
Local Storage Use Cases
Recommendation Based on Quiz Results
Scenario
Your website has a quiz or product configurator. After completion, the result is saved to Local storage. Display it in a widget immediately or during the next visit.
Setup
- Local storage key:
recommended_product. - Example value:
Running shoes.
The Merge Tag inserts the value into the pop-up text: Based on your answers, {{recommended_product}} are a good fit for you. Get 10% off your first order.
Bonus Points Reminder
Scenario
After login, the website saves the visitor's bonus point balance to Local storage. Remind them about the points in a pop-up to encourage a purchase.
Setup
- Local storage key:
bonus_points. - Example value:
350.
The Merge Tag inserts the value into the pop-up text: You have {{bonus_points}} bonus points — use them before the end of the month.
Potential Issues
Merge Tags
| Issue | Result |
|---|---|
| Data layer is missing | The widget will not appear |
| Path to variable is empty or incorrect | The system cannot retrieve the required value |
| The path leads to an object or an array of objects | The widget will not appear |
| The path leads to an array of primitive values, such as strings | Values appear separated by commas and spaces |
| The parameter is missing from the URL | The widget will not appear |
| The JavaScript variable is undefined | The widget will not appear |
The cookie belongs to another domain or has the HttpOnly attribute | The widget will not appear |
| The Local storage key does not exist or has no value | The widget will not appear |
Prefill
If the selected source or contact field does not contain the required value, the field remains available for manual input and displays its configured placeholder.
Updated 4 days ago