Events
An event is a signal about changes in the user profile. Events can be generated by changes in the profile field values, by user activity or inactivity (on the website, in campaigns), or by pre-configured API requests. They are used to launch triggered campaigns i. e. serve as triggers. As soon as the system receives a signal about a certain event (for example, a click or added product), it automatically launches the corresponding workflow.
Events can be generated both in the system and in external systems such as CRM or CMS. In the second case, events are sent to our platform via API.
Event Categories
There are 6 event categories in our system:
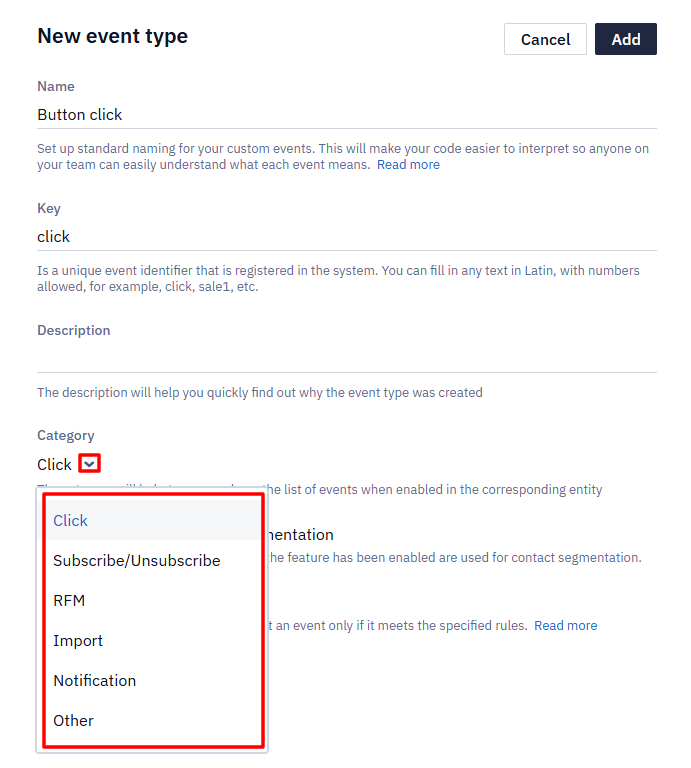
- Click: generated by a click on the link in the email assigned to the event. This is a default category. Read more on how to assign a workflow to a CTA.
- Subscribe/Unsubscribe: generated by a click on Subscribe/Unsubscribe in the subscription form or on the unsubscribe page. This is a service category that is configured by our support team when they create the corresponding form.
- RFM: generated when subscribers migrate between segments depending on their activity. The category is chosen when you set up triggers based on RFM analysis (R – the time since the last activity (purchase/open); F – the frequency of purchases or opens; M – money customers spent). For example, you can set up a trigger when users move from the segment "bought 3 months ago" to the segment "bought 6 months ago" category, and send corresponding reactivation campaigns in time.
- Import: a default category that is used to launch a workflow after contact import. You can also create other events in the Import category on your own. For example, import of male contacts only can launch one workflow, and import of female contacts only – another.
- Notification: a service category that is automatically created after trigger failure alerts settings.
- Other: generated by all custom events that can be created manually or sent via API, for example, website registration, adds to cart, etc.
Events from the categories Link and Other are most common, events from RFM and Import are less common. To facilitate the automation process, the following most often used events are available in the system by default:
- Confirmed subscription (Click);
- Import of new contacts (Import);
- Filled form (Subscribe/Unsubscribe).
Creating an Event Type
You can create events in two ways:
- Automatically (via API, after setting up the launch conditions for regular workflow and workflow based on changes in the contact's field)
- Manually.
The event sent via API is automatically registered in the Other category. Read more on API integration.
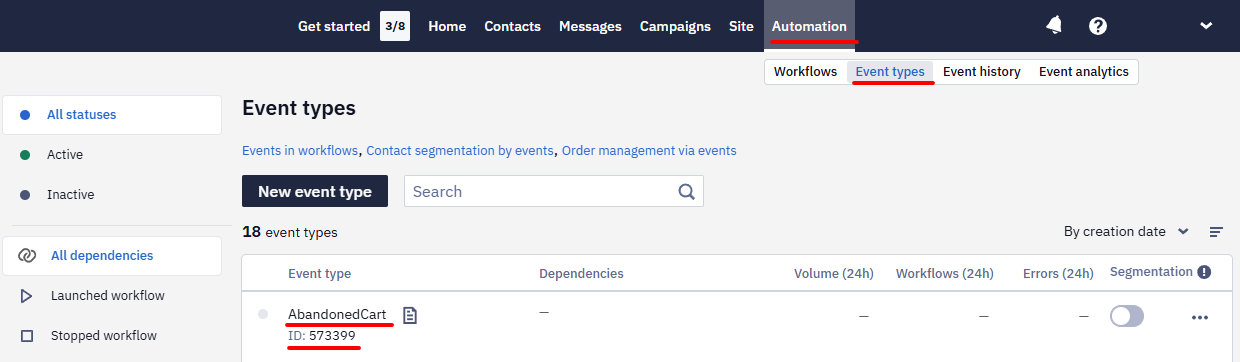
To create an event manually, go to Automation → Event types and click New event type.

Follow the steps below:
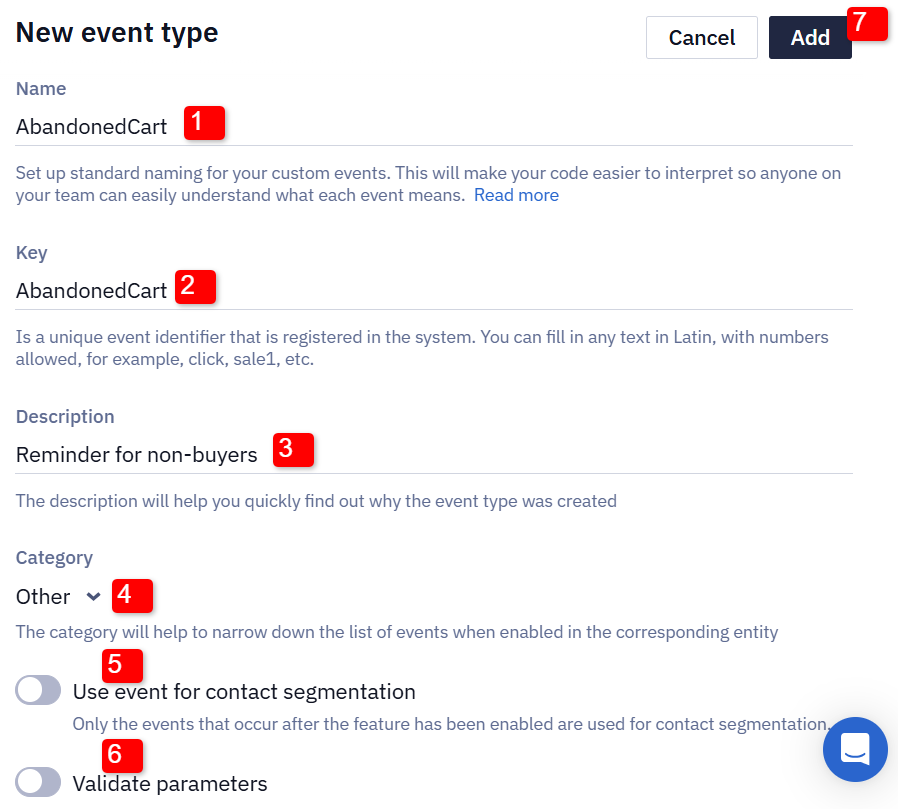
- Fill in Name (required).
- Fill in Key (required). A key is a unique event identifier that is registered in the system. You can fill in any text in Latin, with numbers allowed, for example, click, sale1, etc.
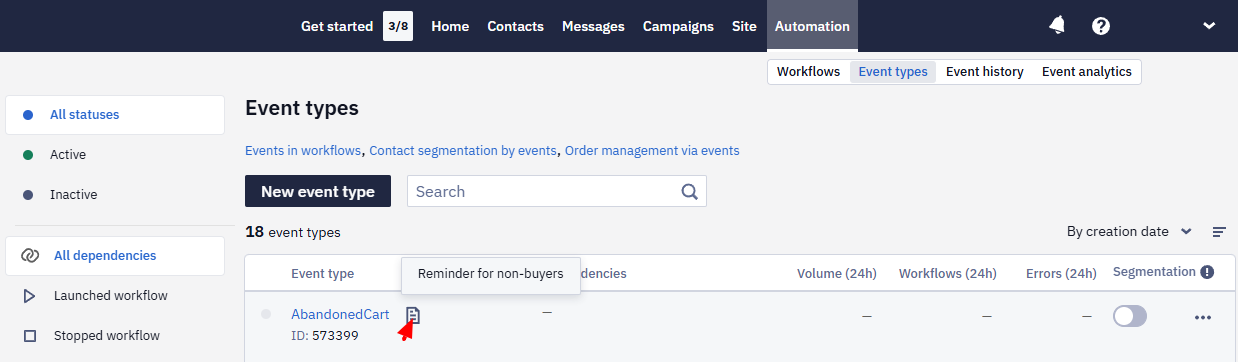
- Add a description that will help you quickly identify what the event is used for. Next to the event type name in the general list, you will see a document icon; when you hover over it, a description will appear.
- In Category, select the necessary event category.
- If you're subscribed to Segmentation by user events, enable Use event for contact segmentation. Segmentation primarily applies to user-generated events sent via API. To subscribe, please contact our sales team [email protected]
- Enable Validate parameters.
If the option is enabled, the system only accepts an event whose structure complies with the validation rules.
More about Validating Event parameters >
- Click Add.
After this, a new event type appears in the Event types list and the system will automatically assign it a unique ID.
Launching a Triggered Campaign on Event
Creation will differ depending on the event category, but the main steps are as follows:
Step 1. Registration in the System
At this stage, you need to create an event in eSputnik or provide integration with the system to send custom events via the API (see "Creating an event").
Create an event manually or send it via API. All created events are displayed in Automation → Event types.

Step 2. Create a Workflow
Create a workflow that will be launched by the created event. For example:
- click in the message (Click);
- subscription (Subscribe/Unsubscribe);
- import of new contacts (Import);
- migration of subscribers from active to passive (RFM);
- website and app activity (Other, Subscription, View);
- order (initialized, in progress, delivered, canceled).
- Go to Automation → Workflows and click New workflow.

- Enter the workflow name and description (optionally).
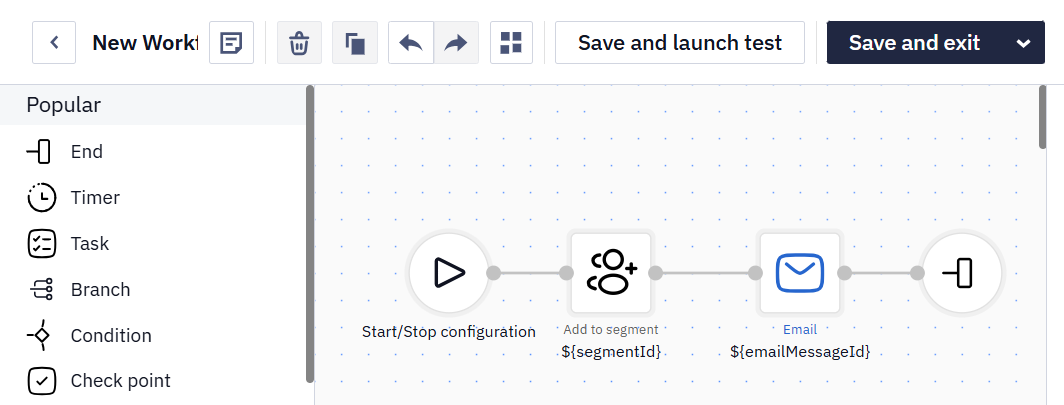
- Build the workflow by dragging the necessary blocks and connecting them.
This is an example of the workflow that will be triggered by a click on the Learn more button in the message. All contacts that have clicked this button will be added to a separate segment Opened, and will receive an additional message with details of the previous offer.
NoteTo extract the data out of order and pass it to the message, use Get order block
Step 3. Link the Event to the Workflow
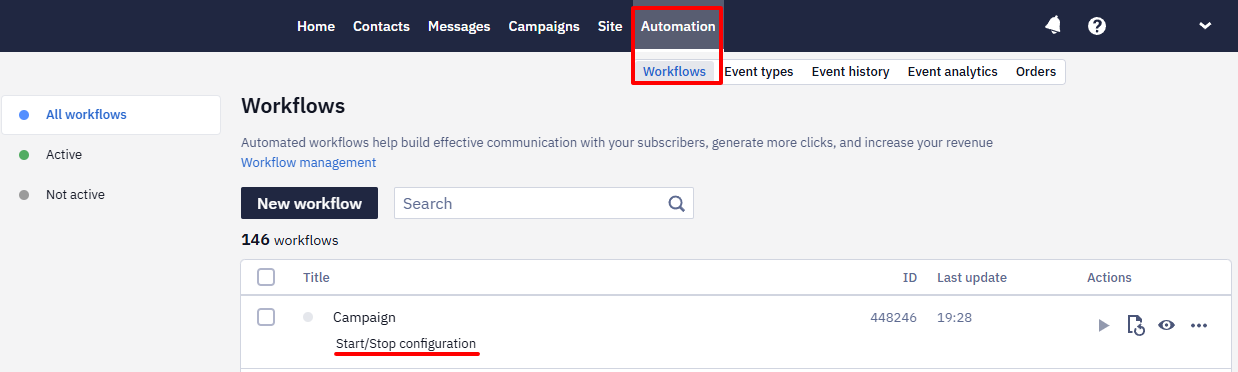
- Go to Automation → Workflows and click Start/Stop configuration.
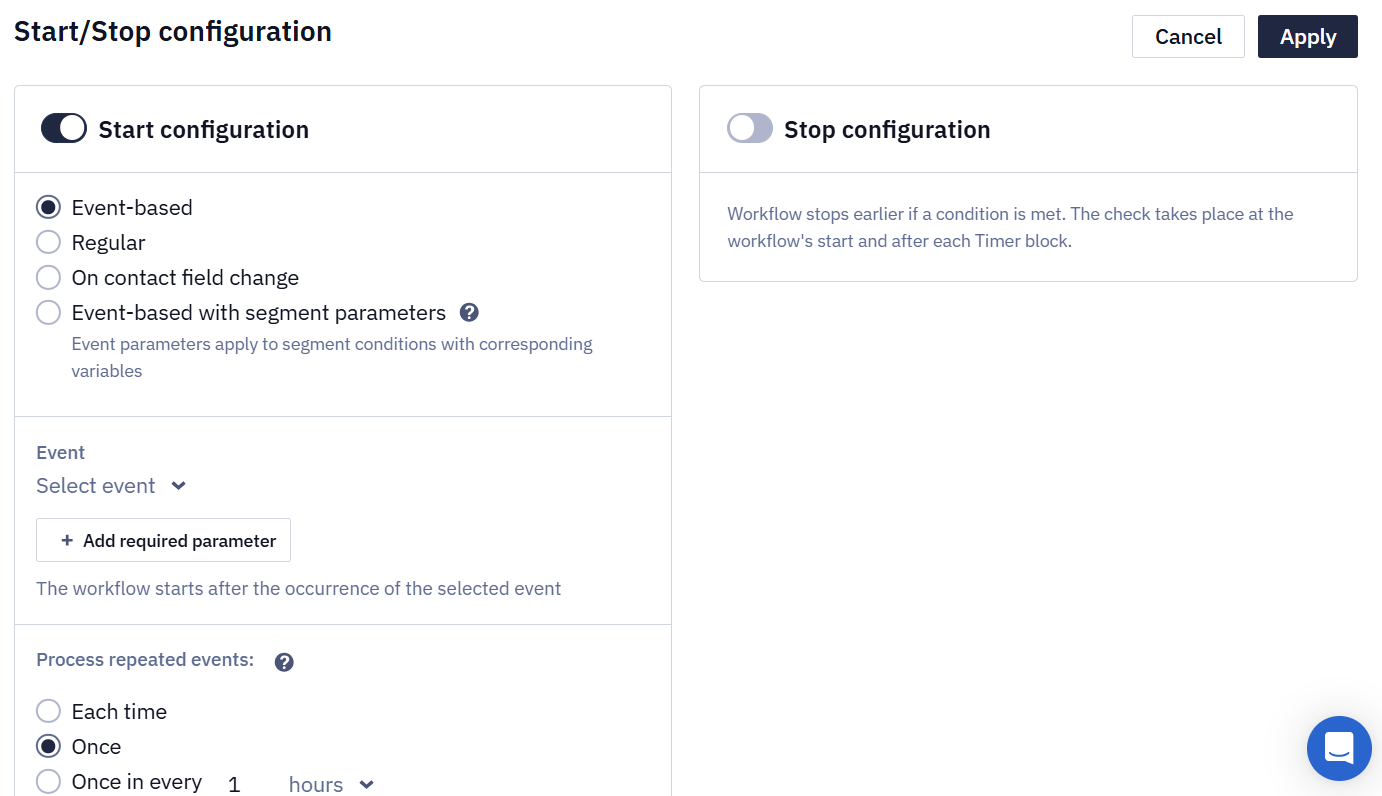
- In pop-up window activate Start configuration switcher and select the event.
- Click the Event-based tab and select one of the process unique events option:
- Each time: to launch the workflow each time when receiving the event. For example, choose this option for the triggered workflow Order. Each time your customer makes an order, they will receive a corresponding message (for example, confirmation). If they make 3 separate orders per day, they will receive 3 messages.
- Once: to launch the workflow only once regardless of the number of events sent by the same contact. For example, choose this option for a welcome series after the first purchase: no matter how many orders the customer makes, they will receive only one welcome series.
- Once in every____ hours/days/weeks/months: to launch the workflow once within a given period of time. For example, choose once in 1 hour for abandoned carts. If the same customer abandons cart 3 times in an hour, the workflow will process only one event and send only one message.
NoteBy default (the Each time option), a workflow re-triggers on every repeat occurrence of the linked event, even if the event carries the same data (for example, the same order). To prevent duplicate runs for the same event data, choose Once or Once in every____ instead.
- Click Apply.
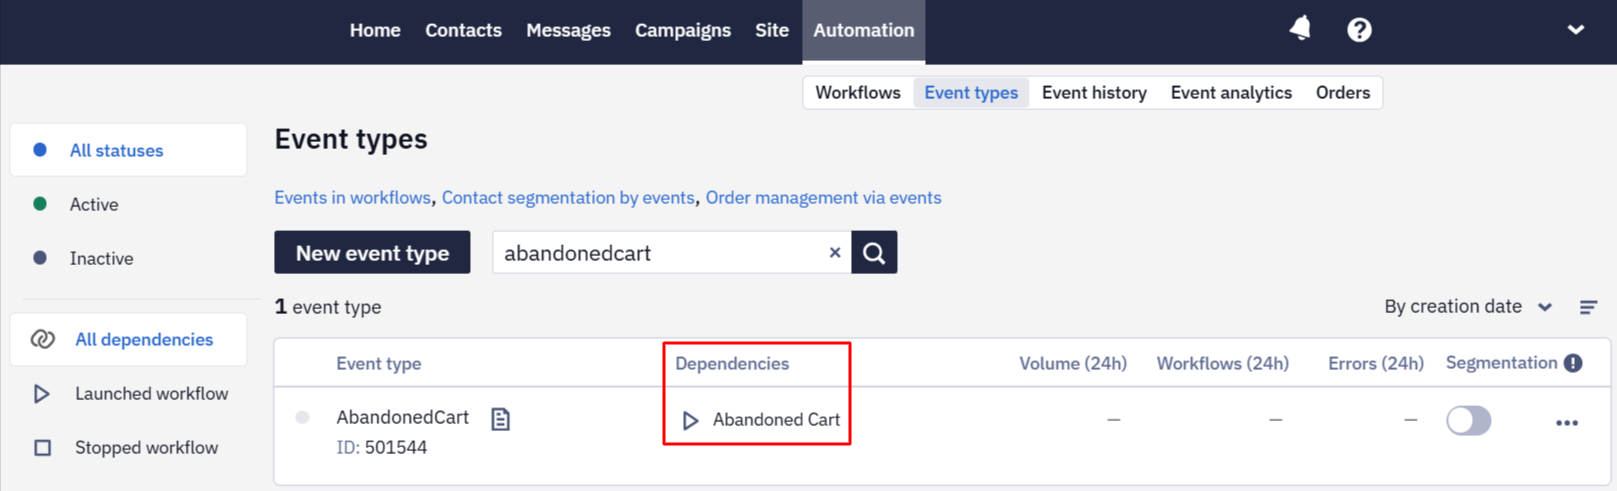
The event will appear in Launch configuration of the configured workflow. The workflow will appear in the Dependencies of the assigned event.
Step 4. Launch the Workflow
Click the Activate icon and confirm your action.
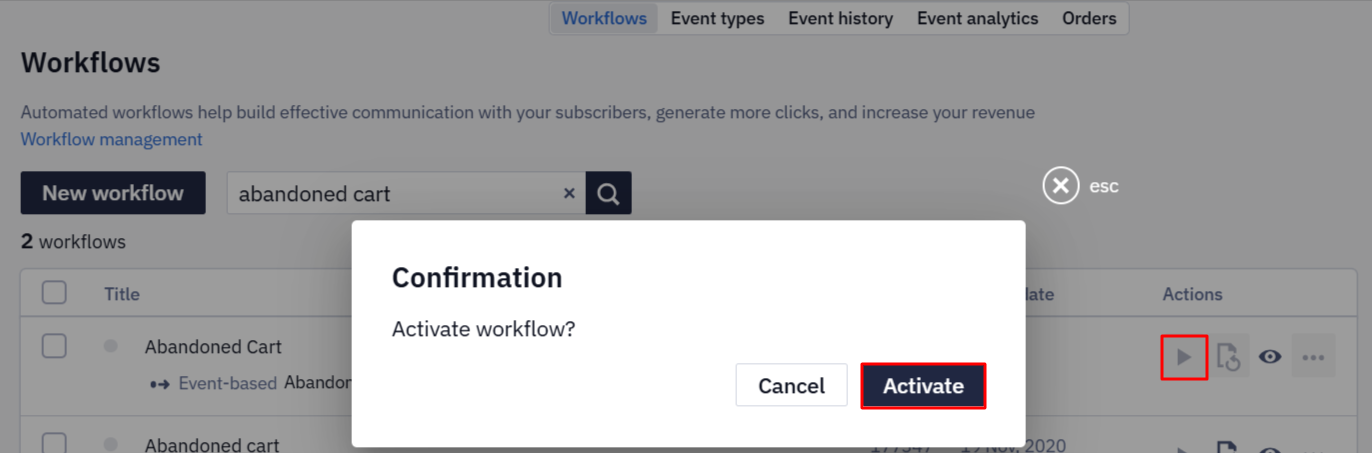
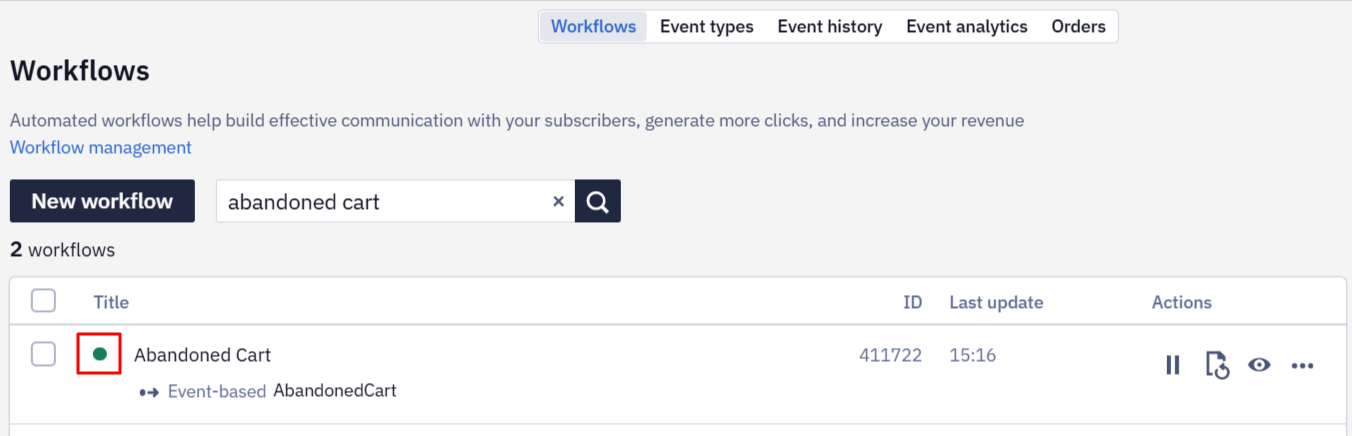
The status of the workflow will change to active.
After you link the event to the workflow, this event will trigger the workflow launch for the contact whose information (email address, phone number, token) is sent in the event. Contact information is sent in an integral part of the event.
{
  "params": {
    "ContactId": "22222",
    "EmailAddress": "[email protected]"
  }
}
Viewing, sorting, and validating event parameters
Go to Automation → Event types to view available event types.
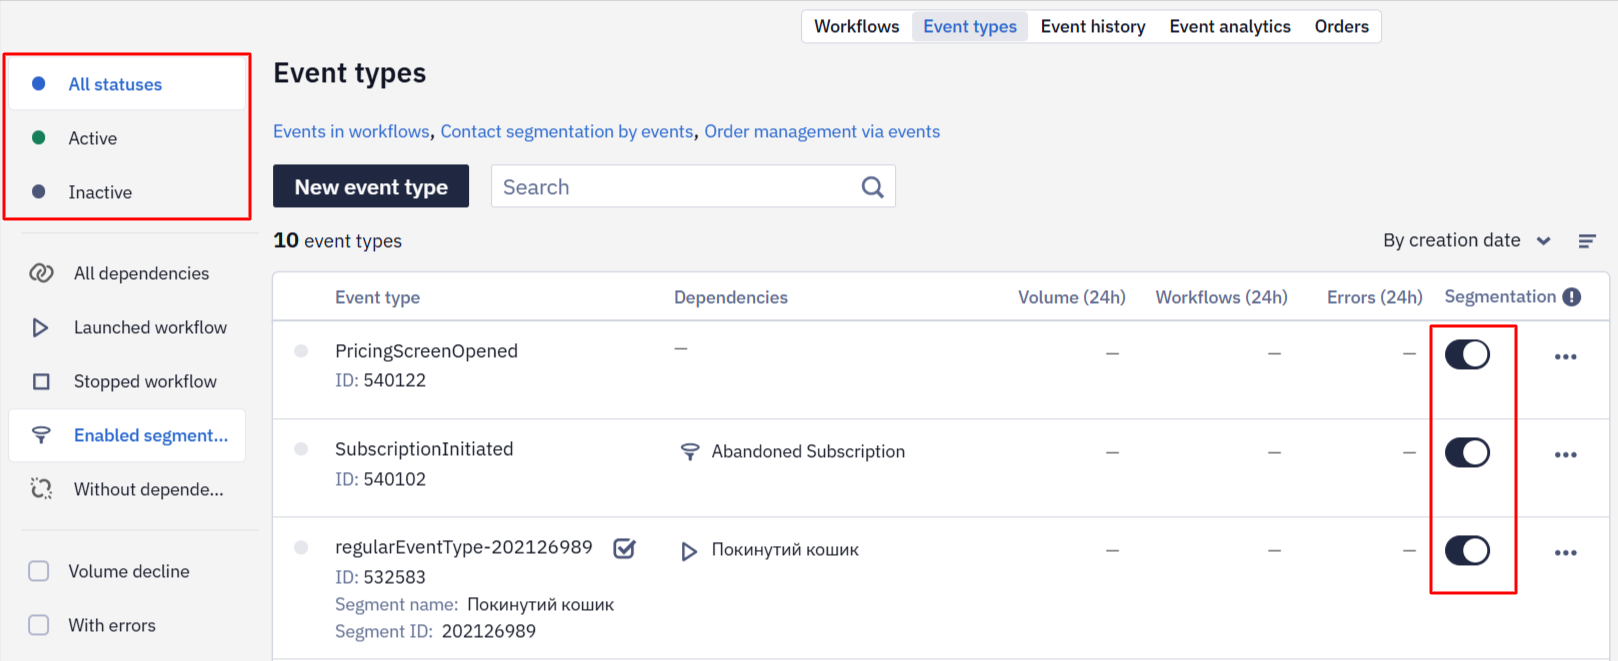
Activity Statuses
To sort events by activity, select the appropriate filter:
- All statuses
- Active
- Inactive
Event Type Dependencies
Event type dependencies represent the relation between the event type and a workflow or dynamic segment.
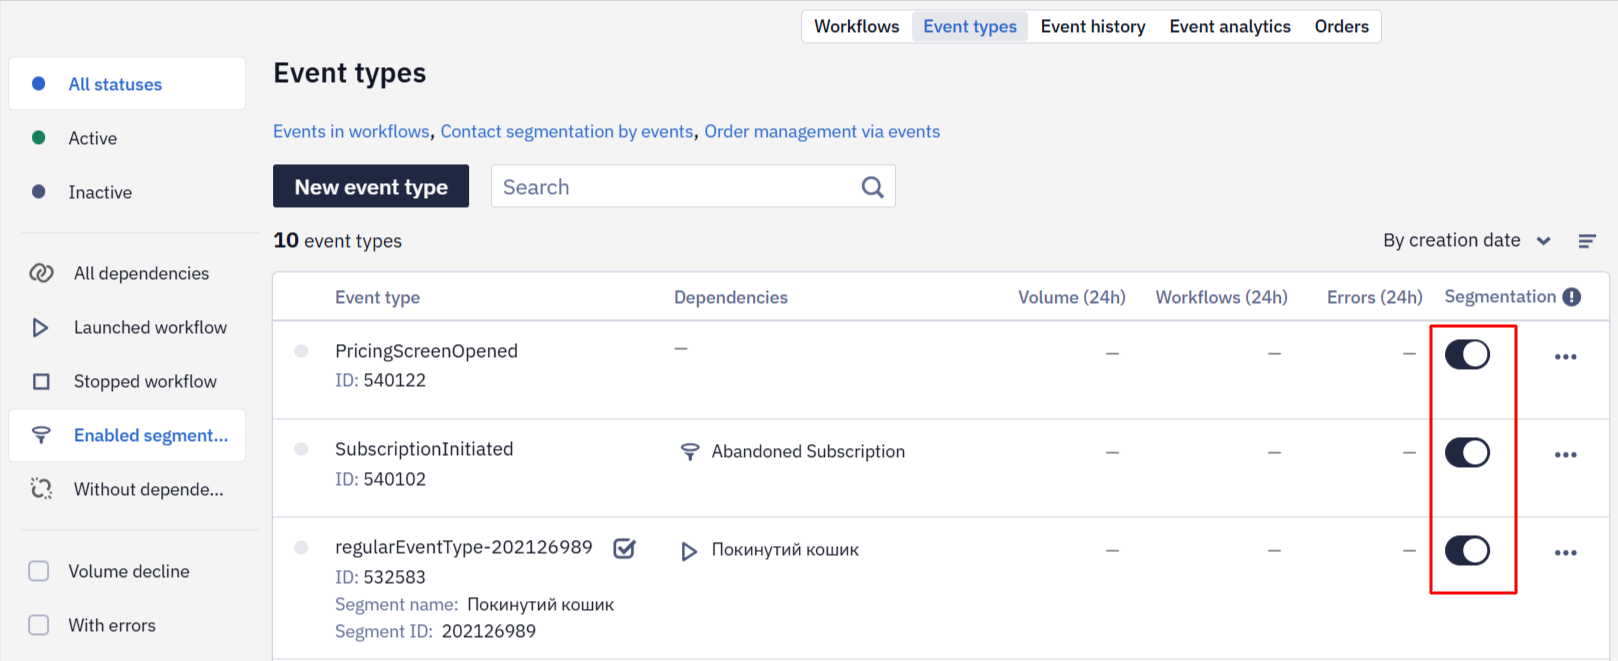
To filter event types by dependencies, select the tab:
- All dependencies
- Launch workflow (specified in the workflow start configuration),
- Stop workflow (specified in the workflow stop configuration),
- Enabled segmentation (events are used to build a dynamic segment),
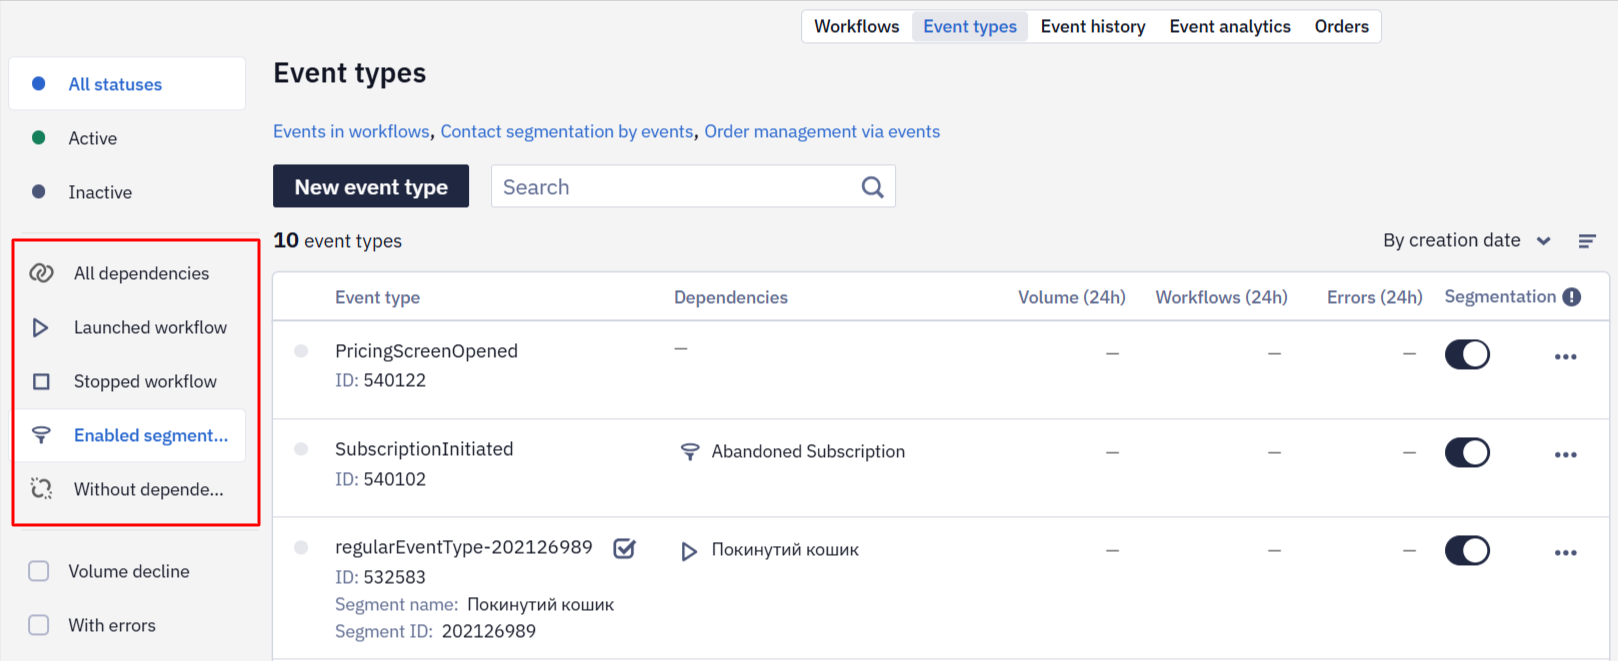
- Without dependencies.
NoteOne event type can have multiple related workflows and dynamic segments. In this case, dependencies are grouped, and their quantity is displayed.
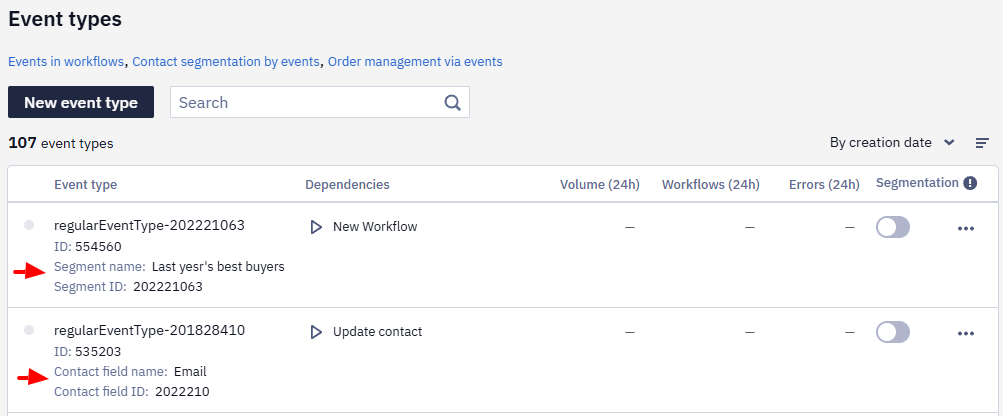
Event types created for regular workflows and workflows based on contact field changes contain:
- Segment name, segment ID.
- Contact field name, contact field ID.
Click on the dependency to open the Dependencies of event type window, which provides detailed information about the associated workflows and dynamic segments.
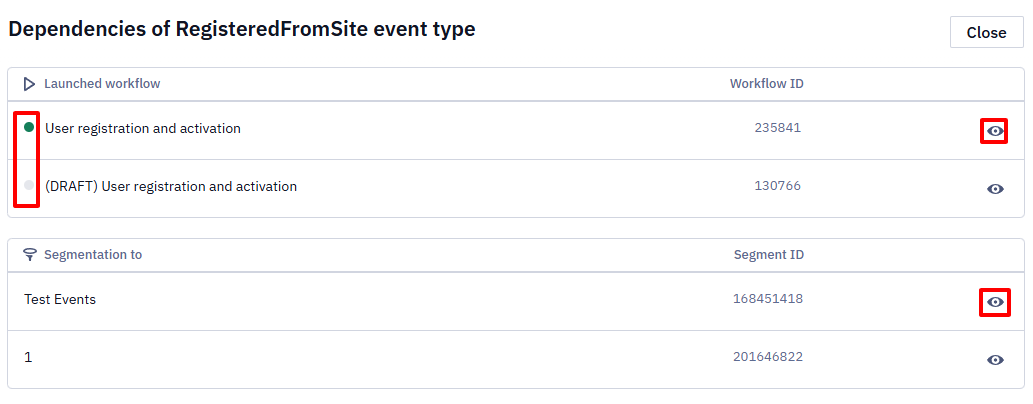
The green marker next to the workflow indicates that this workflow is active.
Click on the preview icon to view and edit related objects.
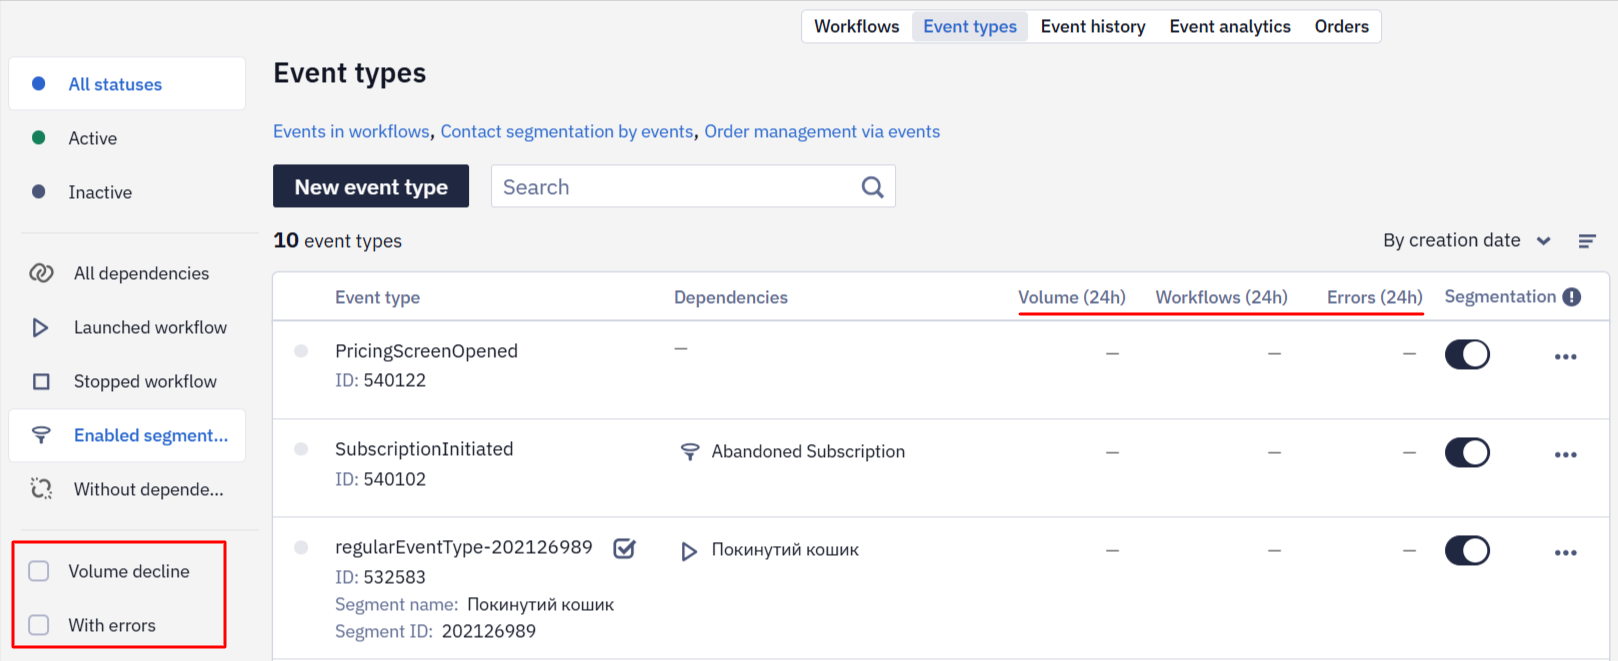
Daily Statistics
Activate the checkbox on the tab in the left menu to filter event types and workflows with declining metrics, as well as events with errors
- Volume decline
- Launched workflows decline
- With errors
Declining metrics are displayed in orange so that you can promptly notice events that require attention.
Additional Actions with Event Types
Clicking on the three dots in the event type field reveals a menu with the following options.
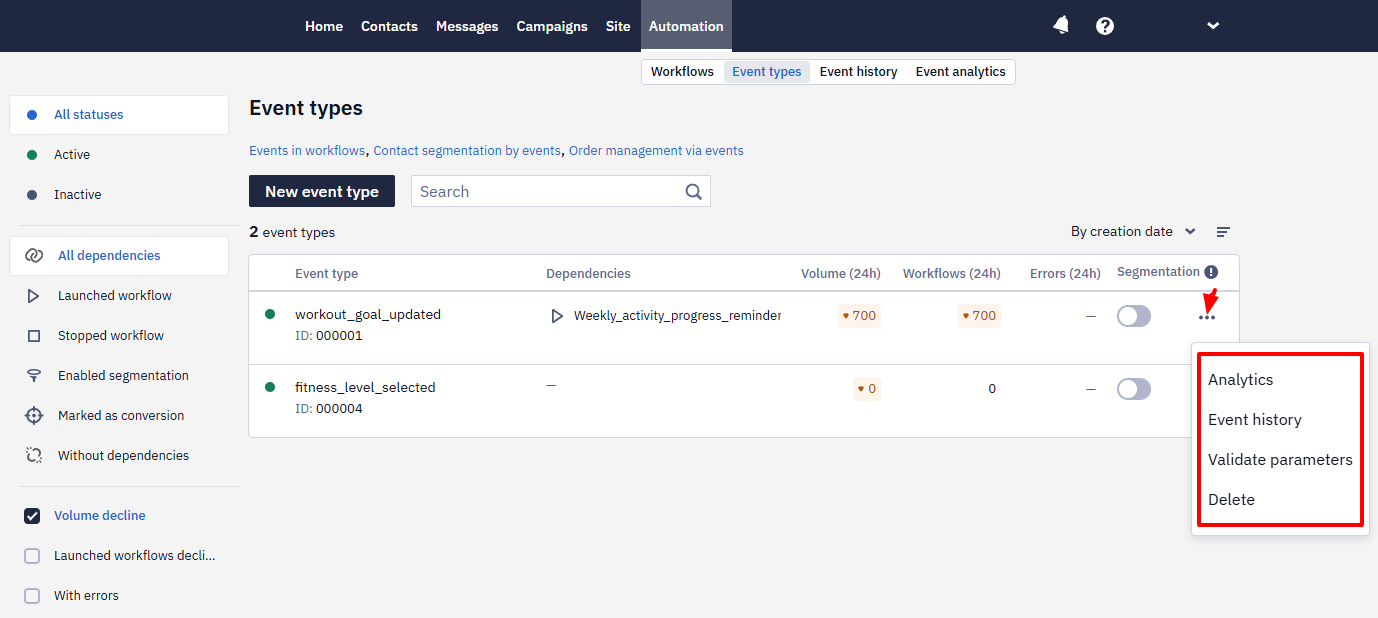
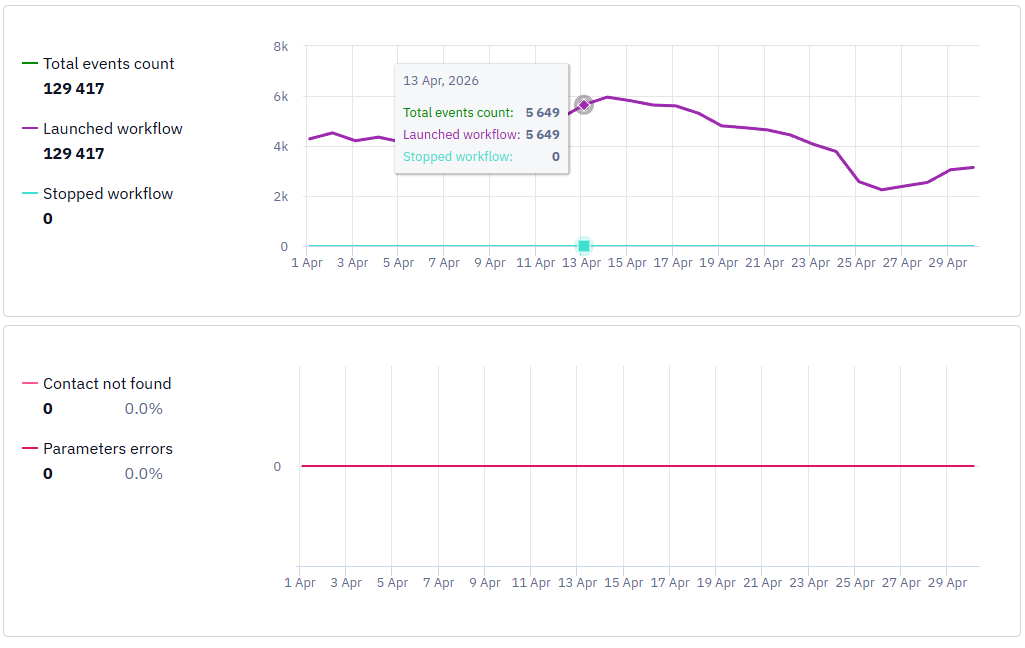
Analytics
Charts display metrics of event and workflow activity, and error metrics, and include the following categories
- Total events count
- Launch workflow
- Stop workflow
- Contact not found
- Parameters errors
Event history
This option shows the launch history of the selected event.
Parameters validation / Structure preview
Add validation parameters so that the system accepts only events that correspond to them.
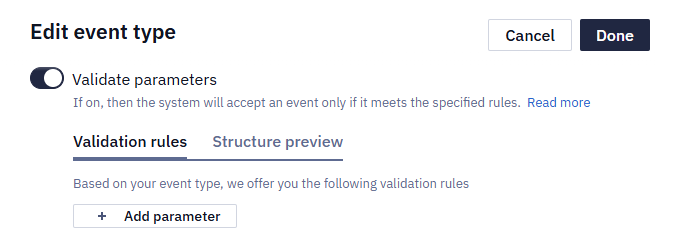
If an event is used for contact segmentation and has already been transmitted to the system, you can view its structure on the Structure preview tab and compare event parameters with the validation rules you've set. You can also copy the structure parameters.
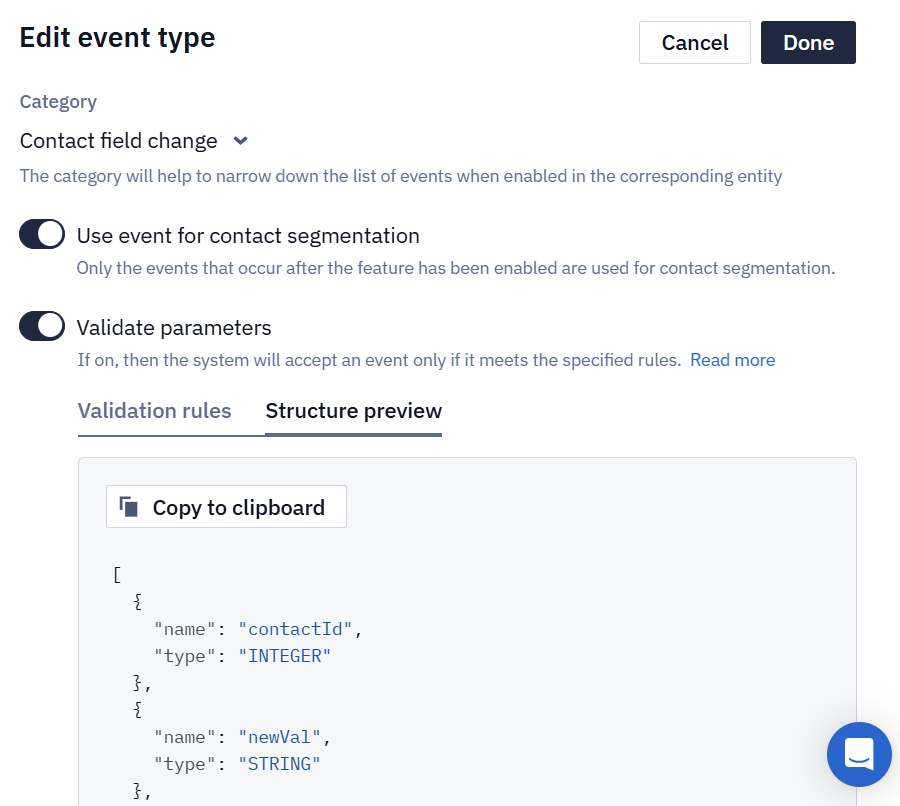
NoteWhen transmitting new parameters, they will add to the event parameter structure, while the existing ones will remain unchanged.
Delete
The event is deleted along with its history, and recovery is not possible.
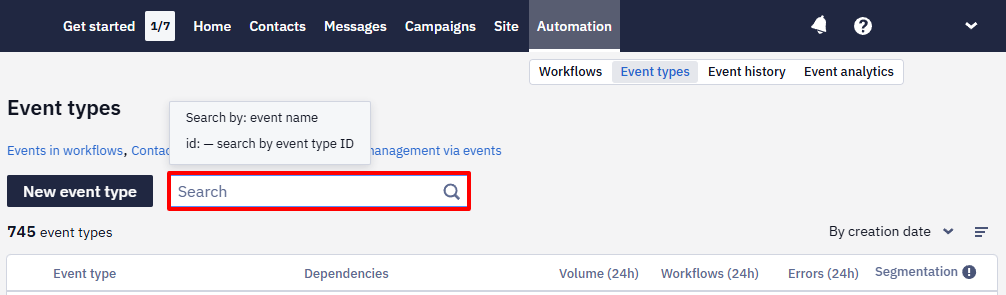
Event Search
To find a specific event, enter its name or ID in the search bar.
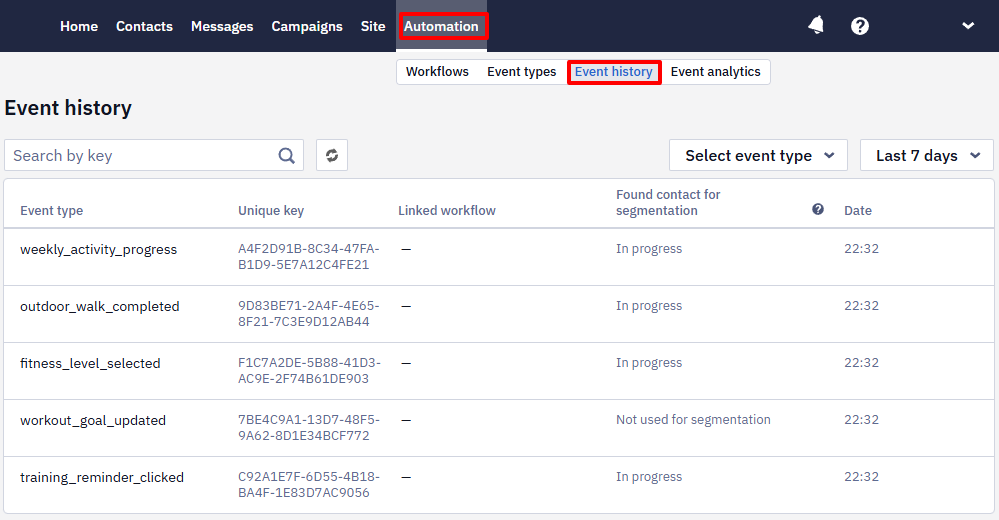
Event History
You can view the events sent to the system in Automation → Event history.
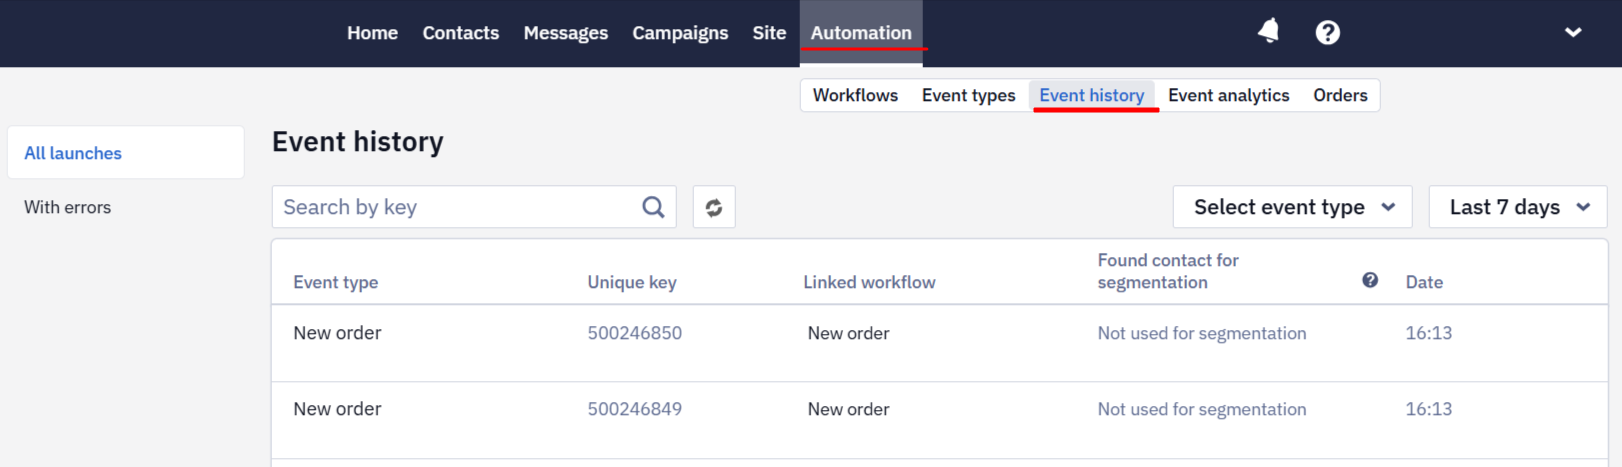
If no events have been sent, the tab will be empty.
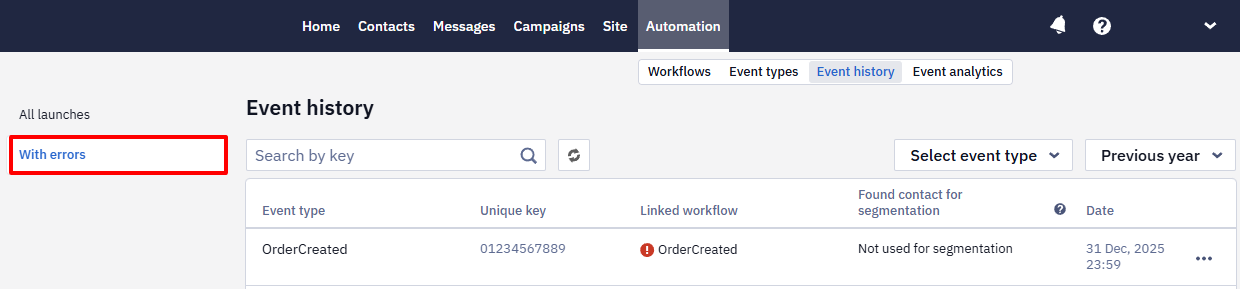
You can track events sent to eSputnik, filter them by name and time, and search by key.
Event type, its key, linked workflow, the contact found (if event segmentation is used), and time when the event is registered, are displayed in the general list of events.
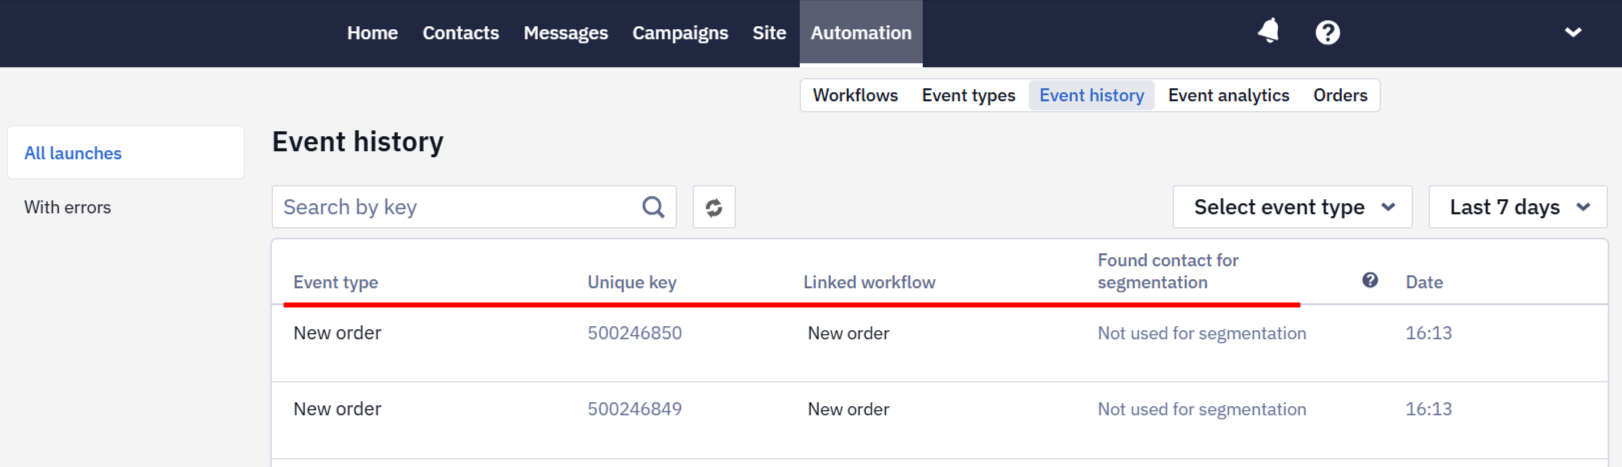
Click the Event Type line to see the time of its occurrence and the parameters that are transmitted to the system.
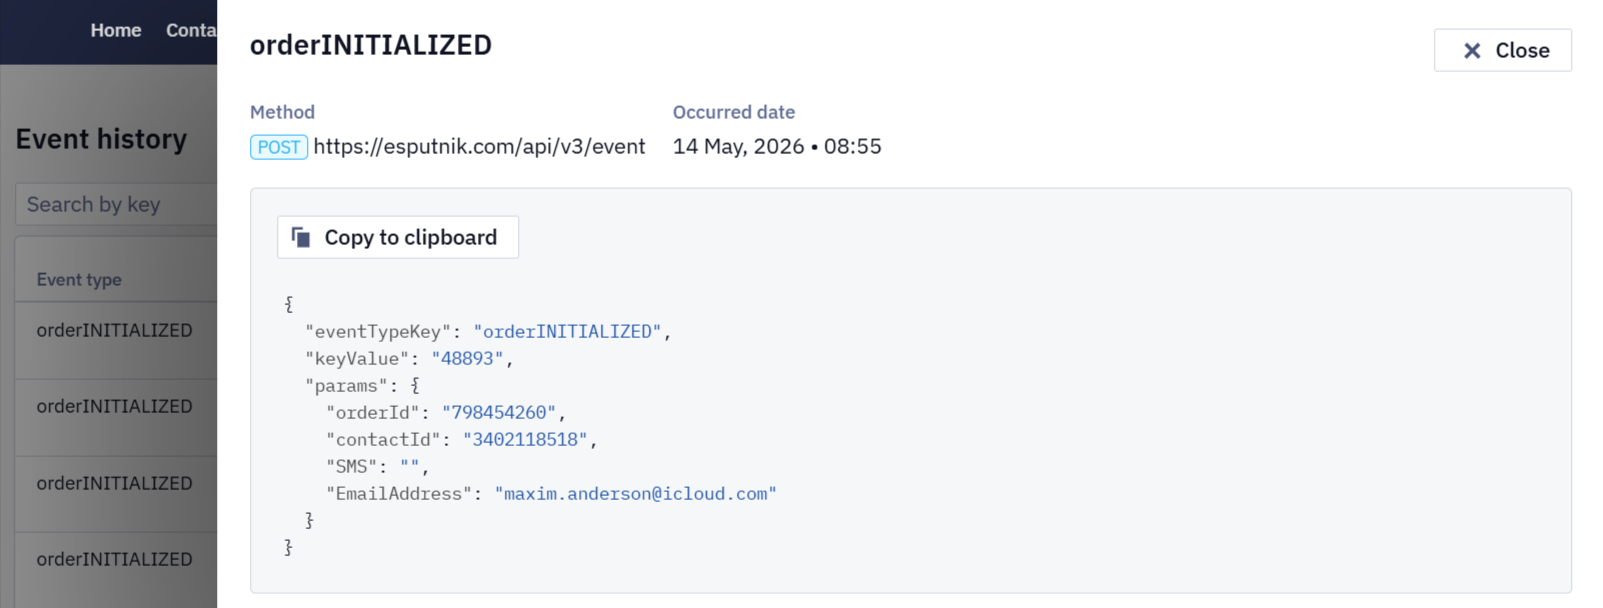
This information will allow you to monitor the workflow in progress.
Note
- The request body is displayed exactly as it was passed to the system.
- Custom events display the endpoint of the Generate event method by which they were passed.
On the With errors tab, you can see relevant events, such as missing required parameters. Error examples will help you easily debug the sending of the necessary data.
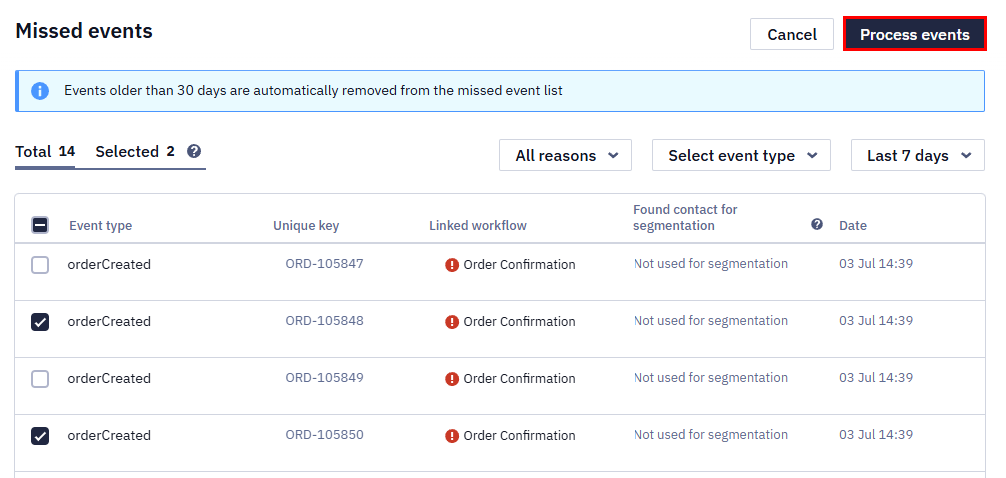
Missed Events
If event processing reaches a system limit, the workflow does not start immediately. Instead, the system adds the event to the missed events list.

Events may appear in the list for one of the following reasons:
- Contact limit exceeded;
- Workflow launch limit exceeded;
- Active workflow limit exceeded.
Active workflow and launch limits can come from a connected CDP plan or a postpaid Email plan. You can see the available limits on the Pricing plans page.

In the Missed Events window, you can:
- filter events by reason, event type, and time period;
- select multiple events for reprocessing.
After resolving the causes of the missed events, select the required events and click Process events.
If you have any questions, please contact to [email protected]
Updated about 3 hours ago