
Unsubscribe Page/Unsubscribe Reasons Analysis
The unsubscribe page is essential to allow users to easily opt out of receiving emails. This helps maintain the quality of the contact database, comply with data protection regulations (such as GDPR), and adhere to Gmail's recommendations for sending broadcasts.
By default, a standard unsubscribe block is placed in the footer of every email sent via our system.
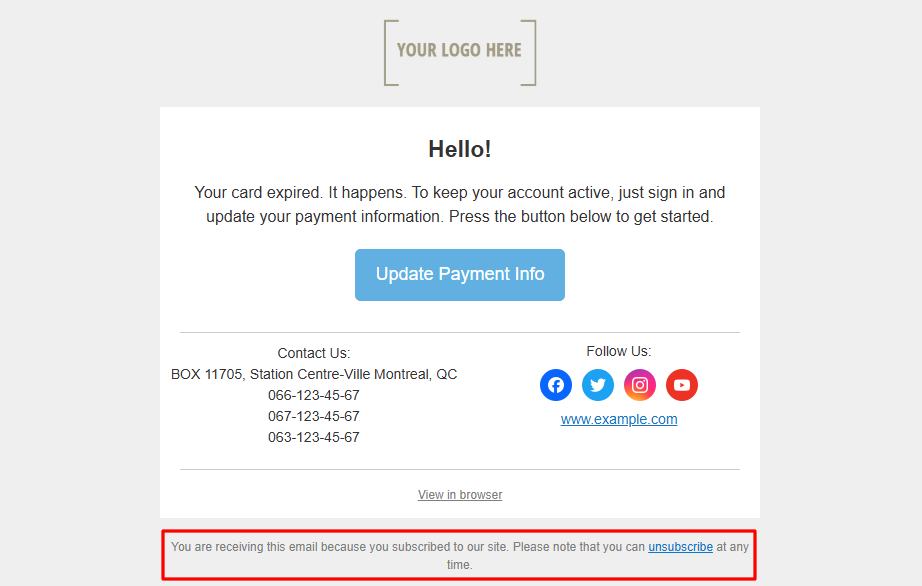
When editing this block, follow these requirements:
- The link must be visible.
- The link text should explicitly indicate the option to unsubscribe.
- Unsubscribing should be straightforward, without unnecessary steps (e.g., registration or authorization).
Unsubscribe Options
eSputnik offers the following unsubscribe options: one-click, two-click, and subscription category-based.
Let's explore the differences between them.
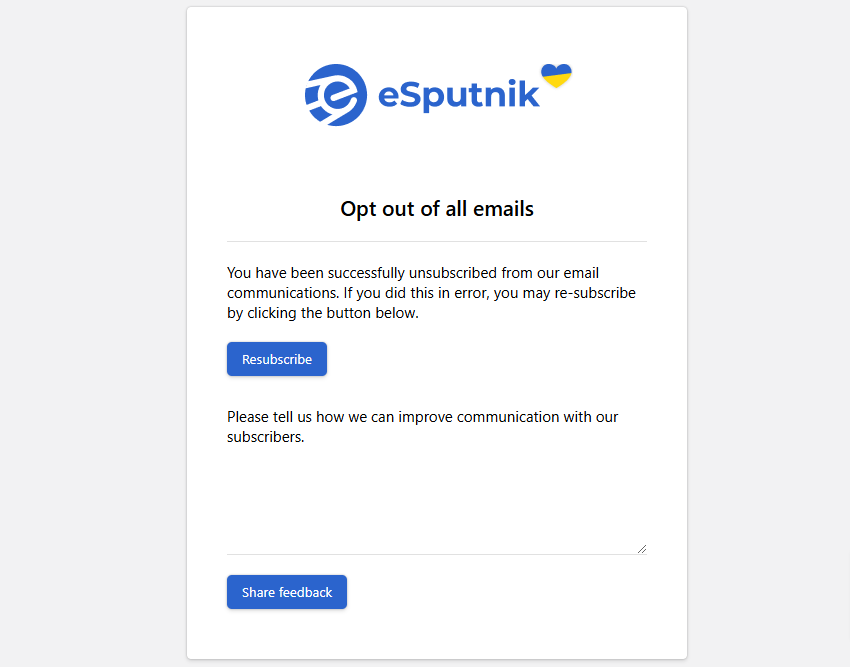
- One-click unsubscribe. The user clicks the unsubscribe link in the email and automatically gets the Unsubscribed status.
The unsubscribe page features a Resubscribe button and a field to provide feedback on why unsubscribe.
One-click unsubscribe works from the click alone, so the status can appear without the recipient intending it: the email was forwarded and someone else followed the link, or a mailbox security filter opened every link in the message. A contact who didn't mean to unsubscribe can subscribe again on the same page.
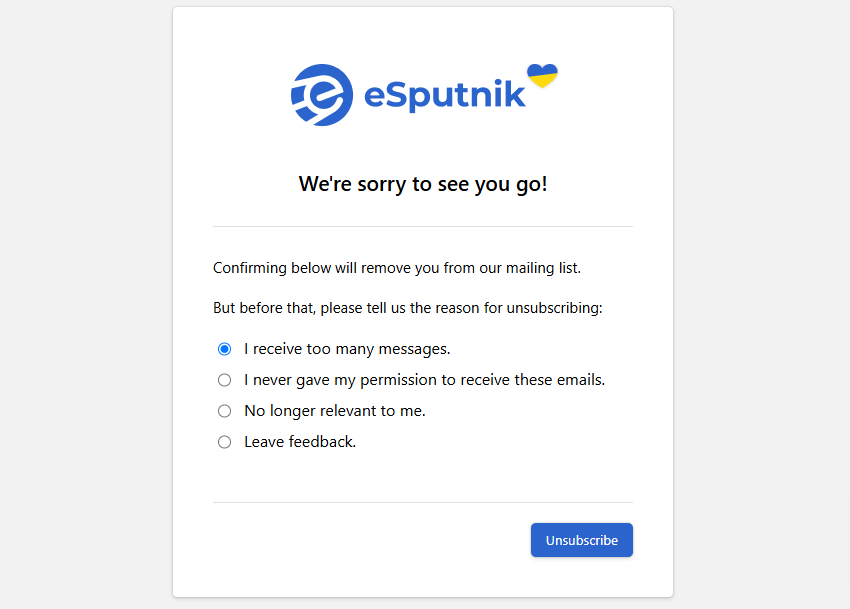
- Two-click unsubscribe. First, the user clicks the link in the email, and only after clicking the unsubscribe button again, they get the Unsubscribed status.
This page includes fields for selecting unsubscribe reasons and for leaving a review.
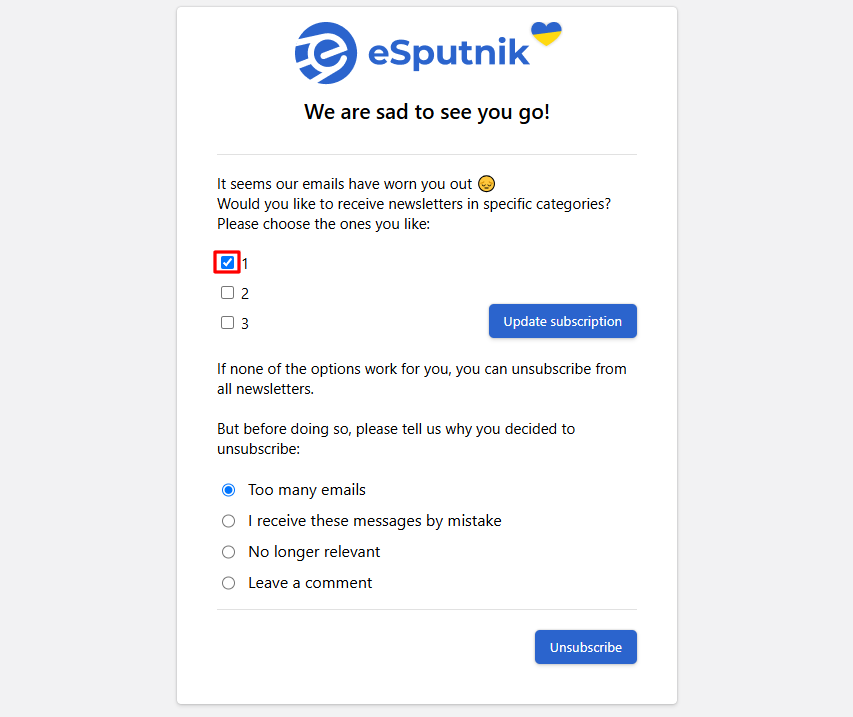
- Subscription category-based. A customized unsubscribe page where the user chooses which specific categories of emails they wish to unsubscribe from.
This option's advantage is that the user retains their subscription and continues to receive information only from the selected categories. This provides an alternative that helps retain subscribers.
The page shows every subscription category of the account, including the ones created later, and category names are not translated for language versions. See Subscription Categories.
In addition to standard unsubscribe pages, you can set up custom pages with:
- branding in your corporate style, including a logo and text;
- a survey to gather reasons for unsubscribing;
- an option to subscribe to social media or other channels;
- the ability to update subscriptions based on specific categories.
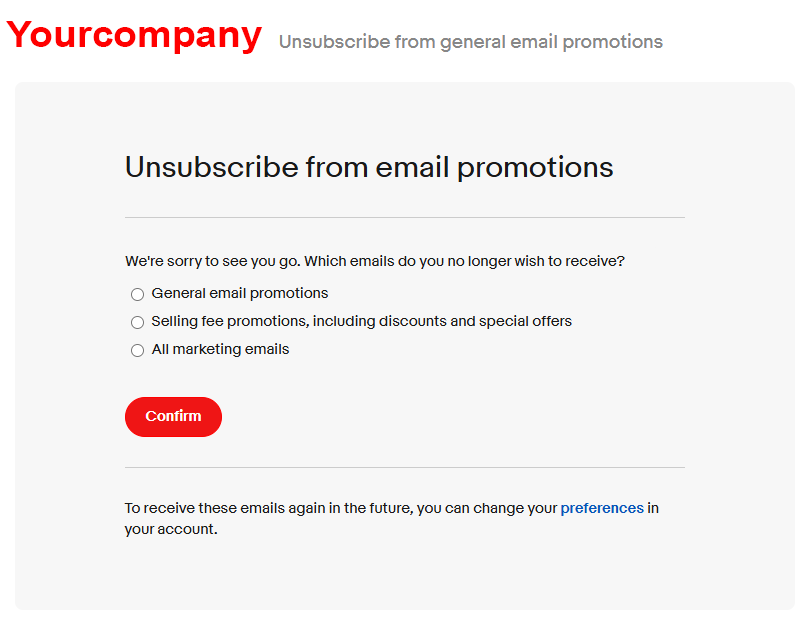
To set up an unsubscribe page in your corporate style, contact customer support at [email protected].
Enabling Unsubscribe Options
The Two-click unsubscribe option is enabled by default in the settings.
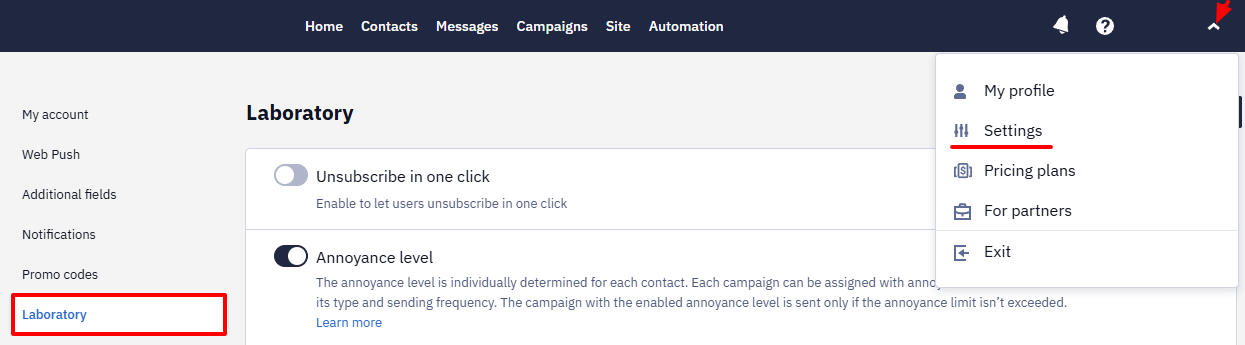
To enable One-click unsubscribe :
- Go to your eSputnik account settings → Laboratory tab.
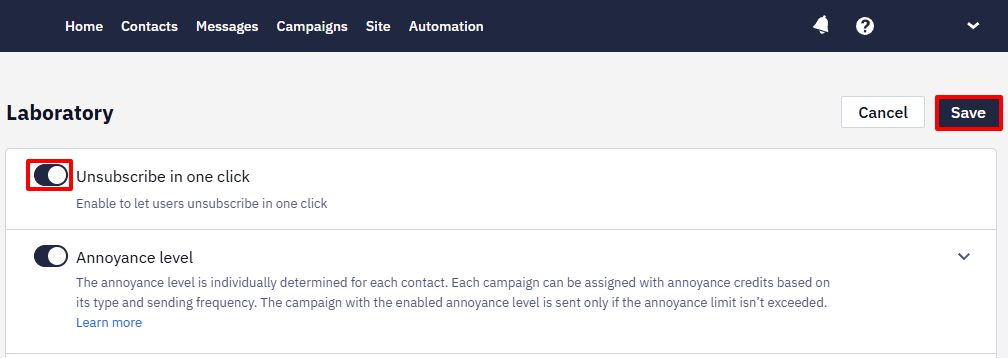
- Activate the Unsubscribe in one click toggle and click Save.
To set up an unsubscribe page with category options, send a request to [email protected].
Unsubscribe Reasons
If the unsubscribe page includes a field for comments or reasons, you can view data in the Campaigns → Unsubscribe reasons section.
NoteIf a contact unsubscribes without selecting or specifying a reason, their opt-out will be recorded but won’t appear in the Unsubscribe reasons section.
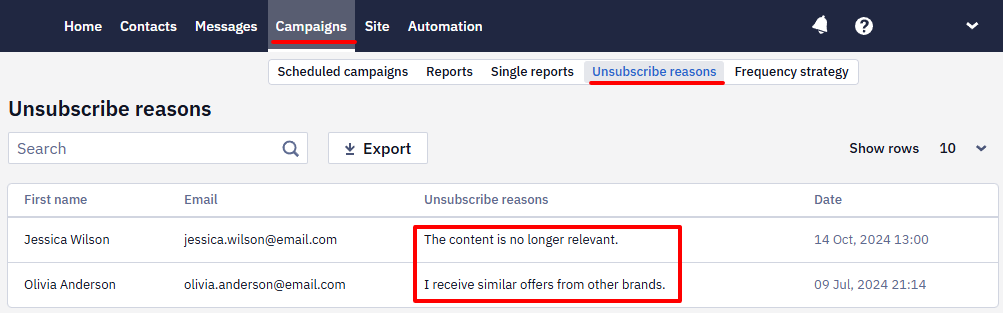
Analyze the data to identify factors leading to email unsubscribes. This will help you reduce the unsubscribe rate in the future.
ImportantThe acceptable unsubscribe rate should not exceed 1%. If this rate is higher, the eSputnik support team may block your campaigns, as they could be flagged as spam according to the eSputnik service terms.
Updated 4 days ago