
Setting Up an Abandoned Cart Workflow
To set up and manage an abandoned cart workflow, you need to:
- Create an abandoned cart email.
- Create a segment.
- Create a workflow.
- Launch the workflow.
- Test triggered emails.
- View reports.
1. Create an Abandoned Cart Email
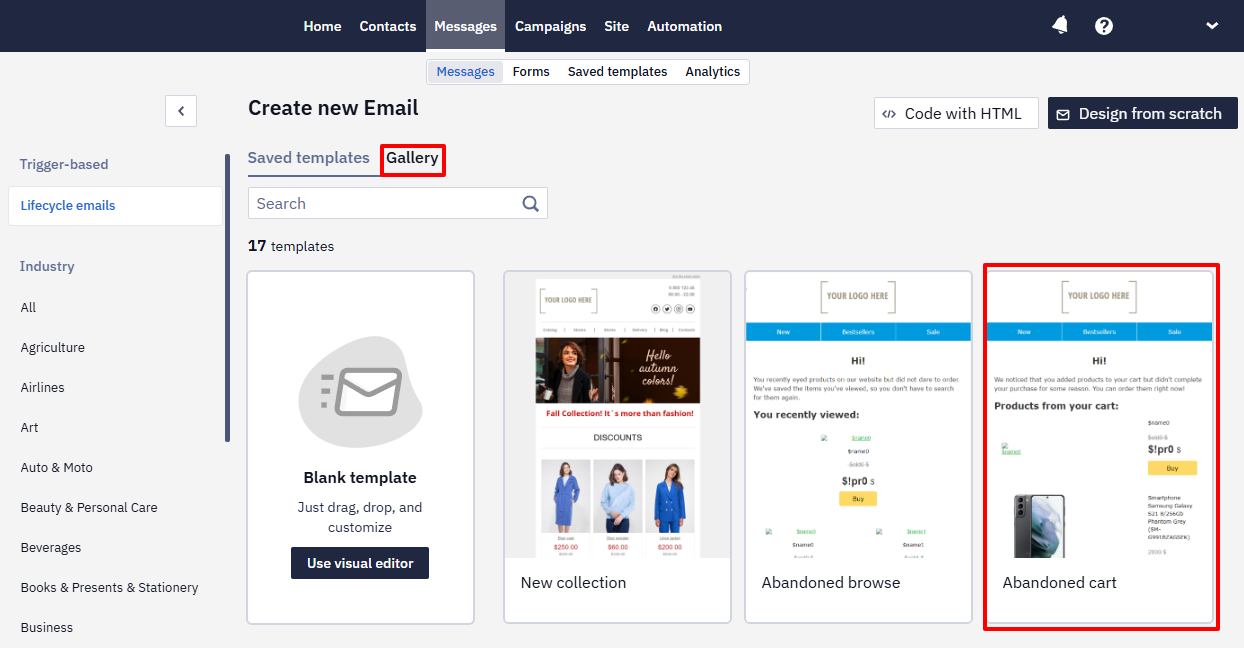
- Go to Messages and click Create email. In the Gallery, select the template Abandoned Cart and edit it as needed.
- Add to the product blocks basic variables (product image, name and price) so that the data on abandoned and recommended items can be automatically added to the email when it’s generated personally for each contact. This data will be taken from the data source you’ve previously uploaded to the system.
Read a full guide on how to add dynamic variables to emails.
You can choose any other template from Gallery or use your custom template and edit them as needed. This way, make sure you specify all the variables for the block with abandoned products and recommended products if you have it.
- Create a data source and assign it to the email. The abandoned cart template typically contains two blocks with products – abandoned items and recommended items. You need to create different data sources for each of them.
The product data comes from the feed by the product ID in the event, so the cart and purchase events have to carry the same IDs as the ProductPage event and the feed. An ID that the feed doesn't have finds no product, and a contact for whom no products are found gets no message.
If you have added your custom variables, make sure they also correspond to the parameters of the data source so that the content is added properly to the email.
Read a full guideline on how to create a data source and assign it to the email.
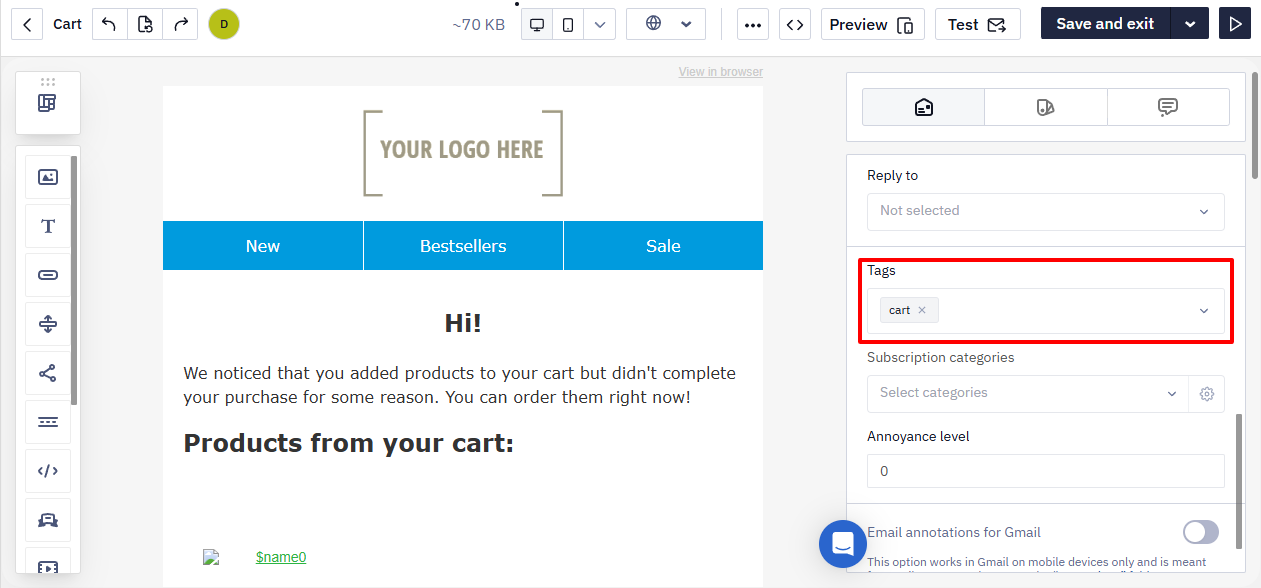
We recommend adding to your abandoned cart emails a corresponding tag (for example, cart). This will allow a faster search of emails and triggers and more convenient report assessment.
2. Create a Segment
NoteTo create segments based on product events and online store events, you need to setting up web tracking in your account.
Before creating the workflow, you need to create a segment that will include all contacts who have added products to their cart but left without completing the purchase.
- Go to Contacts → Segments, click Add segment and choose Dynamic. Enter the name and optionally purpose and tags, and click Next.
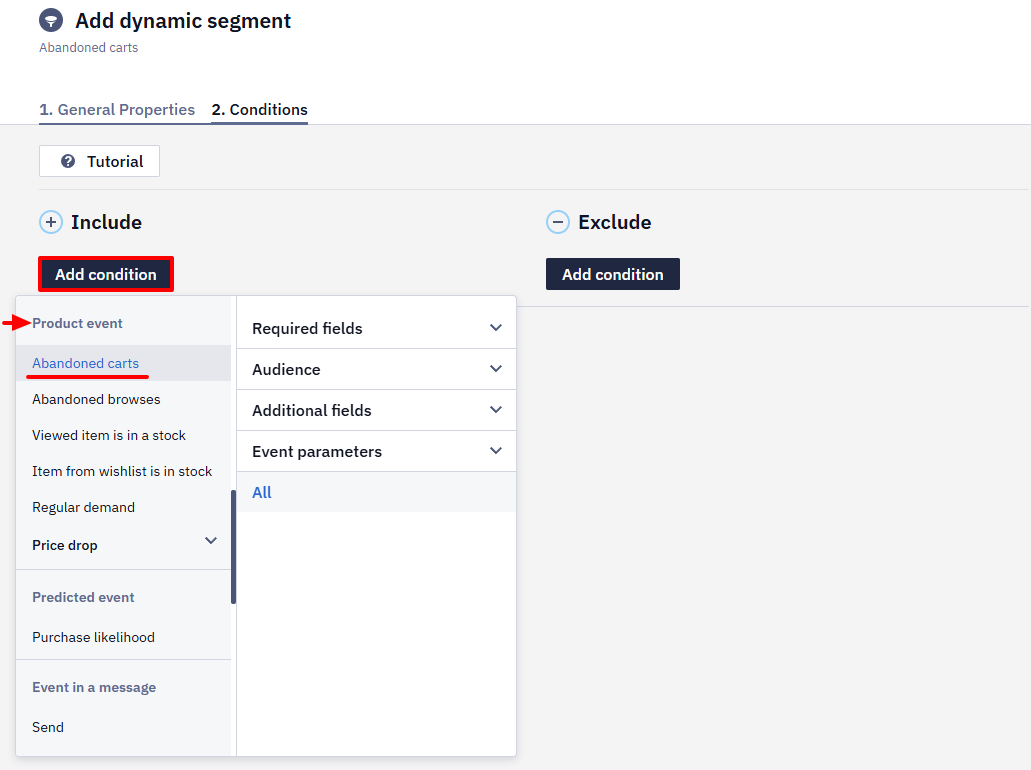
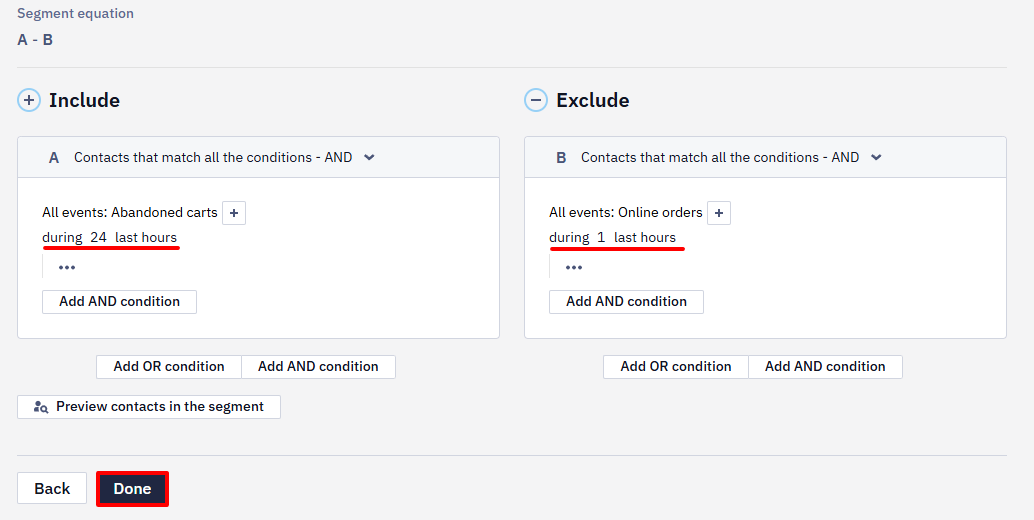
- In Include, click Add condition and select the following conditions: Product events → Abandoned carts → All. Change last weeks to 24 last hours.
- In Exclude, click Add condition and select the following conditions: Online store event → Online orders → All. Change last weeks to 24 last hours.
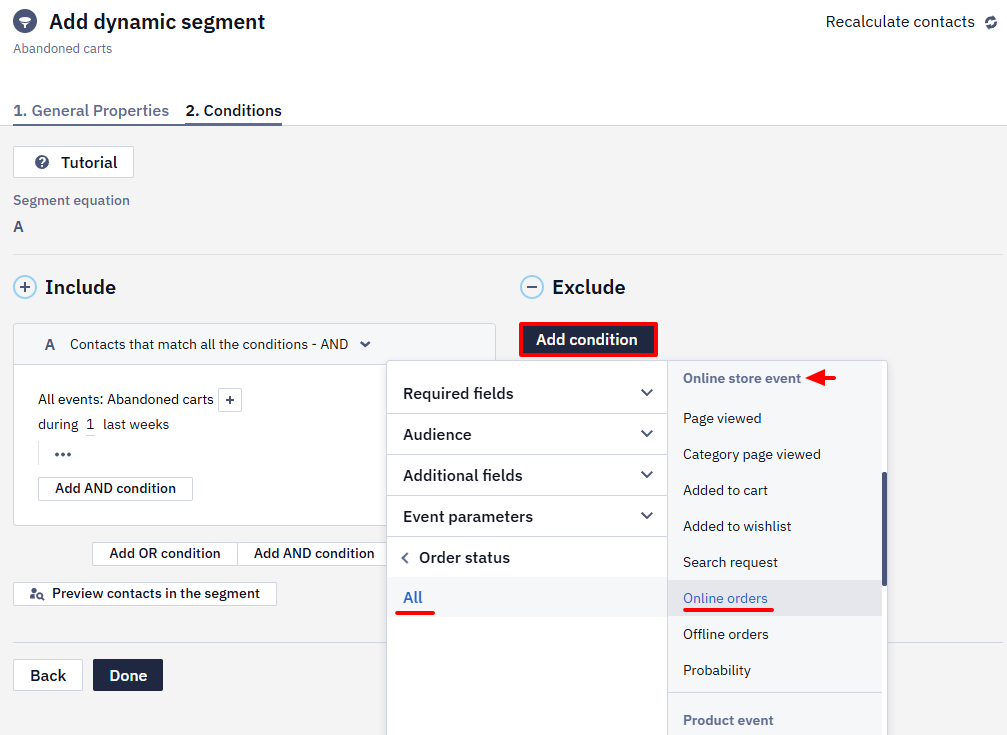
Your segment should look as follows. Click Done.
3. Create a Workflow
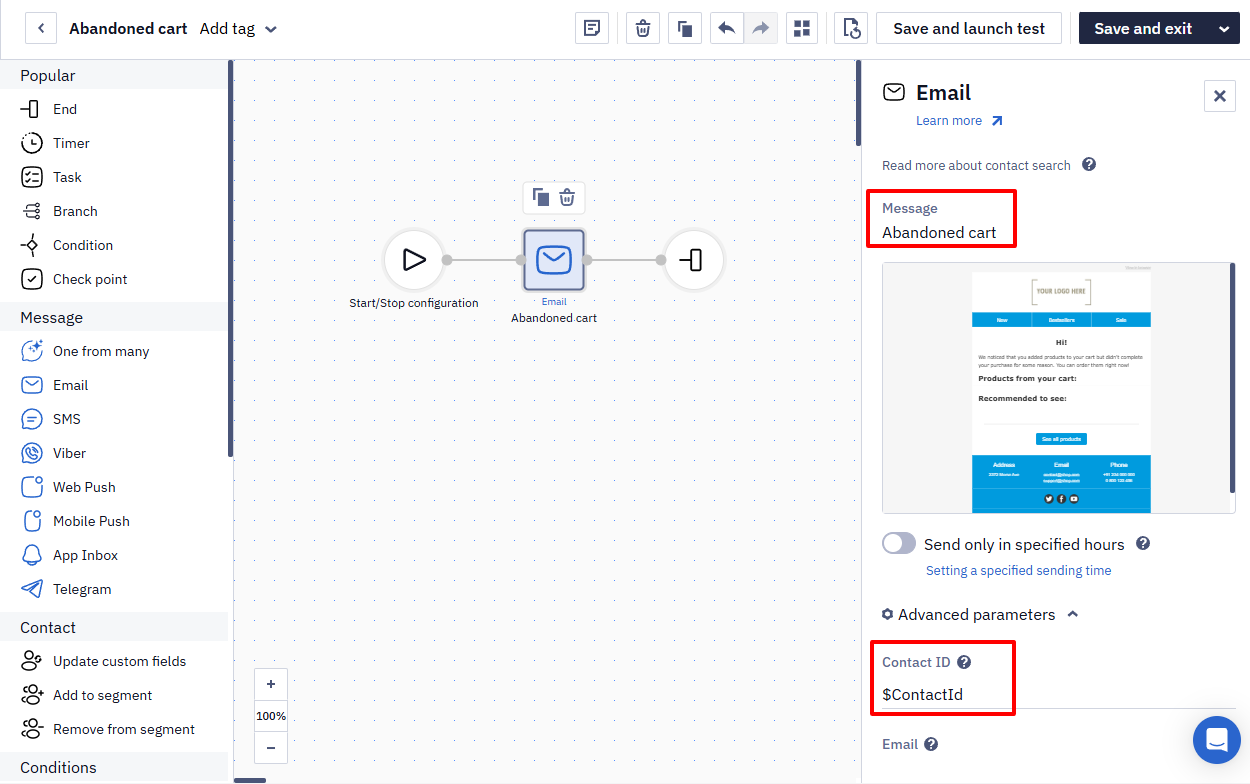
- Go to Automation → Workflows and click New workflow. Create a workflow with the following blocks: Start, Email, End.
For the block Email, in Message, select the created abandoned cart email. In Contact ID, enter ${ContactId}.
4. Launch the Workflow
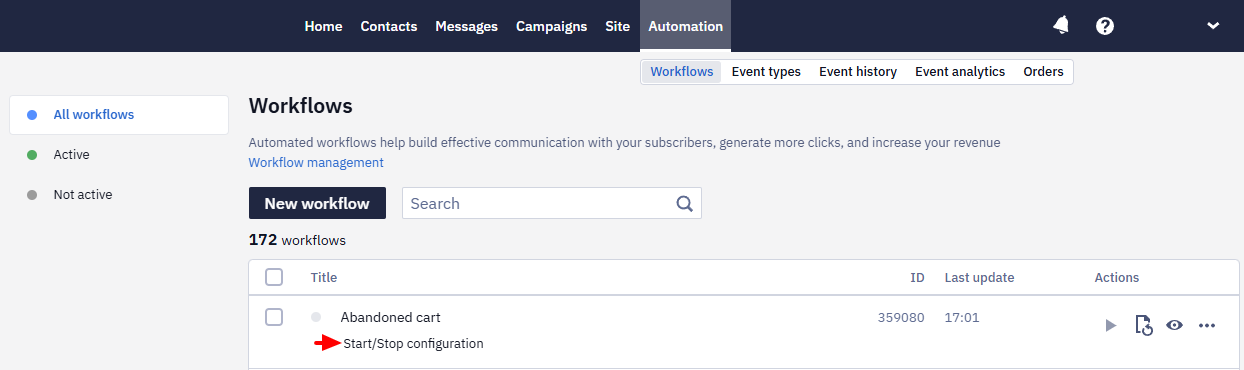
- Go to Automation → Workflows, select the created abandoned cart workflow and click Start/Stop configuration.
- Click Regular and in Segment select the created abandoned cart segment. Leave the default start date (that is the day of configuration).
- In Start schedule, select once an hour.
- In Process unique events, select start no more than once in 7 days. Click Apply.
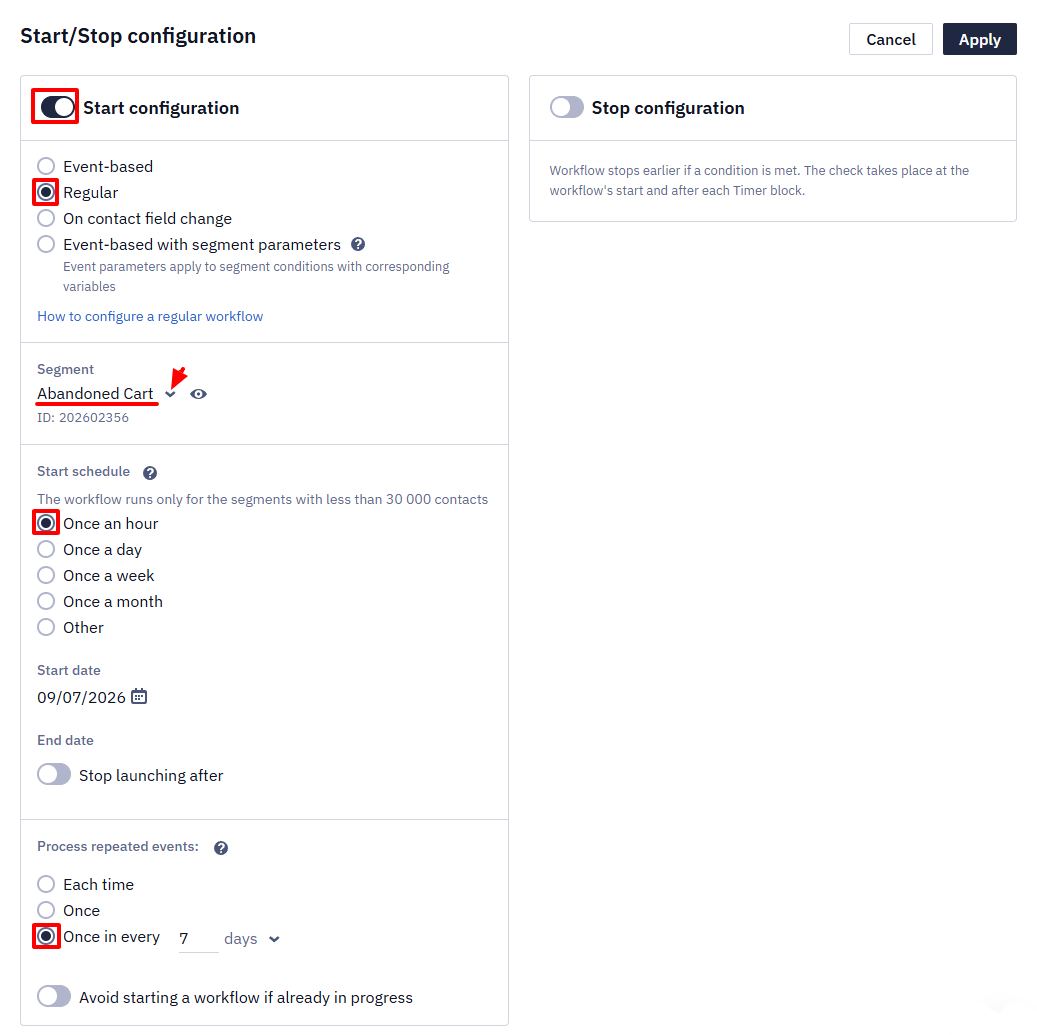
ImportantThe condition Once in every 7 days restricts sends to the same contact. Based on it, one contact can receive only one abandoned cart email per week. Such restriction helps minimize spam complaints and unsubscribes because people don’t like receiving reminders after each site visit. However, you can specify any condition you like.
- Click Activate and confirm the action. The workflow status will change to active.
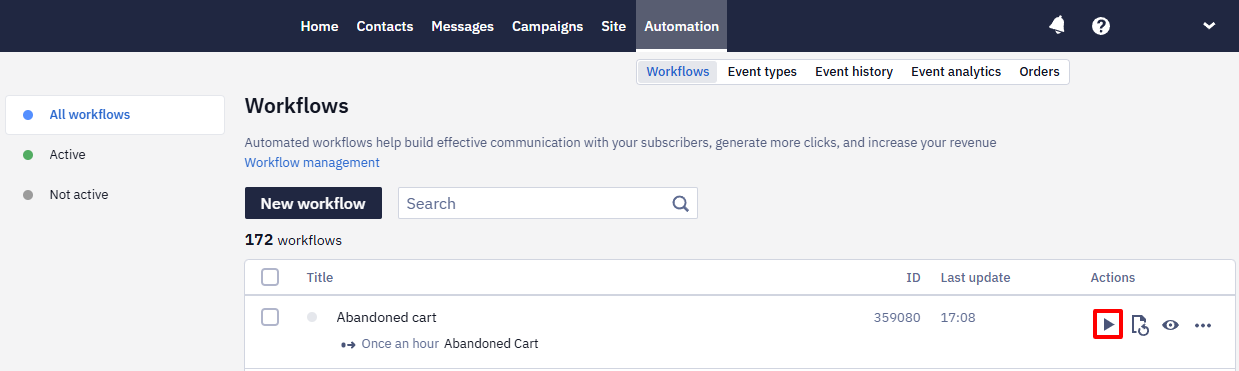
Such configuration launches the workflow once an hour. After the launch, the segment is refreshed and new contacts are added to it.
5. Test Triggered Emails
- To test triggers for an abandoned cart, go to the corresponding website (which data sources you’ve uploaded in the system), from the email or browser, sign in if needed, view products, add them to the cart, and leave without completing the purchase.
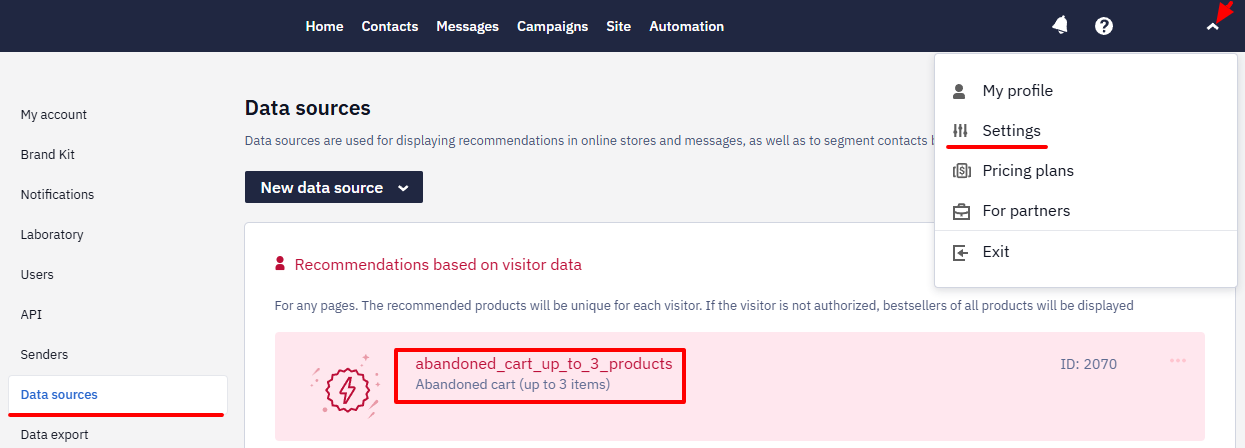
- To check whether the system tracked the triggered action, go to your personal profile → Settings → Data sources and click the data source you’ve assigned to the abandoned cart email.
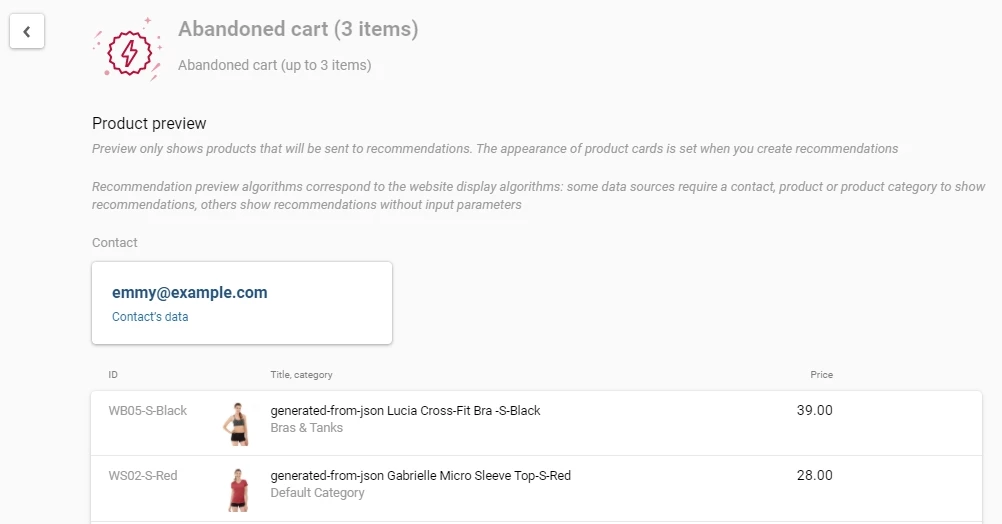
- In Contact, enter your email address. If the action was recorded, you’ll see the items you've added to the cart.
You can send a test abandoned cart email to your address in 2 ways:
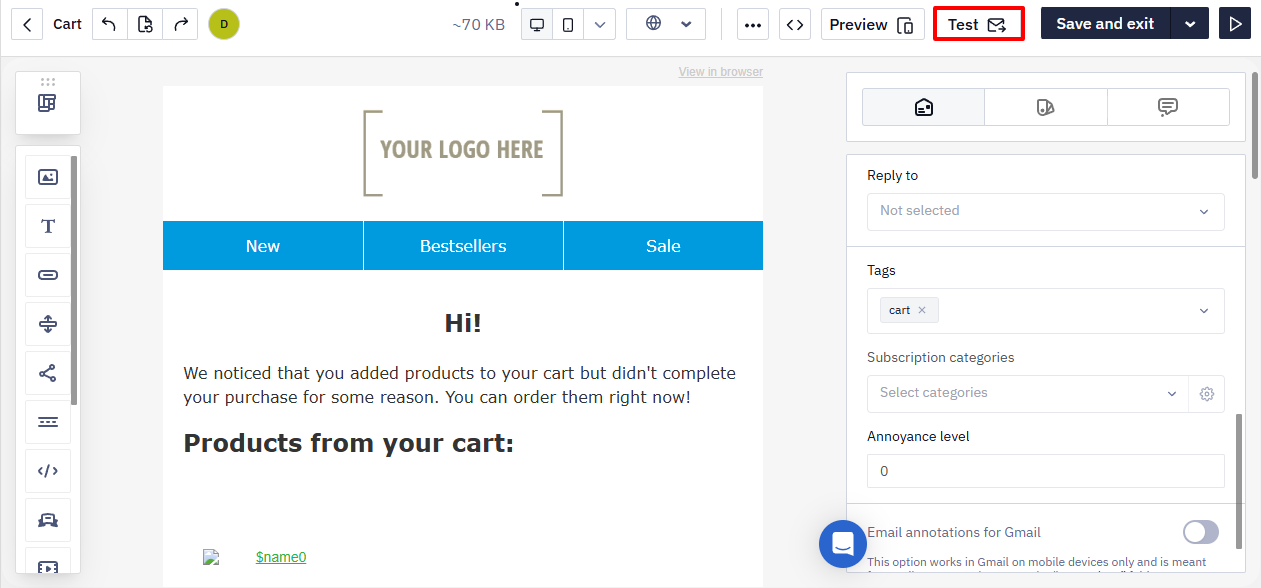
- As a single test email. Go to Messages, select the corresponding template, click Test, and send the email to your address. You can send the test email to several addresses.
- From the workflow. Go to the created workflow and add there the Get contact block. In Contact ID, enter
${ContactId}.
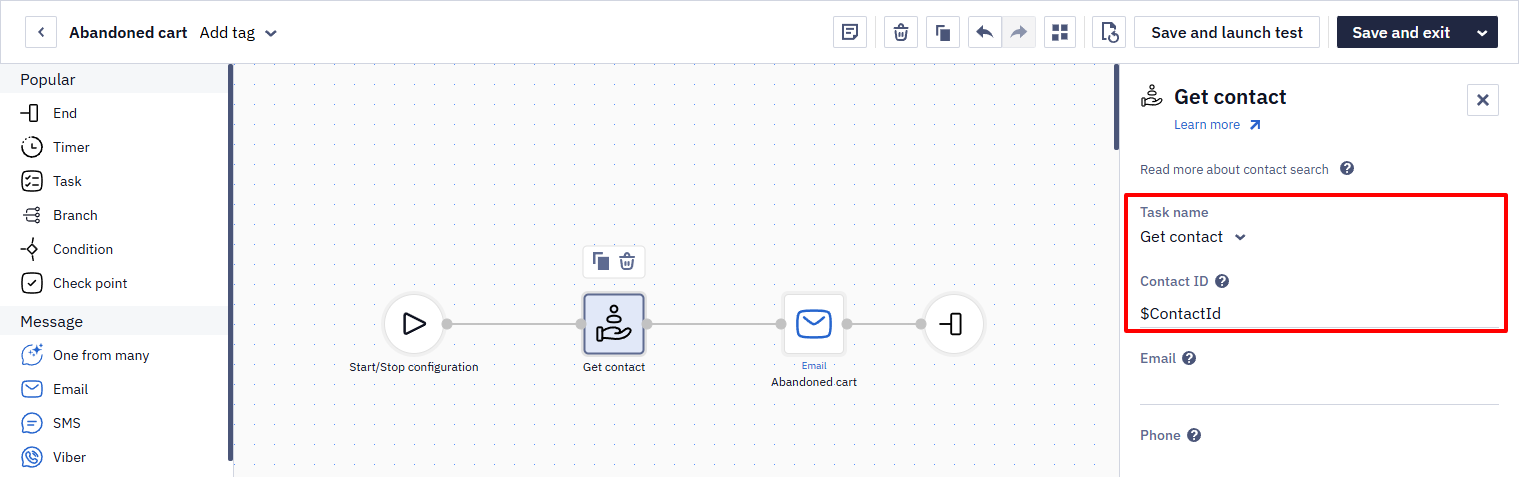
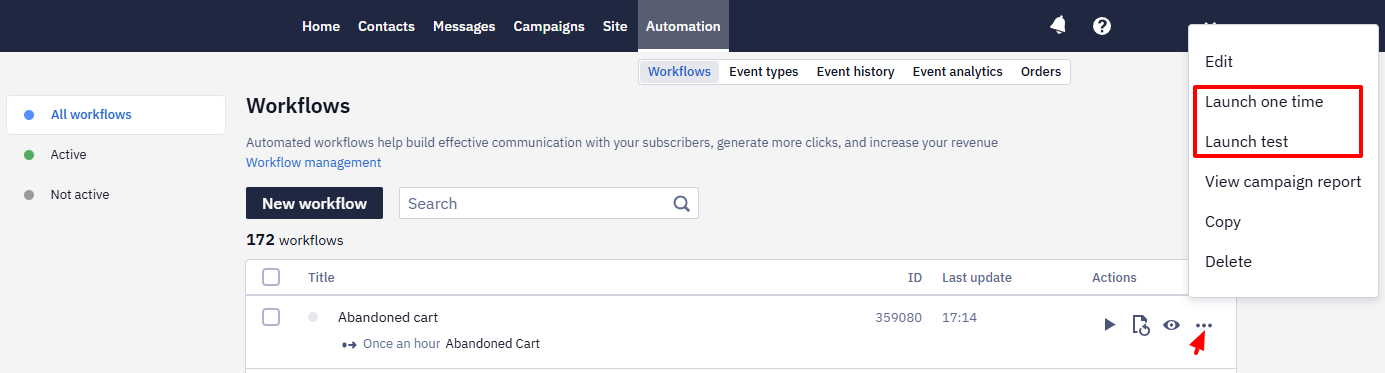
- In the workflow general list, click the menu on the right and select Launch one time (or Launch test). Specify a test contact or event parameters and lunch the workflow. This workflow stops on an event, so turn off Stop configuration before testing — a manual run doesn't check that condition.
6. View Reports
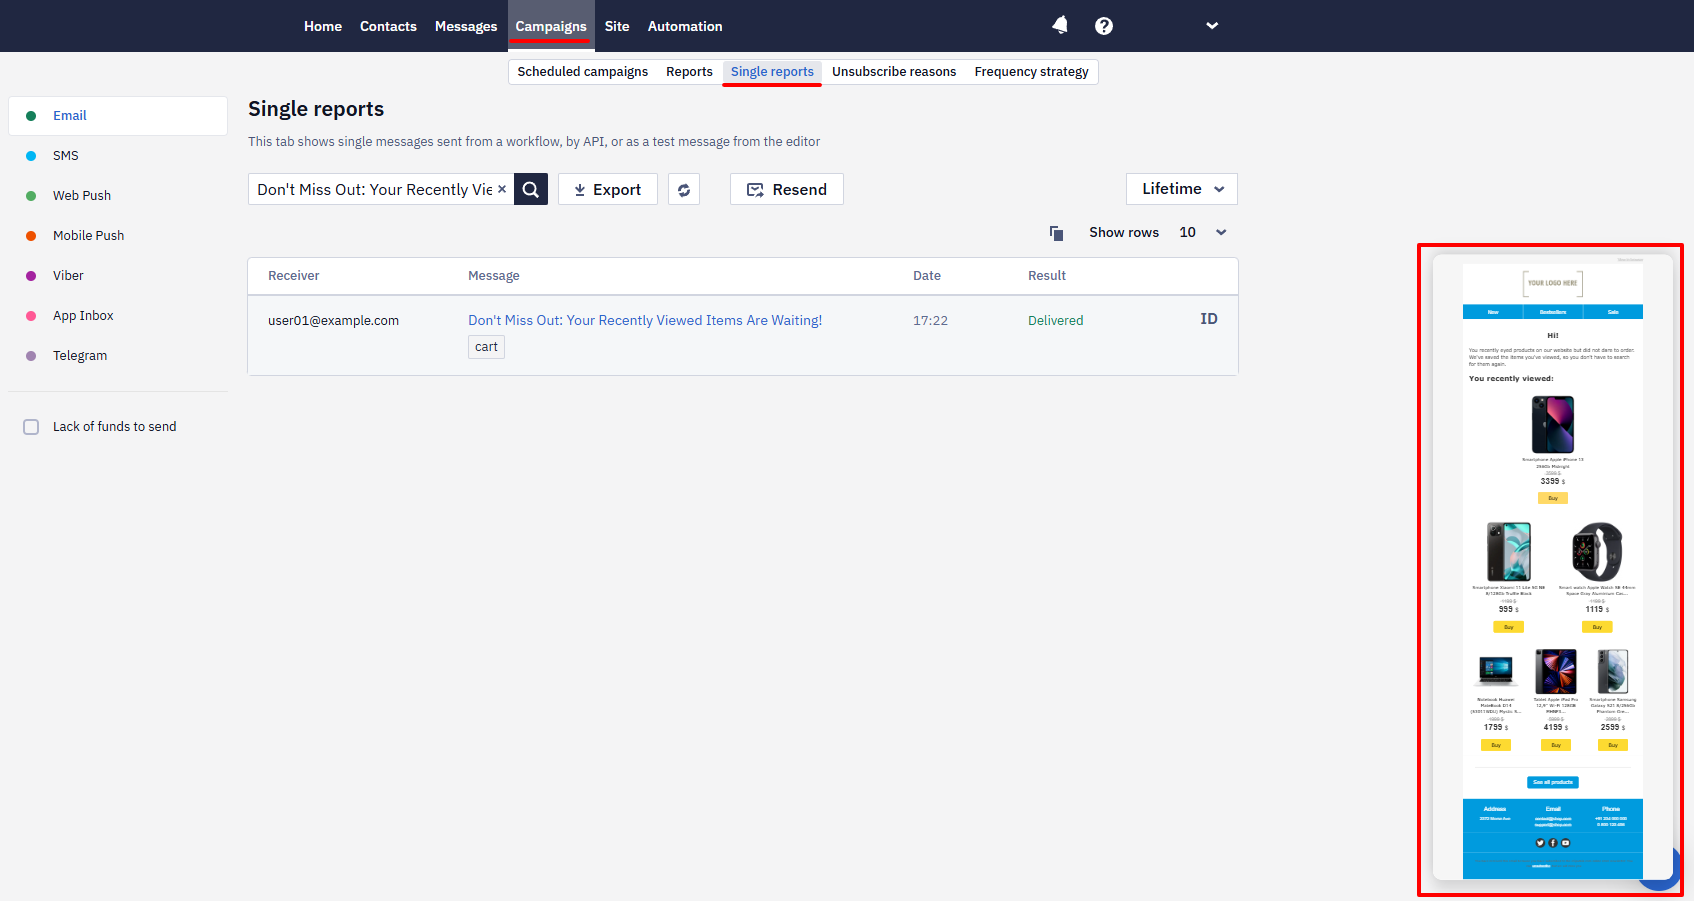
To see reports on single emails (tests), go to Campaigns → Single reports and select the necessary email. Hover over the message title or click it to view a full version. You’ll be able to see what email was generated and what products were added to the blocks with variables.
To see reports on campaigns sent from the workflow, go to Campaigns → Reports and click the necessary campaign.
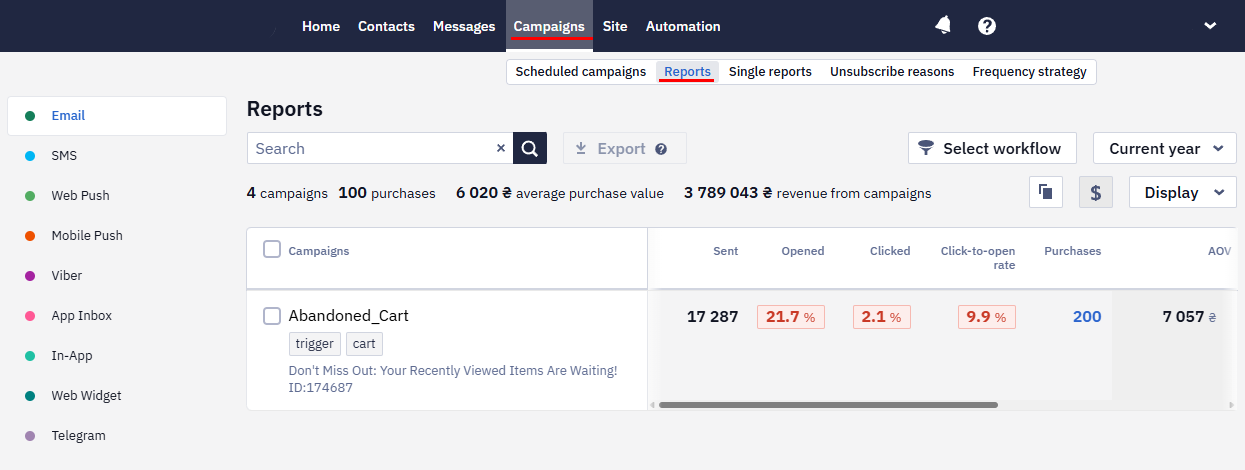
Here, you can see statistics of campaign performance like opens, clicks, results by domain, etc. You won’t be able to see the generated blocks as each contact will receive their own version.
Updated 28 days ago