
Customer Reactivation
Any business has inactive customers who haven’t opened messages or made orders for some time. You can drive back part of this audience with automated reactivation campaigns.
To create a reactivation campaign, you need to build a dynamic segment and schedule a single message or create a workflow.
Creating a Dynamic Segment for Reactivation
A dynamic segment is a group of contacts where contacts are added automatically based on the set conditions. For a reactivation segment, you can select such conditions as the last open, click, order, etc. performed a certain time ago. Segments are recalculated every day at 3 to 4 a.m. UTC, and all contacts who have been added to it receive the reactivation message at the specified time.
Before getting started, we recommend you read a full guideline on how to create a dynamic segment.
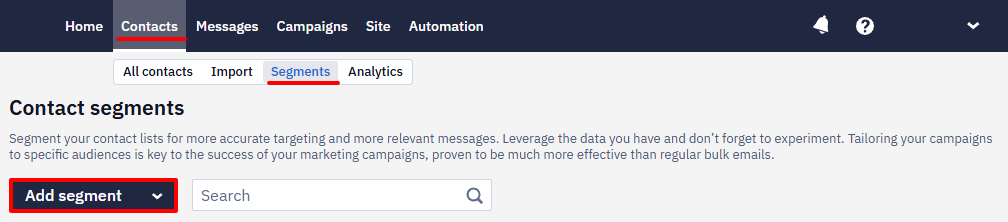
- Go to Contacts → Segments and click Add segment.
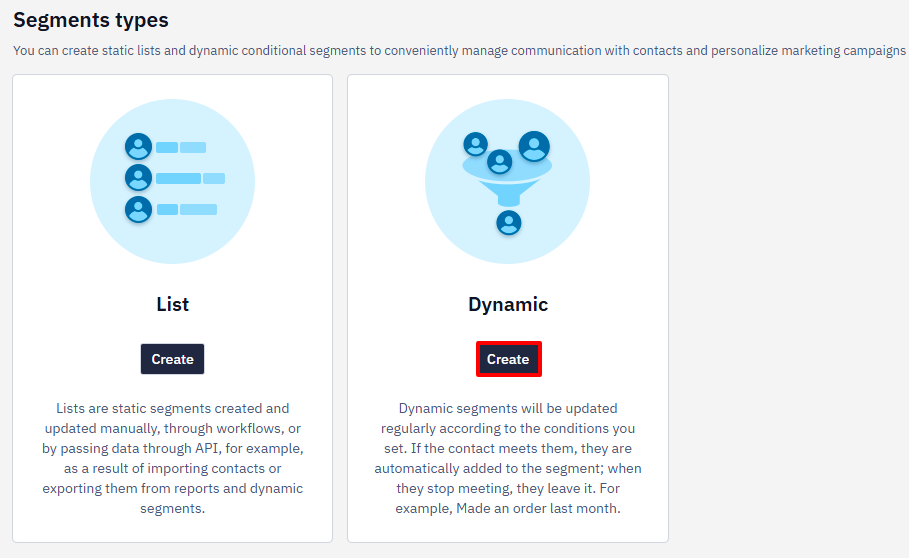
- Select Dynamic and click Create.
- Enter segment name (required) and purpose and tags (optional). Click Next.
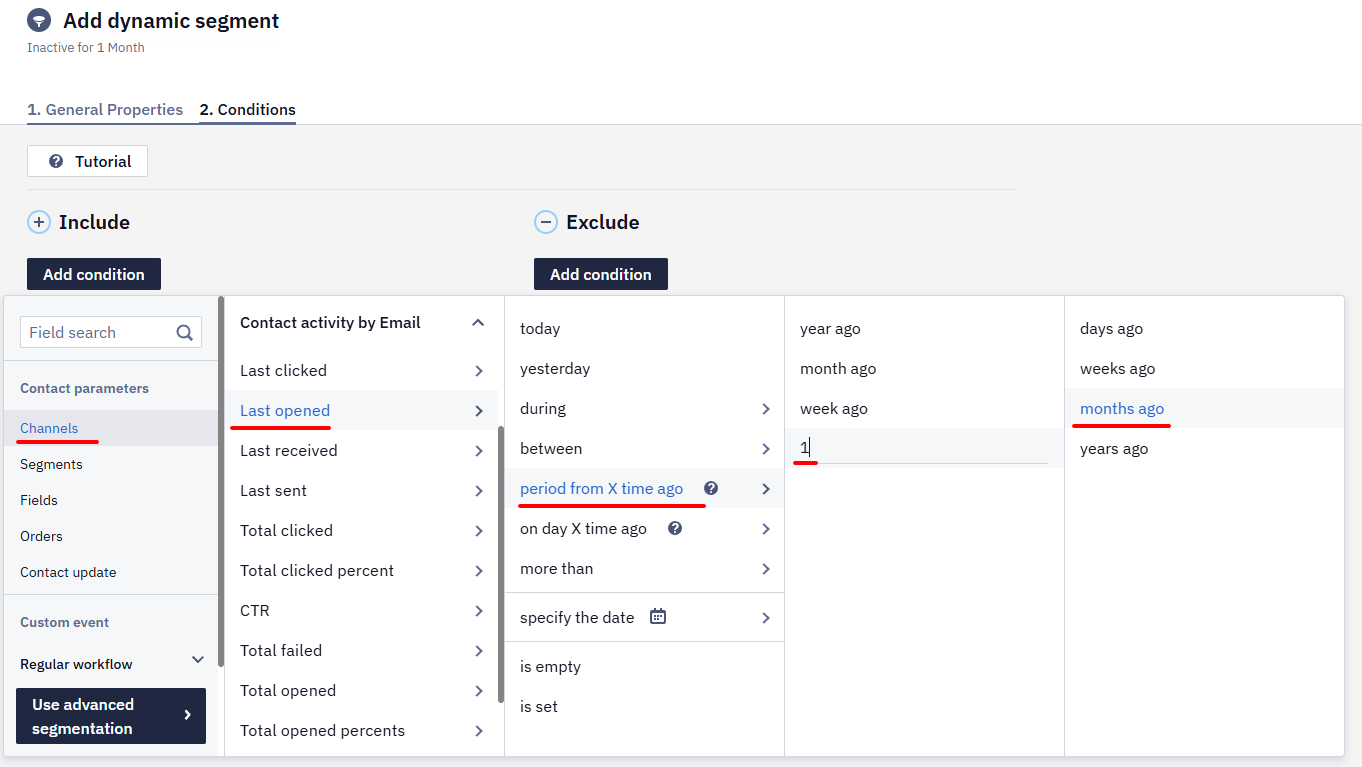
- In Include, click Add condition and select conditions (contact activity, orders or events) and time of the last activity.
- After the card is created, you can include more conditions to it or exclude them.
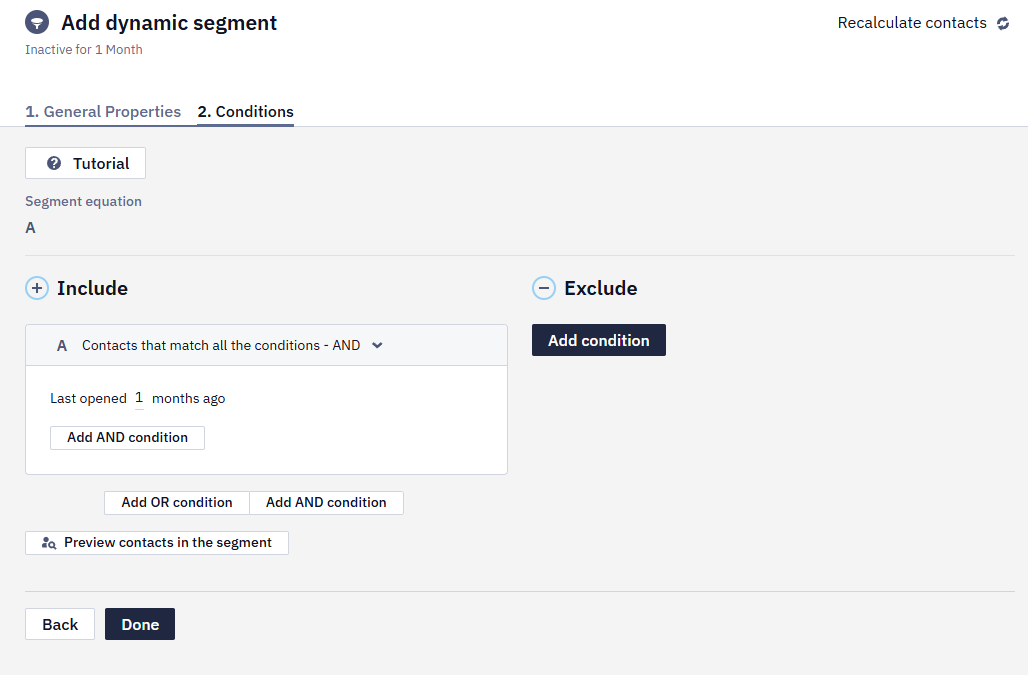
- When all conditions are specified, click Done.
Launching an Automated Reactivation Campaign
Let's look at a regular campaign and workflow creation.
Regular Campaign
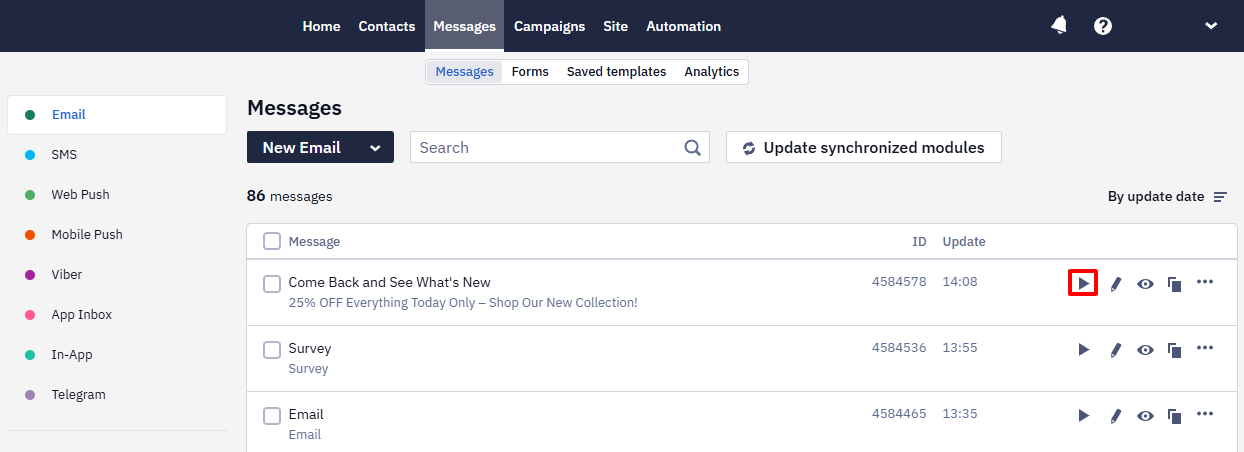
- Go to Messages → Messages.
- Select the previously created reactivation message and click Create campaign.
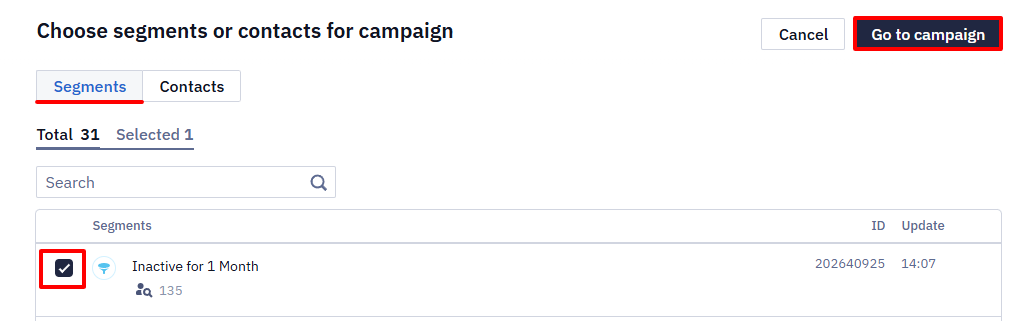
- Select the created segment or segments for reactivation and click Go to campaign.
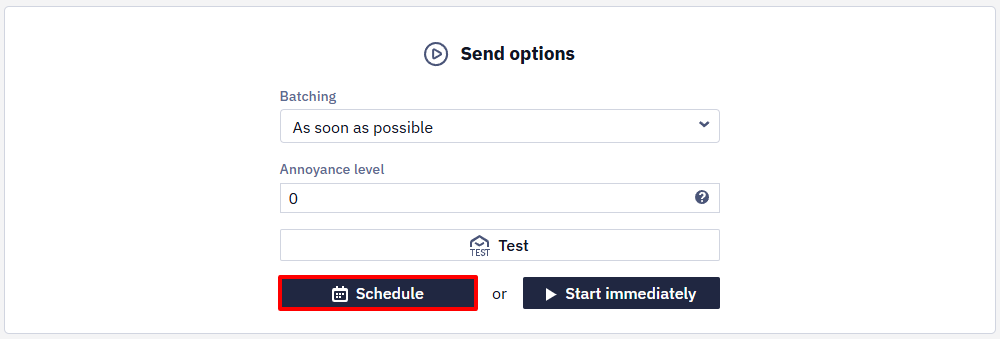
- Scroll down to Send options and click Schedule.
- Select Every day and click Confirm.
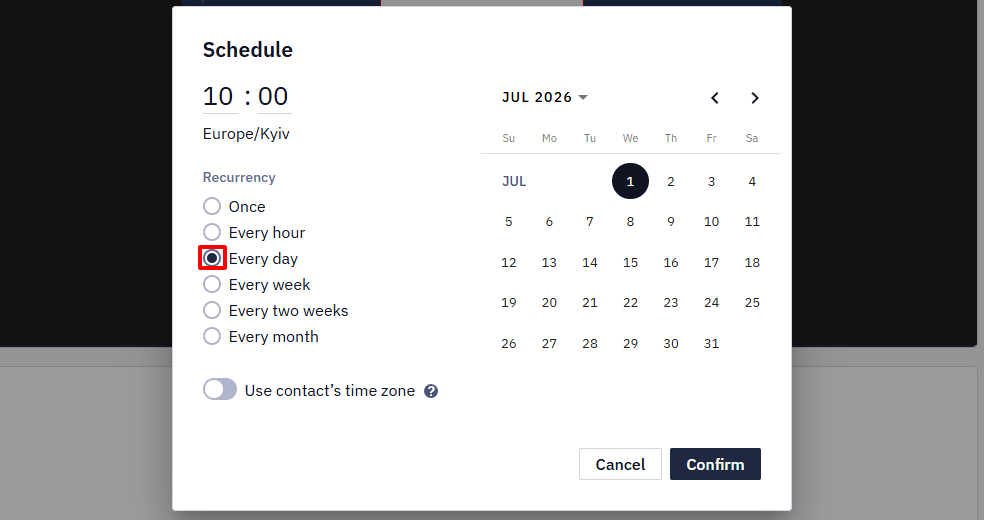
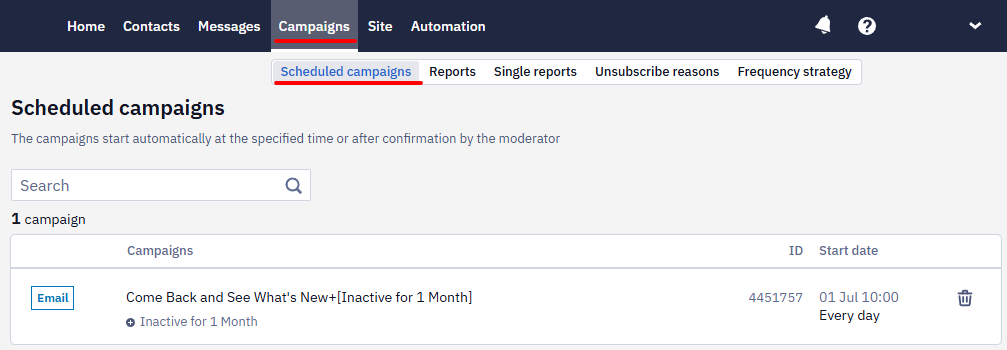
You can find scheduled campaigns in Campaigns → Scheduled campaigns.
Reactivation Workflow
Workflows allow you to send both single messages and series consisting of multiple multichannel messages and conditions.
Before getting started, we recommend you read a full instruction on how to create a workflow in the drag-and-drop editor.
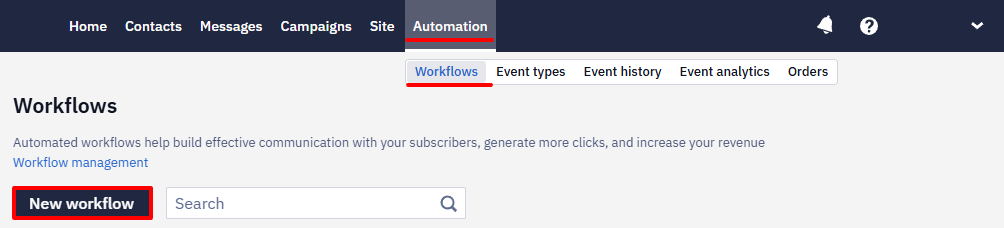
- Go to Automation → Workflows and click New workflow.
- Enter its name and tags (optionally).
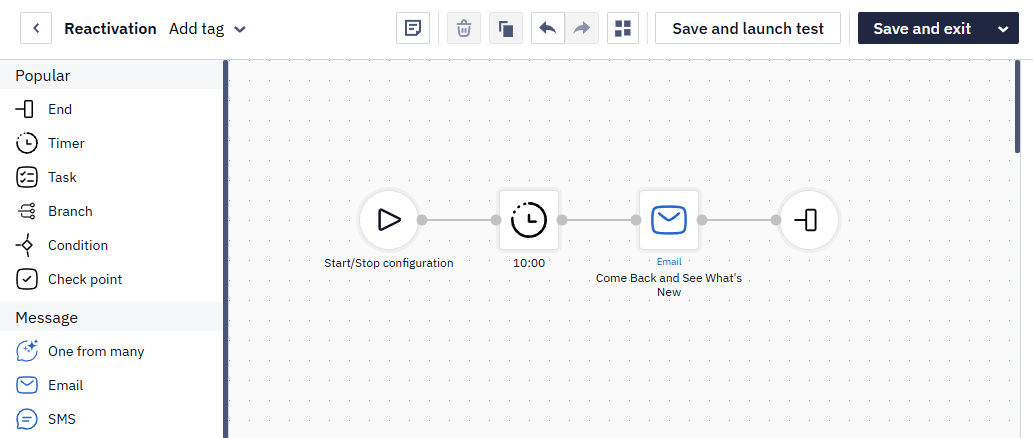
- Create a workflow with the following blocks:
The simplest workflow will consist of the following blocks:
- Start
- Timer
- Email (you can choose any type of message available in eSputnik)
- End
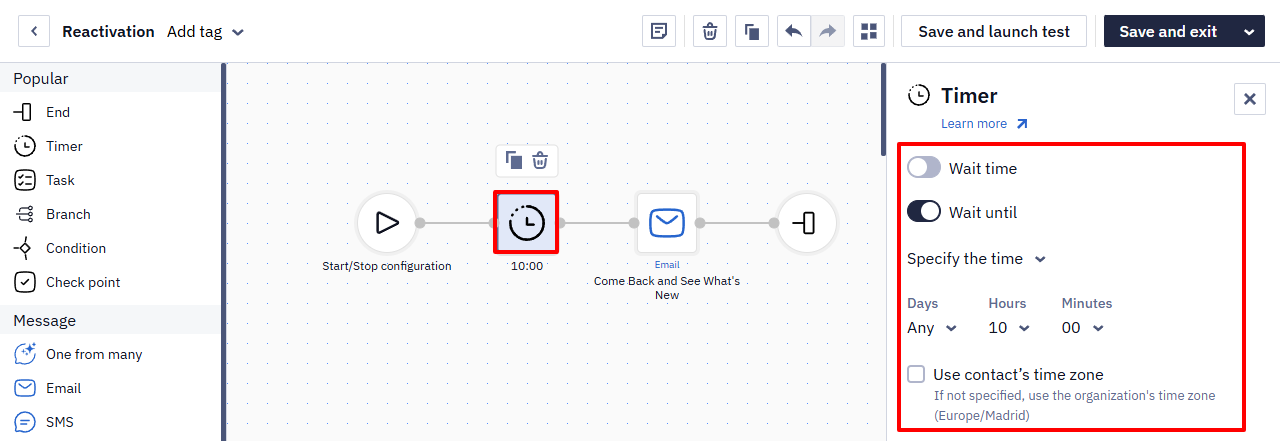
The Timer block regulates sending time so that the campaign isn’t sent to contacts straight after recalculation. In Wait time enter the time of delay, in Wait until select the day of the week and the time for sending the message.
If you need to consider the contact's time zone, activate the corresponding checkbox.
Select the reactivation email in the Email block parameters.
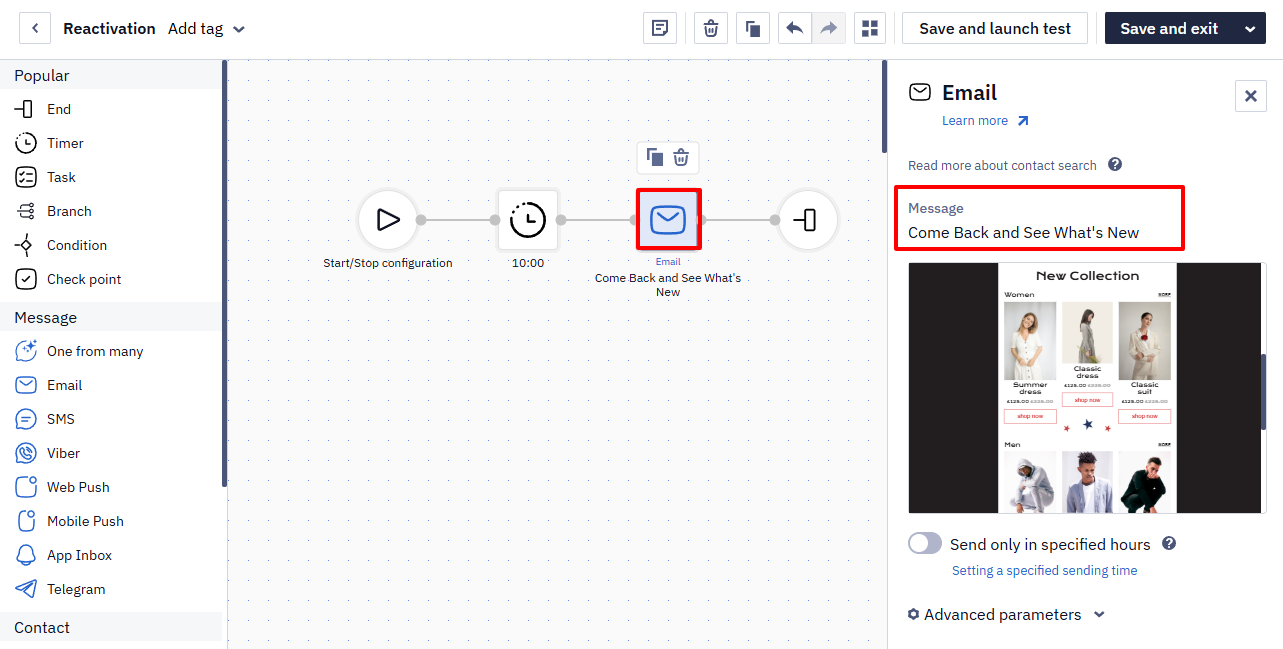
All blocks must be connected to each other.
- Click Save and exit.
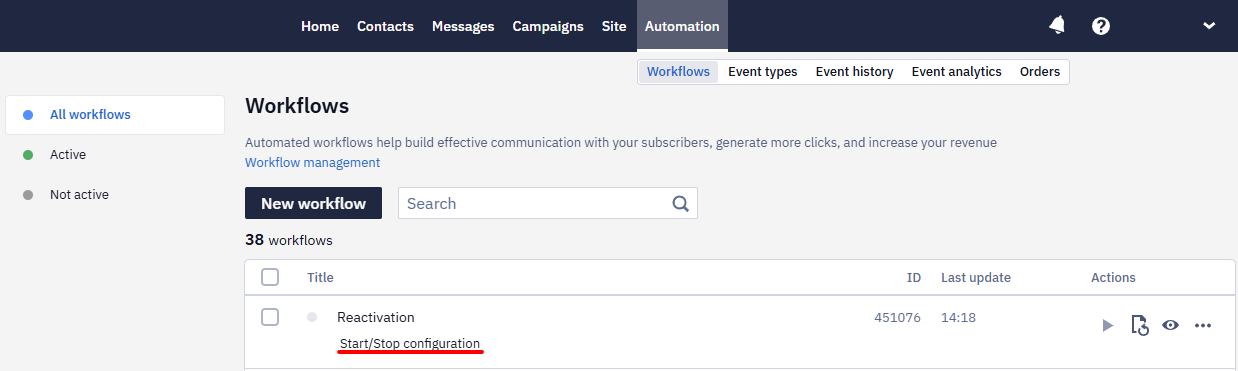
- Go to Automation → Workflows, select the necessary workflow, and click Start/Stop configuration.
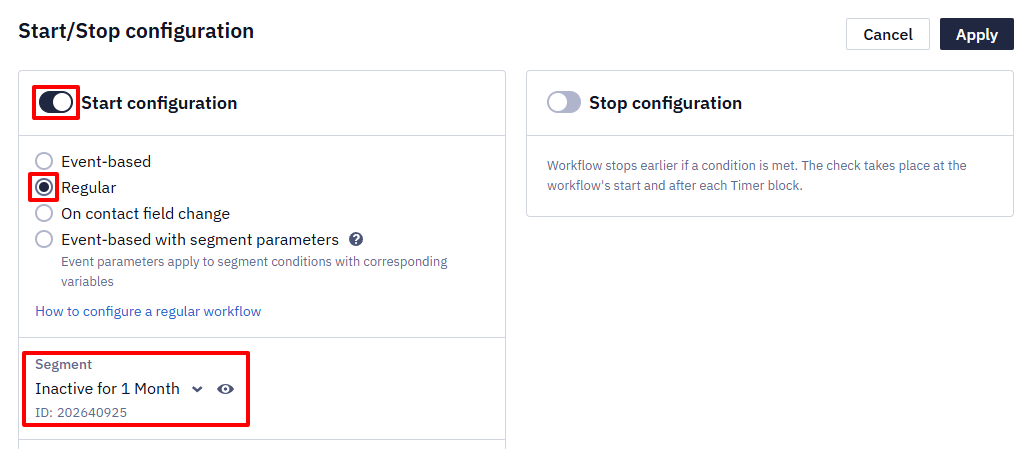
- Enable the Start Configuration slide button, select the Regular condition and created segment.
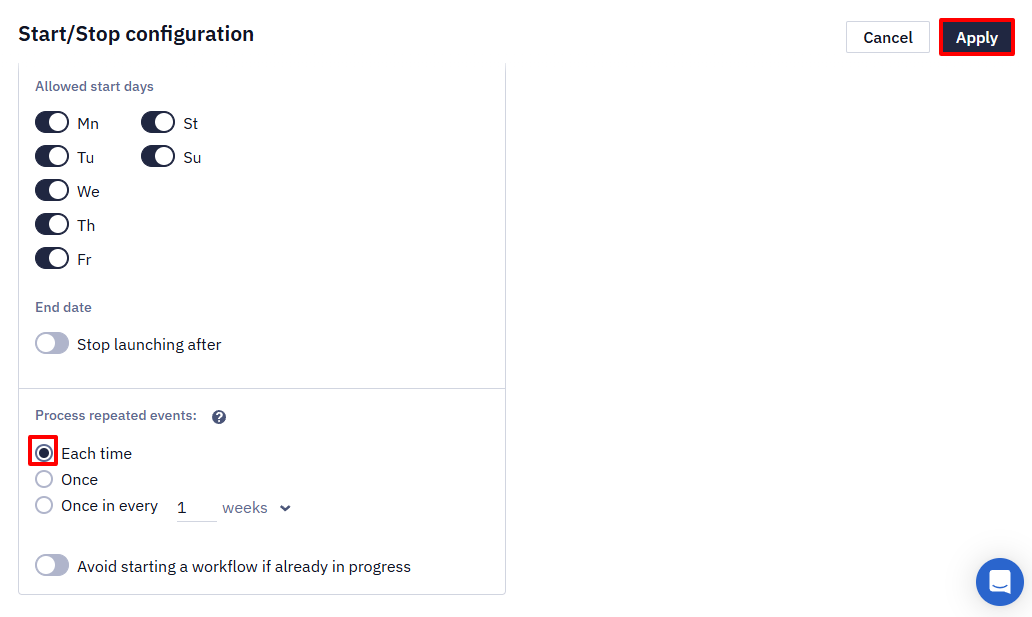
- Select Each time in Process unique events and click Apply.
- Click the Activate button to launch the workflow.
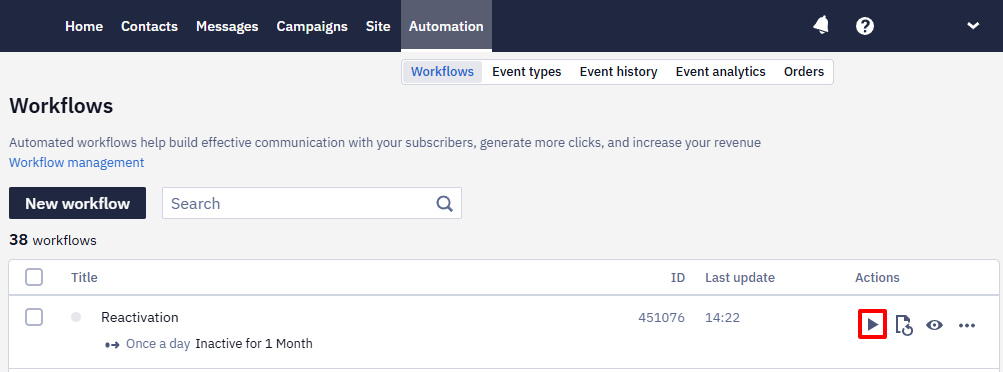
All contacts included in the dynamic segment will receive the reactivation campaign at the time specified in the workflow.
Updated 3 months ago