
Setting Up Web Push Notifications on Your Website
Selecting a Subscription Type
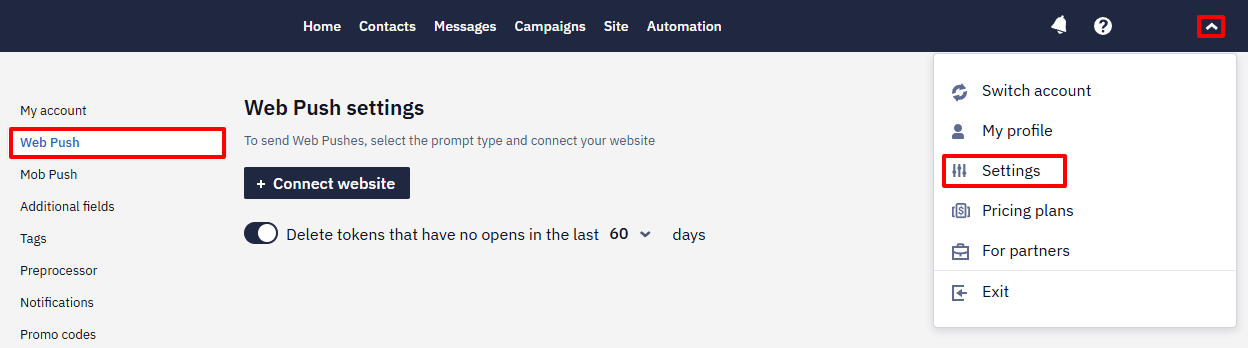
- Go to your account settings and select the Web Push tab.
- Select the subscription type:
- Double Opt-in. A double opt-in subscription. The advantage of this type is the ability to customize the appearance of the subscription and confirmation windows. In this case, a user will first see your customized window, and then the standard one.
- Single Opt-in. Allows users to subscribe with just one button click, without additional confirmation.
Google Chrome may block intrusive subscription windows To avoid potential limitations, select the Double Opt-in subscription.
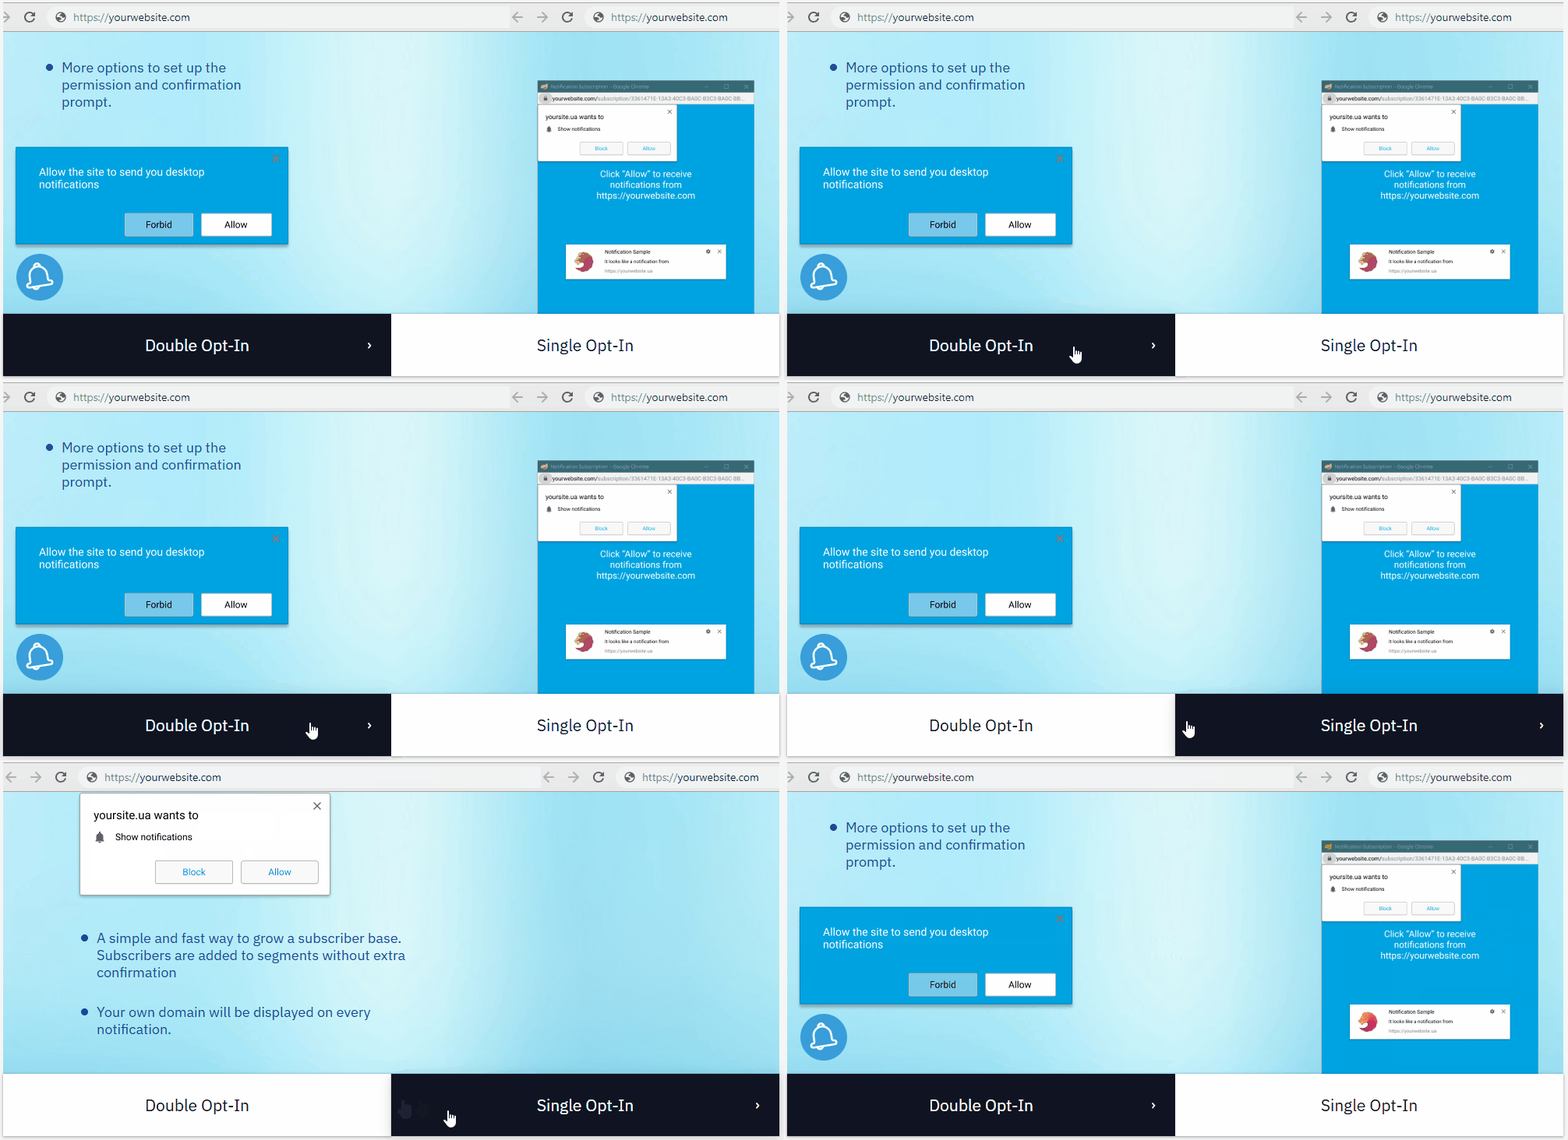
You can switch between Single Opt-in and Double Opt-in at any time. Existing subscribers keep their tokens, and the appearance of the subscription prompt — texts, colors, images — can also be changed at any time. Neither change requires reinstalling the script or the Service Worker file.
How often the native (single opt-in) prompt is shown is controlled by the browser and depends on the share of users who dismiss it on your site. After a refusal, the prompt may stop appearing at all — the browser puts the site into a quiet notifications mode, and from then on the permission can only be enabled manually in the browser settings. The double opt-in prompt is your own window, so it is not subject to these browser restrictions.
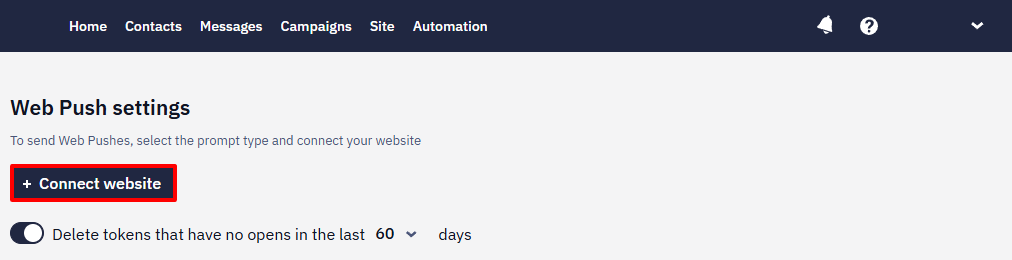
Click the +Connect website button, then select the subscription type if your account has existing subscriptions.
Using the Shopify, WooCommerce, or OpenCart plugin?
The technical part of Web Push setup (script, Service Worker, domain registration) is handled by the plugin automatically.
Go directly to activating the script and skip the manual script installation sections.
→ Shopify | → WooCommerce | → OpenCart
New Website Adding
After selecting the subscription type, fill in the required fields Website URL and Website name.
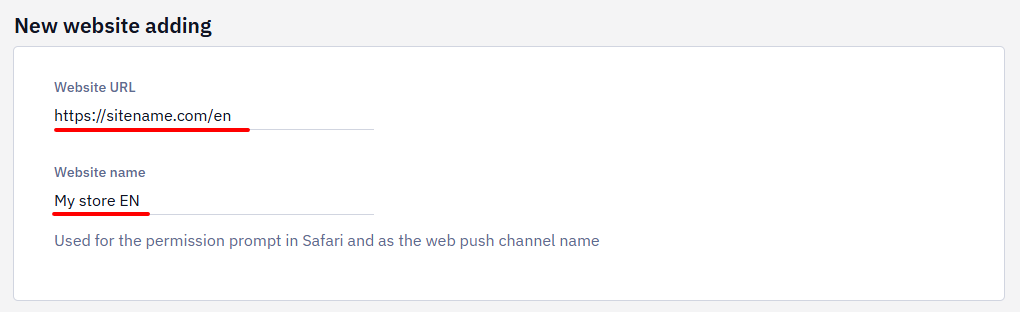
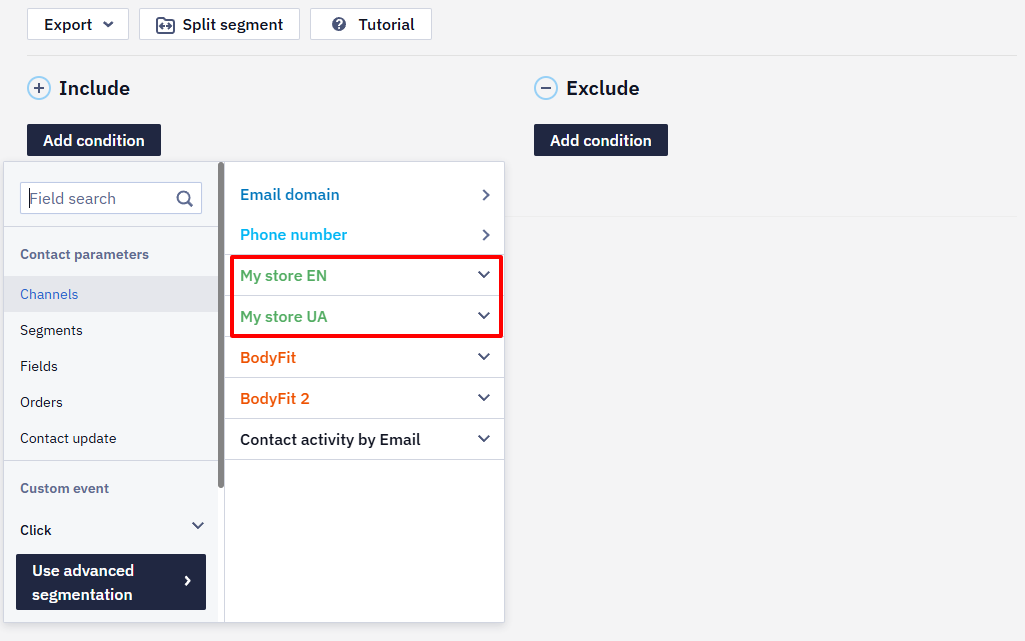
The Website name field can be used to create dynamic segments, as well as for searching and filtering contacts within a list.
We recommend using original website names for each site or subscription page — this will help you segment subscribers from different versions, even if they share the same domain.
Example:
sitename.com/en— My store EN (English website version)sitename.com/ua— My store UA (Ukrainian website version)
Service Worker Setup
Service Worker is a script that runs in the background on your device, even when you are not using the website or application.
A Web Push token is issued per browser (through the Service Worker), not per device. A person using several browsers on the same device generates a separate token in each one. Two browsers on one device therefore create two separate subscriptions, and both of them can receive the same push.
The browser does not have to be open for delivery — the Service Worker runs in the background wherever the operating system and the browser support it.
The Service Worker configuration includes three fields (filled in automatically):
-
Path to the file — the path to the directory on the website where the script file should be uploaded.
-
File name — the name of the file containing the code (will be generated in the Web Push Integration step.)
-
Scope — the scope within which the Service Worker can interact with the website content. It defines on which pages or in which directories of the website this Service Worker will be active.
-
When using a web push Service Worker together with a PWA (Progressive Web App) Service Worker, it is necessary to separate their scopes to avoid conflicts. A typical setup is to place the PWA Service Worker in the root directory of the website and the web push Service Worker in any other directory.
-
The scope of the web push Service Worker is not limited to the pages where the script is active. It works on all pages of your website, even if they are not within the specified scope.
-
The browser stores the notification permission for the whole domain, not for a path. Language versions that share a domain —
/uk/,/en/— therefore share one subscription: once a visitor allows notifications on one of them, the prompt no longer appears on the others. Several web push apps can be created for one domain in the account, but the browser's permission stays domain-wide.
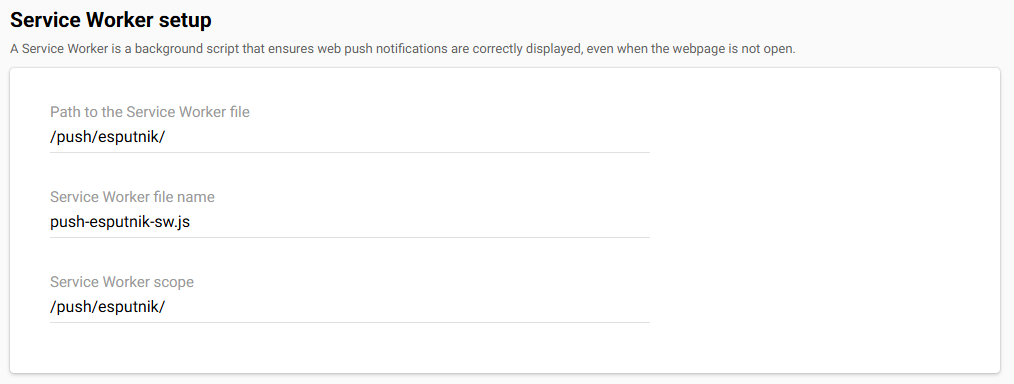
If you need to place the file in a different directory on the website, change the path to the Service Worker file.
NoteThe file path and scope must have the same base path, starting and ending with a slash
/. For example, if the path is/push/esputnik/, then the scope must also start and end the same way, meaning it should also be/push/esputnik/.
Web Push Certificates
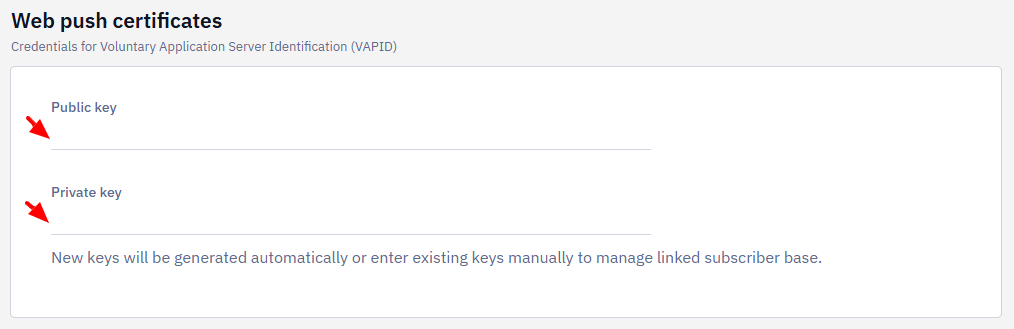
If you already have a subscriber base, enter public and private keys in the corresponding fields. To receive new certificates, leave the fields blank—the keys will be automatically generated along with the script for your website.
Legacy Browsers Support
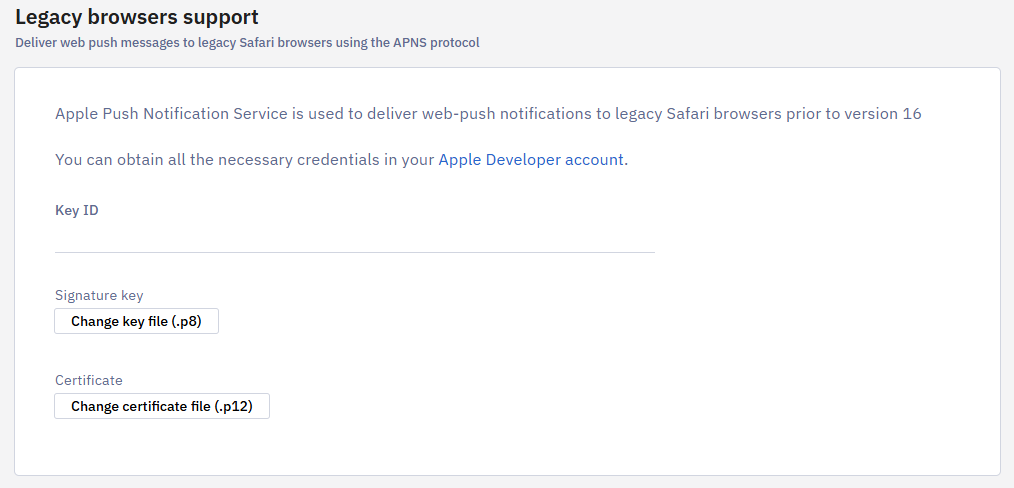
Follow the link to configure Web Push subscriptions on Safari versions below 16.
Web Push Integration
It consists of the following steps:
- Generating and integrating the script
- Checking the website status
Let's take a closer look at these steps
Generating and Integrating the Script
If your site uses a content security policy (CSP) or a firewall, contact support for the current list of domains the script uses.
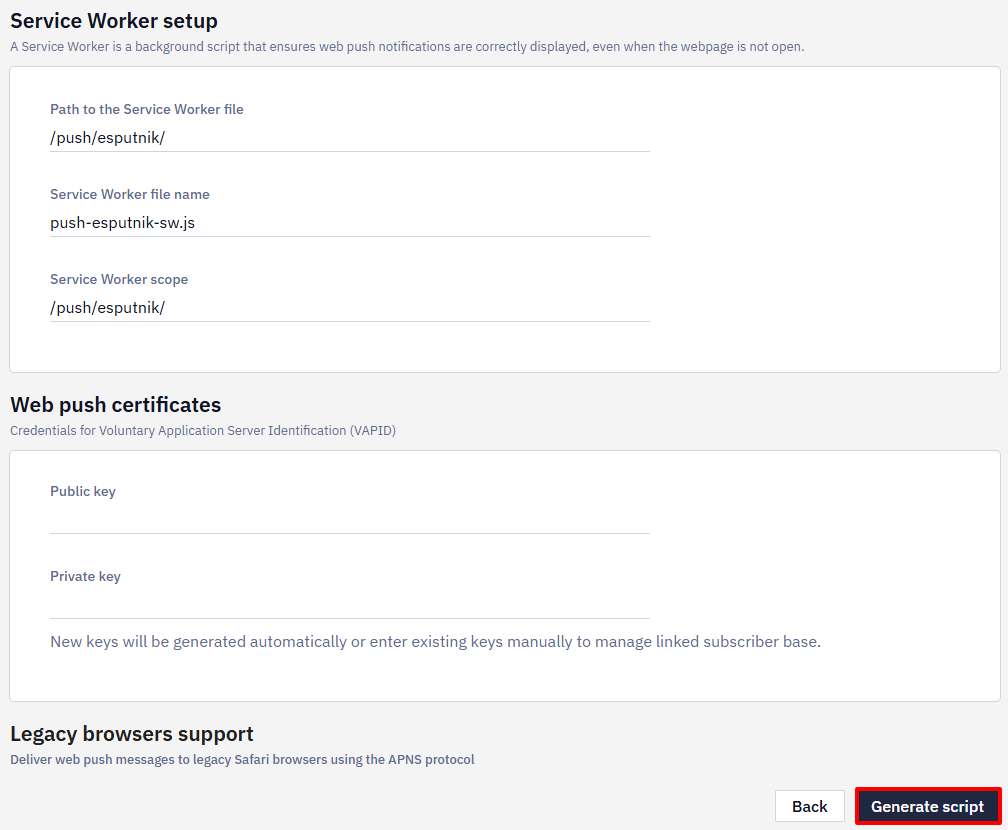
Click Generate script and follow these steps:
- Download the Service Worker installation file below and copy it to the
/push/esputnik/directory on your website or to the directory specified in the File path field in the Service Worker settings. - Copy the generated code and insert it into the
<head>section of your website's HTML pages. - Create a manifest file, place it on your site, and connect it on HTML pages to enable sending messages to devices with iOS/iPadOS.
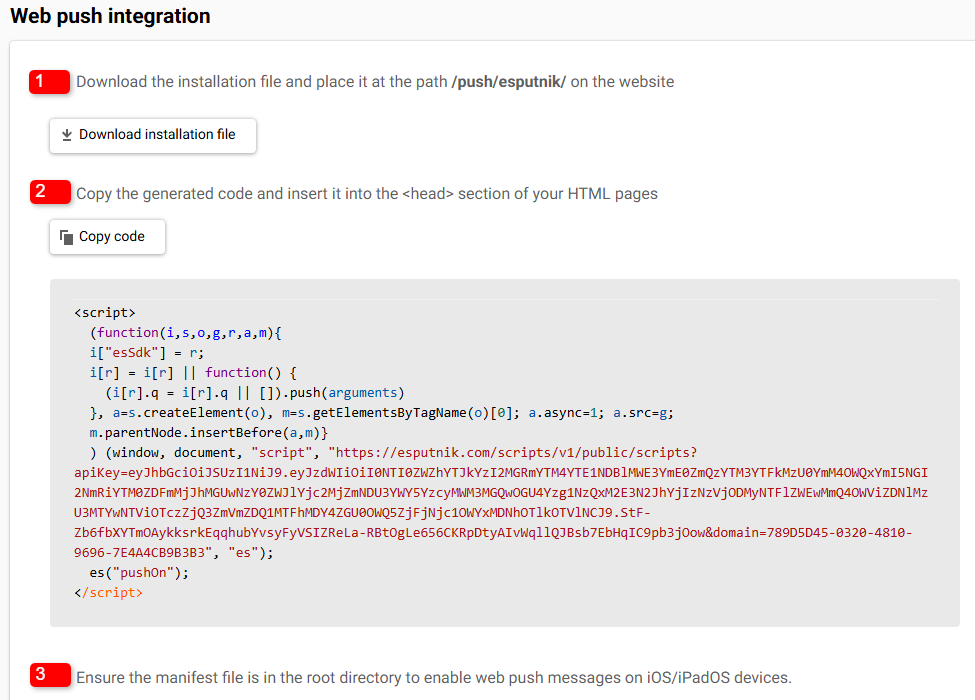
The token in the generated script is limited to events — it gives no access to contact data, so keeping the script in your site's code is safe.
Checking the Connection Status
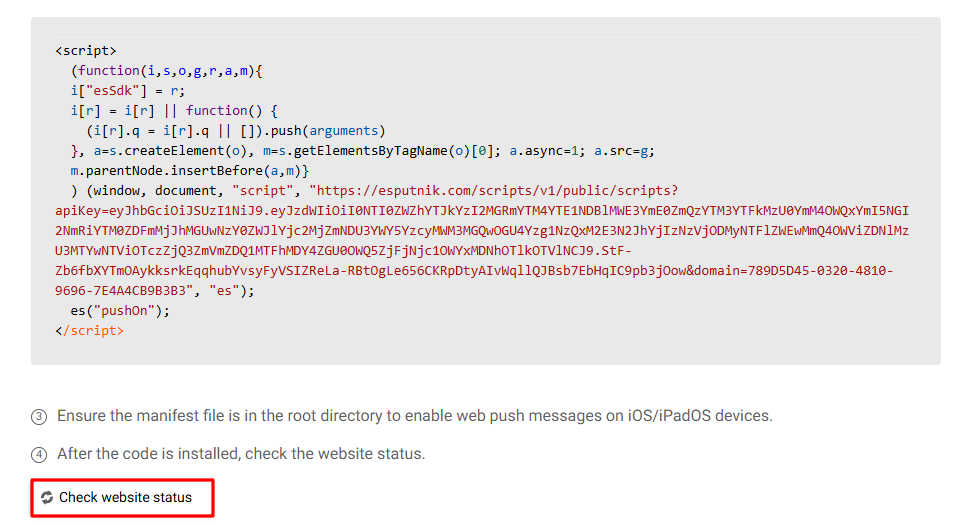
After uploading the installation file and adding the code to your website, click the Check website status button.
You can also check the status directly from the website list on the Web Push settings page, without opening Web Push integration: click the refresh icon next to the website status.
NoteA new web push subscription is matched to an existing contact through a
CustomerDataevent carryingexternalCustomerId. If this event isn't sent right after the subscription is confirmed, the token attaches to a new (anonymous) contact instead of your existing one. See Setting Up Web Tracking for the event format.The Web Push script itself does not accept
externalCustomerId— you can't bind a subscription to an external identifier at the subscription step. To send a Web Push to a specific contact, use the Send prepared message resource withcontactId.
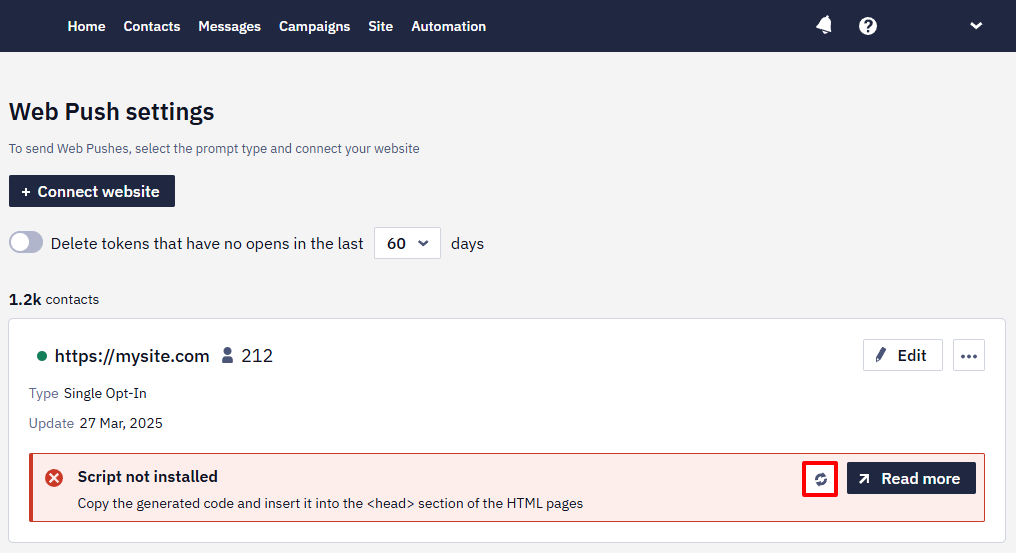
The Website connected status should appear in the settings — when checking from the website list, it is shown as a notification under the website. From this moment on, tokens will start to be collected.
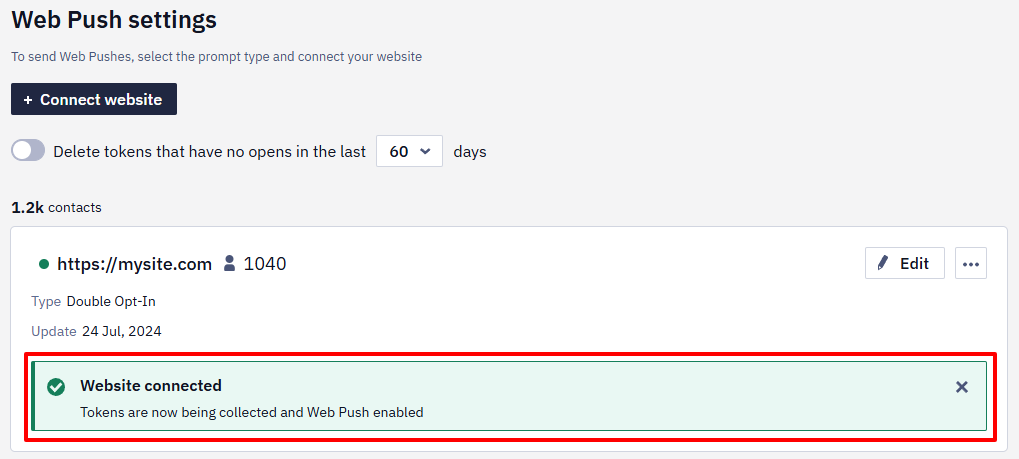
A new Web Push subscription is matched to an existing contact through a CustomerData event carrying externalCustomerId. The event binds the token only to a contact that already exists with this externalCustomerId: if the contact existed before the subscription, send the event right after the subscription is confirmed, and if the contact is created later, send it after the contact is created. Until the event is sent, the token stays on a separate anonymous contact. The event has to be sent by the site's JavaScript, in the same browser where the subscription was made: the script matches the token to the contact using the data available in the browser. If your site sends CustomerData from its own server, the script doesn't see that data and the token stays on a separate contact. See Setting Up Web Tracking for the event format.
The Web Push script itself doesn't accept externalCustomerId — you can't link the subscription to an external identifier at the moment of subscription. To send a Web Push to a specific contact, use the Send prepared message resource with contactId, provided the contact has a web push token — after the subscription, the contactId is available in the browser storage.
Passing a webpush channel in the Add/update contacts request no longer updates the token — the service stopped supporting it, and a web push token is set only by the site script. If the CustomerData event wasn't sent and contacts with only a token have already accumulated separately from your contacts with an email, they are merged when the subscriber follows a link from one of your emails: the script matches the contactId in the link's UTM tag against the subscription stored in the browser. See Identification of Contacts for the details.
We don't recommend assigning externalCustomerId to contacts that have only a web push token: the token can become invalid, and a contact left without media channels is deleted automatically. The external identifier stays attached to the deleted contact and can't be assigned to another one.
Check the settings you’ve made if you see Script not installed.
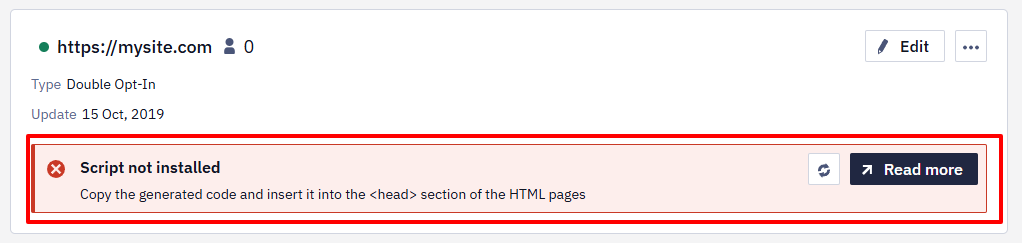
Sometimes, the website status may not be displayed due to the website provider’s security policy. If the script is installed, ignore this status.
The website is checked when you connect it and each time you check the status manually; there are no automatic recurring checks. If your site's protection (for example, Cloudflare) blocks this check, add our IP addresses 18.193.171.62, 3.66.101.249, and 52.16.166.210 to the allowlist — the entry is needed only while the website is being checked.
The Script not installed warning can also be a false positive when the script is added through Google Tag Manager — the subscription can work correctly despite the warning.
Judge by the actual signals instead: the script loads (visible in the browser's Network tab), the Service Worker is registered, the browser shows the permission prompt and the subscription succeeds, and the subscriber base grows. Only if the functionality genuinely fails should you look for an sw.js / PWA Service Worker conflict or for errors in the Console and Network tabs.
Web Push Support on iOS/iPadOS in PWA
To enable Web Push notifications support on iOS/iPadOS devices in PWA (Progressive Web Apps), make sure that:
- the manifest file is placed on your website and available to the browser;
- the manifest is connected on the website's HTML pages in the
<head>section, for example:<link rel="manifest" href="/manifest.json">; - the manifest contains
"display": "standalone"or"display": "fullscreen". Ifdisplayis not specified, the browser usesbrowserby default, and Web Push on iOS/iPadOS may not work; - if the app should open from the website's home page, specify
"start_url": "/"in the manifest.
Placing the manifest in the root directory is not required.
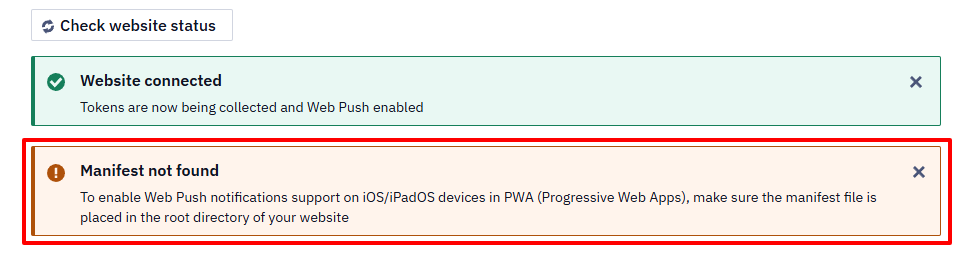
If Web Push on iOS/iPadOS in PWA is not required, you can ignore the Manifest not found status. After adding the manifest, recheck the status with the refresh icon in the website list.
Users can unsubscribe from web push in PWA through the browser/device notification settings or directly from a received push notification. A separate unsubscribe option inside the PWA itself is not required.
Click Set up subscription to go to the appearance settings of the subscription window, or Back to return to the general settings tab.
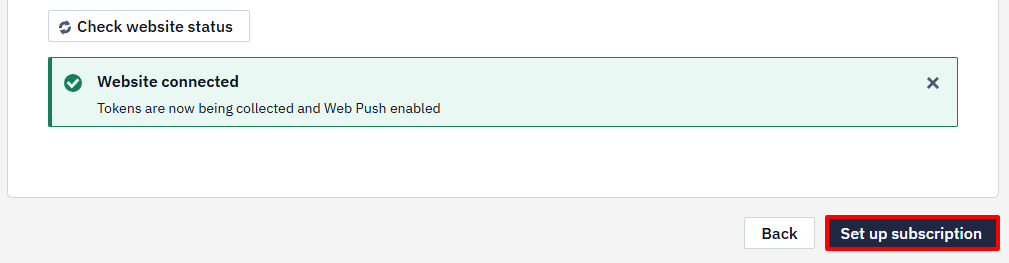
Learn more about customizing the appearance of the subscription window in a separate article.
Deleting Tokens
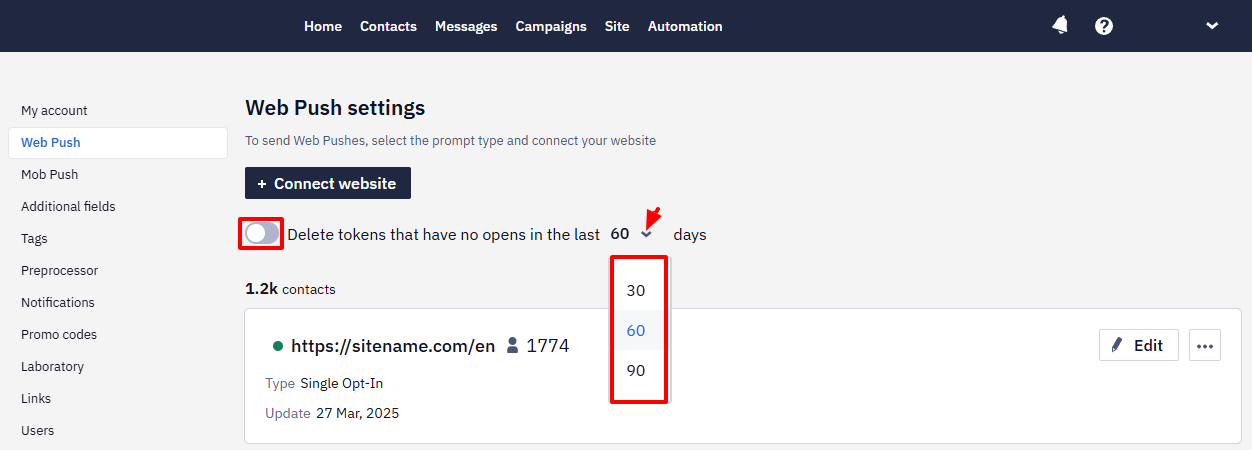
Enable the option to automatically delete inactive tokens after 30, 60, or 90 days to keep only those users who interact with the campaigns.
Editing Web Push Integration
To return to the integration settings, for example, to change the website name, re-upload the installation file, or copy the generated code, click the website link or the three dots icon and select Web Push integration.
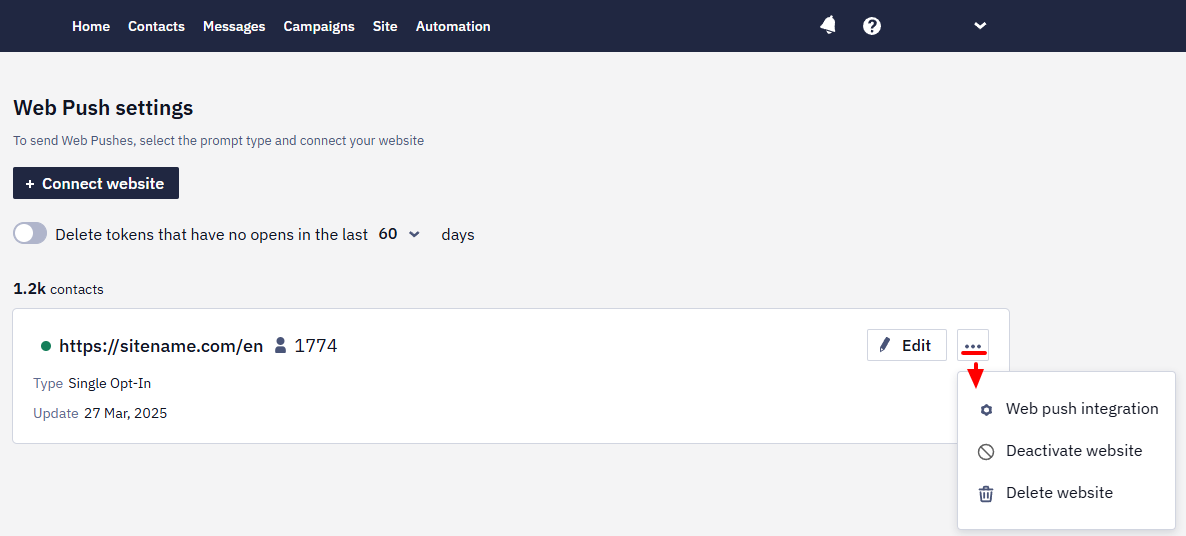
In the same menu, you can delete or temporarily deactivate/reactivate the linked site.
If the site is deactivated, collecting subscribers for it is suspended and sending messages is impossible.
After activation, all functionality will become available again, all contacts will remain subscribed and with active tokens.
When you delete a site, all web push tokens collected on the site are deleted along with it.
- To link a site, you can use the API resource Add web push domain.
- This resource is also used in integration with plugins such as WooCommerce and Shopify.
- A site linked via the API is inactive by default — it must be activated manually.
The token used by the script on your site is scoped: it can generate events and nothing else. It gives no access to contacts, so keeping it in the page code is safe.
Updated 1 day ago