Webhooks in Workflows
Webhook workflows allow working with parameters from the workflow context.
This request uploads and sends the contact’s data from eSputnik to other systems and contrariwise collects data into eSputnik from external systems. Using this as a part of a workflow, you can:
- Address your own resource, which will process the request and return data for
- Personalization (for example, a personal promo code or a token for authorization) in the message.
- Checking response parameters.
- Send data from an event or from the contact’s card (for example, order id, additional field “contact’s id in messenger” or “Birthday”) to an external resource.
NoteOnly the contact’s data (fields + additional fields) and the parameters from an event that triggered a workflow with a webhook can be sent through a webhook. In most cases, data transfer in webhooks is configured in JSON format, but XML and text formats are also available.
Account-level data — such as your tariff/plan or billing status — is not available inside a workflow and cannot be referenced in a webhook block. The Webhook block can only call an external endpoint or send/receive contact- and event-level data.
Using Webhook Responses in Messages and Workflows
You can seamlessly use JSON responses received from external services via webhook calls directly in your workflows. This allows you to fully leverage real-time data, such as from your CRM, to personalize communication and drive intelligent workflow decisions.
Key Benefits:
- Personalize messages with dynamic data tailored to each user
- Route contacts through different branches in your workflow using data-driven logic (via the Condition block)
This approach allows you to create deeply personalized communications tailored to each user's context.
How It Works
When a webhook returns a JSON response, the data is stored in the workflow under an object named after your data source (i.e., the webhook name). You can reference this data:
- In messages using Velocity syntax
- In subsequent Condition and Webhook blocks in the workflow — using regular expressions
Example: Using Workflow Response in Messages
Suppose you send a request to a webhook data source called crmWebhook to retrieve a personal promo code. The response might look like this:
{
  "externalId": "user_12345",
  "promoCode": "WELCOME-5OFF"
}
To display the promo code in a message within the workflow, use the following Velocity syntax:
$!crmWebhook.promoCode
or alternatively:
$!data.get("crmWebhook").get("promoCode")
Where
crmWebhookis the name of your webhook data sourcepromoCodeis the field returned in the response
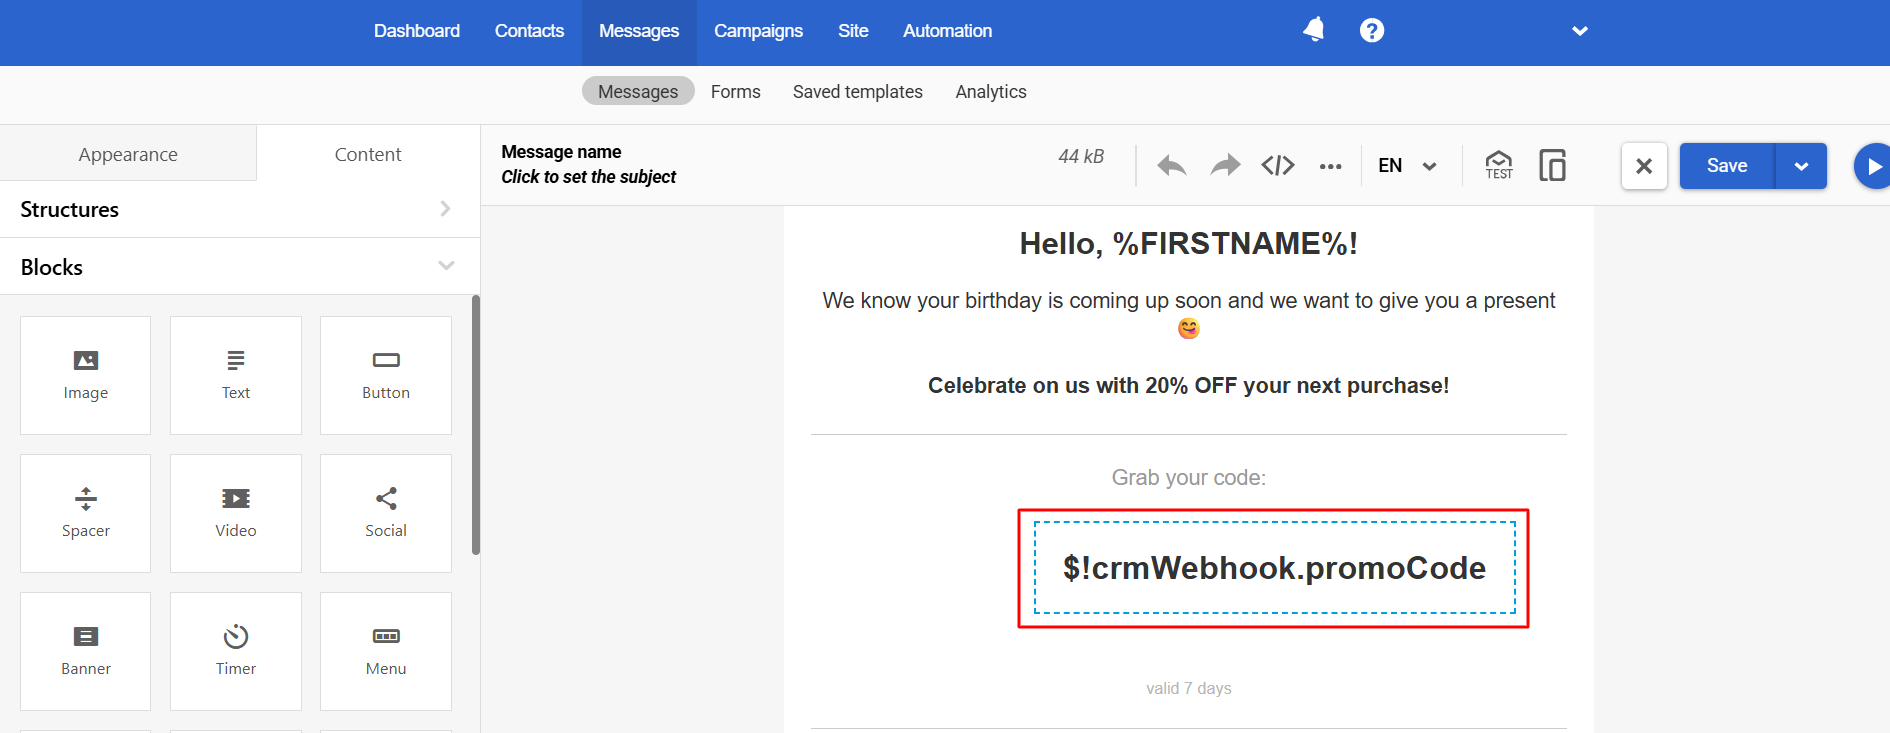
As a result, each contact will see their own unique promo code retrieved from your external system.
Example: Using Workflow Response in the Condition Block
Let’s say you want to check if a contact is a member of your loyalty program. You send a request to crmWebhook, and the service responds with:
{
  "externalId": "user_98765",
  "isLoyaltyMember": true
}
To configure the Condition → Variable matches regular expression block:
- In the Name field, enter the data source name:
crmWebhook - In the Pattern field, enter a regex pattern to match the desired value, for example:
.*true.*.
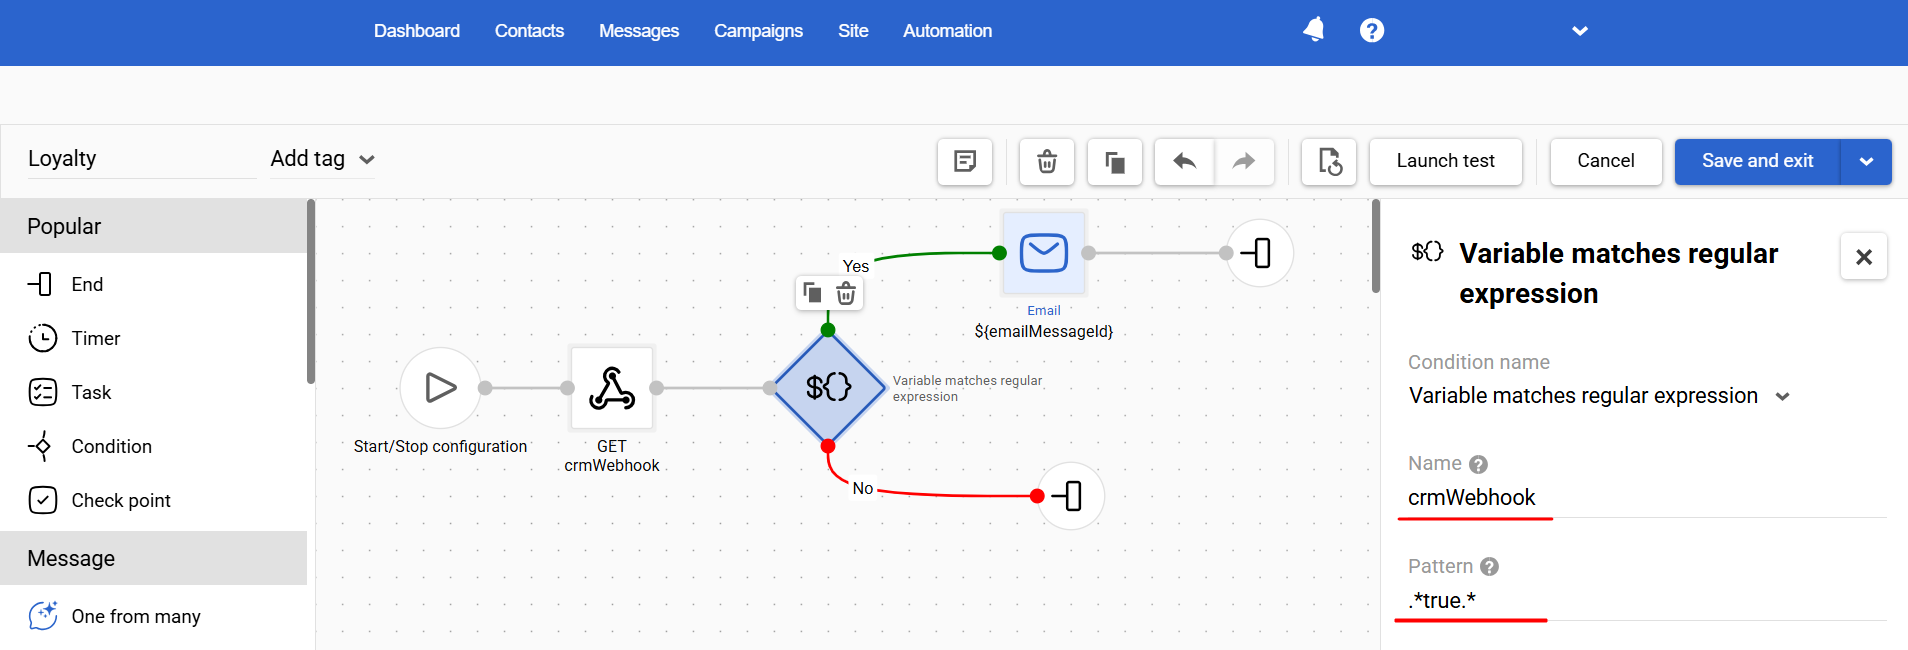
If the value of isLoyaltyMember is true, the contact proceeds down the Yes path.
Otherwise, they follow the No path.
NoteThese examples demonstrate just a few ways you can integrate external data into your workflows. You can expand on this approach by:
- Checking for specific values or nested fields
- Applying multiple regular expressions
- Combining Velocity logic for dynamic content rendering
Use webhook responses to power smarter automations and deliver meaningful, real-time personalization at scale.
Creating a Webhook in a Workflow
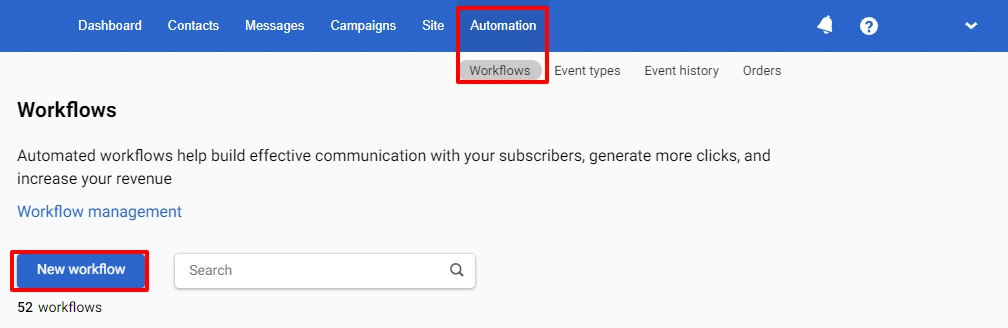
- Go to Automation → Workflows and click the New workflow button.
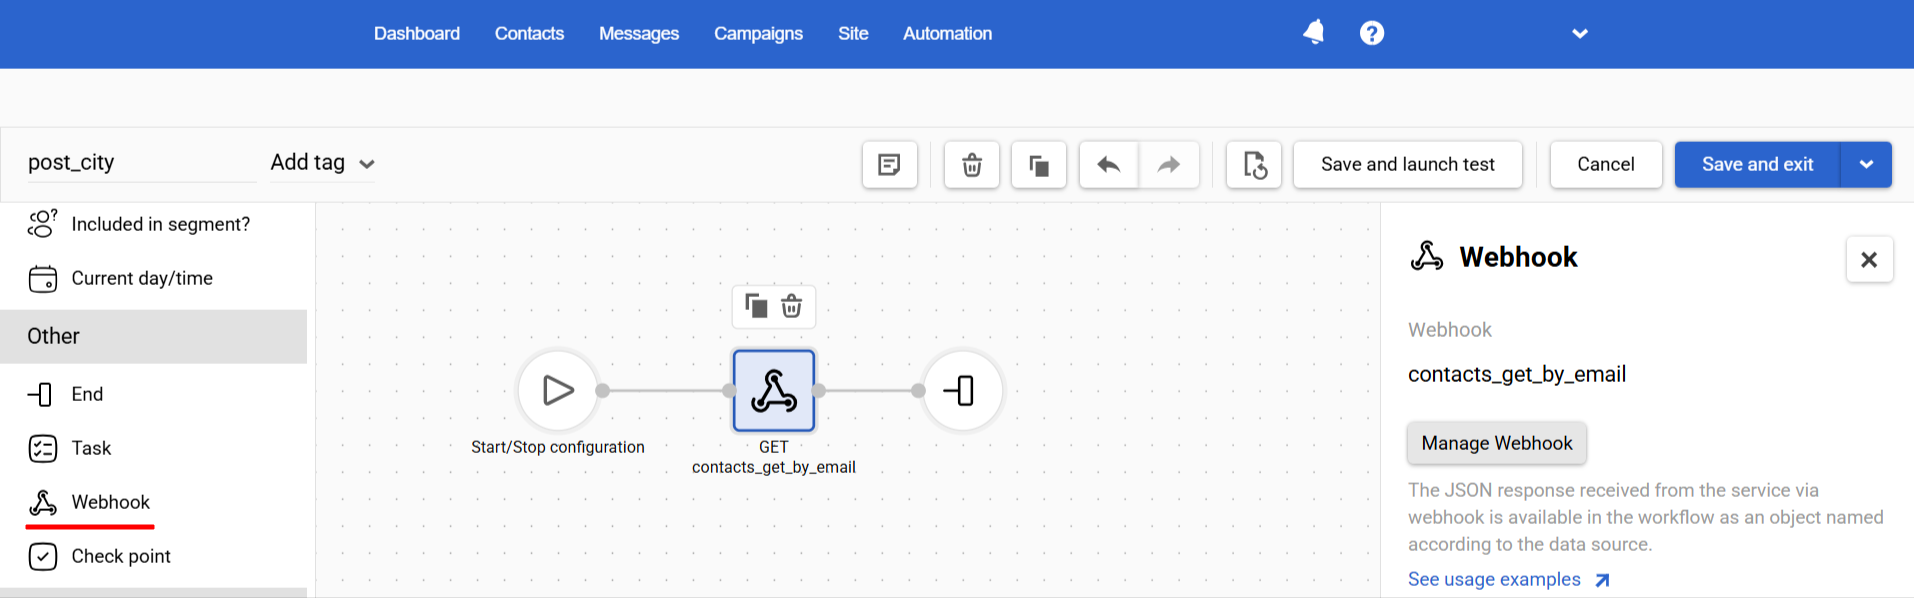
- Open the Other tab on the left panel, and select Webhook.
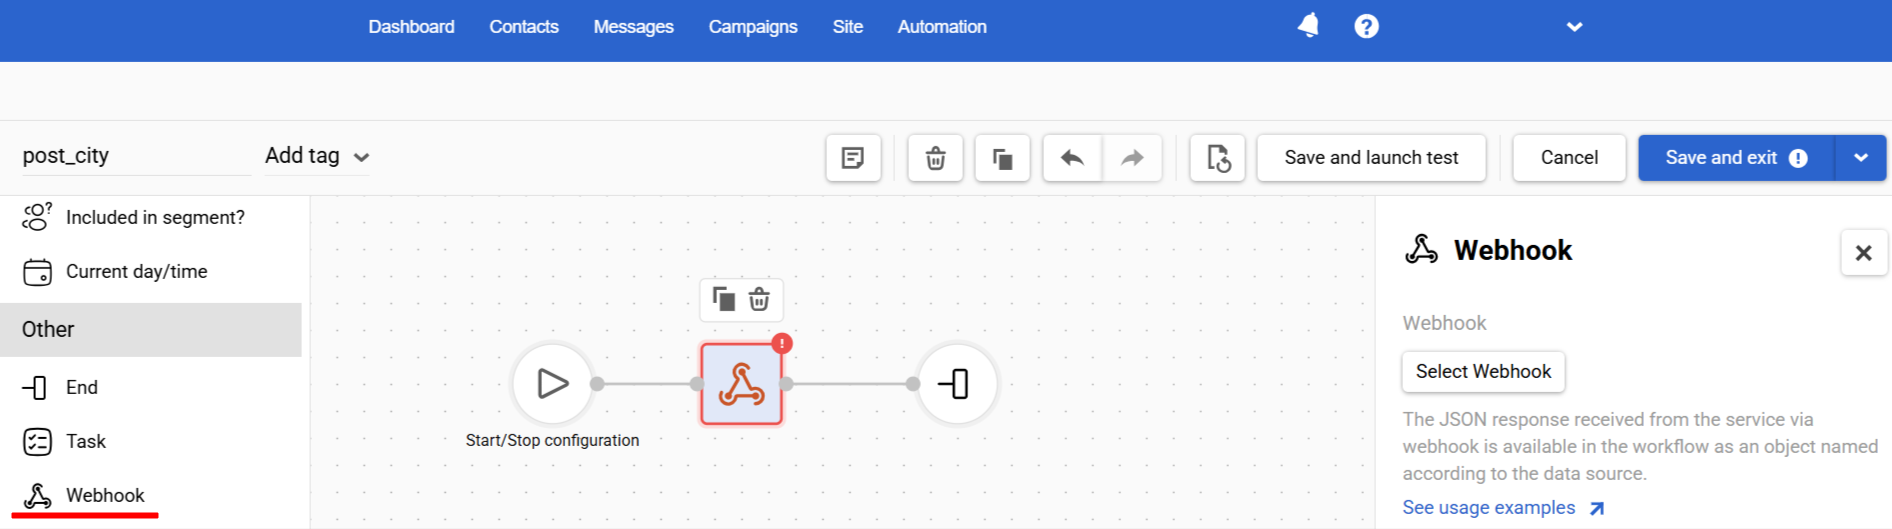
- Click the Select webhook button on the Settings panel on the right side.
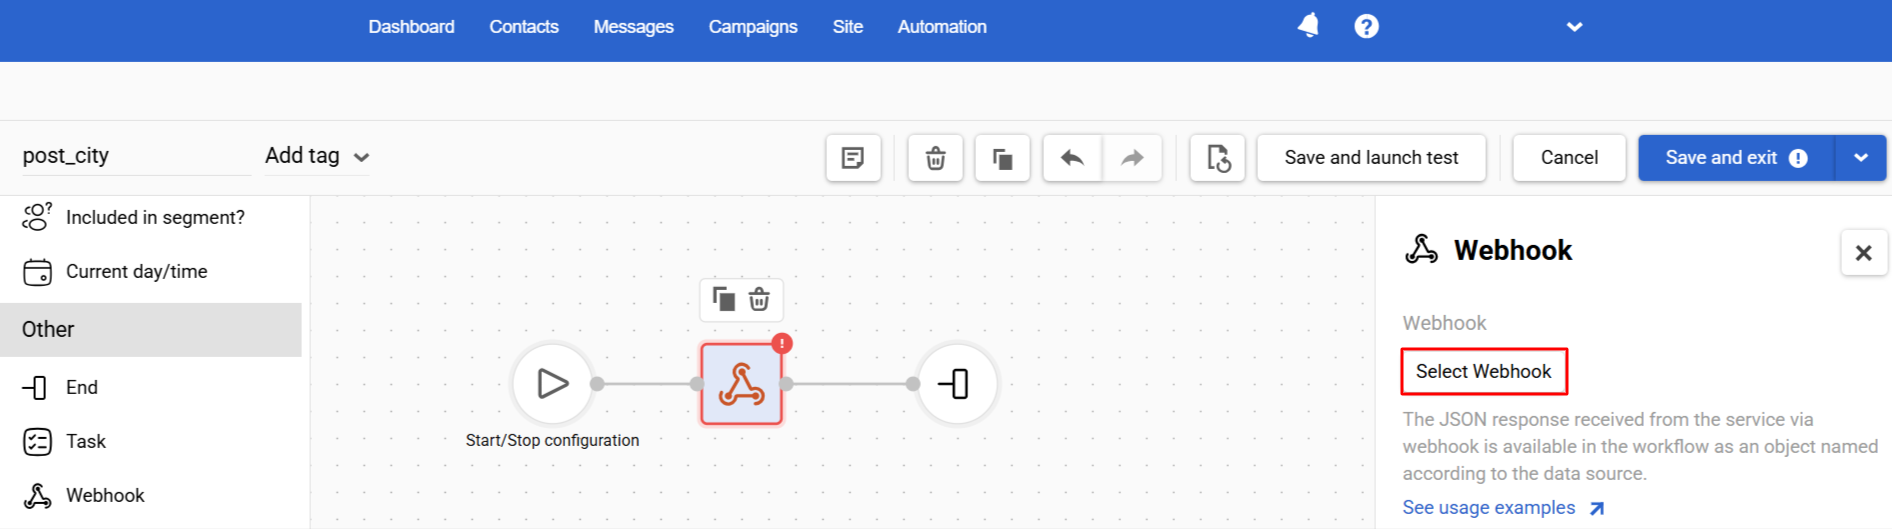
- Select the exiting webhook or create a new one.

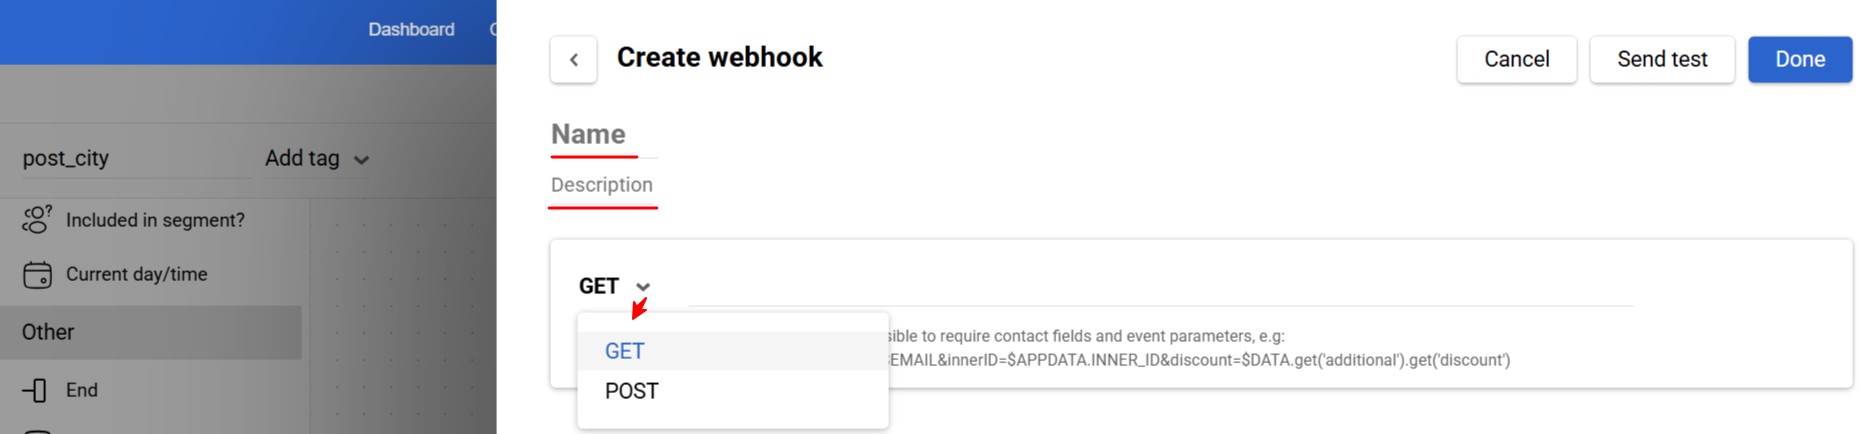
- In the new webhook configuration window, enter a name, description (optional), and select the request type from the drop-down menu:
GETorPOST.
Data Substitution from the Workflow Context
To obtain data in the block, Velocity variables are used case-insensitively in the following formats:
| Format | Variable | Description |
|---|---|---|
| Shorthand | $discount | If the variable does not exist, the literal text $discount is output |
| Silent | $!discount | If the value is missing, nothing is rendered |
| Alternate value | ${discount|$otherGift} | If the variable value is missing, a fallback value is inserted |
Please noteIf the context contains both a value from external data (for example,
"firstname": "Maggy") and a value from the contact card (for example,firstname = "Margaret") for the same field, the external value ("Maggy") will be used in the substitution.
Working with GET Request
Use this request type when you want to request data on an external resource using the link to use the data in a workflow and insert it inside the workflow. The data is transmitted to an URL as "name-value" pairs.
In order to configure the webhook:
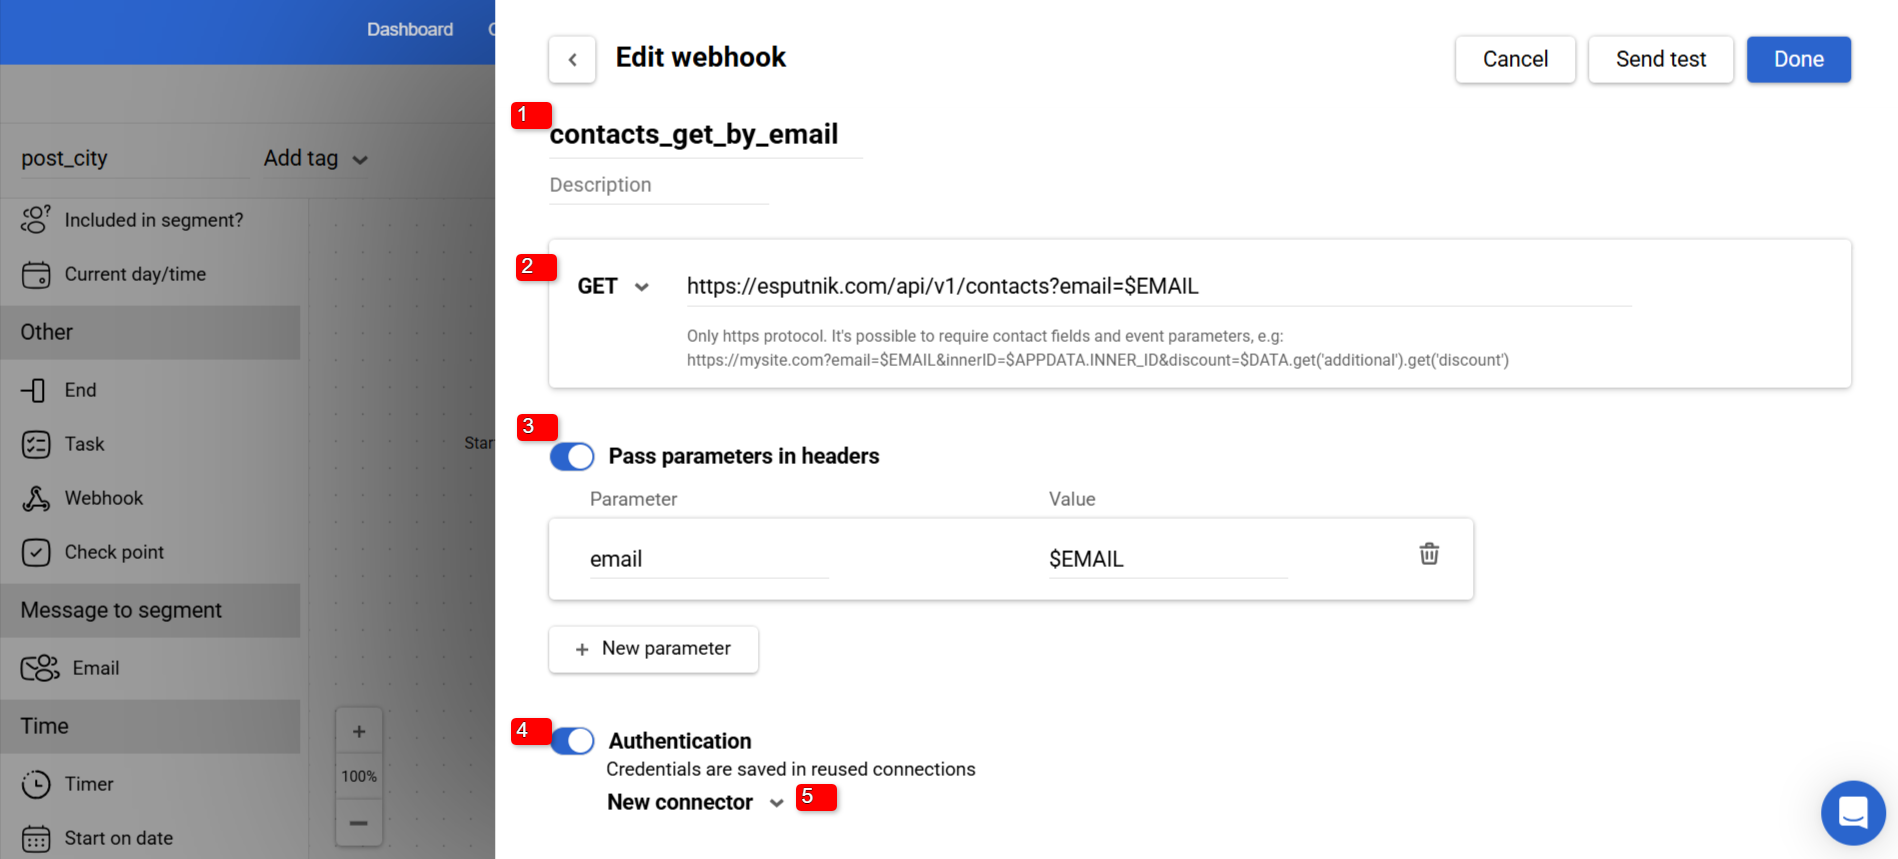
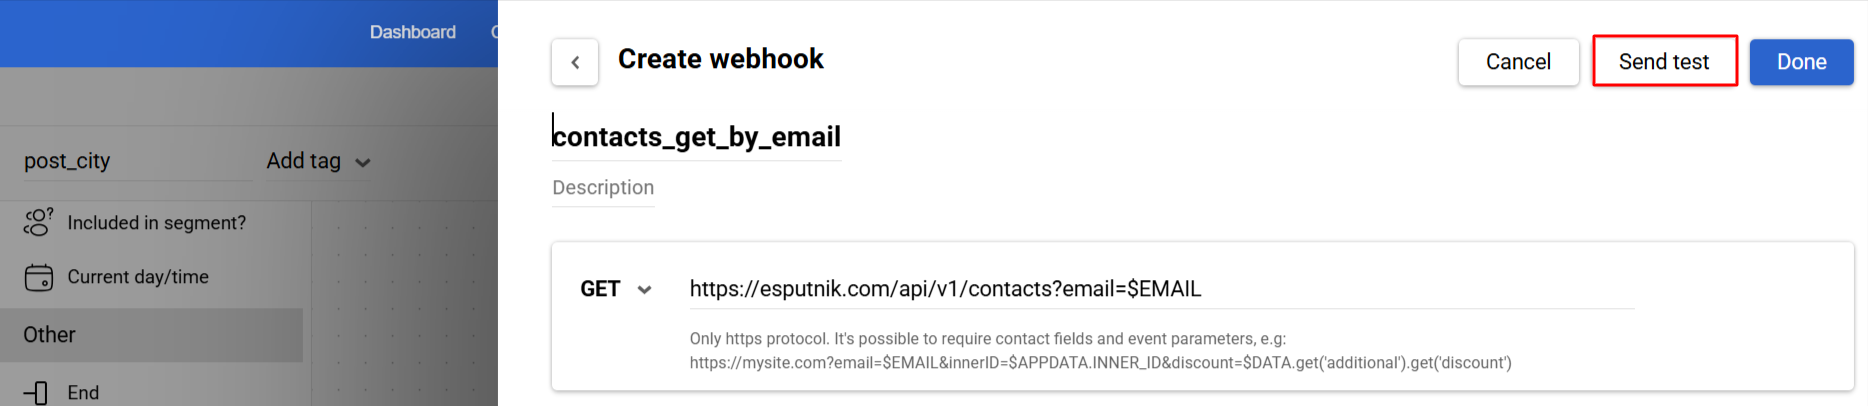
- Enter the webhook name using any symbols (required field) and description (optional field).
- Enter the resource’s URL through secured
HTTPSprotocol (if you enterHTTPthe system does not save the link). Type in variables you want to return after the interrogation symbol. In this example, we transmit the email parameter’s value from an event triggering the workflow and address the EMAIL field related to the contact’s card on the resource to which we sent theGETrequest. - If your resource reads parameters from headers, enable Pass parameters in headers slide button and enter corresponding variables and values you want to address.
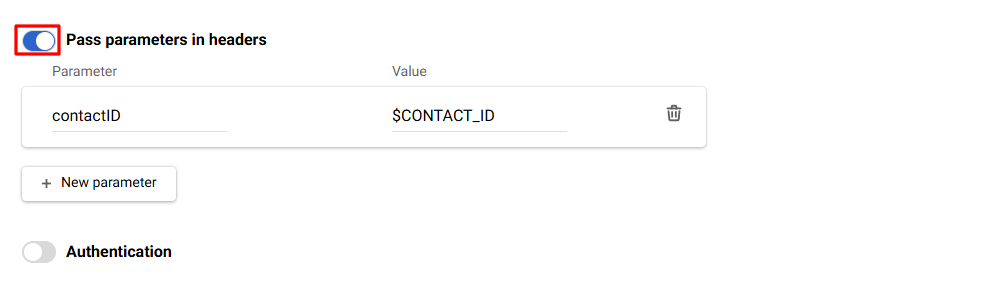
Below are examples of parameter names and their values that can be used:
| Parameter | Value |
|---|---|
| phone | $phone |
$email | |
| name | $name |
| city | $city |
| contactID | $contact_ID |
| param | $workflowInstanceId |
NoteFor
GETrequests, the$workflowInstanceIdvalue can be passed in the webhook parameters — it is a unique identifier for the workflow instance. It allows identifying which specific events belong to the instance and, based on that, calculating statistics and conversions.
ImportantFor
$workflowInstanceId, the character case matters, while for contact fields, it does not.
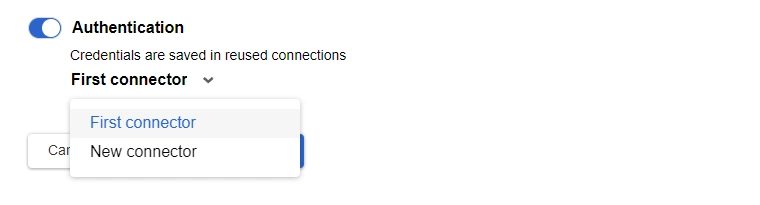
- Enable Authentication slide button and select authentication connector. If you need to configure a new one, click the New connector button to open the Create connector window.
- In Create connector window enter the following details:
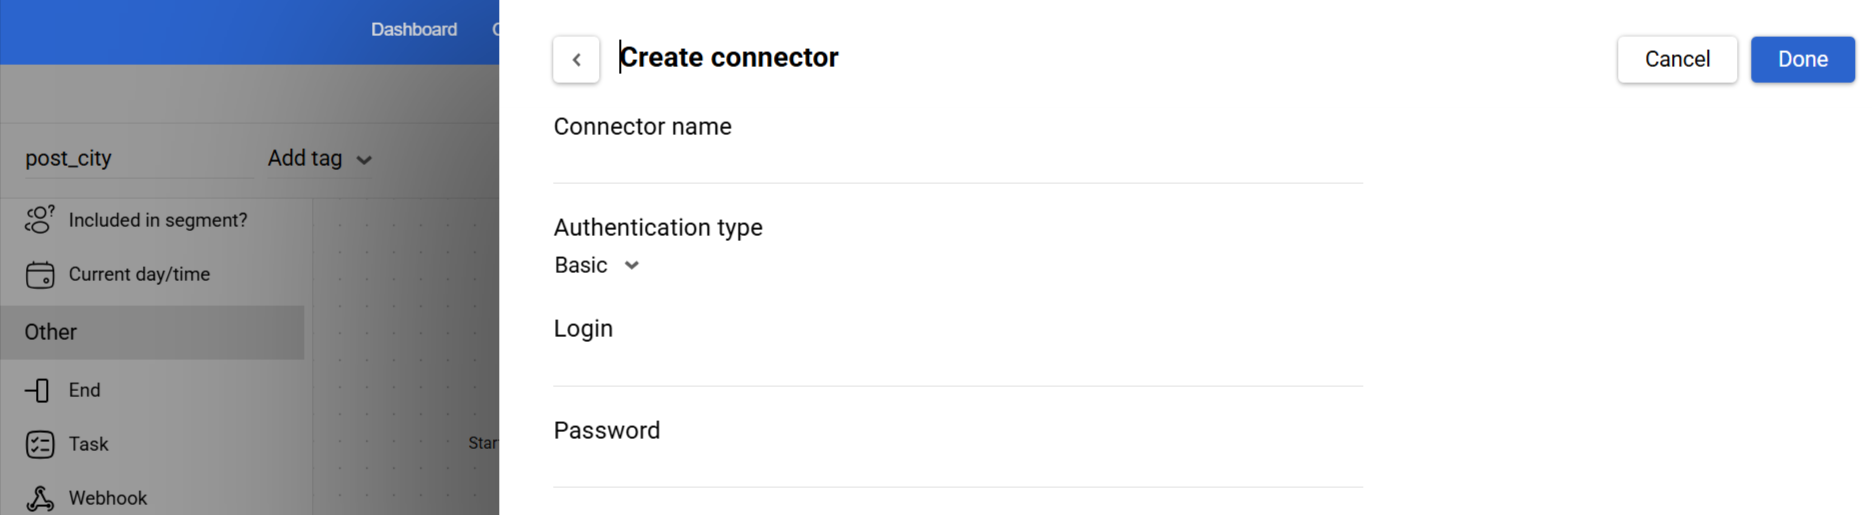
- Connector name.
- Authentication type from the drop-down list: Basic, Bearer token, API key, or OAuth 2.0.
- Enter login and password/token/key.
Click the Done button to apply the new connector in the webhook automatically.
GET-request Testing
- Click the Send test button.
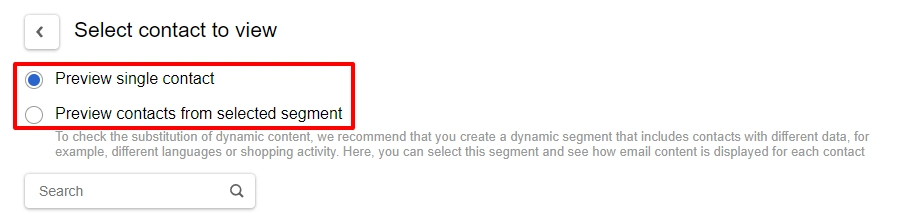
- Select a contact from the list or find it through the search and click Next.
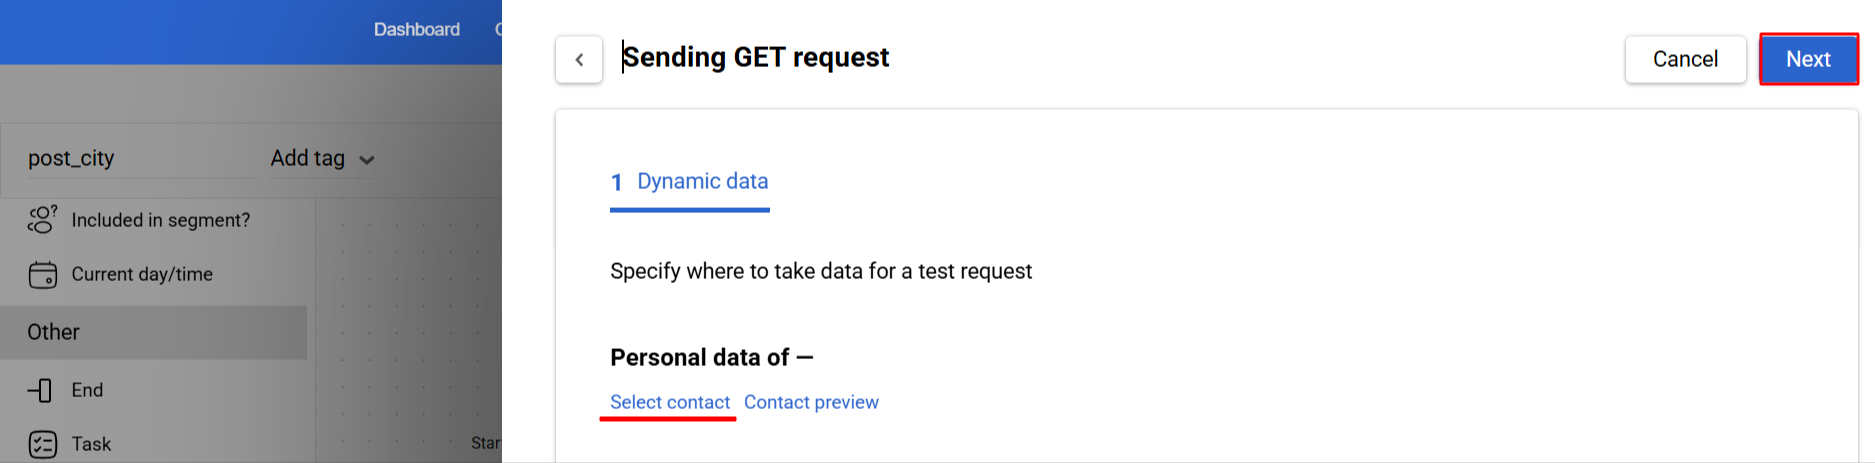
To find contacts in a segment, select Preview contacts from the selected segment.
- Click Send request.
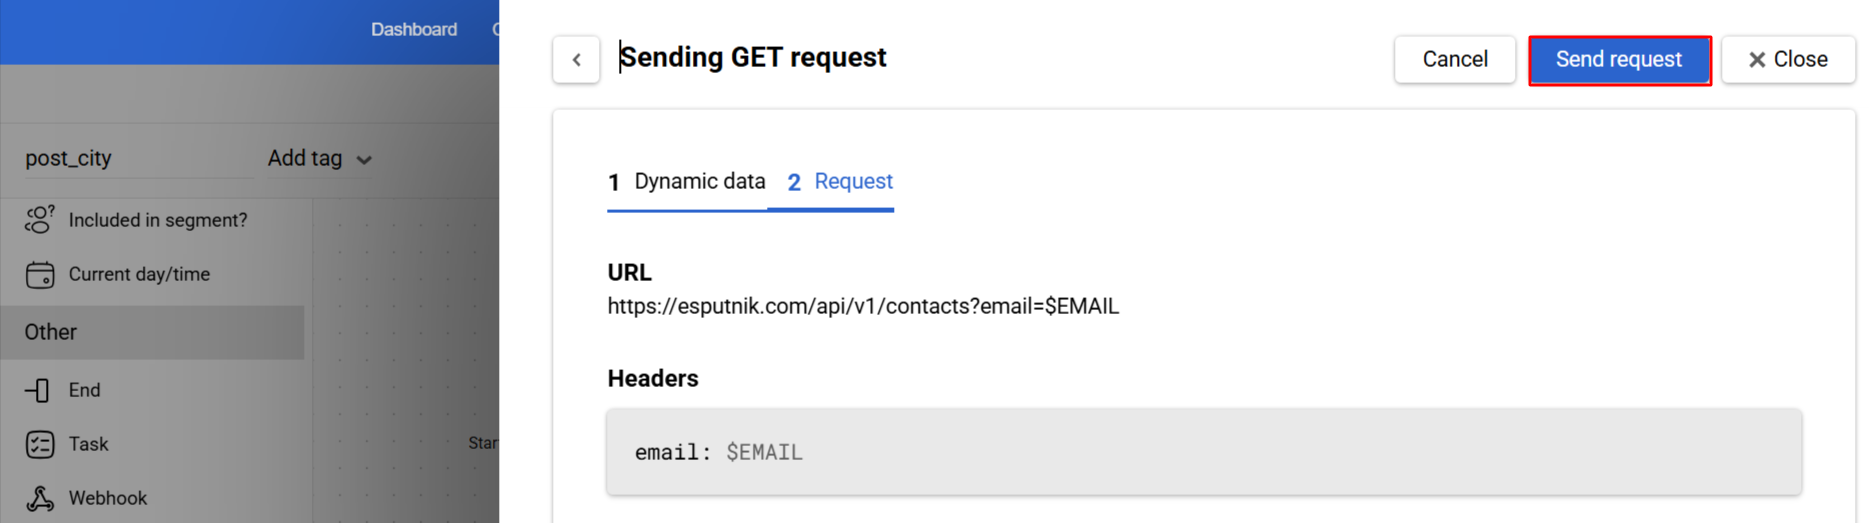
- In the testing window, you get the response:
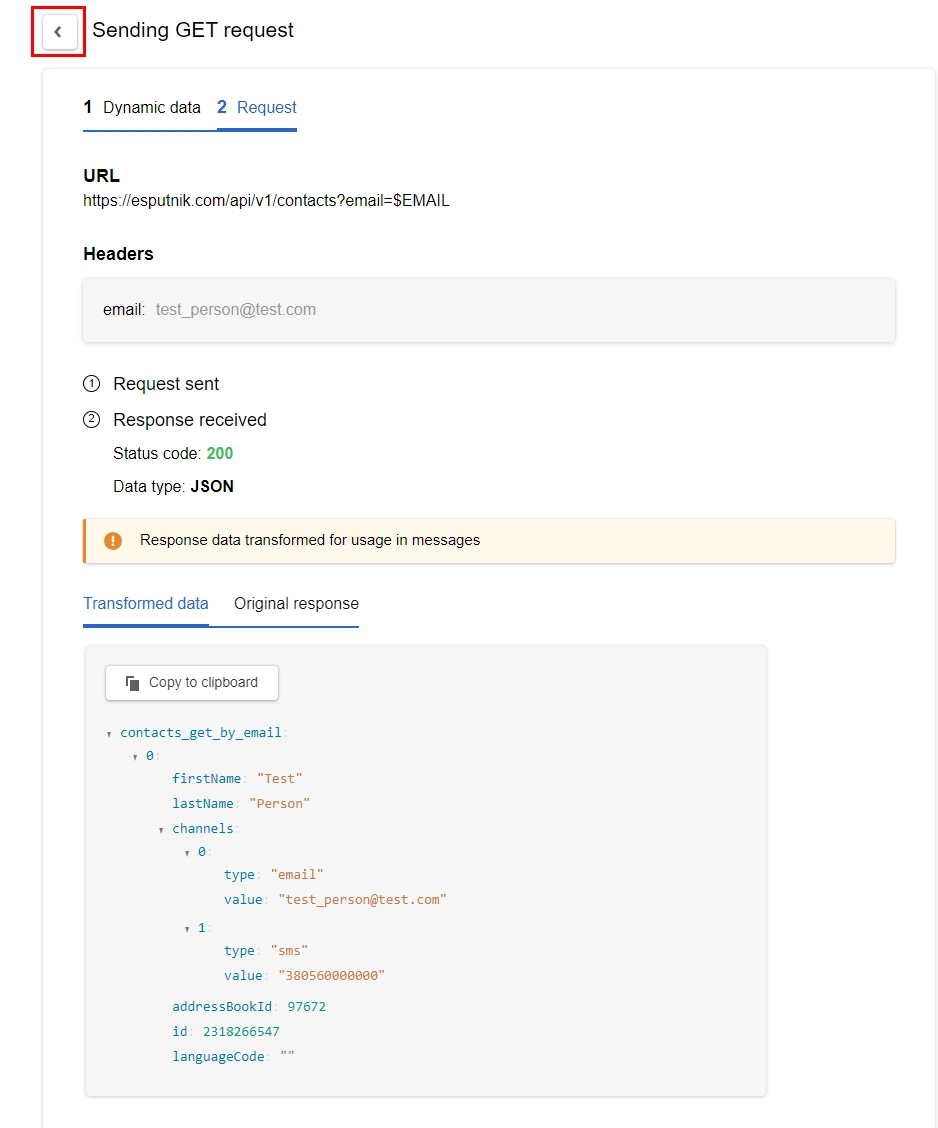
Click the Back arrow in the top left corner of the dialog window, and click the Done button.
Now the new webhook is available for selection in your workflow.

Working with POST Requests
Let’s see the example of when it is necessary to send the data about the contact’s city to get a promo code for him/her from an external source.
Follow the steps below to configure a webhook with the POST request:
- In the webhook block settings, click the Select webhook button.
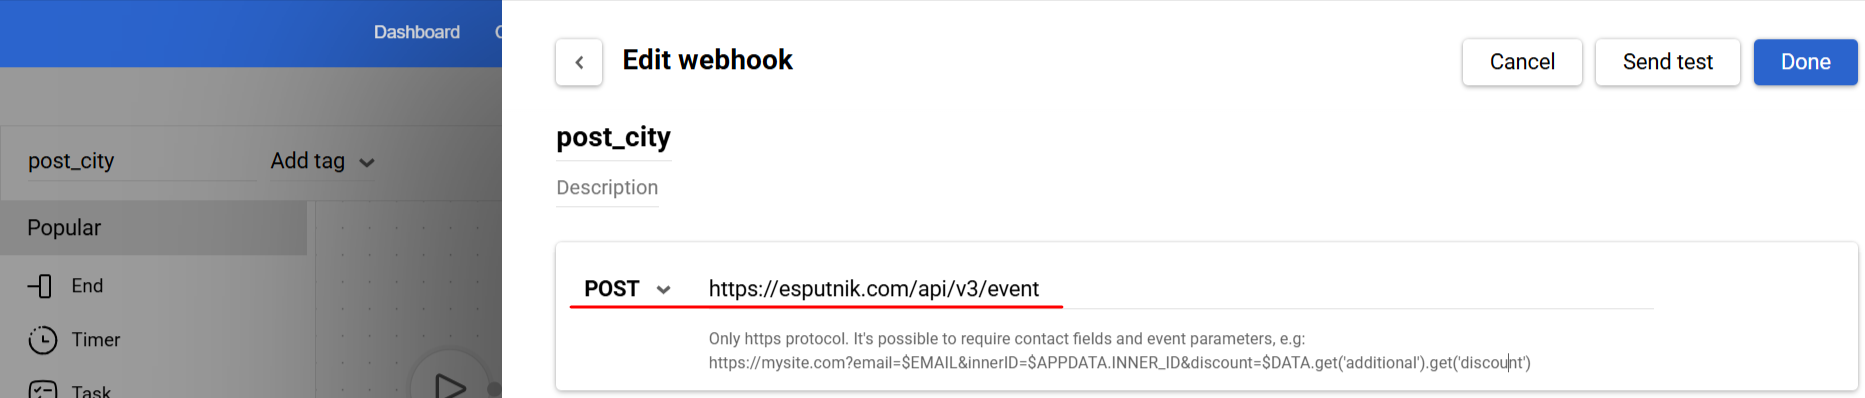
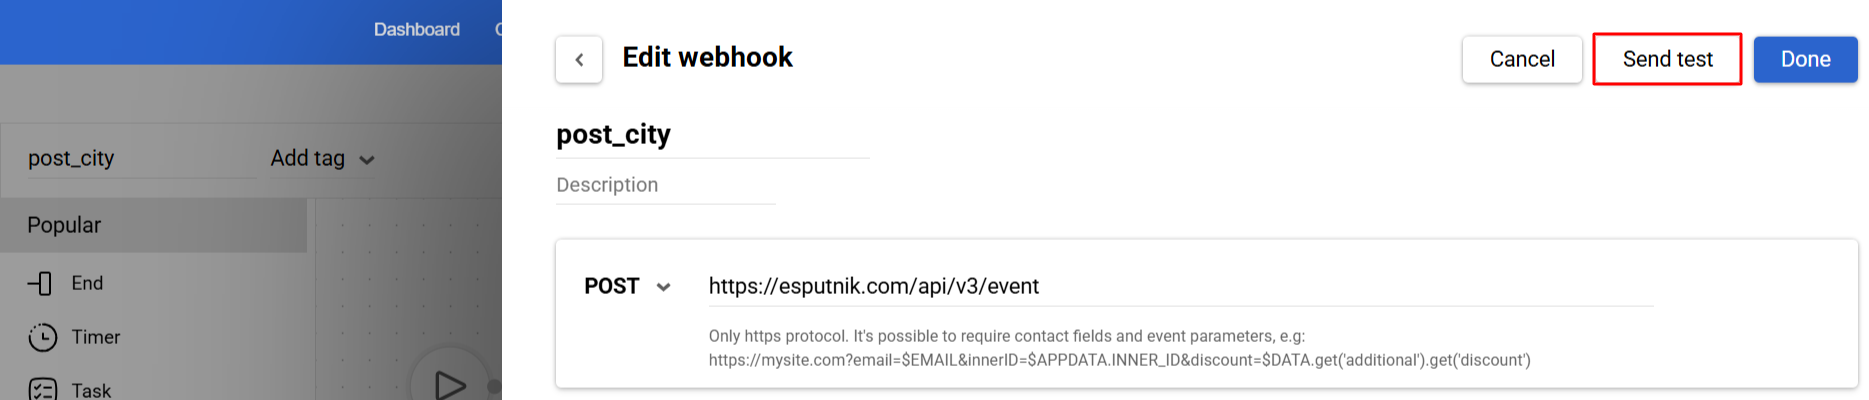
- In the Webhook configuration window, enter the webhook name and select the
POSTrequest type. Enter the URL of a resource using the secureHTTPSprotocol.
- If your application reads parameters from headers, enable the Pass parameters in headers slide button. Enter corresponding variables and their values

NoteFor
POSTrequests, the$workflowInstanceIdvalue can be passed in the webhook parameters — it is a unique identifier for the workflow instance. It allows identifying which specific events belong to the instance and, based on that, calculating statistics and conversions.
ImportantFor
$workflowInstanceId, the character case matters, while for contact fields, it does not.
- Enable the Authentication slide button to configure authentication parameters. Select from existing connectors or create a new one.
In the body of the POST request, you can send a random amount of data. For that, enable the corresponding slide button, select the format of the data to be inserted and insert it below. Available formats: JSON, XML, text.
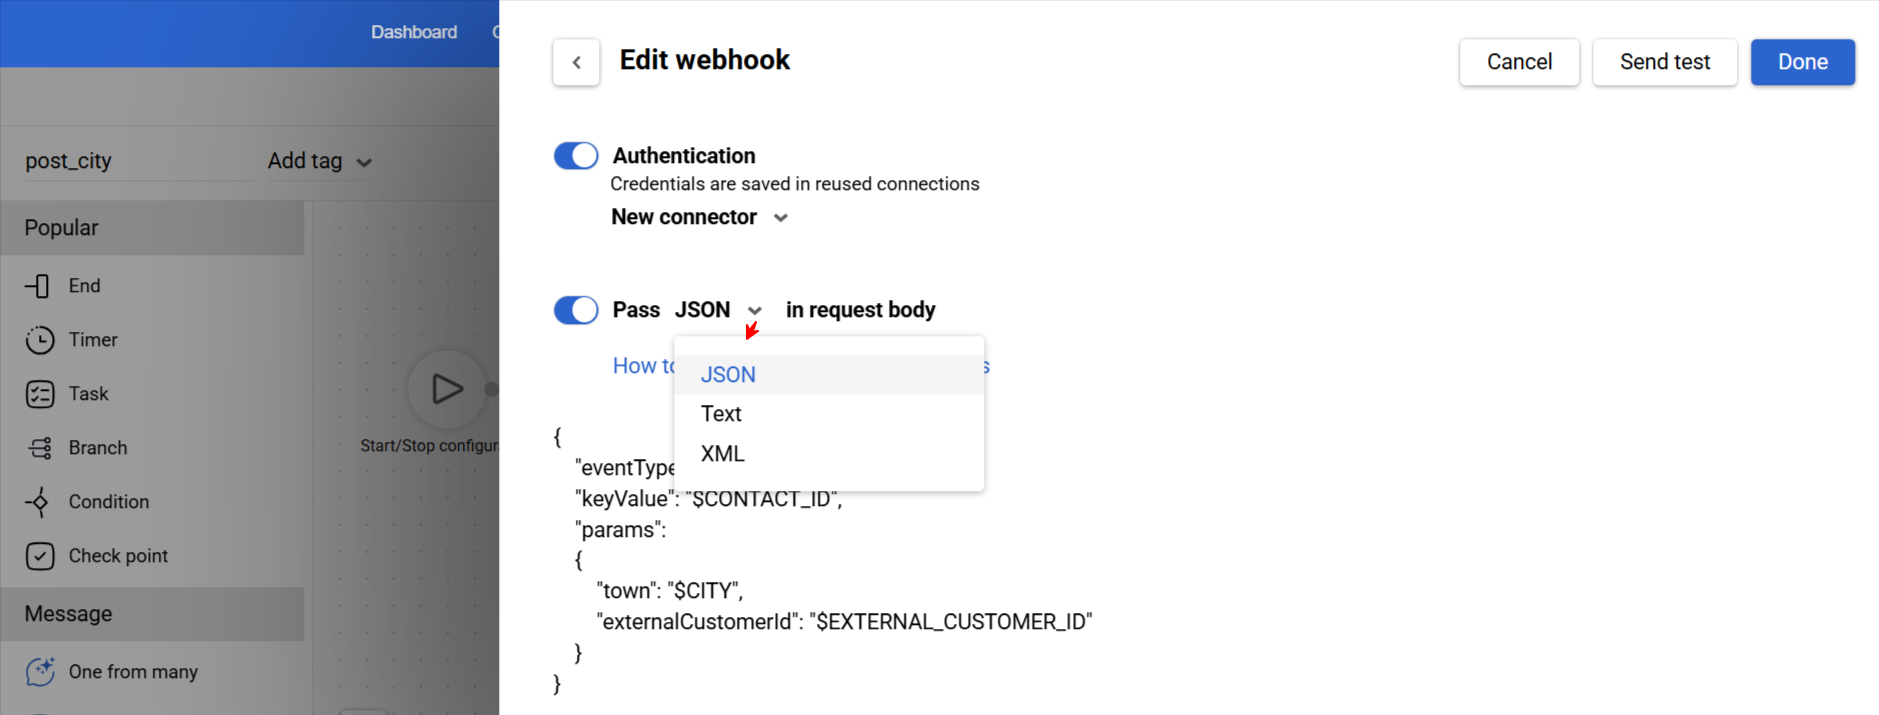
To access event parameters, use Apache Velocity, for example: "param": "$param".
POST-request Testing
- Click the Send test button.
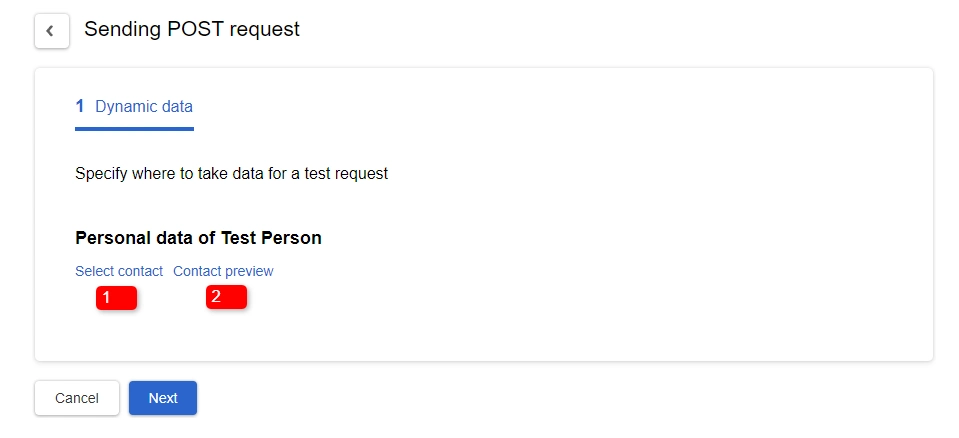
- The system suggests where to take the data for testing – from the contact’s card or from an event. If the webhook URL is configured to address a parameter from an event, then during testing the system suggests choosing an event from the list of those received by the system at any time, or to enter the event’s body manually.
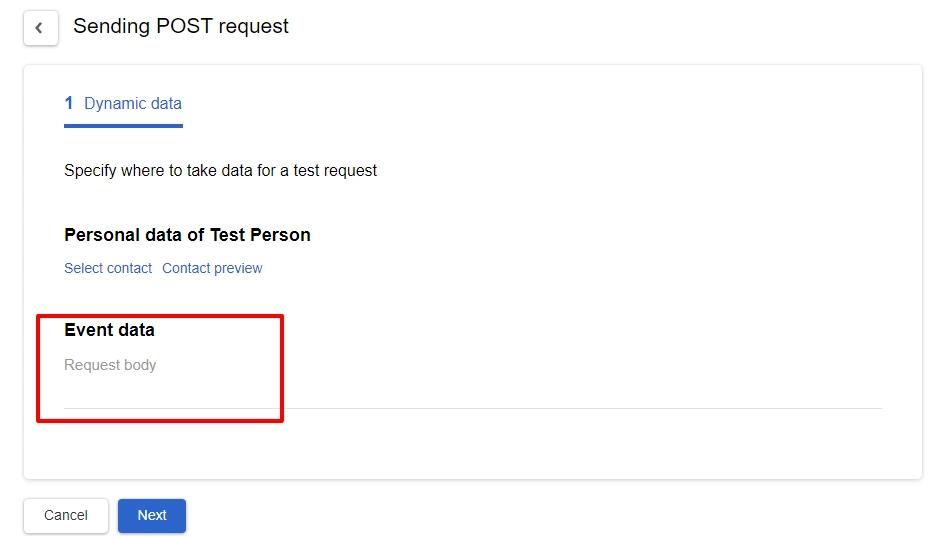
Since in our example we indicate addressing to the contact field, then it is necessary to select a contact from the base in the eSputnik account. You can choose another contact (1) or view the selected one (2).
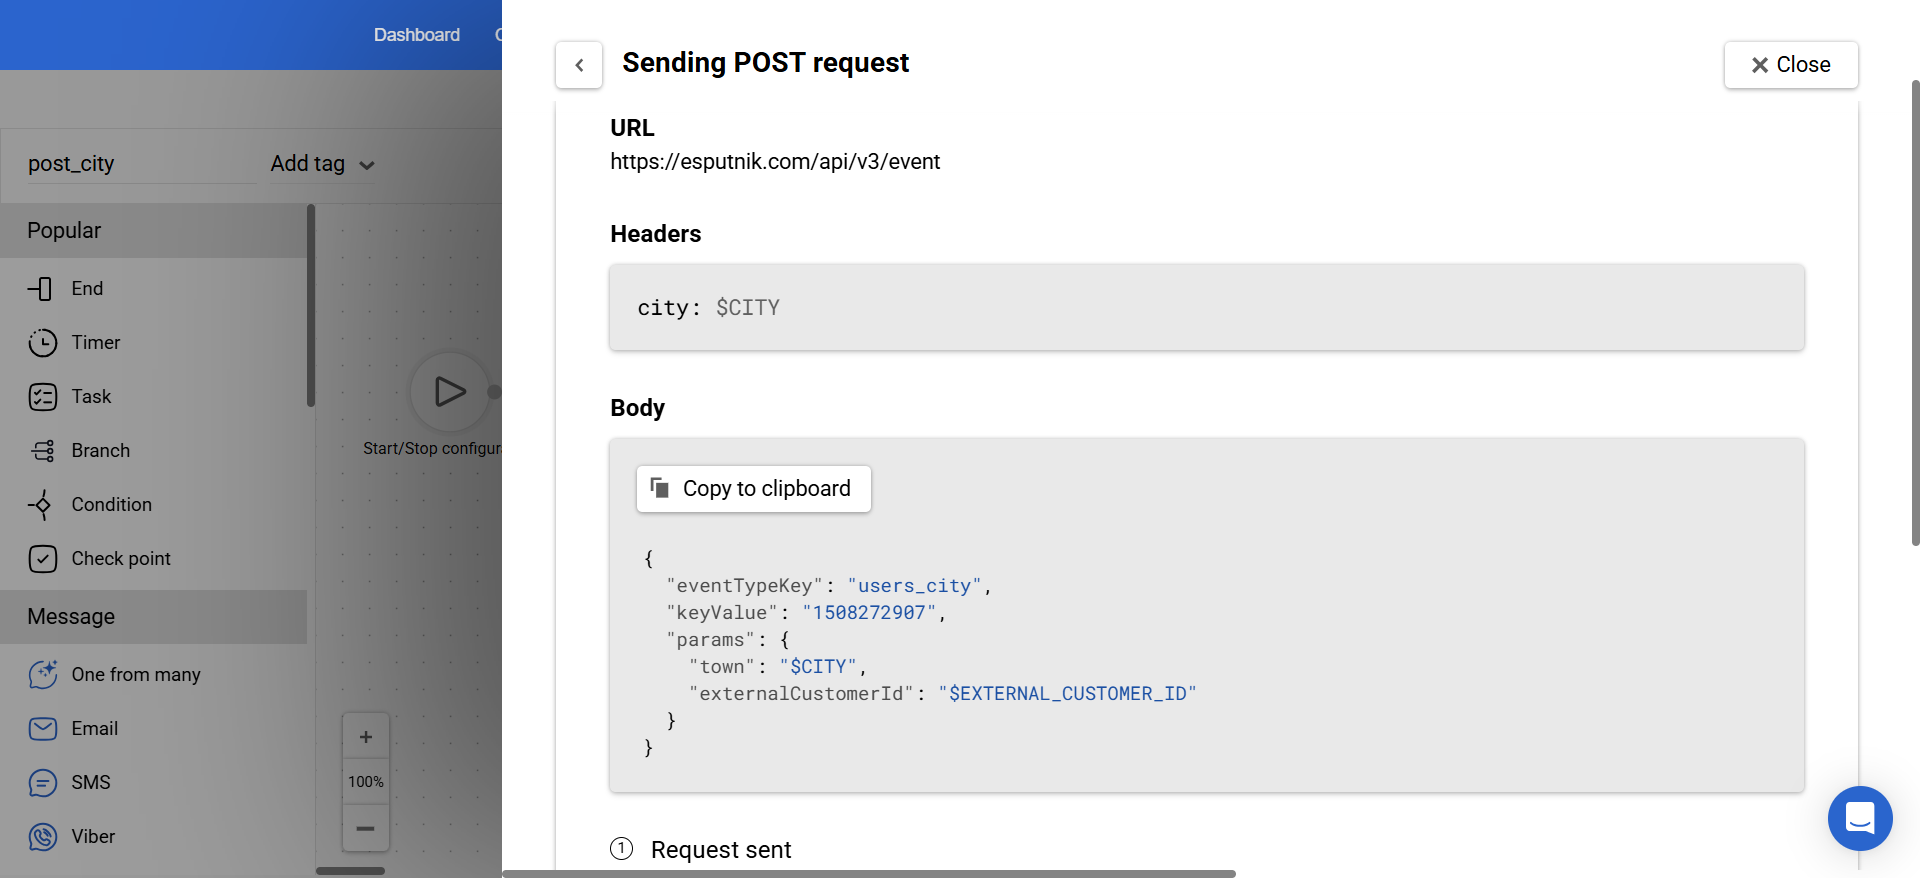
Upon pressing the Next and Send request buttons you receive the response with Headers and Body:
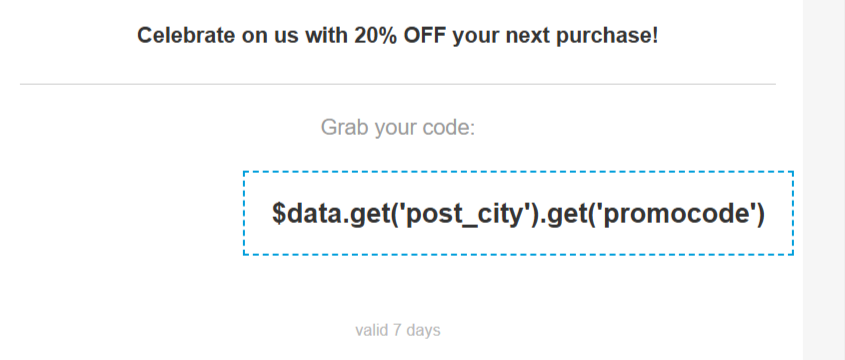
To show the promo code in the message, enter the following expression into the text area:
$data.get('post_city').get('promocode')/ $post_city.get('promocode'), where
post_cityis the source name (webhook name).promocodeis the name of the variable containing the promo code value.
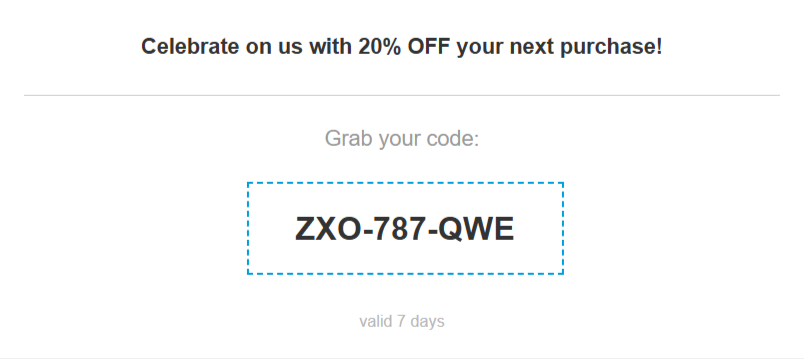
The result of a promo code inserted in the email:
Retry Rules
If the endpoint returns a 5xx server error, eSputnik repeats the request every 3 minutes, up to 3 retry attempts. Other response classes do not trigger these automatic retries.
Make the endpoint idempotent so that processing the same request more than once does not create duplicate operations.
Advanced Parameters
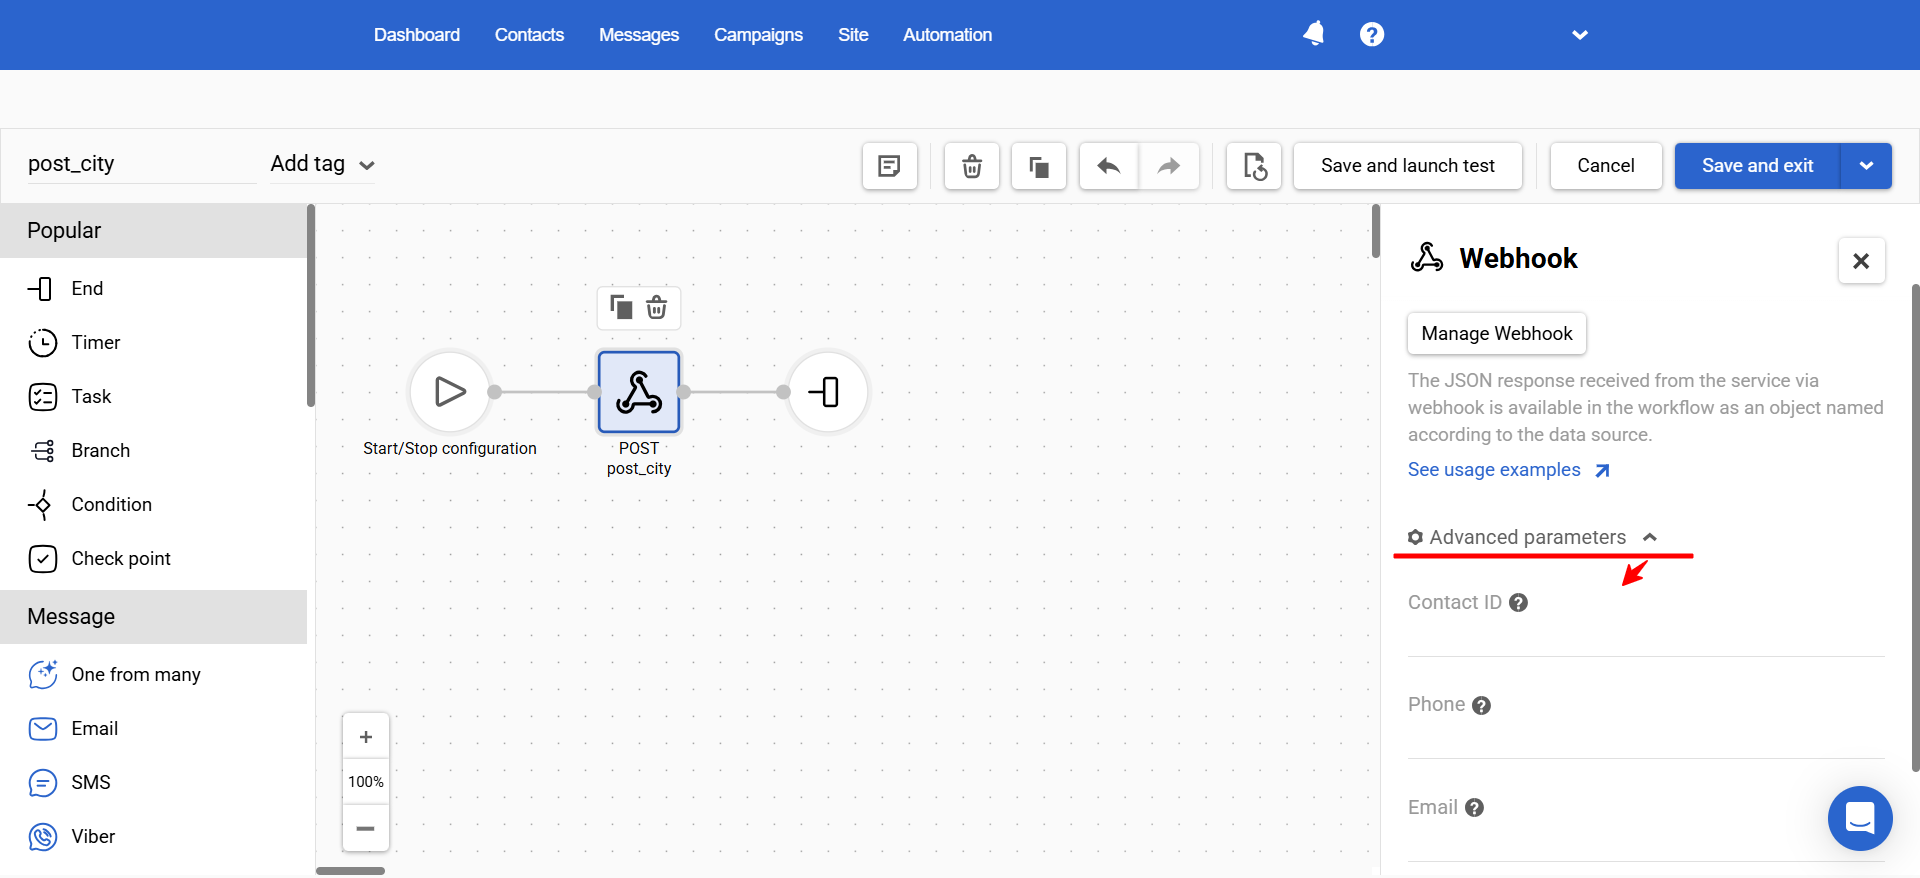
The block contains advanced parameters, and the cases for filling them out are detailed in a separate article
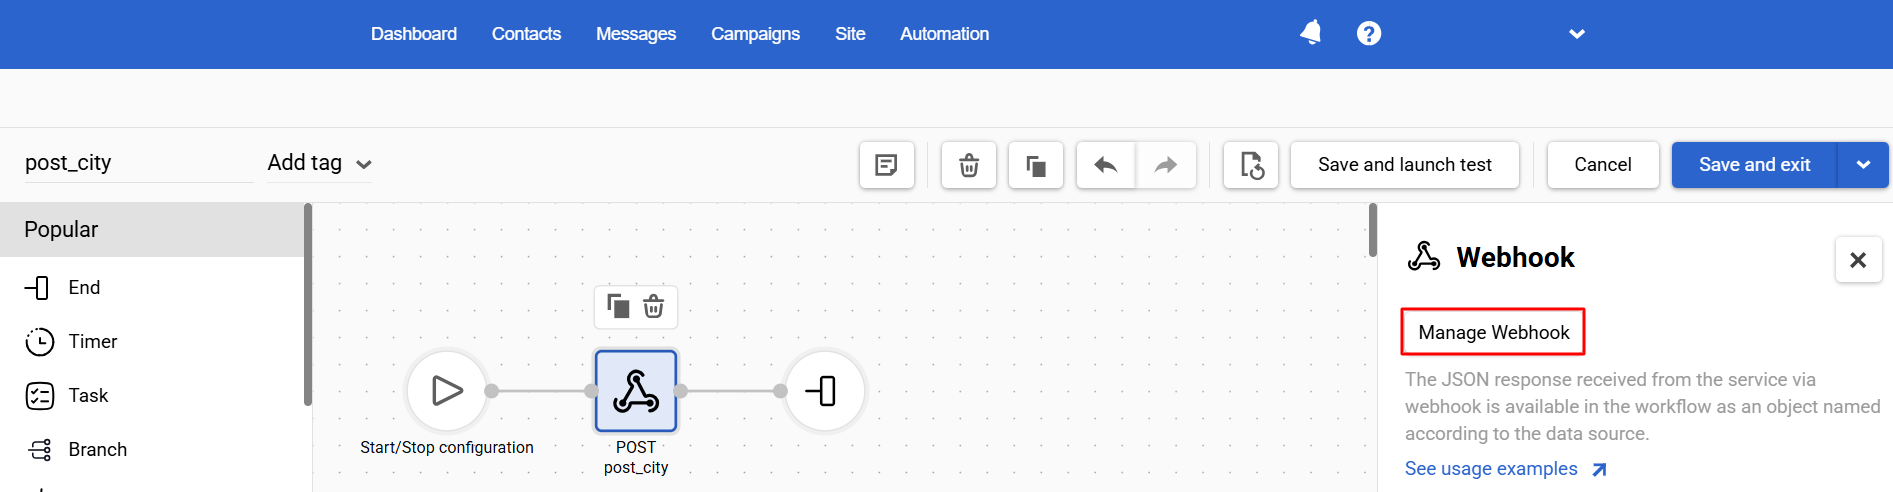
Webhook Management
Press Manage Webhook in the webhook block settings. The window containing the list of webhooks opens. There you can:
- create a new webhook
- edit existing webhooks
- test webhooks
- delete webhooks
- view the list of deleted webhooks
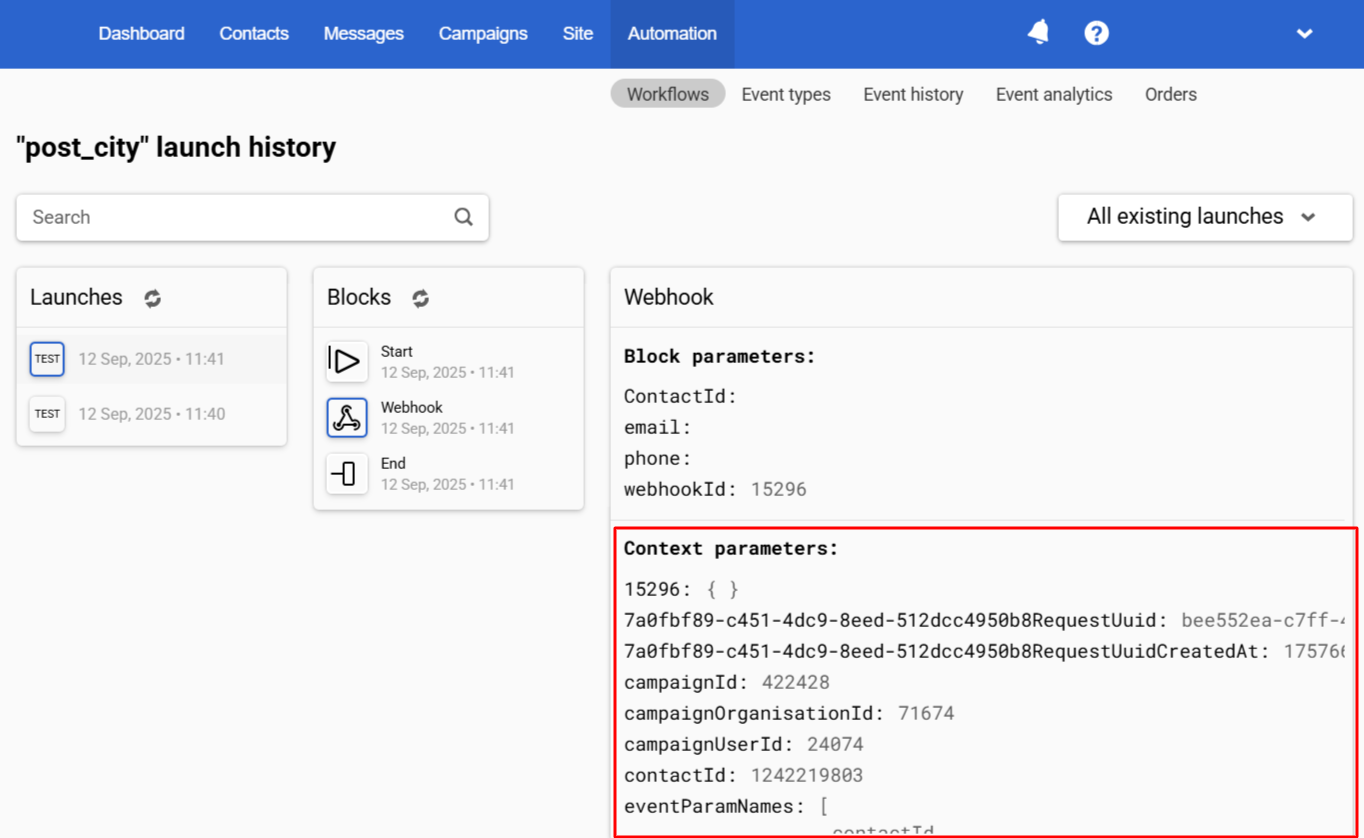
In the launch history of the workflow with a webhook, you will see the details of the request:
Updated about 23 hours ago