
Sending eSputnik Widget Events to Google Analytics
Learn how to integrate your eSputnik forms with Google Analytics.
You can send the events data related to the interaction of users with your eSputnik widgets to your Google Analytics (GA) account.
eSputnik supports the Universal Analytics and Google Analytics 4 scripts for tracking events on your website.
ImportantIt is recommended to install the Google Analytics 4 script, since the Google Universal Analytics property will stop processing data starting on July 1, 2023 (July 1, 2024, for Analytics 360 properties).
- Setting up GA4 script for a website (directly into the website code).
- Setting up GA4 with GTM.
After that, you have to enable exporting the widget event data to Google Analytics.
The entry point for events depends on the method you use to install the script:
- If there is GoogleAnalytics3 (
ga), send into it. - If there is
dataLayerand there isgtagand dataLayer has at least oneG-\*tag:- Then call
gtagwith parameters (send_tois added) for eachtag id. - Otherwise, we write to
dataLayer.
- Then call
Setting Up GA4 Script for a Website
To set up the Google Analytics GA4 script for a website:
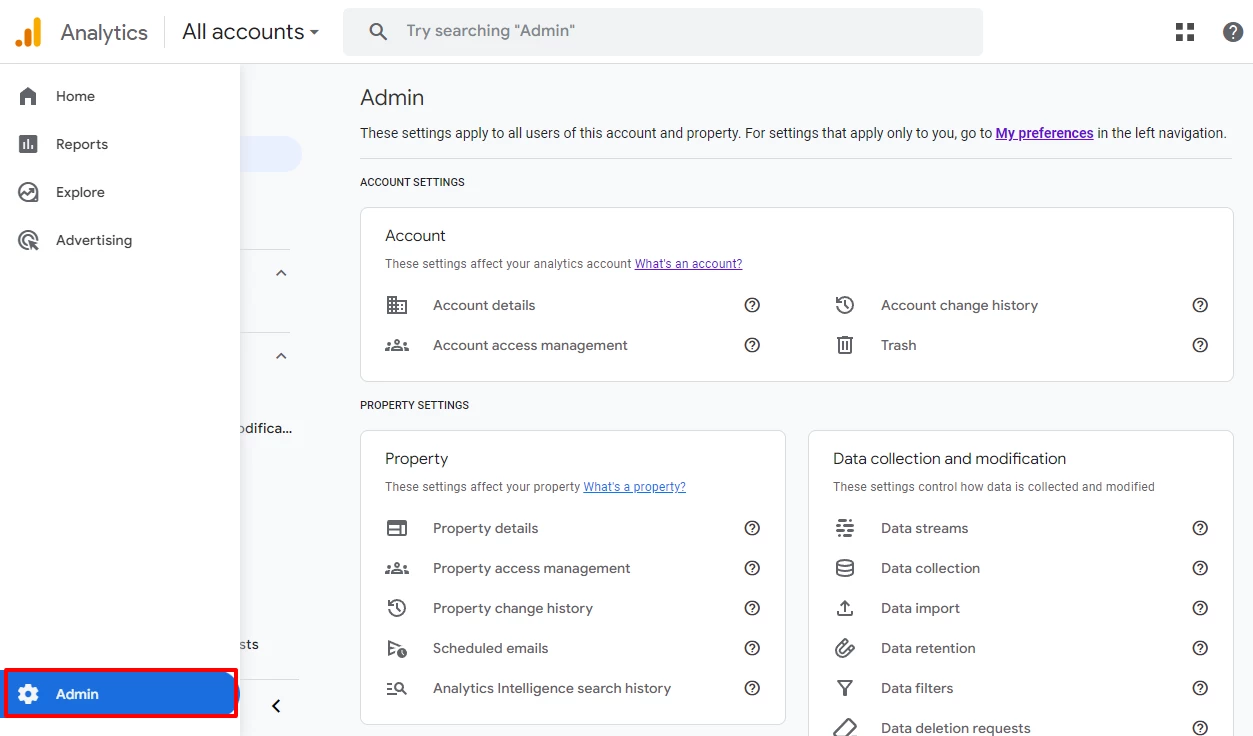
- In your GA account, select the Admin icon to open the GA settings.
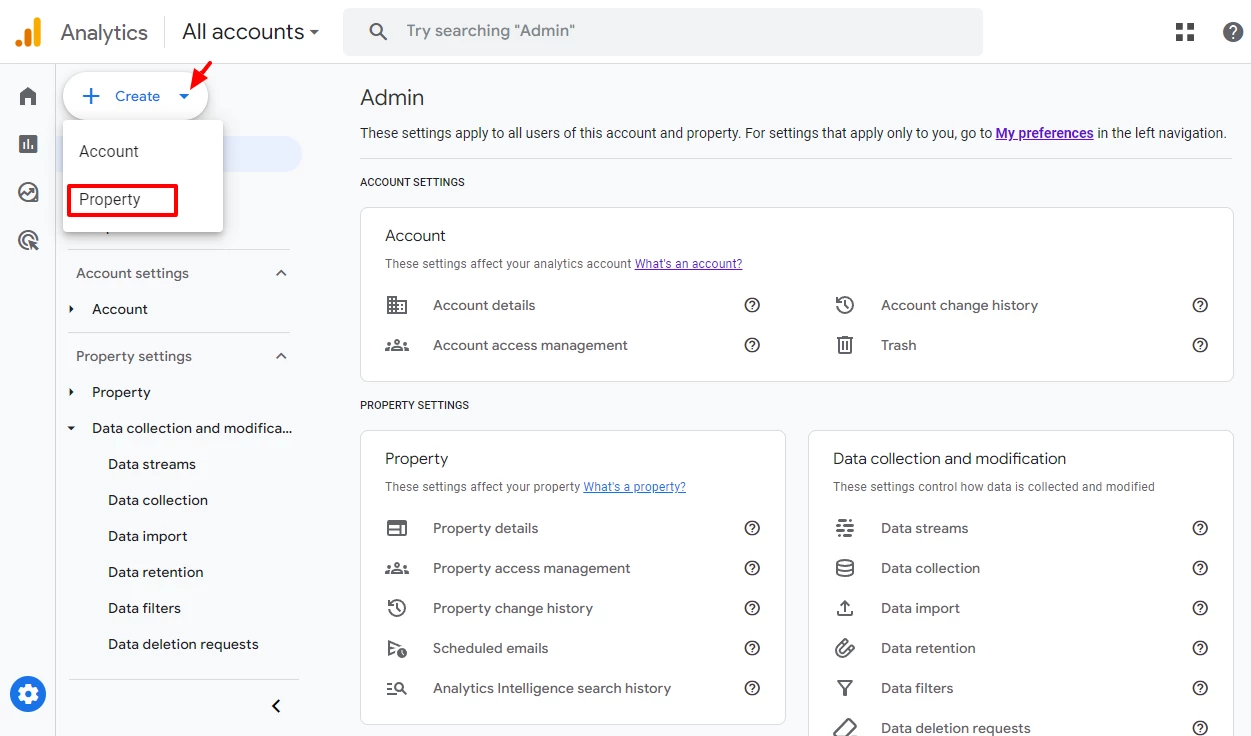
- Click Create → Property.
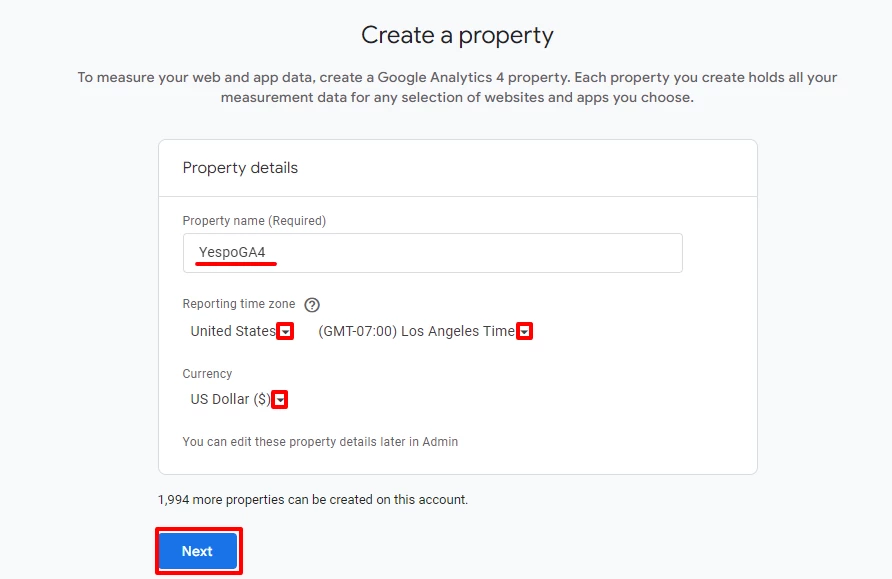
- In the Property setup, enter the property name, select the country, the time zone and the currency, then click Next.
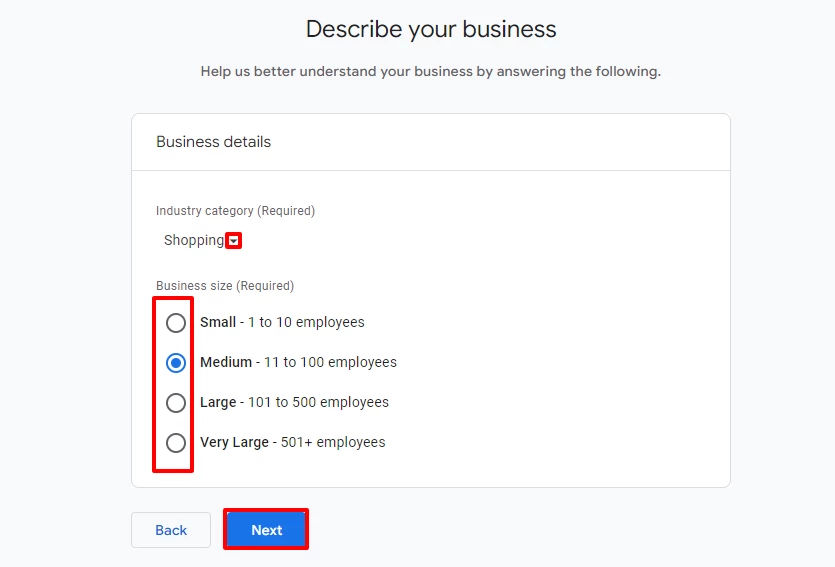
- Describe your business — indicate the industry category and company size.
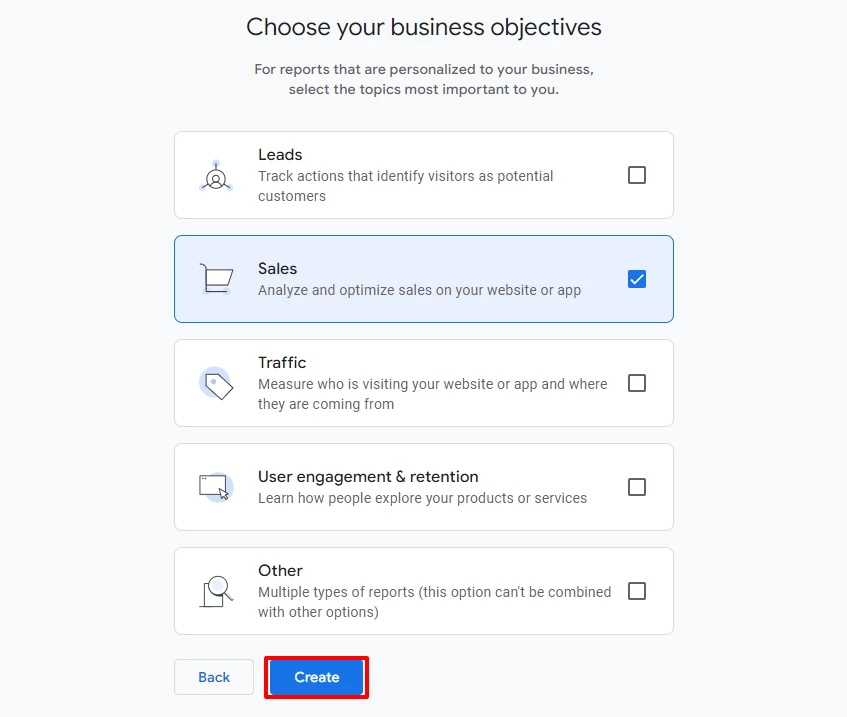
- Choose your business objectives and click Create.
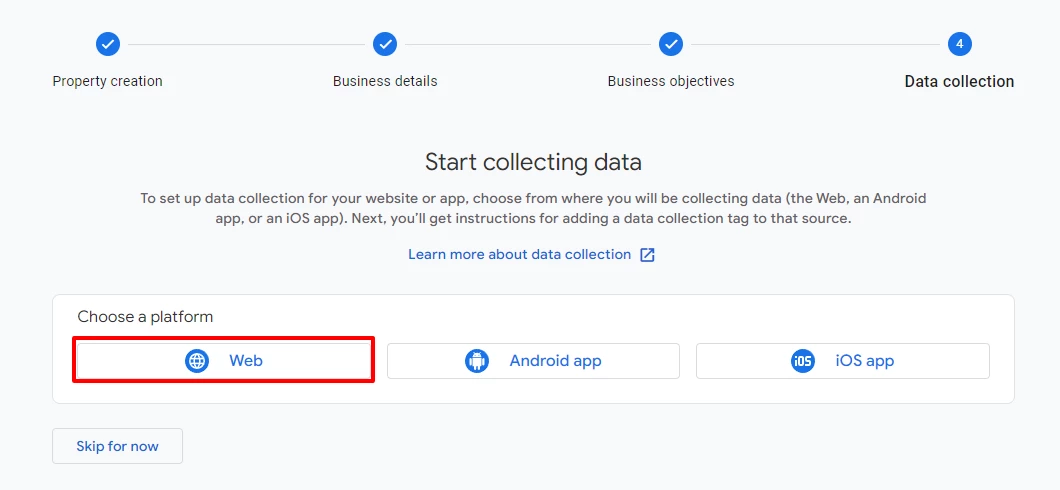
- In your created property menu, select the Web platform.
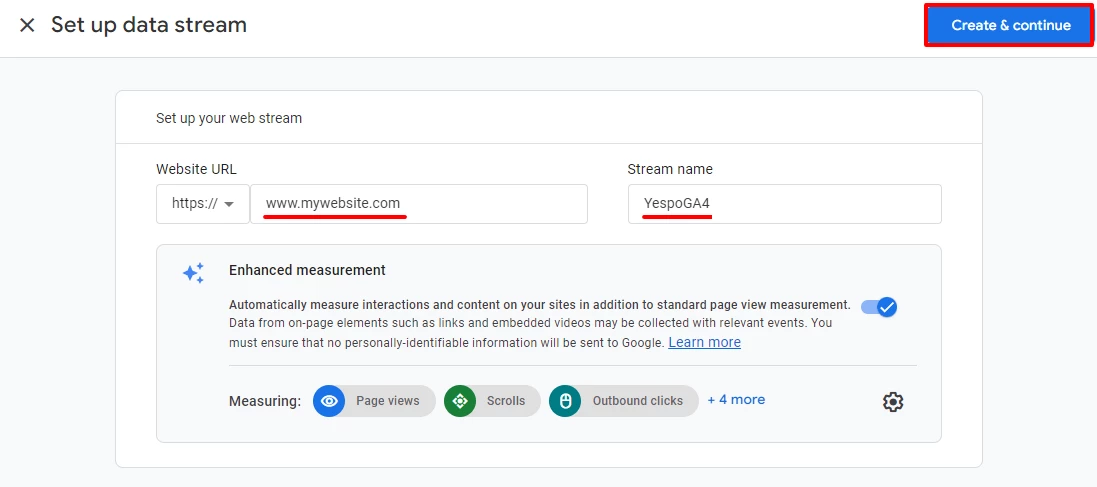
- Enter the website URL and the stream name in the corresponding boxes, then click Create & continue.
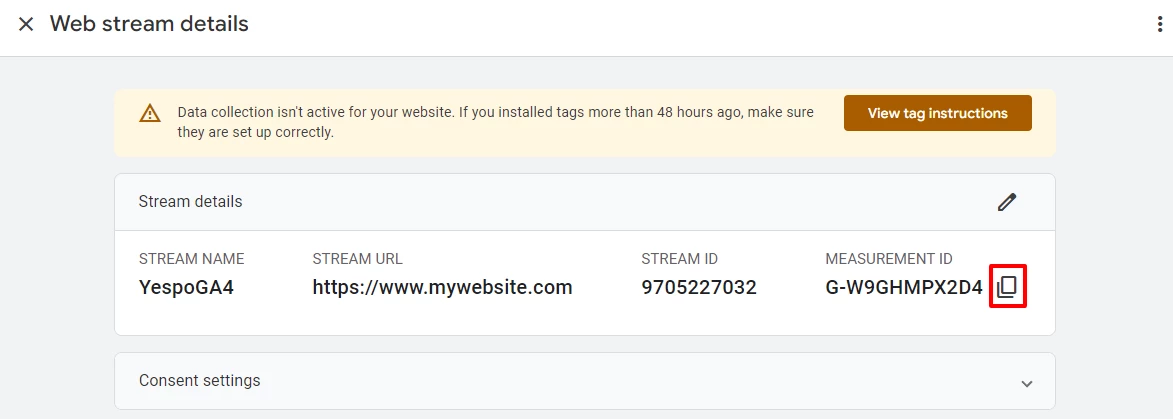
- In the Web stream details menu, click the copy icon beside the Measurement ID.
- Go to your site and insert the following code after the
<head>tag, where substituteMEASUREMENT_IDwith the one copied in the previous step.
<!-- Google Analytics -->
   <!-- Google tag (gtag.js) -->
<script async src="https://www.googletagmanager.com/gtag/js?id={MEASUREMENT_ID}"></script>
<script>
  window.dataLayer = window.dataLayer || [];
  function gtag(){dataLayer.push(arguments);}
  gtag('js', new Date());

  gtag('config', '{MEASUREMENT_ID}');
</script>
Setting Up GA4 in GTM
Before proceeding to setting up GA4 in GTM, you have to:
-
Create a GTM account and a container following these instructions.
-
Follow the GTM standard web page installation instructions.
To set up Google Analytics 4 (GA4) with Google Tag Manager (GTM):
- Follow steps 1 to 6 described in Setting up GA4 script for a website section.
- In Tag Manager, select Tags in the left-hand side menu and click New to create a new tag.
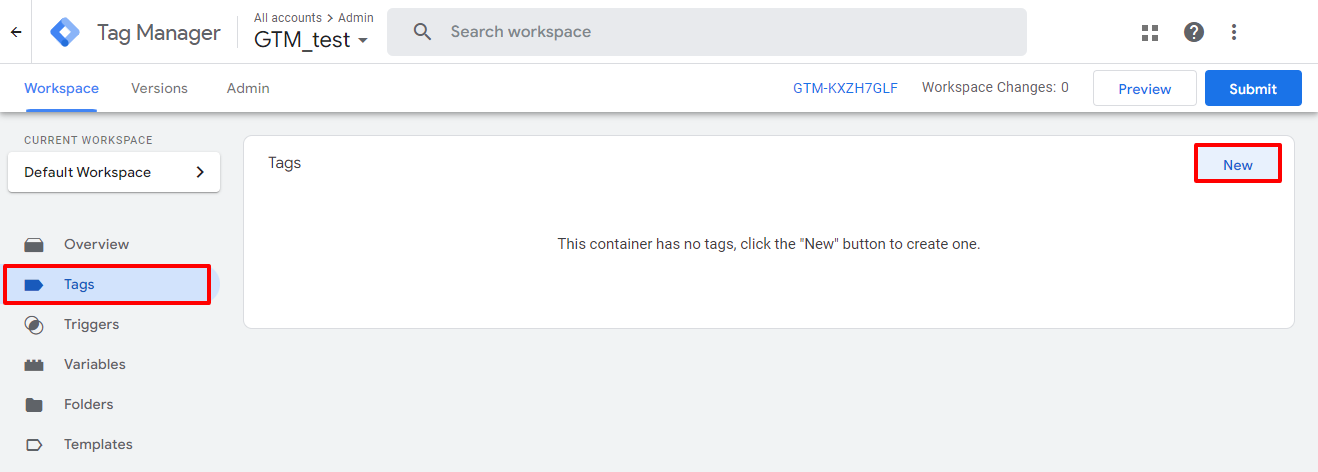
- Set the following tag configuration and triggering, then click Save:
- Select Google Analytics: GA4 Event as Tag Type.
- Use the measurement ID copied in step 7 of this instruction.
- Select All pages for Firing Triggers.
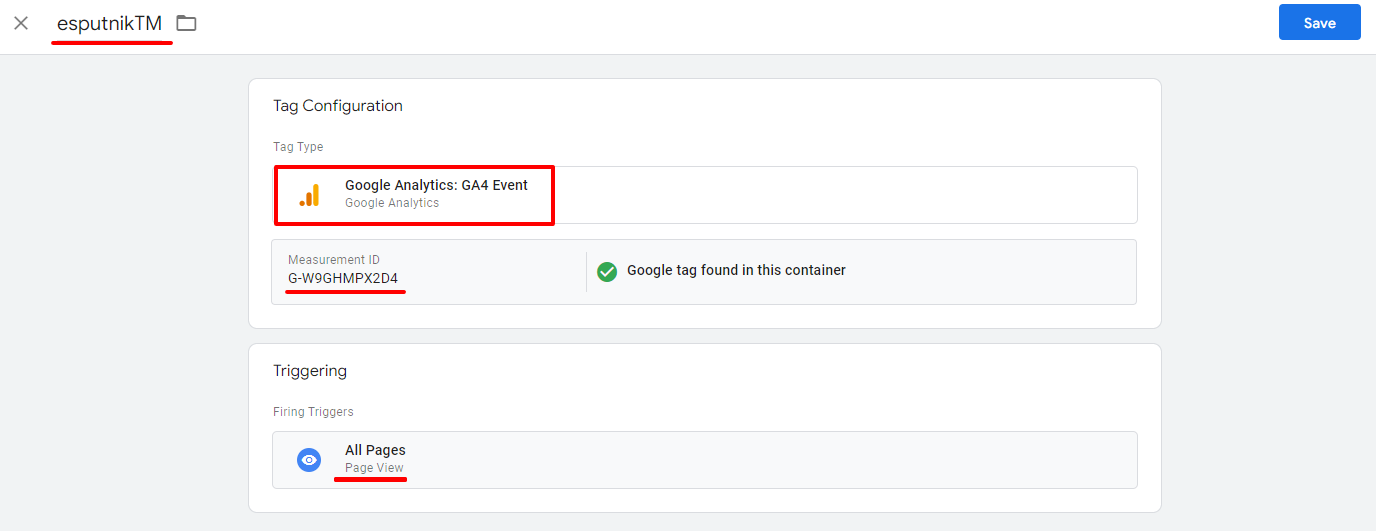
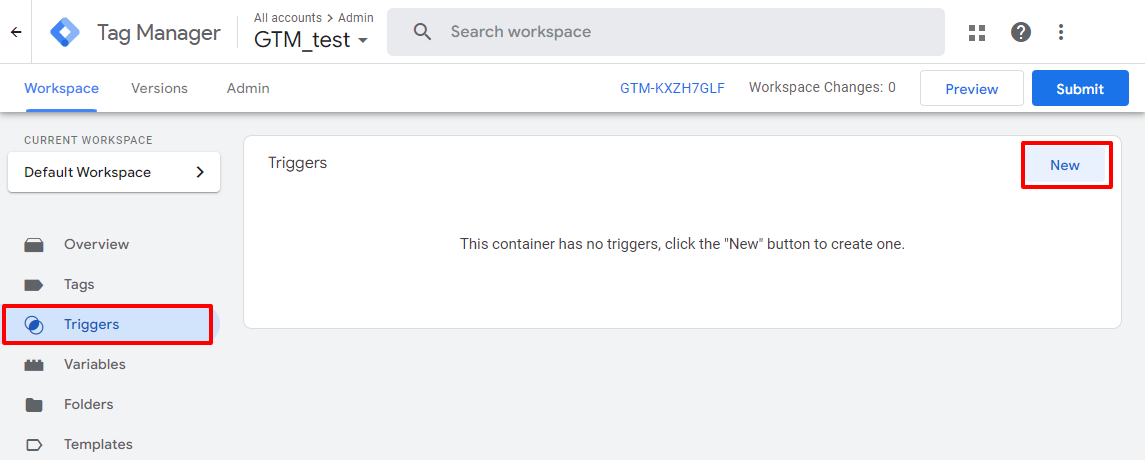
- In the left-hand side menu, select Triggers and then New to create a new trigger.
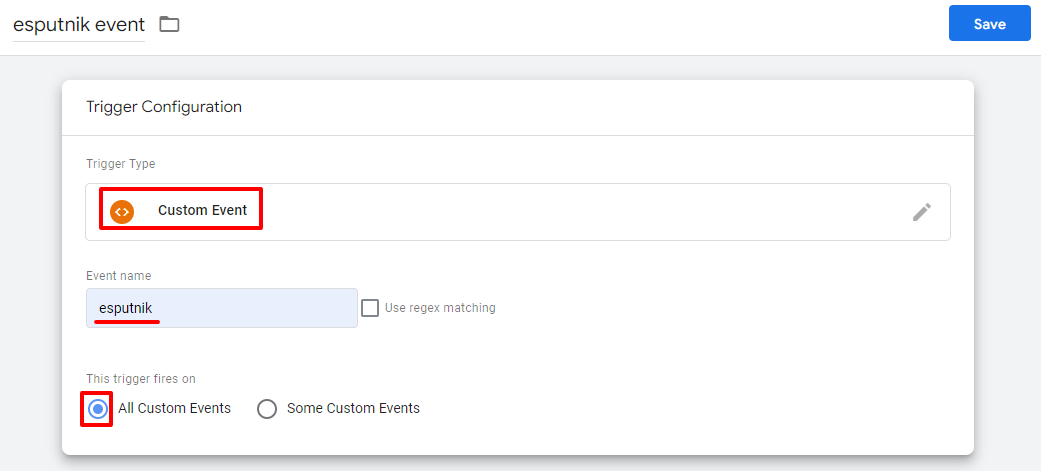
- In the slideout window, enter the trigger name and click the Trigger Configuration pane.
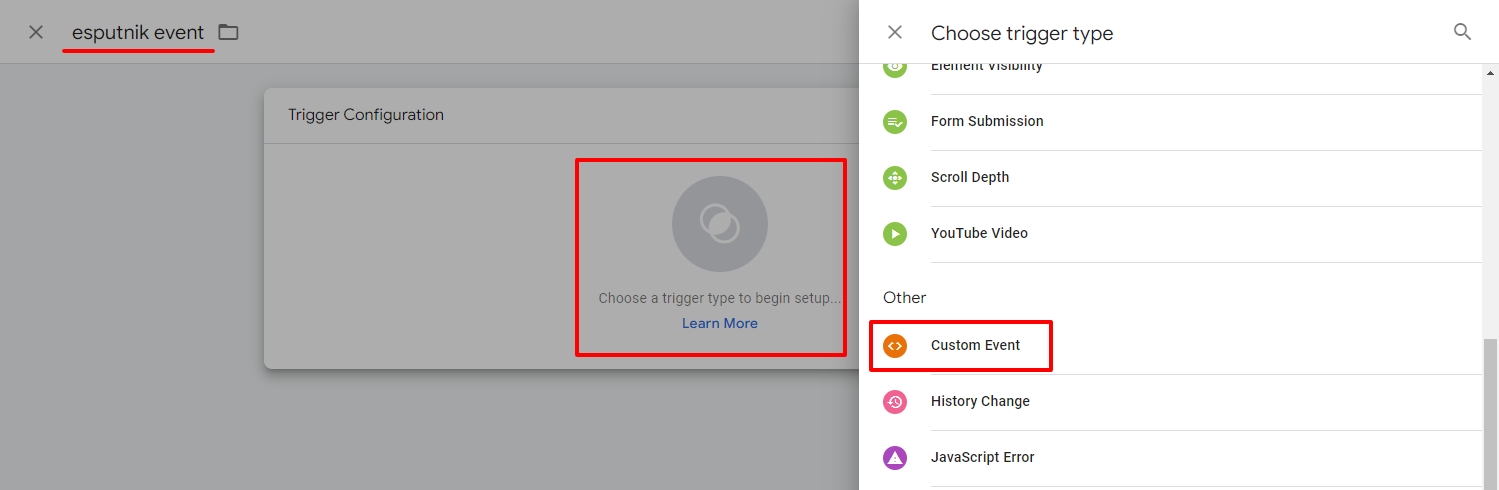
- Set the following configuration in the trigger configuration window:
- Select Custom Event as the trigger type.
- Enter esputnik as the event name.
- Select All Custom Events for the trigger to fire on.
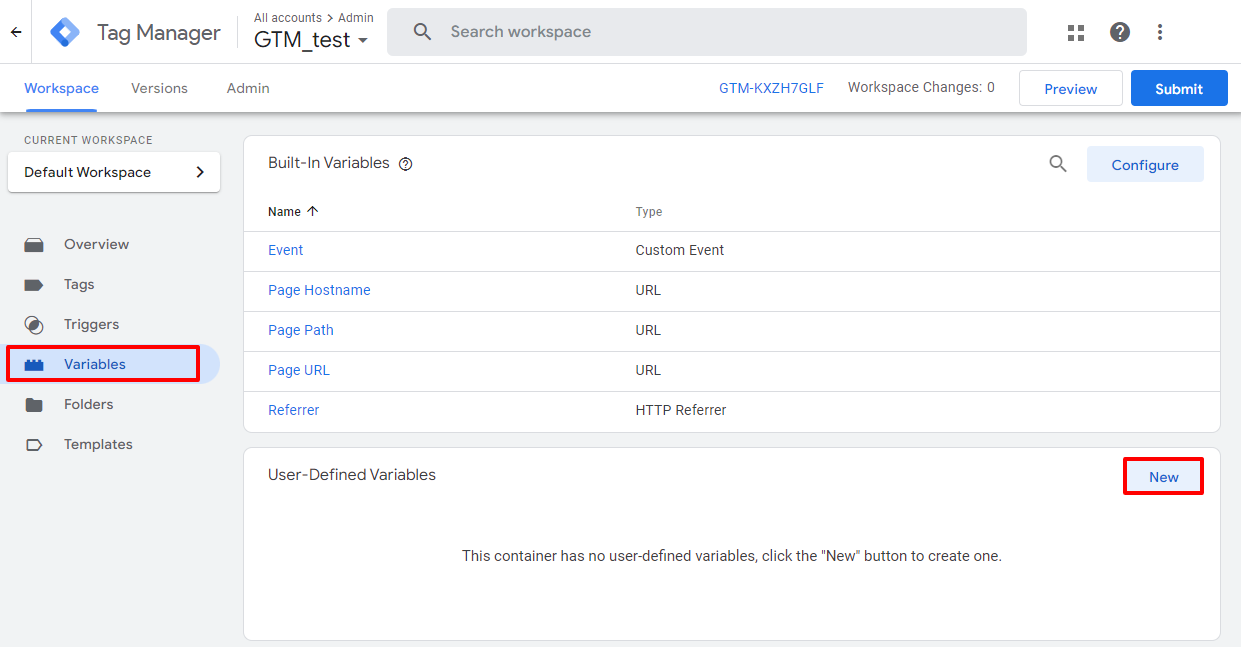
- Go to Variables in the left-hand side menu, and select New in the User-Defined Variables pane.
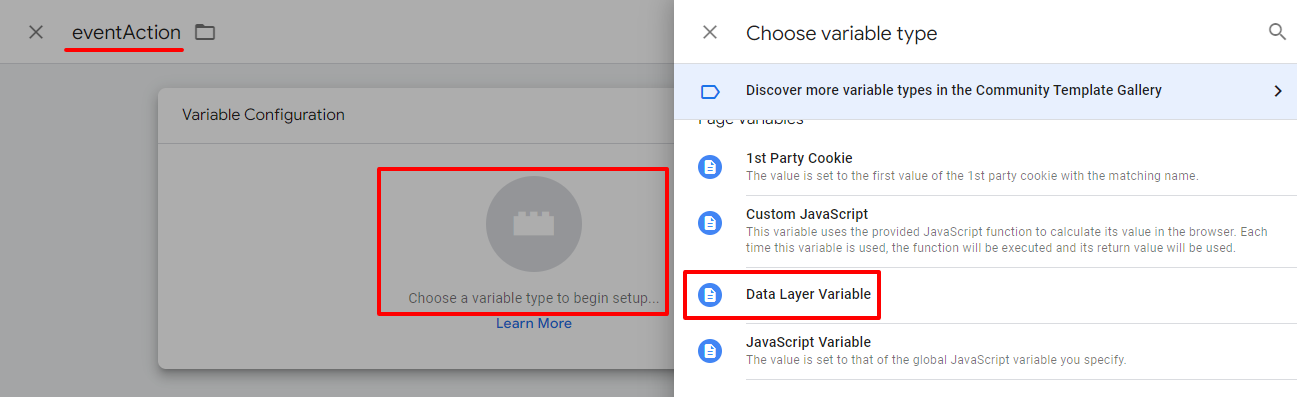
- In the slide-out window, enter configuration name and click the Variable Configuration pane.
- In the slide-out window, set the following parameters, then click Save:
- Variable Type
- Data Layer Variable Name
- Data Layer Version
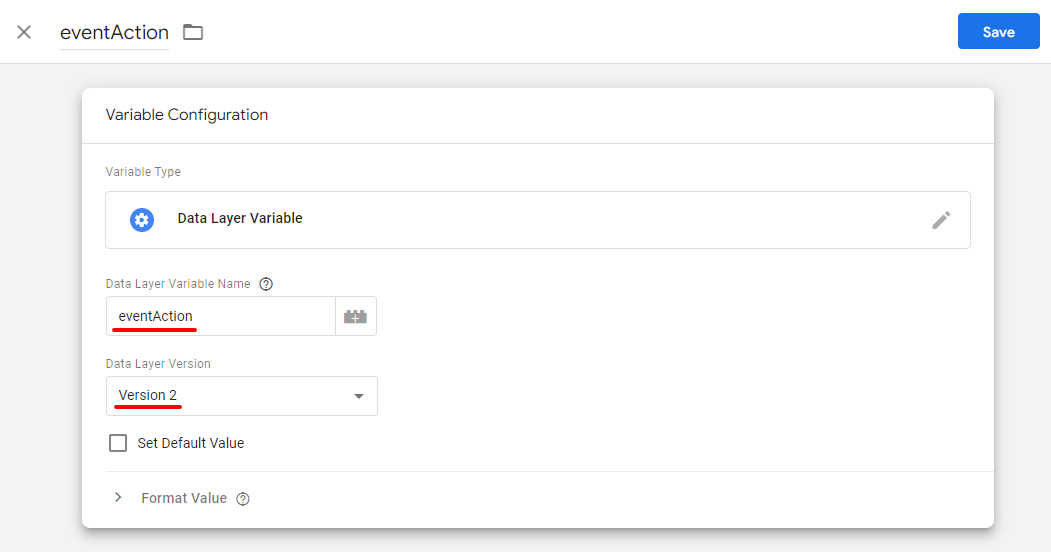
You have to create the 3 variables with the following parameters:
| Variable Type | Data Layer Variable Name | Data Layer Version |
|---|---|---|
| Data Layer Variable | eventAction | Version 2 |
| Data Layer Variable | eventCategory | Version 2 |
| Data Layer Variable | eventLabel | Version 2 |
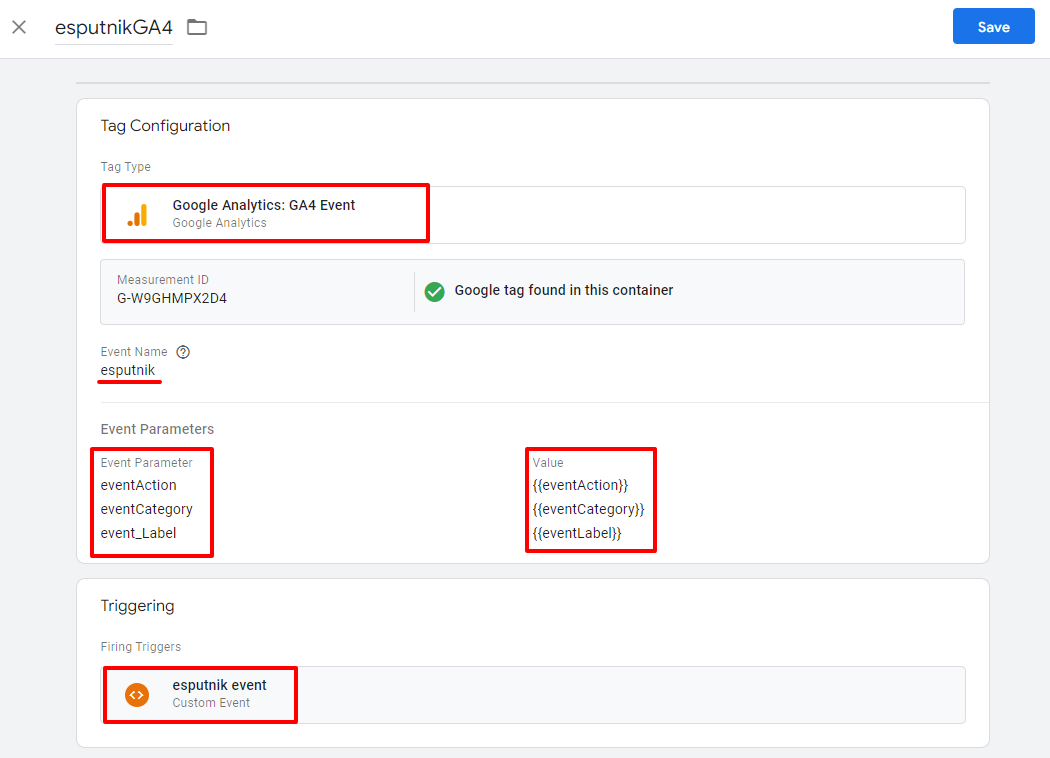
- Go to Tags in the left-hand side menu, and create a new tag with the following configuration, then click Save:
- Select Google Analytics: GA4 Configuration as Tag Type.
- Select the tag you created at step 3 in Configuration Tag.
- Enter esputnik as the event name.
- In Event Parameters, use the parameters and their values created in steps 8 and 9.
- In Firing Triggers, select esputnik event.
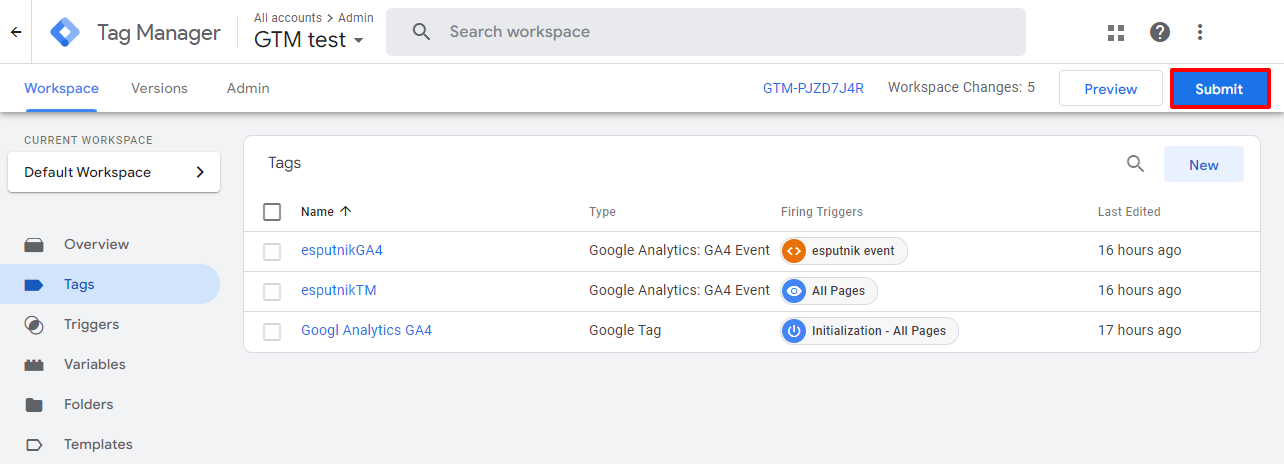
- Click Submit on the top panel.
Enabling Widget Event Data Exporting to GA
To enable the widget event data transfer:
- In your eSputnik account, click Site — Widgets, and select the widget type in the left-hand side menu.
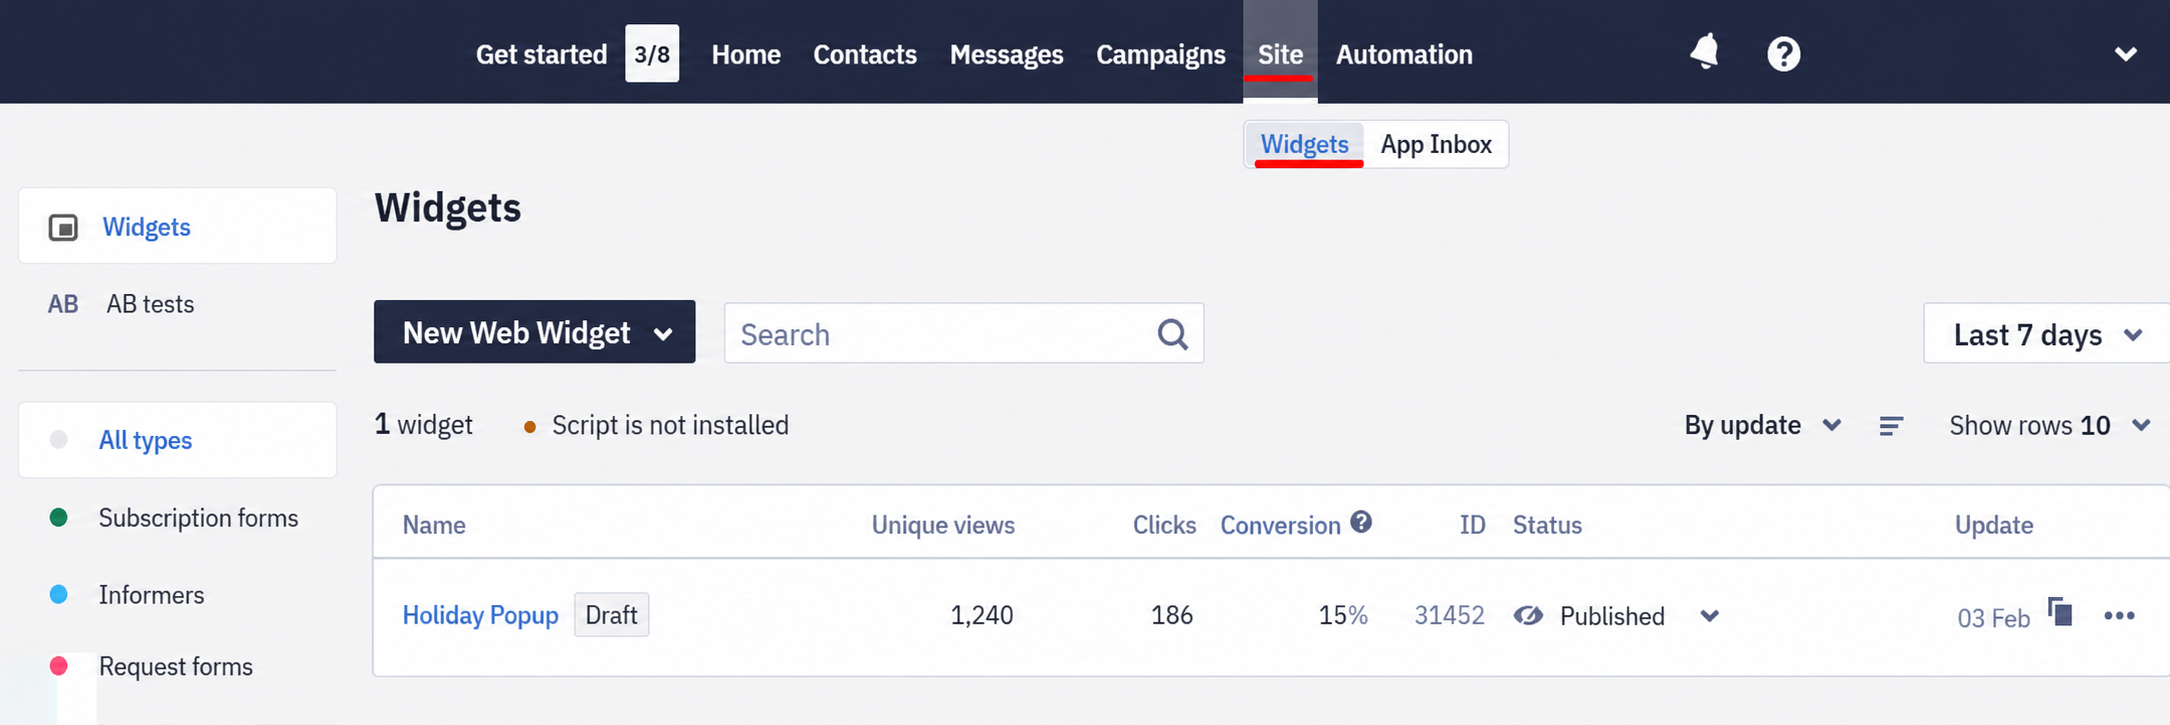
- Select the widget, which events you want to export.
- In the Widget Details menu, select Integrations and enable the Export data to Google Analytics slide button.
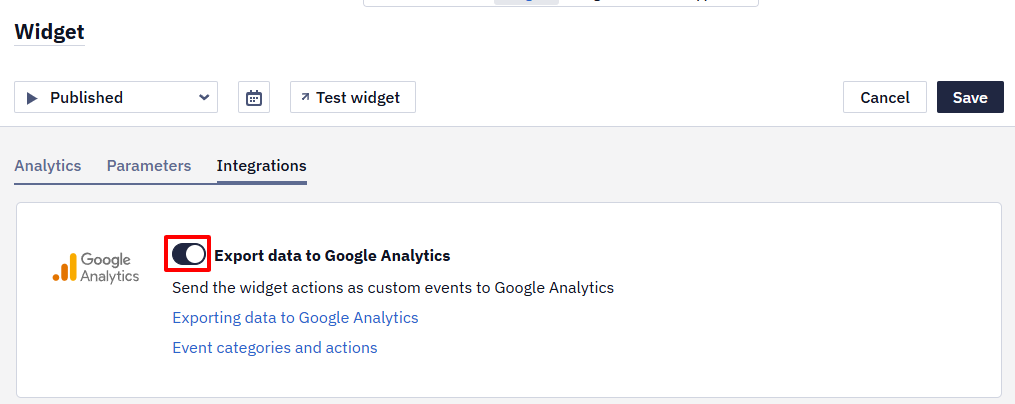
All the event data collected for that widget will be passed automatically to your GA account.
Viewing the Real-time Analytics
To view the real-time analytics in your GA account:
- Select Reports → Realtime in the left-hand side menu.
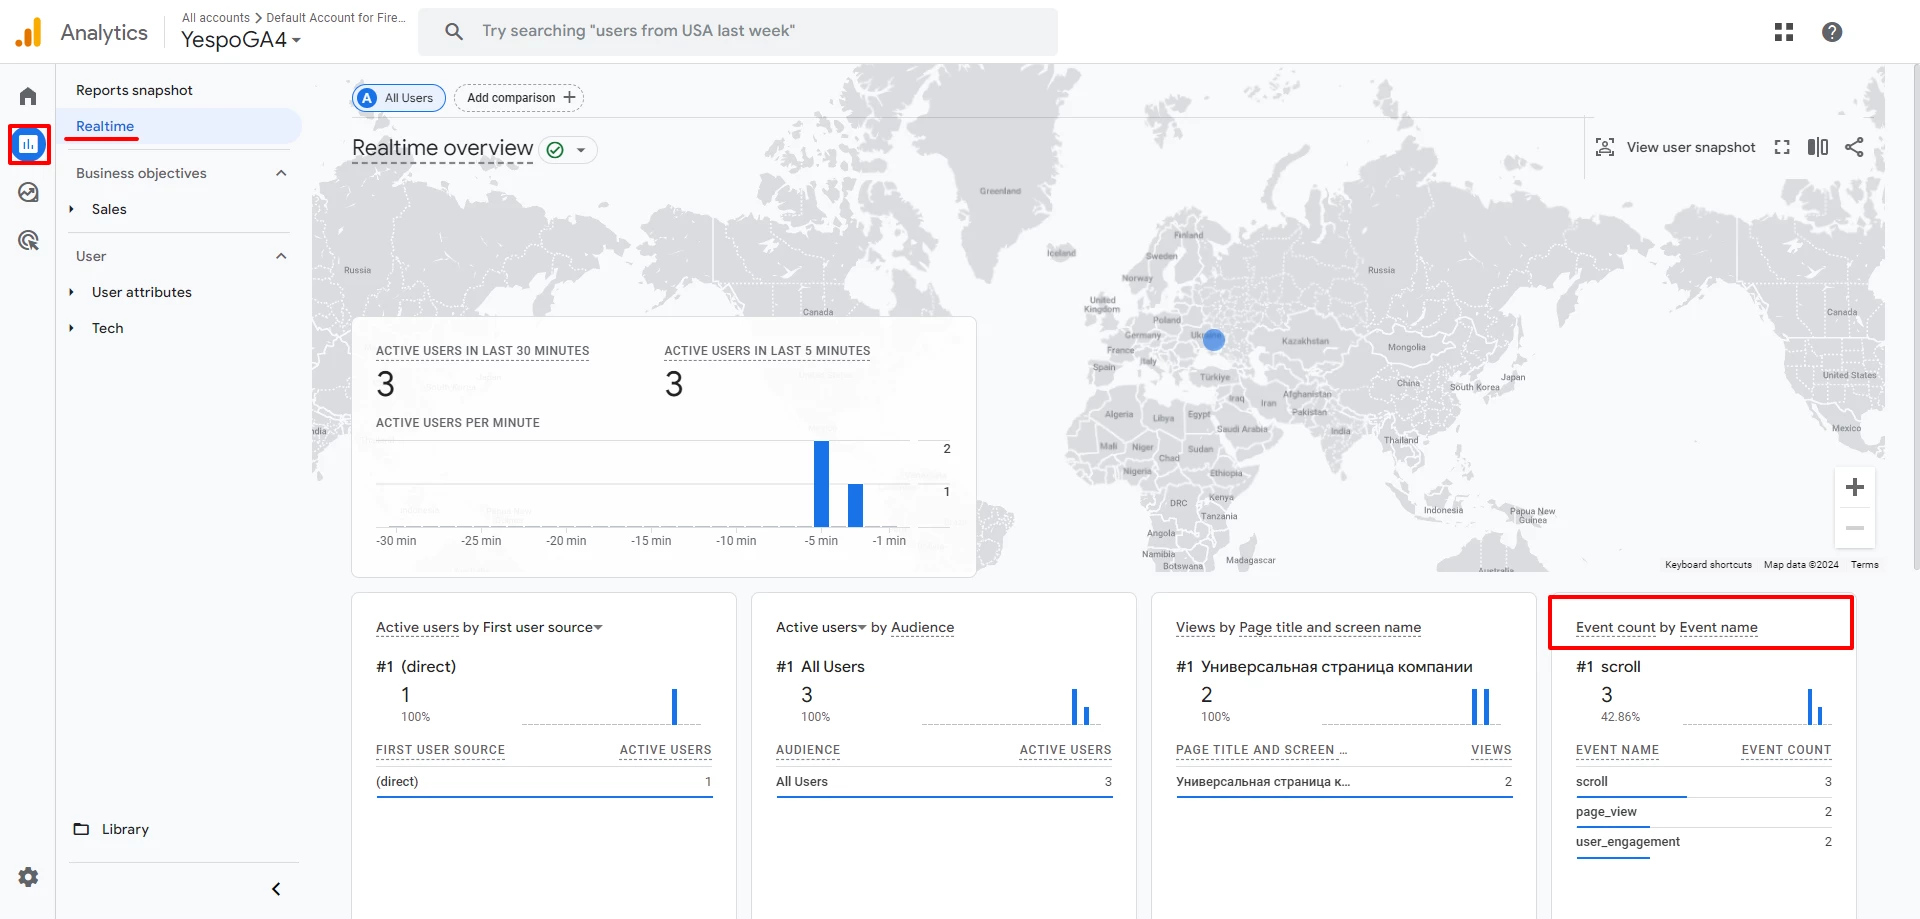
- In the Event count by Event name pane, Select esputnik in the Event name column.
The list of event parameters displays. Click them to see the events.
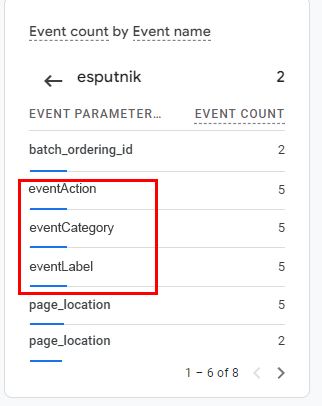
The highlighted parameters are explained in the following table.
| Parameter | Description |
|---|---|
| eventAction | It contains the events as described in Event categories and actions. |
| eventCategory | Widget type. |
| eventLable | Widget ID. |
Event Categories and Actions
GA displays eSputnik events in a table as shown below.
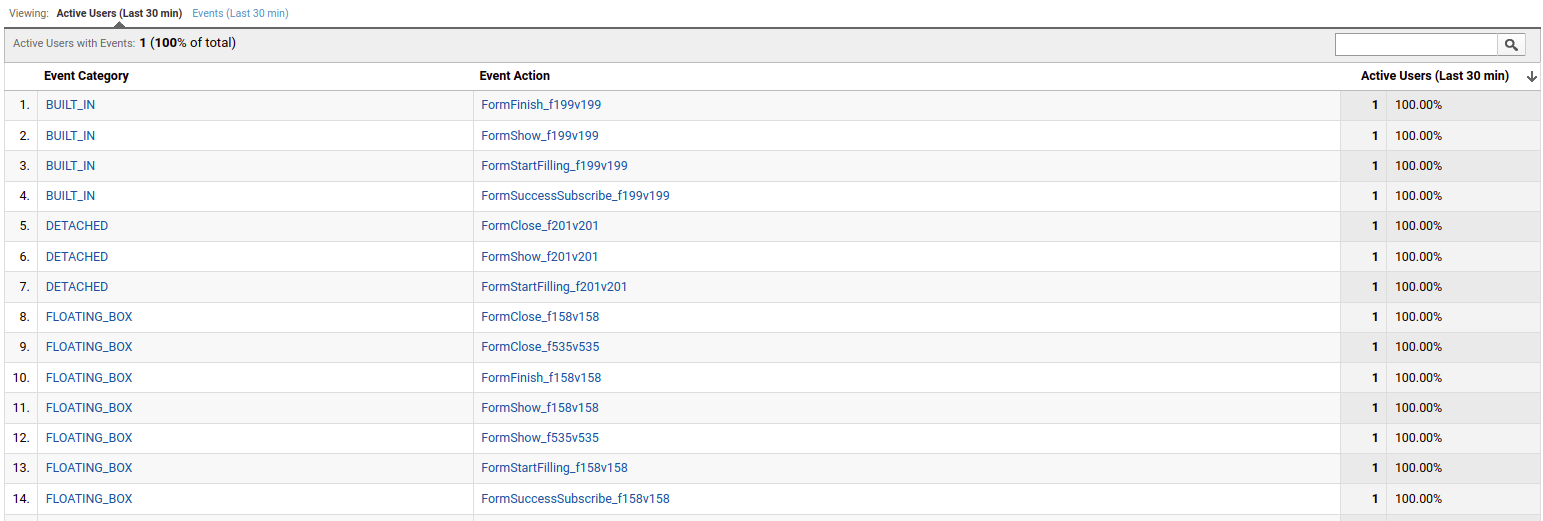
The Event Category column contains the description of a widget/form type as described in the following table.
| Widget/form type | Description |
|---|---|
| BUILT_IN | Inline widget/form |
| DETACHED | Pop-ups |
| FLOATING_BOX | Floating box, informer |
| LAUNCHER | Launcher |
| CONTENT_LOCKER | Content locker |
The Event Action column in GA contains the action type made on a widget. The event actions are explained in the table below.
| Event Action | Description |
|---|---|
| LauncherShow_ web | The launcher button displays on a website. |
| LauncherClick_ | The launcher button clicked. |
| FormShow_bsit | The form is displayed on a website. |
| FormClose_. | A site visitor closed the form. |
| FormButtonClick_on. | A site visitor clicked the form button. |
| FormClick_e wi | A site visitor clicked anywhere within the form. |
| FormStartFilling_ for | A site visitor started filling up the form. |
| FormFinish_bscr | A site visitor completed the subscription form (clicked “Subscribe”, no form validation errors) |
| FormSuccessSubscribe_ess) | Form filling up status (subscription success) |
| FormAlreadySubscribe_d) | Form filling up status (already subscribed) |
| FormErrorSubscribe_ror) | Form filling up status (subscription error) |
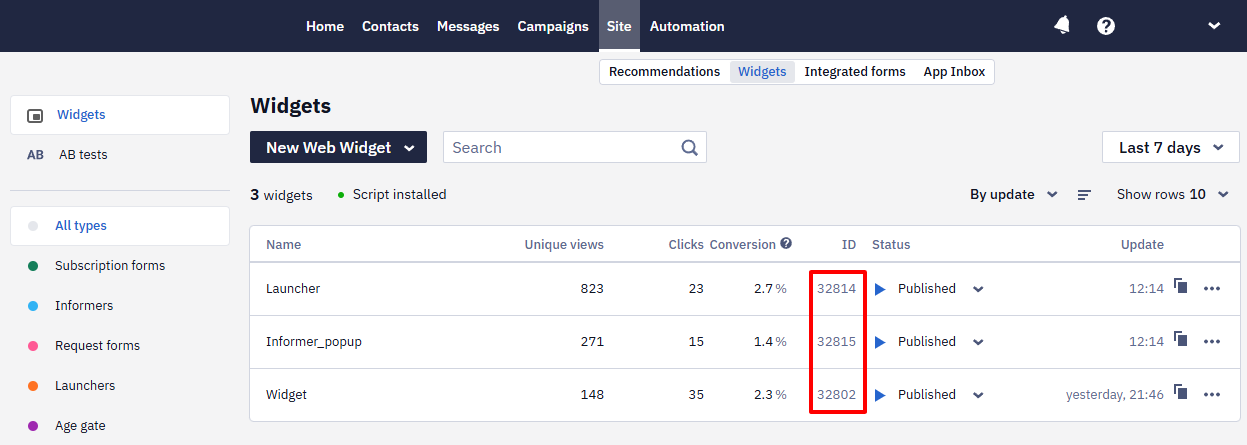
The [ID] part of the events for a specific widget sending its data to GA has the following structure: f(form){id}v(variant){id}, where f(form){id} is the form ID and v(variant){id} is the form variant ID.
For example, FormShow_f781v781 in your GA table means that the form with the ID of 781, and the variant ID of 781 was displayed on a site.
The form ID is displayed in eSputnik, on the Widgets page in the ID column.
Comparing Widget Clicks with GA4 Sessions
NoteGoogle Analytics 4 does not track clicks on the widget's Close (X) button — it only records a session or pageview when a visitor actually navigates via a UTM-tagged link inside the widget. eSputnik's own widget statistics count Close button clicks in addition to link-navigation clicks, so your widget's click count can be higher than the GA4 session count for the same widget.
Updated about 2 months ago