
Launching Workflow Conditions
You can specify different launch conditions for workflows.
- Event-based launch: the workflow is triggered by the selected event;
- Regular launch: the workflow launches for the selected segments based on the specified conditions;
- Launch on contact field change: the workflow is triggered by the change in the contact’s profile.
Event-based
Workflows triggered by the event are sent in response to a user’s action (trigger). It can be a subscription, registration, click in the message, purchase confirmation, app inactivity, etc. You can send events to eSputnik via Firebase / API, and they can be generated within the system.
Let’s see how to configure the launch on the event using a workflow with a welcome mobile push as an example. This workflow is triggered by a registration in your app.
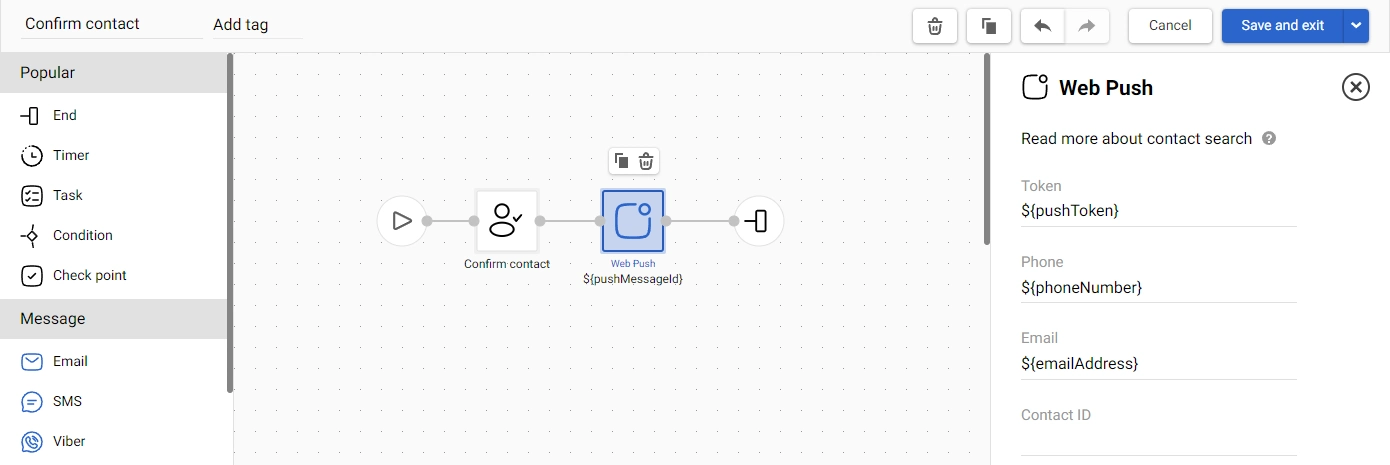
- Create a workflow and select the message that will be sent to all new subscribers.
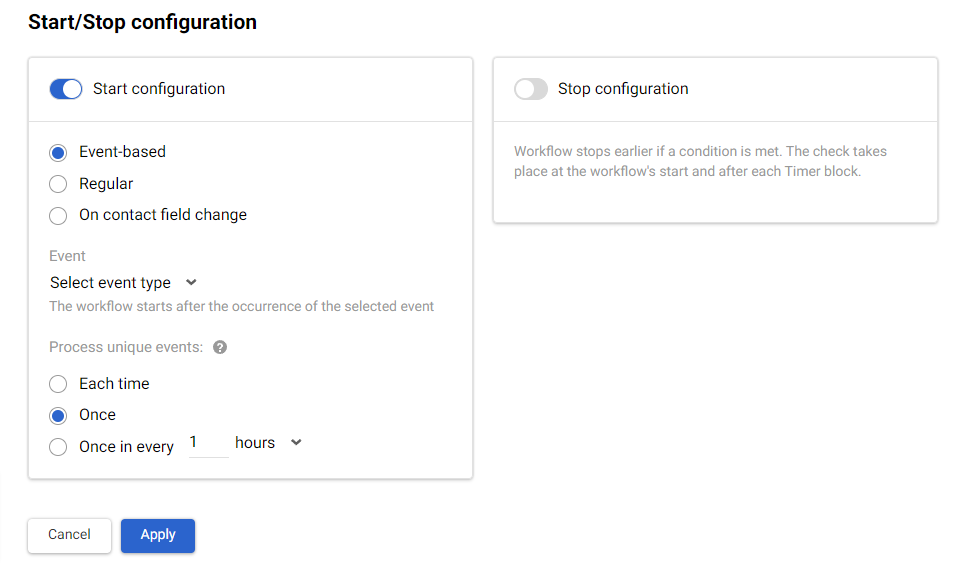
- In Start configuration, select Event-based and select the event type.
- In Process unique events, select once. This way welcome messages won’t be sent to users who attempt to register for the second time.
- Click Apply.
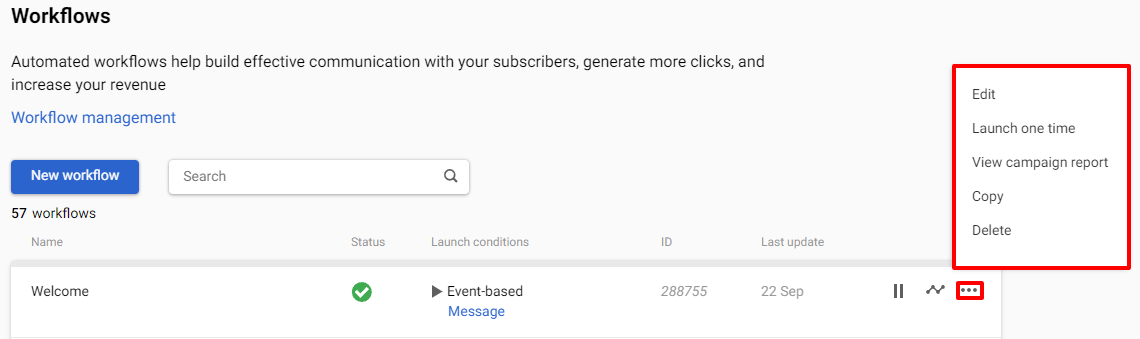
- In the general list, click Activate button and confirm it.

- The workflow status will change to Active.

You can manage your workflows using the settings on the right.
Regular
Regular workflows are only launched for a dynamic segments. A dynamic segment includes users who match the pre-selected conditions. By default, regular workflows are launched once a day after users’ recalculation. You can change the frequency in the settings. Before creating a workflow, you need to create a segment you assign to this workflow.
- Create a workflow and select the message that will be sent to contacts included in the segment.
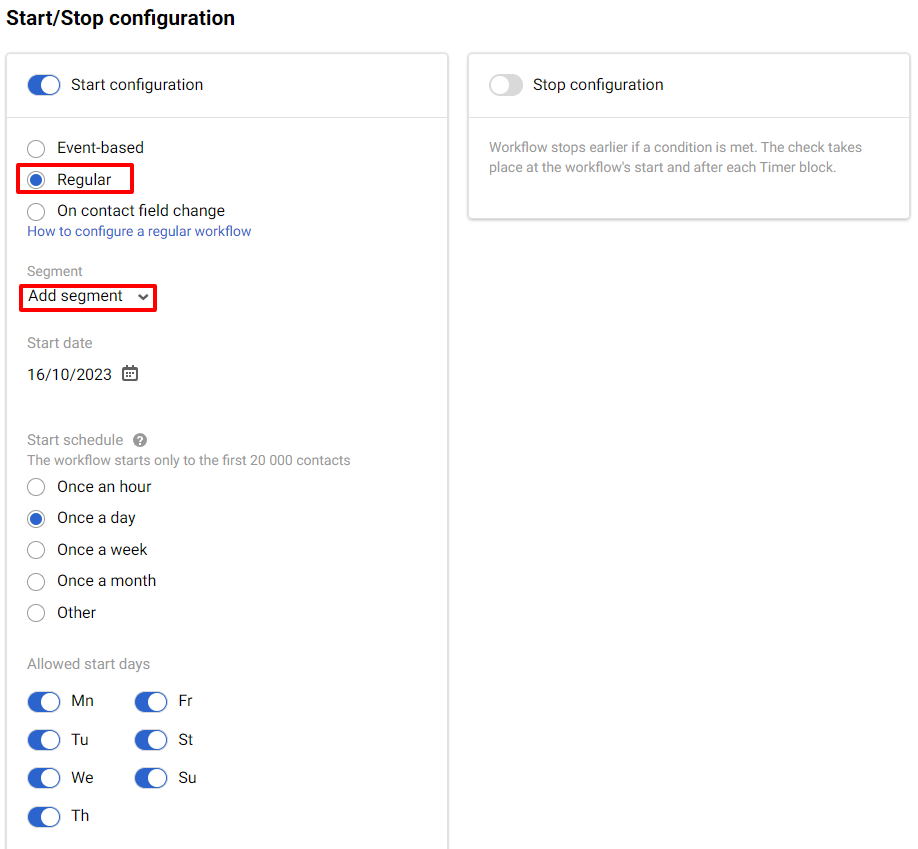
- In Start configuration, select Regular and select the segment. Configure other settings if needed and click Apply.
- In the general list, click Start and confirm it.
Learn more on how to launch a regular workflow.
NoteA scheduled (segment-based) workflow has a default cap of 30,000 contacts per segment. If the segment exceeds this size, the workflow stops running. Contact support to raise the cap for your account.
There is no automatic alert when a scheduled workflow doesn't start because of this cap. Configure your own monitoring in the account notification settings — see Control Over Events, Tags and Promocodes.
NoteFor email messages sent individually by a workflow (not as a bulk broadcast) — including sends initiated via API — a send-rate limit applies. By default it's approximately 100 emails per hour; this is an account-level technical parameter, so the actual value may differ, and trusted accounts may not be subject to it at all. Contact support to confirm the current limit for your account or to request it raised.
On Contact Field Change
Changing the additional fields in the user’s profile can be a workflow trigger. It’s often used to notify about the completion of different actions, such as migration to another plan, subscription, change of preferences, unlocking a new loyalty program level, etc.
- Create a workflow and select the message that will be sent to users whose profiles have been changed.
- In Start configuration, select On contact field change and select the contact field. Click Apply.
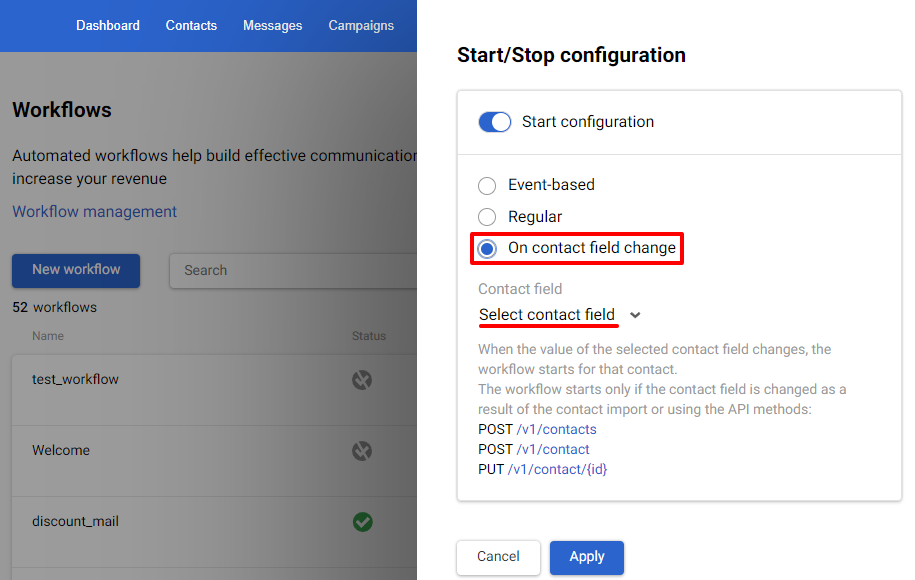
Note that the workflow will launch only if the field is changed:
- After manual contact import;
- After data transfer via the following methods:
If additional fields are changed manually or through any other method, the workflow will not start.
Updated 10 days ago