Introduction to Workflows
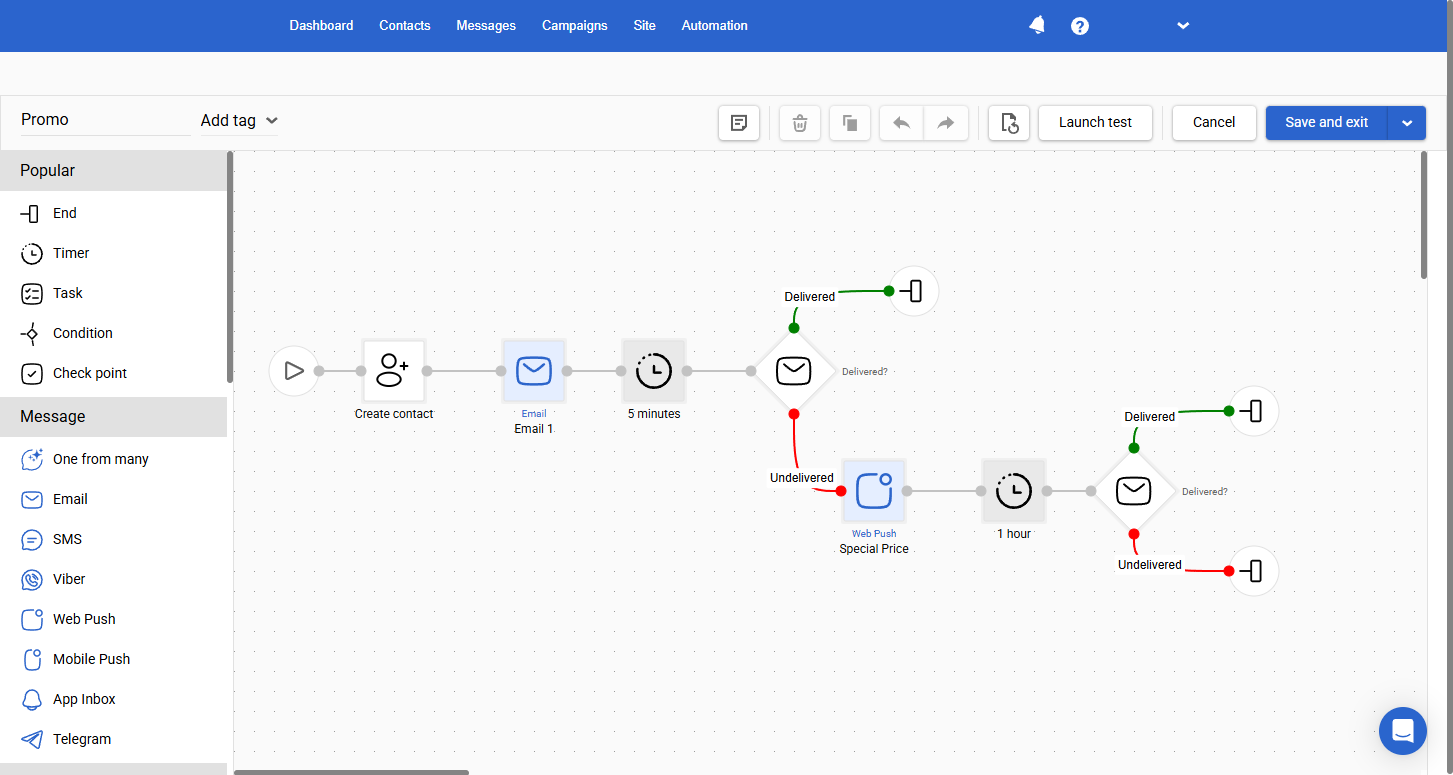
A workflow is an automated actions that occur according to specified conditions with a particular marketing purpose.
You can use workflows to segment your audience and send different campaign types, such as welcome series, birthday congrats, order confirmation, reactivation, etc.
There are 3 types of workflows:
- Triggered workflows launched by the event.
- Regular workflows launched for the selected segments based on the specified conditions.
- Workflows launched by the change in the contact's profile.
In eSputnik, we use a drag-and-drop builder to create workflows. It is a constructor that uses blocks — the tasks and conditions that you can add to a workflow.

Workflow Blocks
Workflow blocks are divided into the following groups:
Blocks | Purpose |
|---|---|
— common blocks. | • End • Timer • Task • Condition • Check point |
— send one message to one contact. | • Email • SMS • Viber • Web Push • Mobile Push • App Inbox |
— remove/add a contact to segments or update custom contact fields. | • Update custom fields • Add to segment • Remove from segment |
— check a contact's compliance with a certain condition, split the workflow into two paths (Yes/No), and run one of them depending on the answer. | • Condition • Split • Sent? • Delivered? • Opened? • Clicked? • Included in Segment? • Current day/time |
— multifunctional group. | • End • Task • Webhook • Sprayer • Check point |
— delay the execution of actions or execute actions at a specified time. | • Timer • Start on date |
And Start block — not included in any group. It automatically appears in a new workflow by default.
Supported Data Access Formats in Workflow Blocks
All workflow blocks allow you to retrieve data from additional contact fields using the following case-insensitive access formats:
-
data.get('fields').get('1234') -
data['fields'].get('1234') -
data['fields']['1234'] -
data.get('fields')['1234'] -
fields.get('1234') -
fields['1234']
In addition to ${parameter}, you can use the following variable formats in all blocks that support value validation:
${event.data.parameter}— a dot selector for nested parameters;${event.array[0].parameter}— an index selector for array elements.
ImportantIn any workflow block parameter, variables can be referenced using both formats:
- With curly braces —
${date}- Short format (without braces) —
$dateBoth formats correctly substitute variable values in block parameters.
Workflow Context
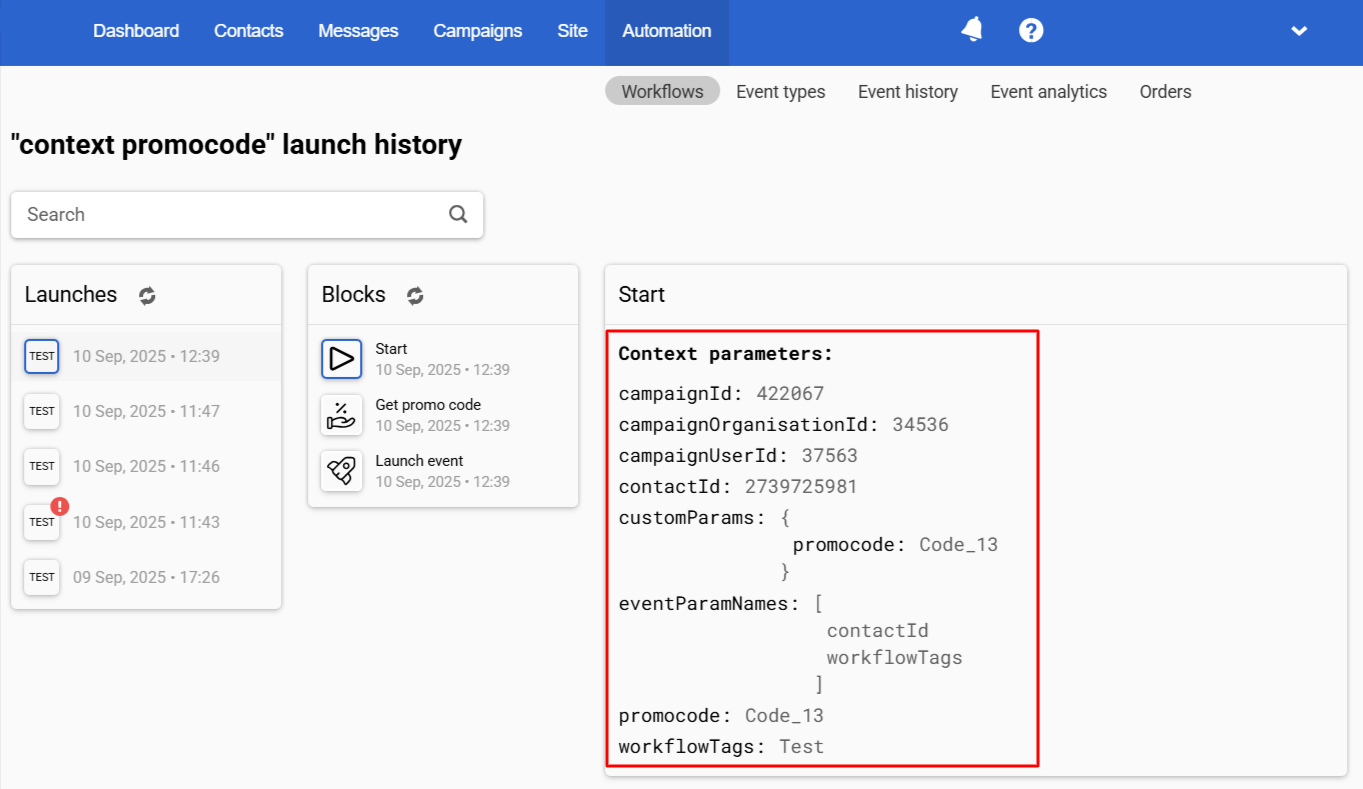
Workflow context data reflects information about a contact and their behavior.

The following types of context data can be distinguished:
-
Contact fields: information from contact cards, such as demographics, loyalty level, or preferences.
-
Event parameters: detailed information about the event that triggered the workflow — a list of products and the order amount, a promo code, etc.
-
Event string data: JSON passed as a string with the event, for example,
"{\"coupon\":\"SAVE10\",\"checkoutLink\":\"https:\/\/site.com\/checkout?cart=CART-98213\"}". -
Webhook response parameters: data received via webhooks from external sources, such as a personal promo code or authorization token.
-
Order data: purchase details or order history.
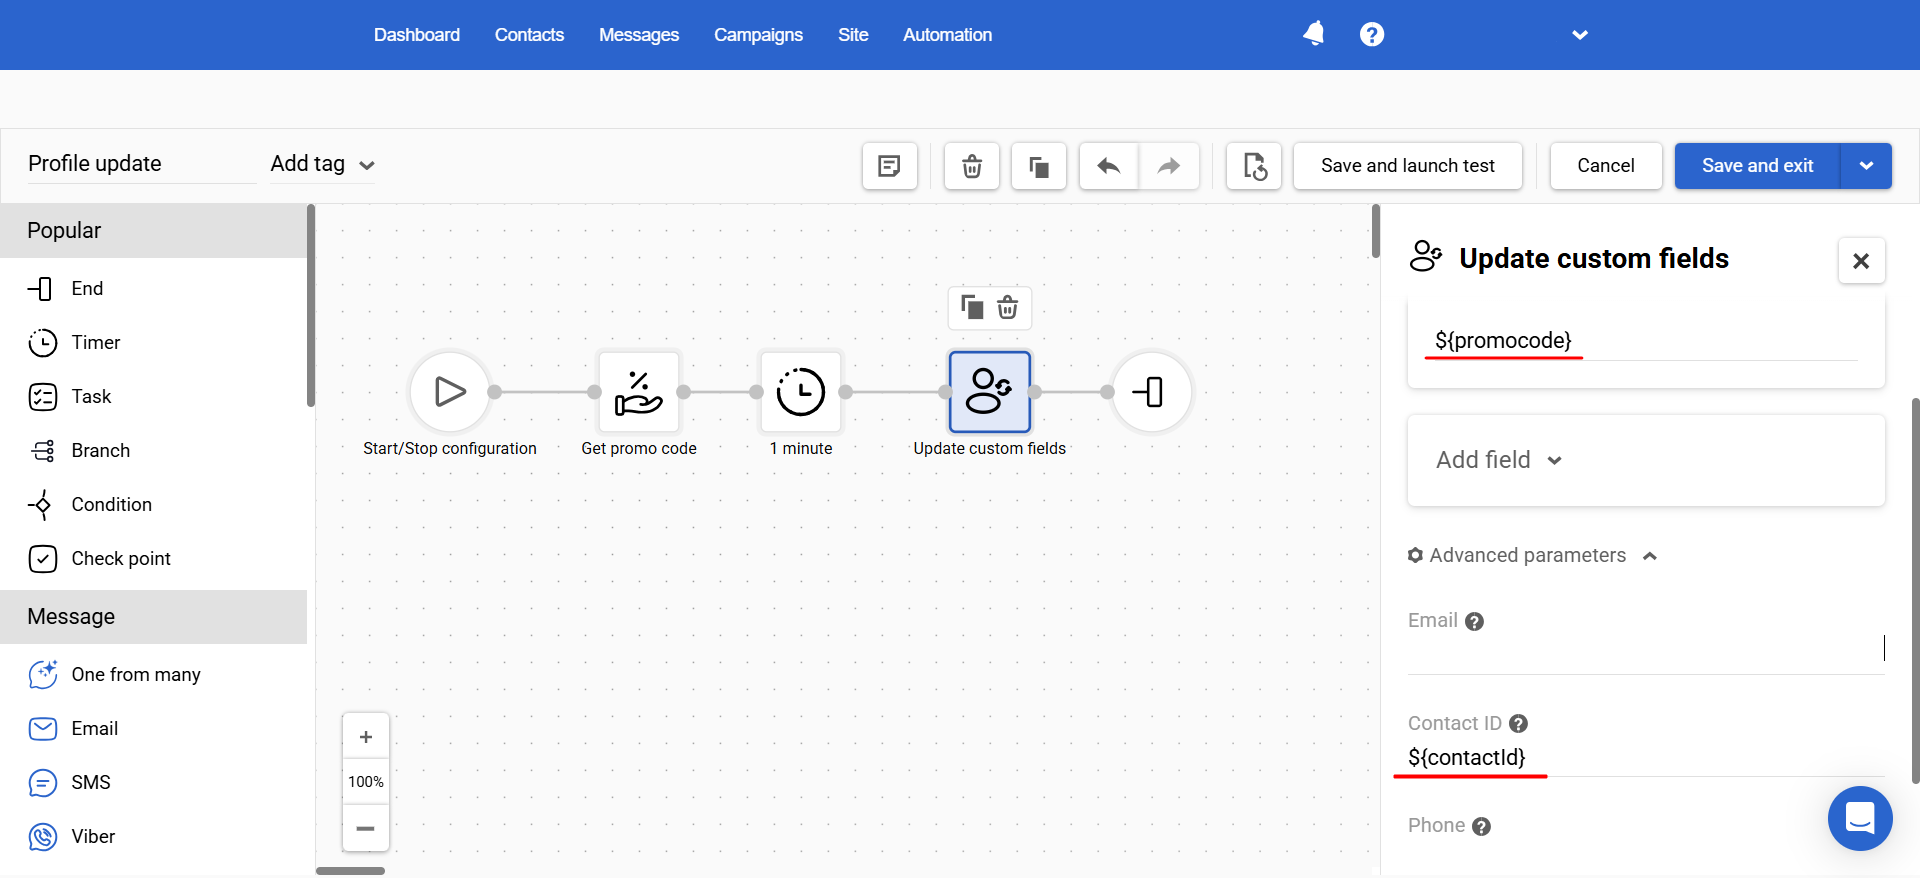
All workflow context data is available in its blocks. For example, to write the promo code used in the workflow to a contact card, you need to:
- After the Get promo code block and the timer for data processing, add the Update custom fields block with the necessary variables from the context, for example,
${promocode}for the promo code value and${contactId}to identify the contact whose card needs to be updated.

- After the Get promo code block and the timer for data processing, add the Update custom fields block with the necessary variables from the context, for example,
As a result, the promo code used in the first workflow will be written to the contact profile.
NoteEach type of workflow context data can be used for personalization and segmentation, allowing you to adapt your communication strategy in real time based on user behavior.
Allowed Send Time Settings
Allowed time settings can increase the likelihood of a quick response to the campaign and communicate with subscribers at the most convenient time for them.
Workflow Examples
This section contains instructions for setting up the most common automatic workflows: subscription confirmation, welcome series, abandoned carts and views, etc. Read more >
Updated about 2 months ago