
Reteno React Native iOS SDK Setup
Setting up the SDK
Follow our setup guide to integrate the Reteno React Native SDK with your app.
Step 1: Add a Notification Service Extension
The NotificationServiceExtension allows your iOS application to receive rich notifications with images. It's also required for Reteno's analytics features.
1.1 In Xcode Select File > New > Target...
1.2 Select Notification Service Extension then press Next.
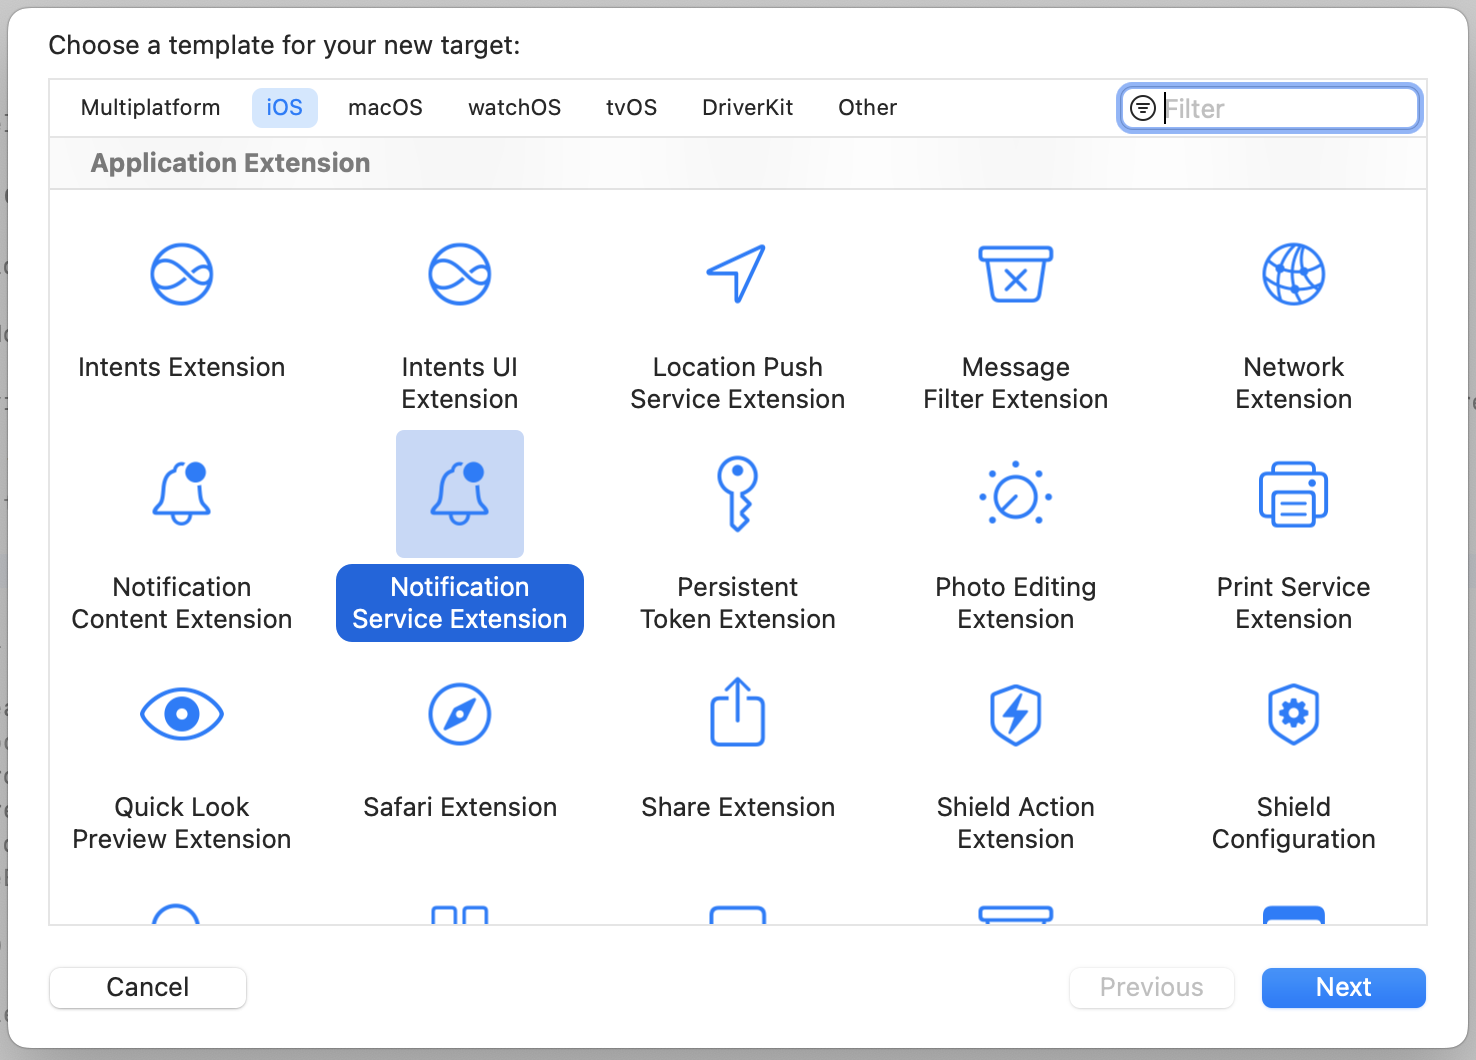
1.3 Enter the product name as NotificationServiceExtension and press Finish.
Do not select Activate on the dialog that is shown after selecting Finish.
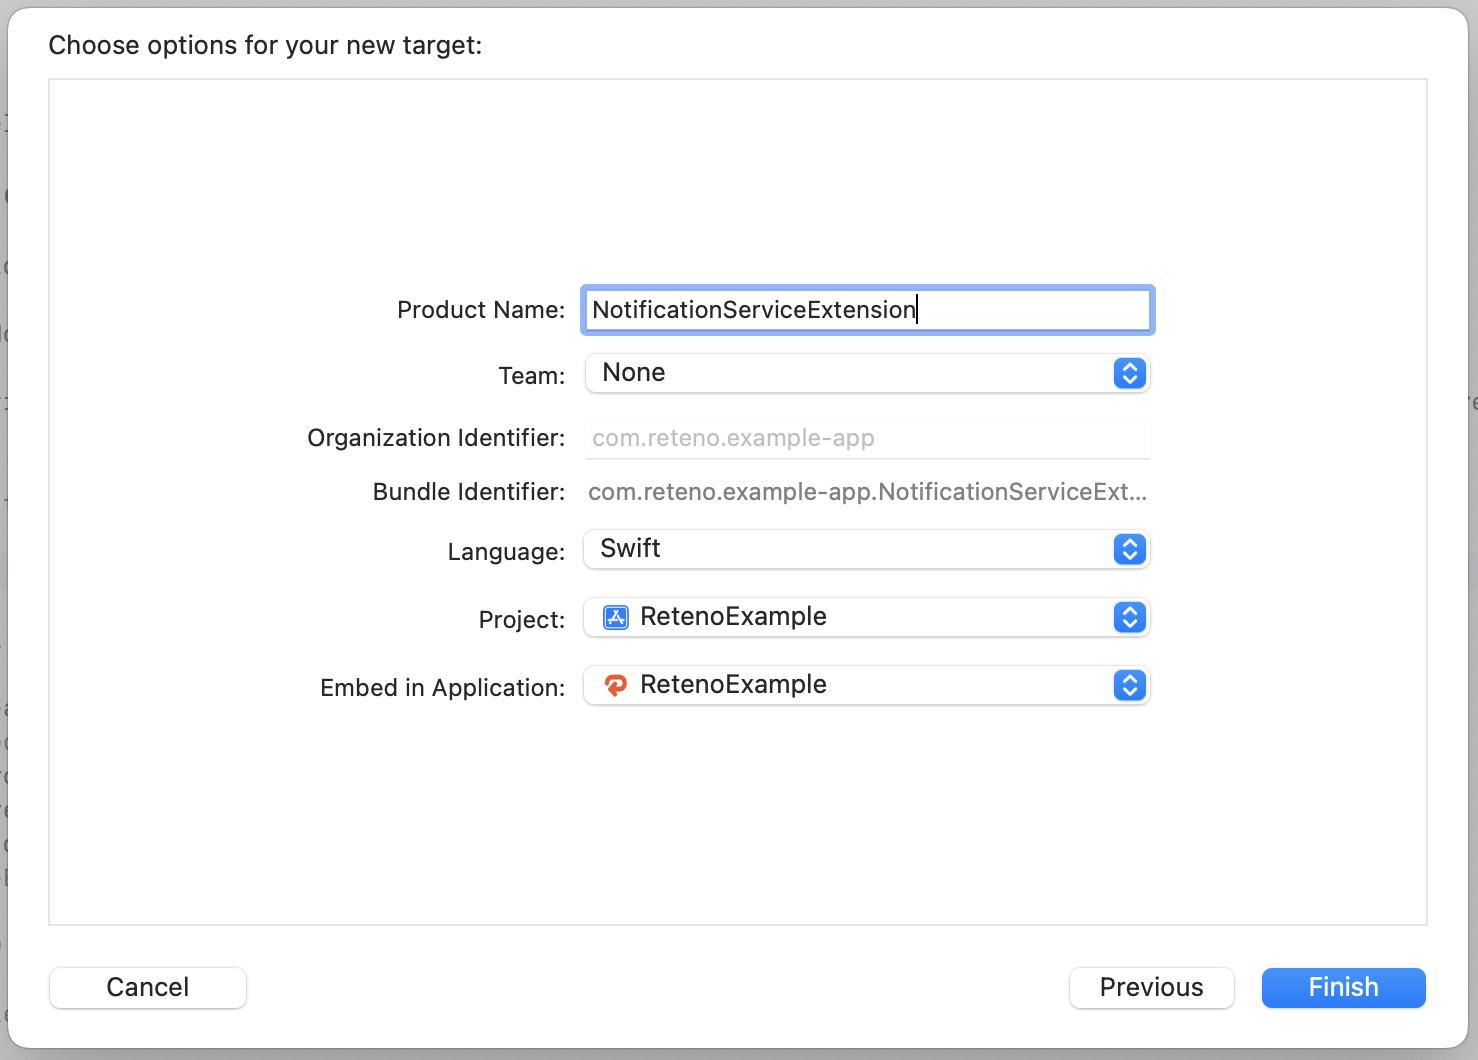
1.4 Press Cancel on the Activate scheme prompt.
By canceling, you keep Xcode debugging your app instead of the extension you’ve just created.
If you activate the prompt by accident, you can switch back to debugging your app in Xcode (next to the Play button).
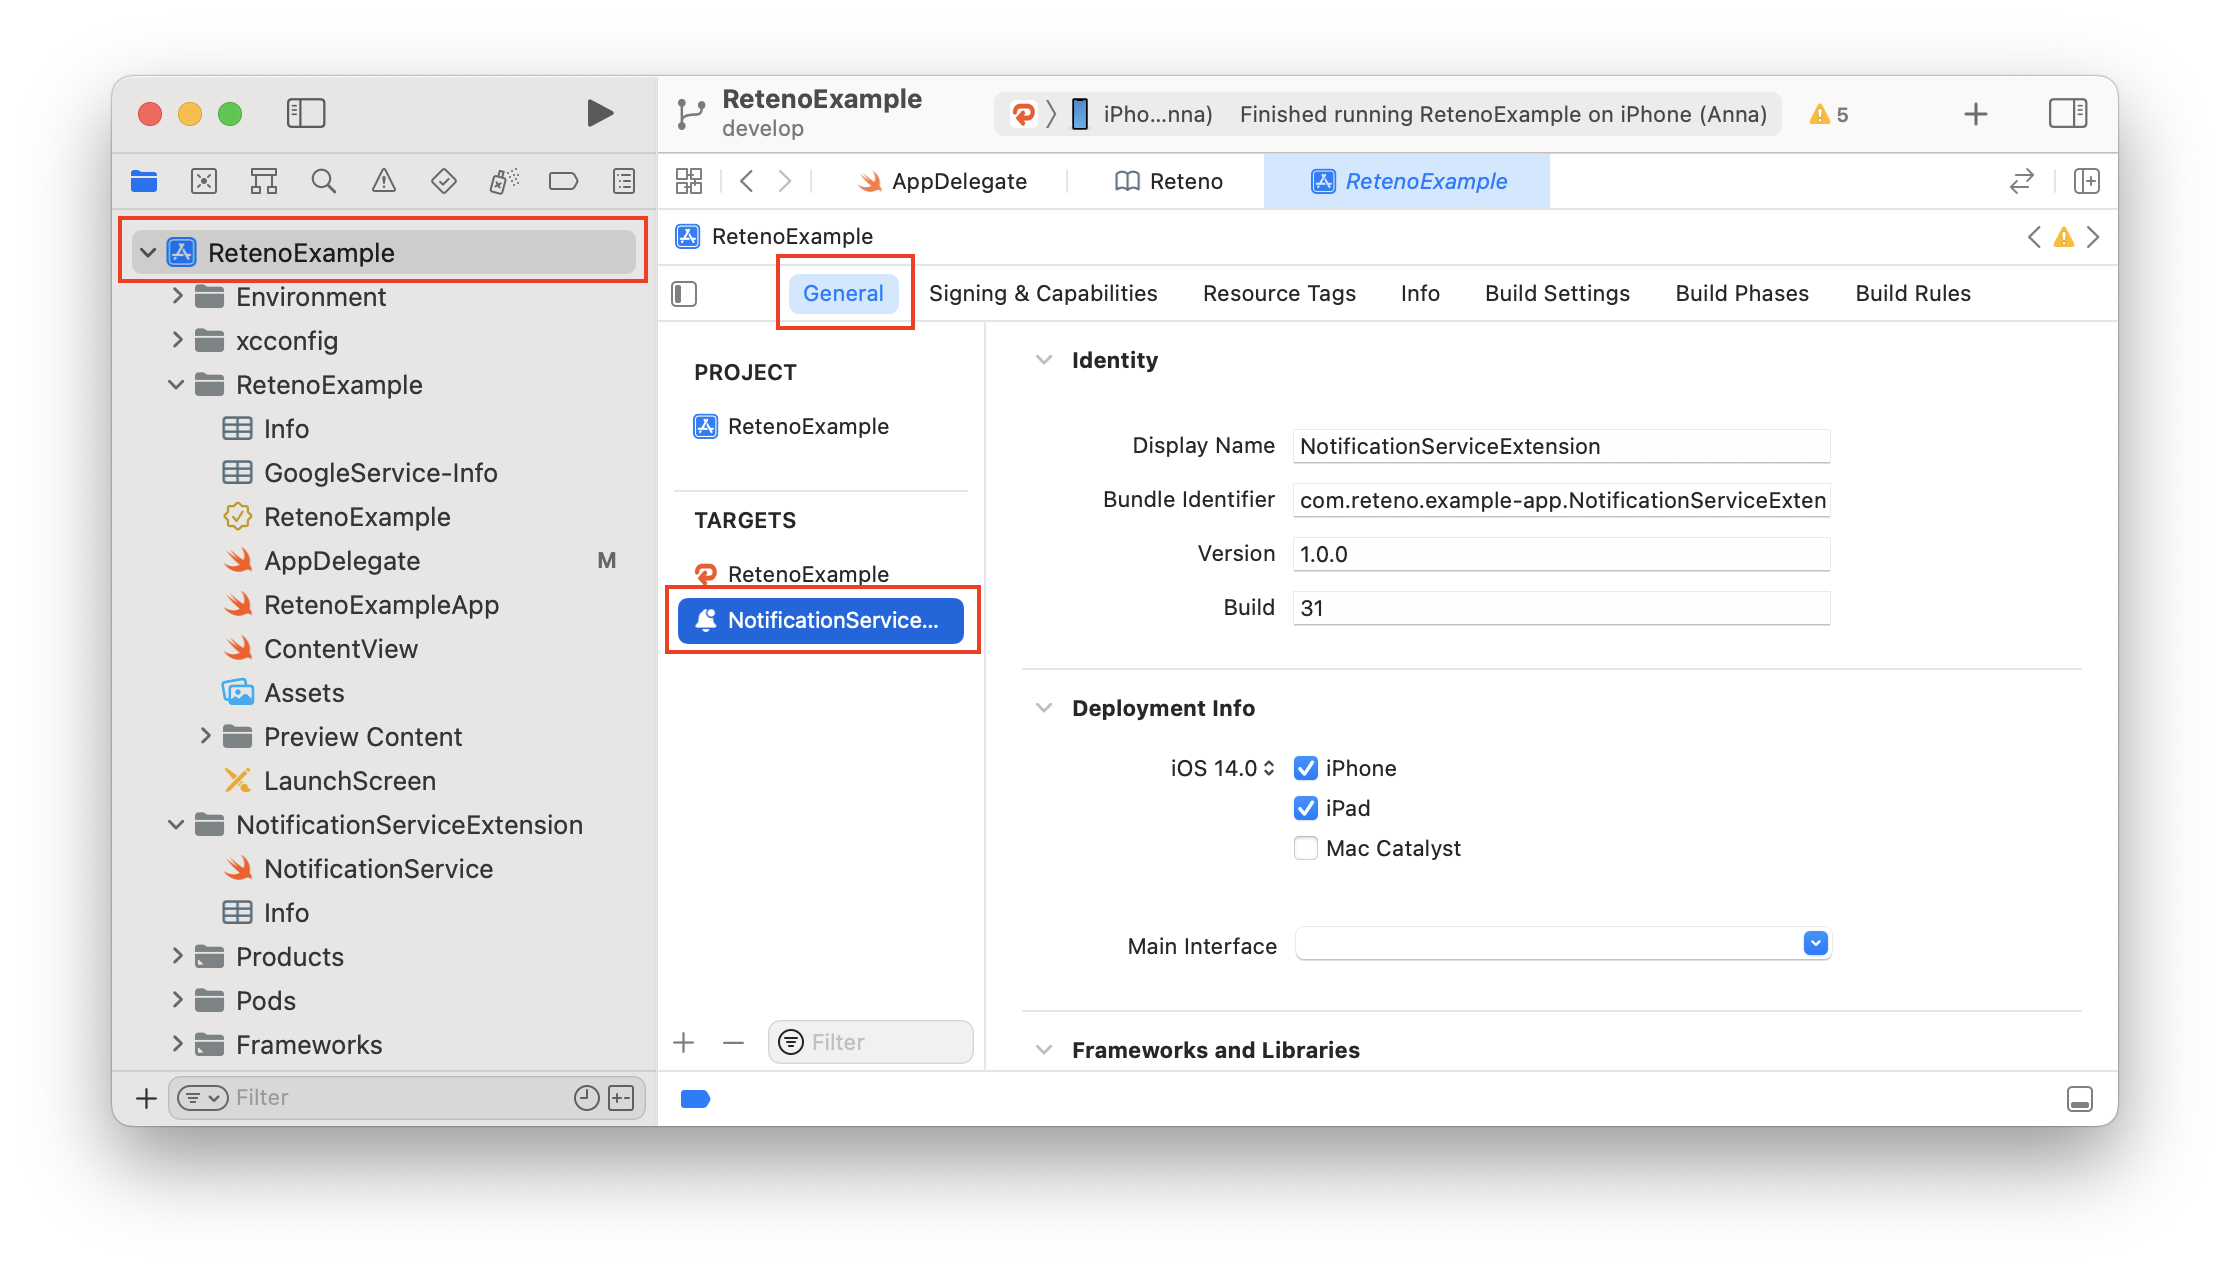
1.5 In the project navigator, select the project directory and select the NotificationServiceExtension target in the targets list.
Check that the Deployment Target is set to the same value as your Main Application Target.
Note iOS versions under 10 will not be able to get Rich Media.
1.6 In the project navigator, select the NotificationServiceExtension folder and open the NotificationService.swift, then replace the entire file contents with the following code. Ignore any build errors at this point. We will import the Reteno module, which will resolve any errors.
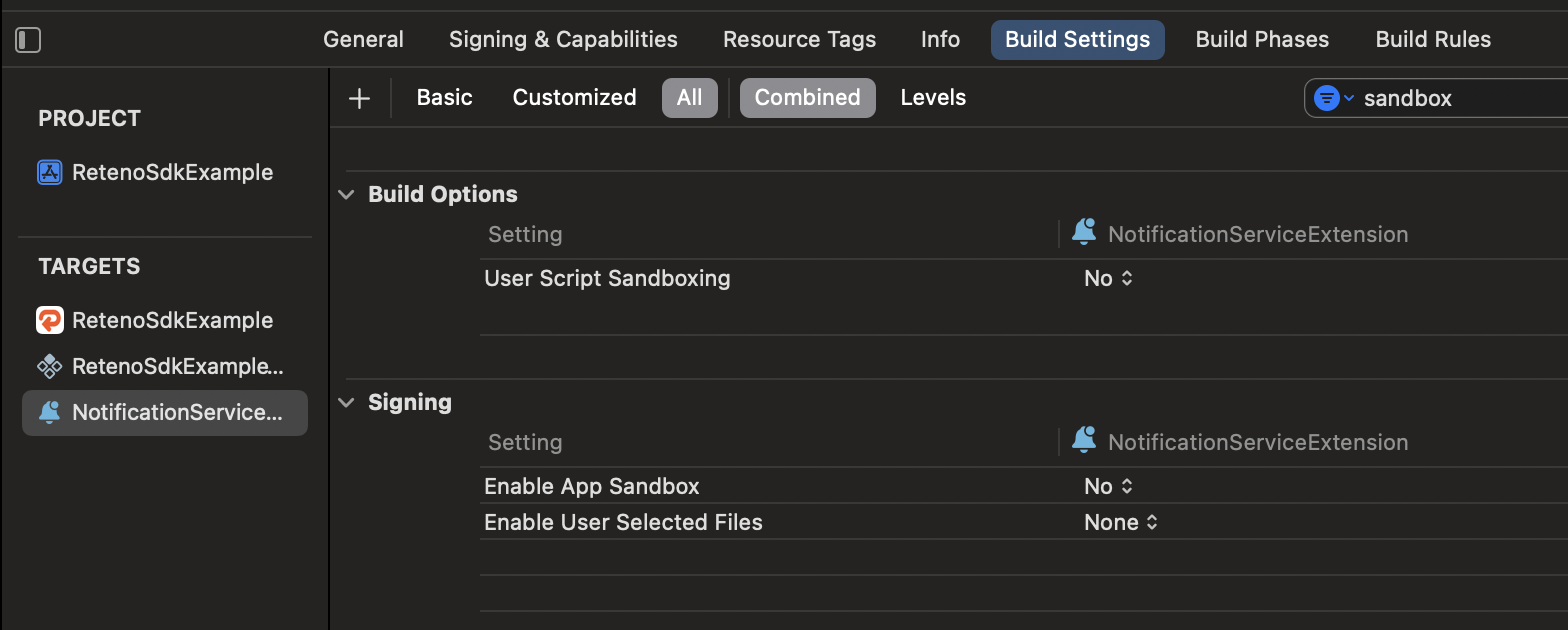
Note After adding NotificationServiceExtension you have to make sure that sandbox is off (like on screenshot below), because it can cause an error.
import UserNotifications
import Reteno

class NotificationService: RetenoNotificationServiceExtension {}
More about Notification Service Extension Modifying Content in Newly Delivered Notifications
Step 2: Install the SDK
2.1 Modify your Podfile to contain next dependencies:
target 'RetenoSdkExample' do
  ...

  target 'NotificationServiceExtension' do
    inherit! :search_paths
    pod 'Reteno'
  end
end
Do not add
pod 'Reteno'to your main app target, and do not pin a version. Thereteno-react-native-sdkpodspec already declares the exactRetenoversion it was built against, and React Native autolinking pulls it into the main target for you. The Notification Service Extension is a separate target that autolinking does not cover, which is why it needs its ownpod 'Reteno'line — but CocoaPods resolves one version per pod across the whole Podfile, so the extension automatically gets the same version as the app.Pinning
Retenoby hand creates a conflict the moment you updatereteno-react-native-sdkto a release whose podspec requires a different version, andpod installfails with an unsatisfiable dependency. If you need reproducible builds, commitPodfile.lockrather than hardcoding the version here.
2.2 Install the npm package before running pod install (Step 3) — autolinking can only resolve Reteno for the main target once reteno-react-native-sdk is present in node_modules.
2.3 After pod install completes, open the <project-name>.xcworkspace file.
Step 3: Install reteno-react-native-sdk:
npm install reteno-react-native-sdk- don't forget about pods (in ios folder)
cd ios && pod installStep 4: Initialize SDK in React Native code
To setup SDK you need an SDK_ACCESS_KEY, visit Managing Mobile SDK Access Keys to get it.
Starting from reteno-react-native-sdk v2.0.0, iOS SDK initialization is performed from JavaScript via initialize(...).
Call initialization once in your root component:
import { useEffect } from "react";
import {
  initialize,
  initializeEventHandler,
  registerForRemoteNotifications,
} from "reteno-react-native-sdk";

useEffect(() => {
  const bootstrap = async () => {
    await initialize({
      apiKey: "YOUR_SDK_ACCESS_KEY",
      isDebugMode: false,
      pauseInAppMessages: false,
      sessionDurationSeconds: 900,
      lifecycleTrackingOptions: {
        appLifecycleEnabled: true,
        foregroundLifecycleEnabled: false,
        pushSubscriptionEnabled: true,
        sessionStartEventsEnabled: true,
        sessionEndEventsEnabled: false,
      },
    });

    initializeEventHandler();
    await registerForRemoteNotifications();
  };

  bootstrap();
}, []);
When you add push listeners, register them before
initializeEventHandler(). That call flushes the native event queue, and anything registered after it misses events that were already queued. See Push notification.
If your app uses @react-native-firebase/messaging, add iosDeviceTokenHandlingMode: "manual" to the initialize options:
await initialize({
  apiKey: "YOUR_SDK_ACCESS_KEY",
  iosDeviceTokenHandlingMode: "manual",
  // ...other options
});
In this mode SDK bridges FCM token to Reteno automatically.
Step 4.1: Add RetenoReactNativeSdk.delayedStart() to your AppDelegate
RetenoReactNativeSdk.delayedStart() to your AppDelegateRequired if you rely on push click attribution or on In-App messages triggered by a push. Call RetenoReactNativeSdk.delayedStart() in AppDelegate before React Native bootstraps:
import reteno_react_native_sdk

func application(
  _ application: UIApplication,
  didFinishLaunchingWithOptions launchOptions: [UIApplication.LaunchOptionsKey: Any]? = nil
) -> Bool {
  // Insert this line first — before your existing React Native bootstrap code
  // (e.g. before `factory.startReactNative(...)` or `RCTBridge(delegate:launchOptions:)`).
  RetenoReactNativeSdk.delayedStart()

  // ...your existing React Native bootstrap code continues here, unchanged...

  return true
}
This is a snippet to insert into your existing application(_:didFinishLaunchingWithOptions:) — not a full replacement for it. If your app also uses Firebase, call it right after FirebaseApp.configure(). For a complete, working method (including the React Native factory setup), see example/ios/AppDelegate.swift.
Why this is needed. iOS requires the notification-center delegate to be registered before didFinishLaunchingWithOptions returns. Otherwise the system never delivers the notification response that cold-launched the app. The React Native module is instantiated lazily and initializes too late for this, so without delayedStart():
- a push click made while the app was terminated is not reported to Reteno — you will see delivered pushes with no clicks in your statistics;
- an in-app message linked to that push never opens.
delayedStart() registers the delegate synchronously; the JavaScript initialize(...) call then completes startup and replays the push that launched the app. Warm-start clicks work either way, so this problem only appears once the app has been fully closed.
Note that delayedStart() restores attribution and in-app messages, but it does not make setOnRetenoPushClickedListener fire for the push that launched the app. On iOS you have to read that push with getInitialNotification() — and guard the call by platform, because on Android the same push already reaches the click listener. See Cold start.
Step 5: Add App Groups
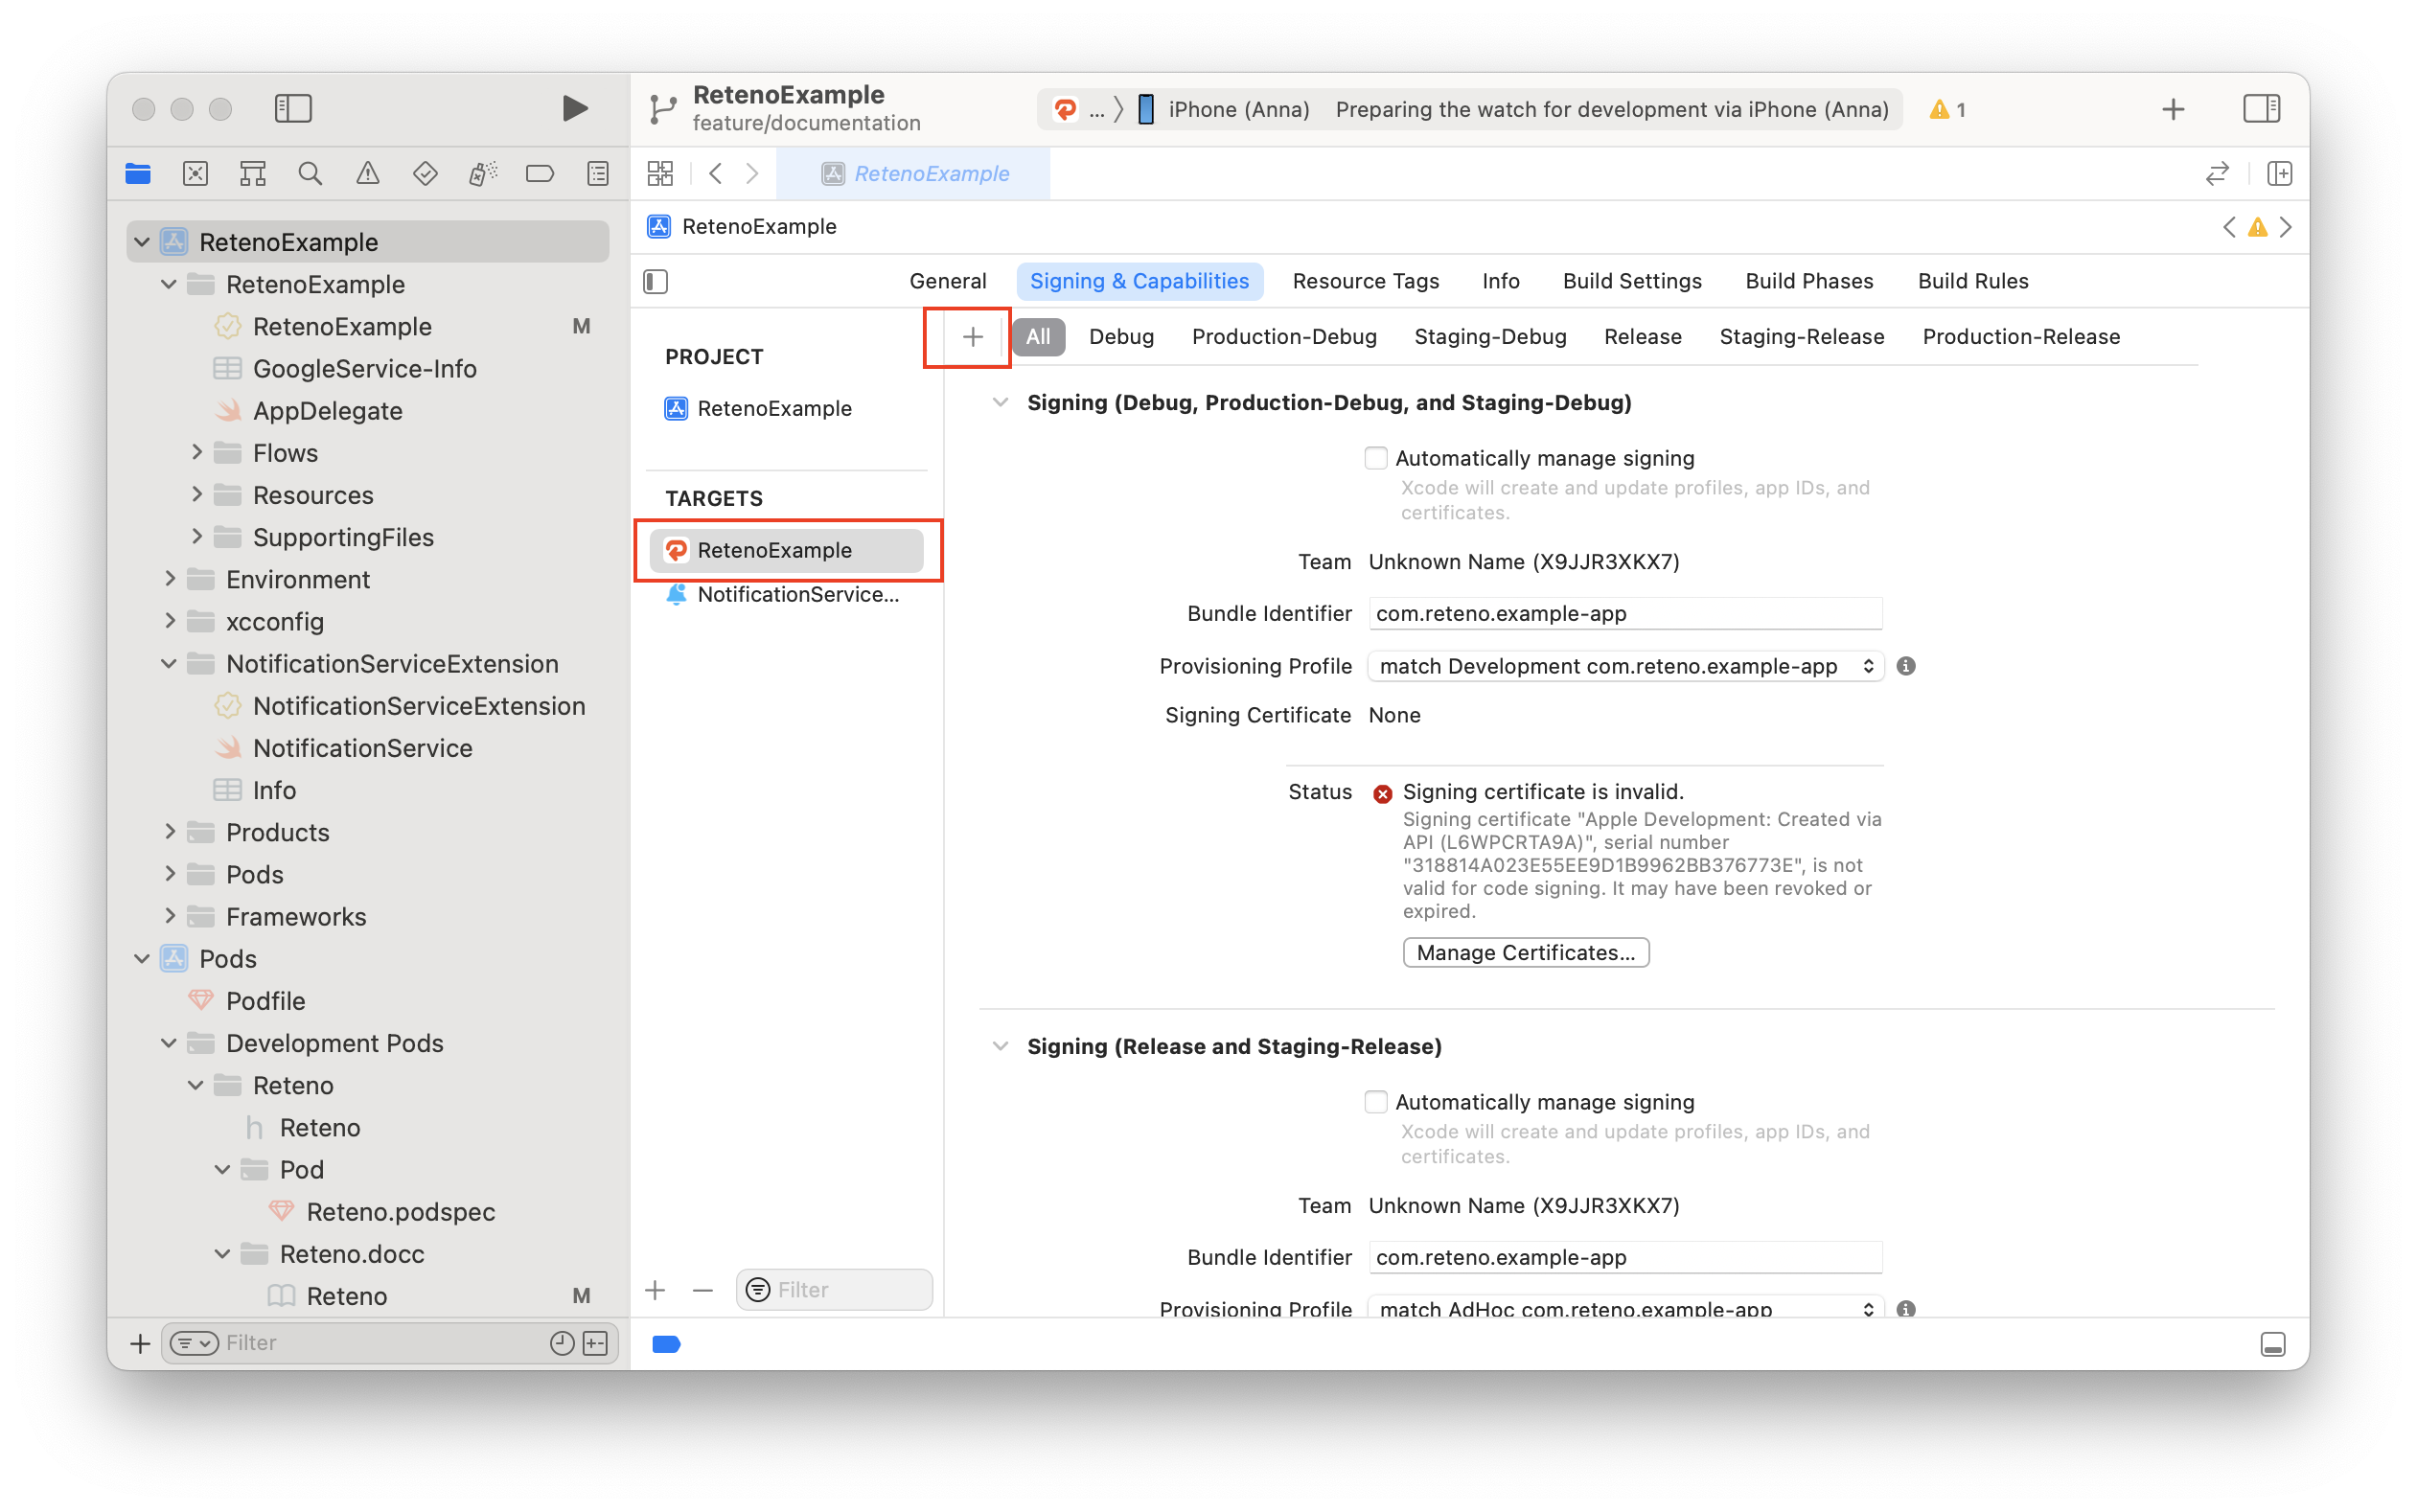
5.1 In your Main app target got to "Signing & Capabilities" > "All"
5.2 Click "+ Capability" if you do not have App Groups in your app yet.
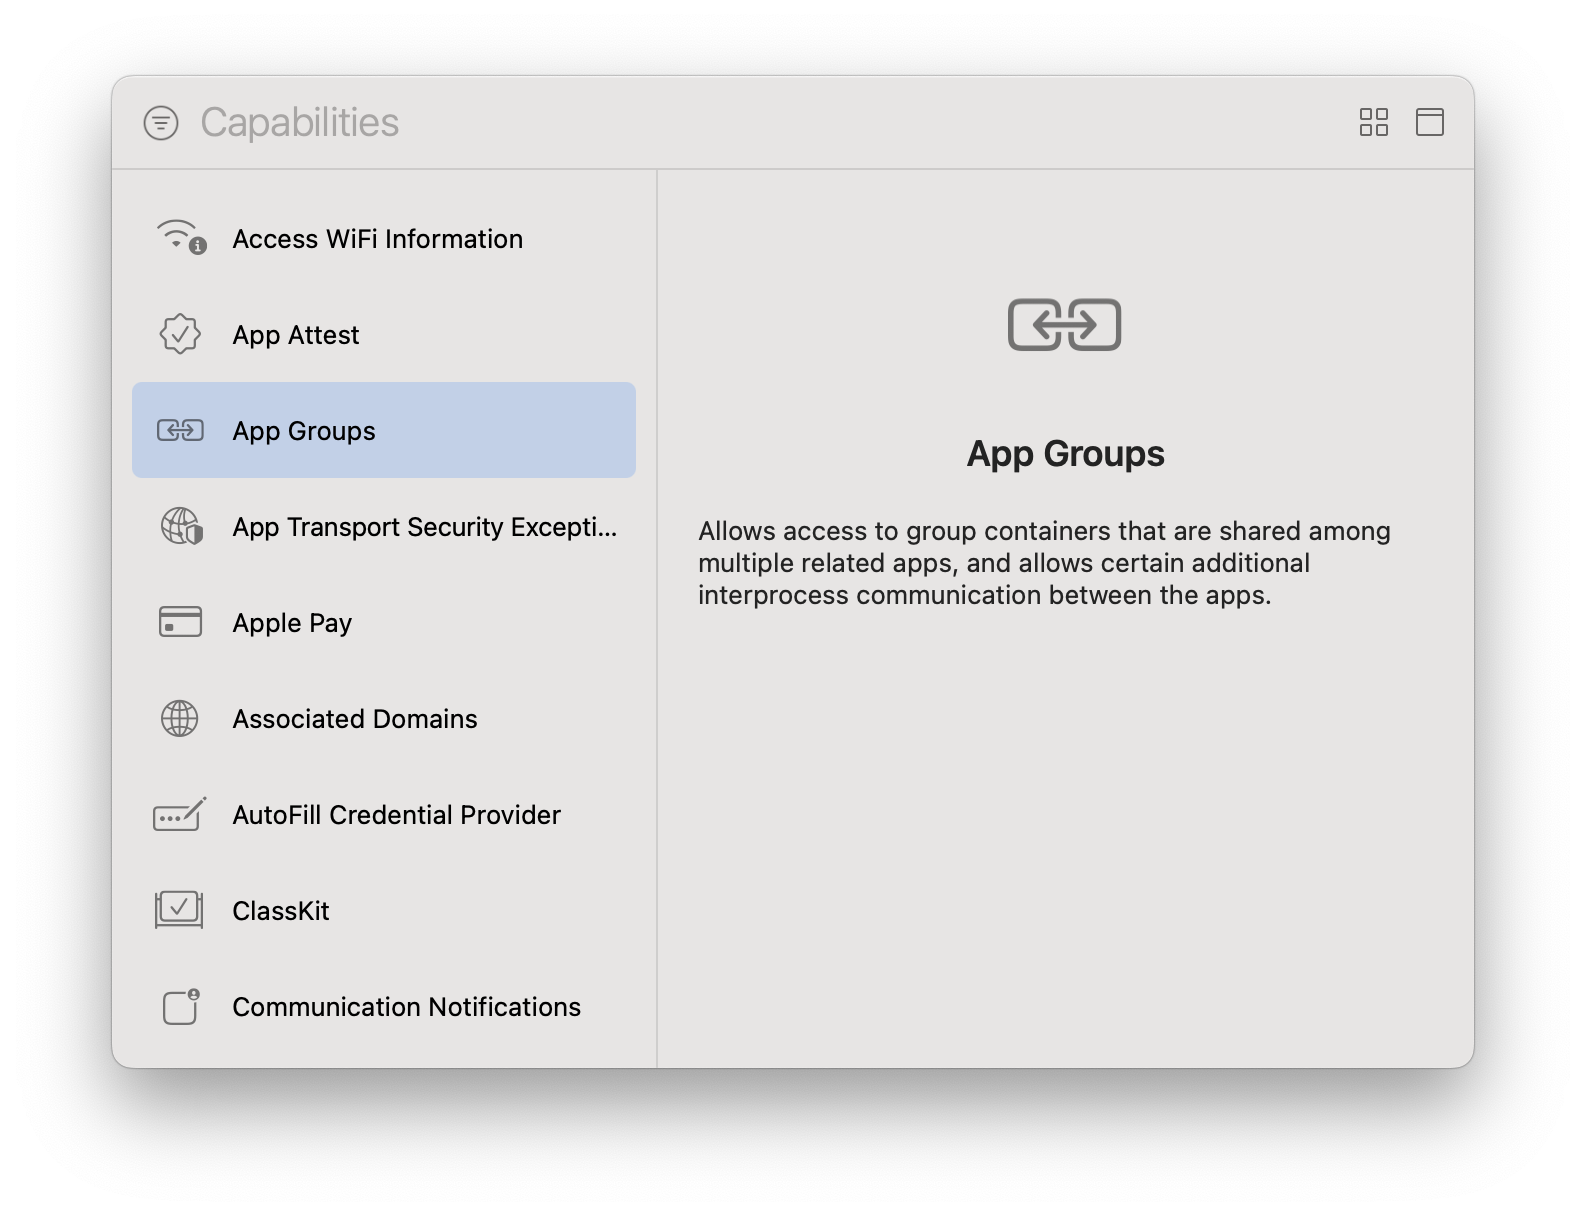
5.3 Select App Groups.
5.4 Under App Groups click the "+" button.
5.5 Fill the "App Groups" container as group.{bundle_id}.reteno-local-storage where bundle_id is the same as "Bundle Identifier" off your app (in the main target) and press OK.
5.6 Select the NotificationServiceExtension target and repeat steps 5.2 - 5.5 for it
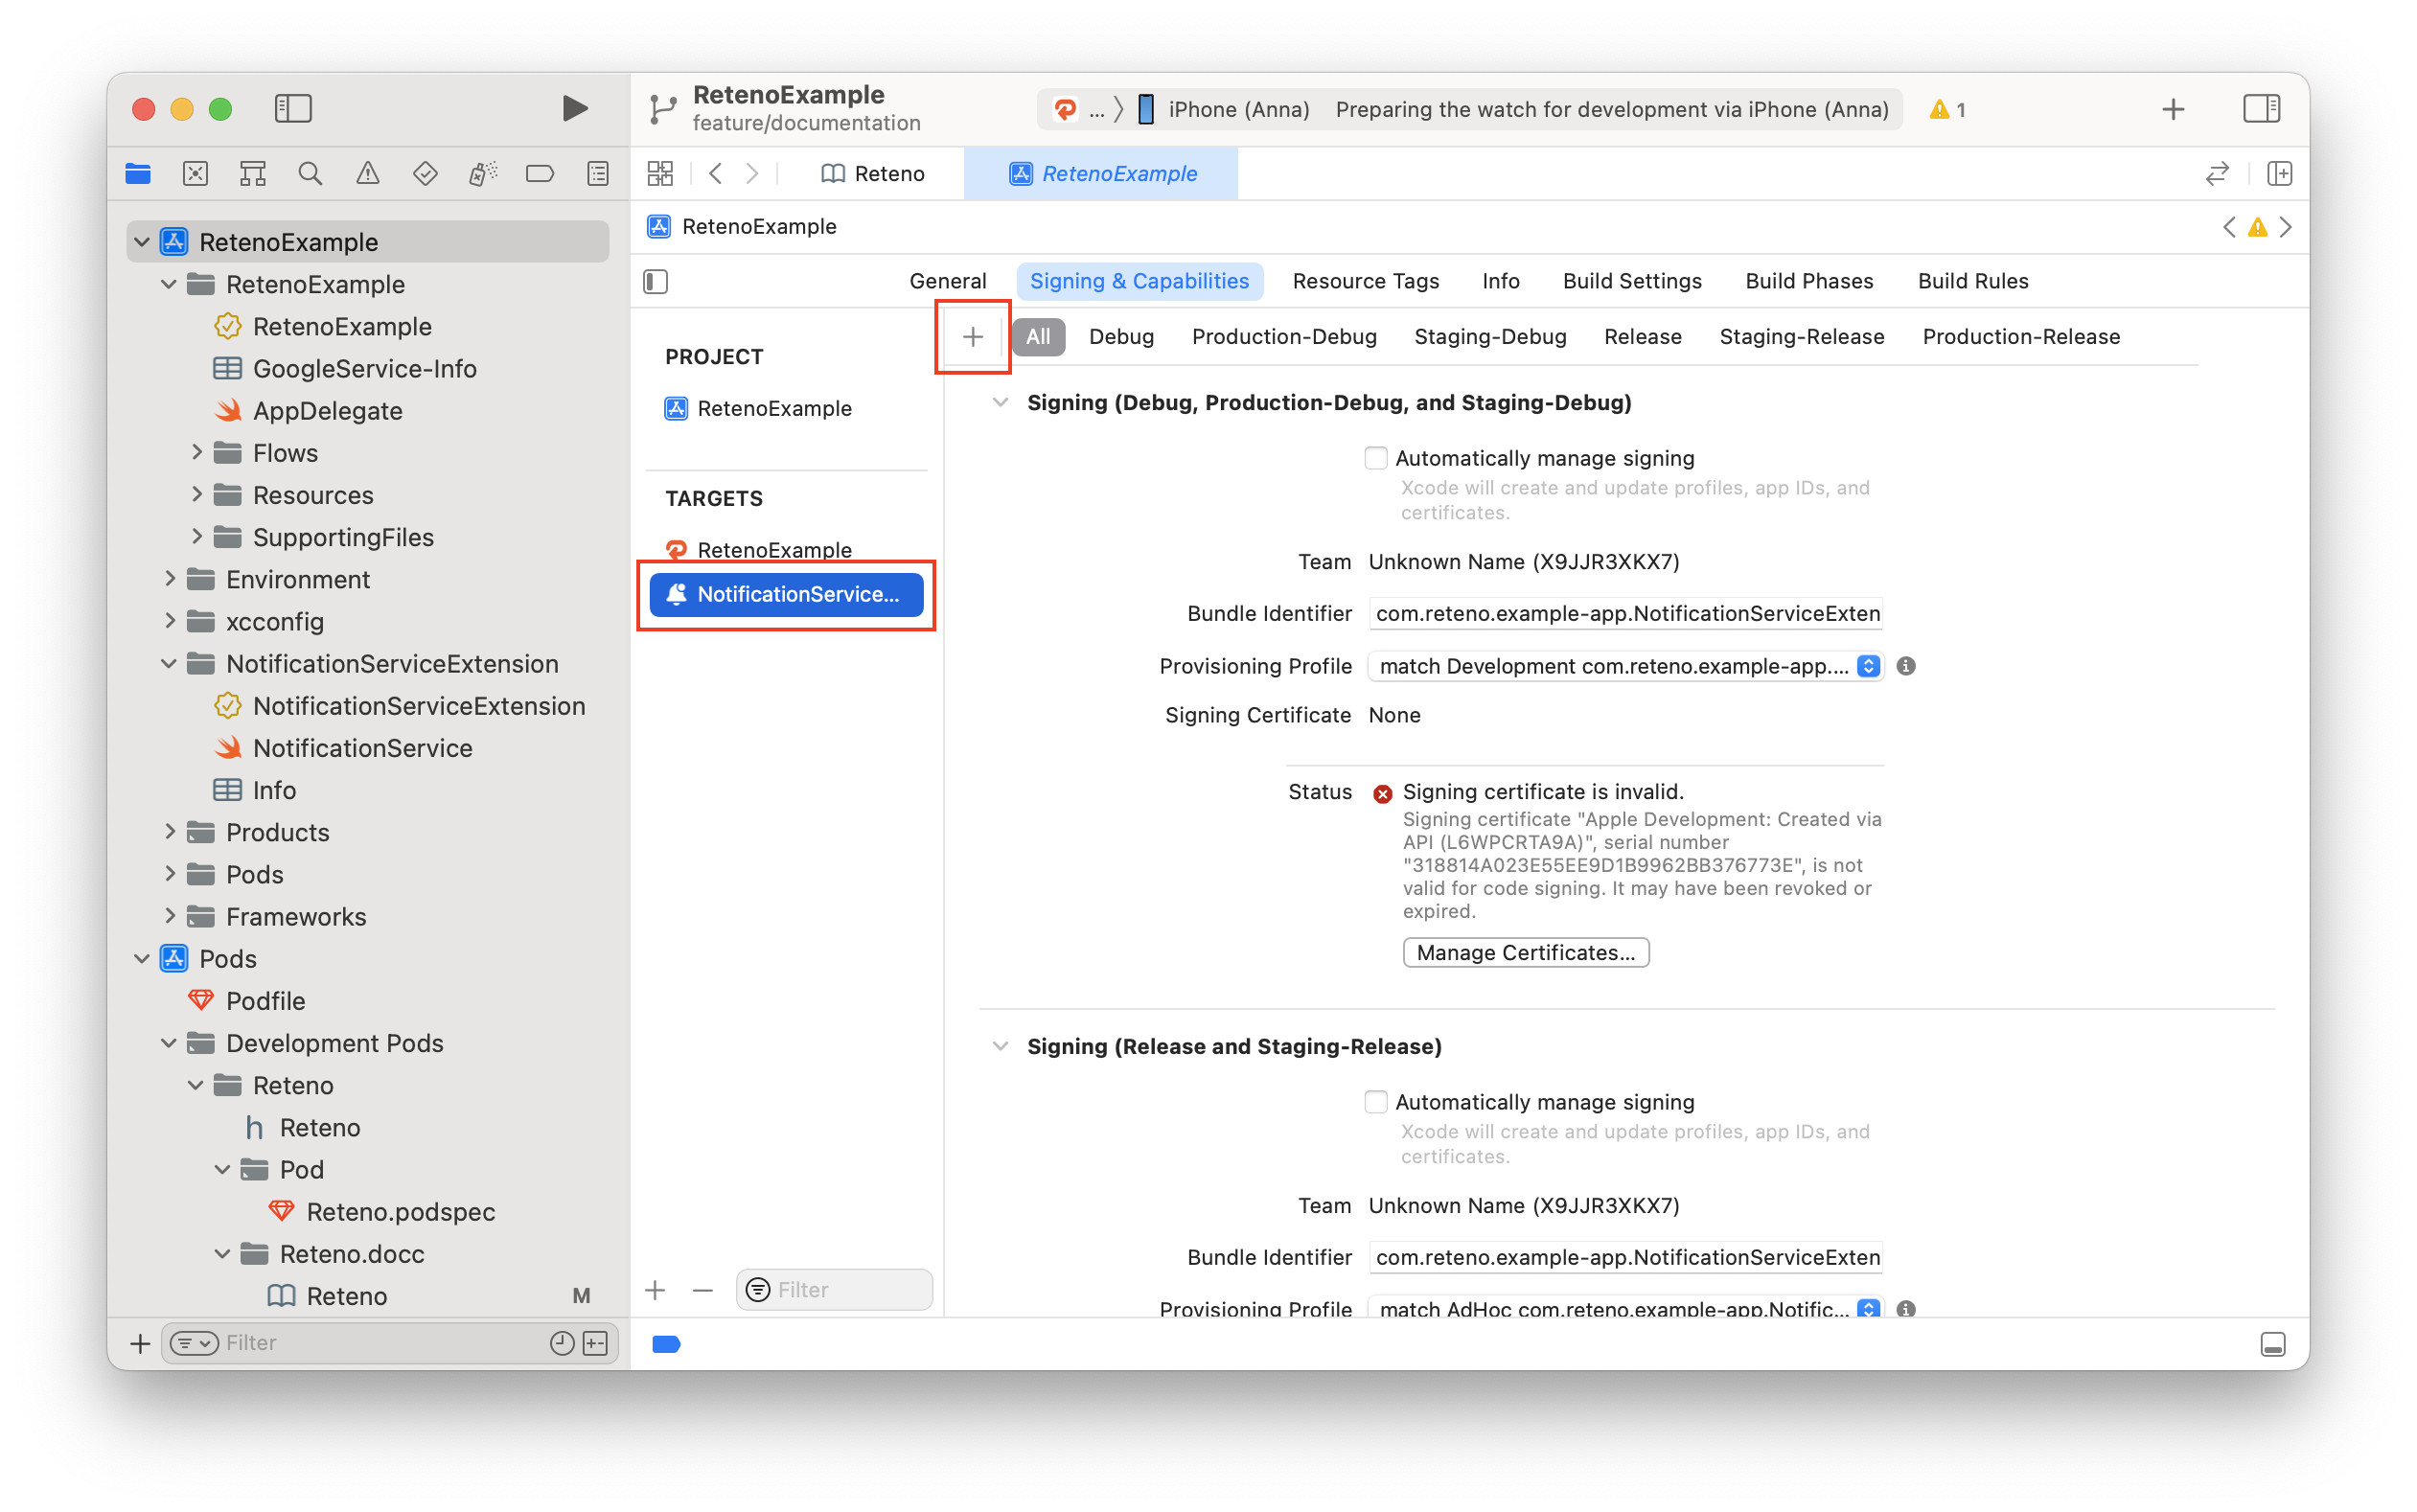
Note that group name structure should be group.{bundle_id}.reteno-local-storage where bundle_id is the same as your Main App target "Bundle Identifier". Do Not Include NotificationServiceExtension.
For more information visit Configuring App Groups
Step 6: Add Push Notification capability to your main app target (not NotificationServiceExtension!)
Push Notification capability to your main app target (not NotificationServiceExtension!)Step 7: Device token handling in v2.0.0
In v2.0.0 token handling is configured in initialize(...):
iosDeviceTokenHandlingMode: "automatic"(default): use APNs token flow (no Firebase).iosDeviceTokenHandlingMode: "manual": required for@react-native-firebase/messaging; SDK auto-bridges FCM token at runtime.
If you need fully manual token forwarding, call:
import { setDeviceToken } from "reteno-react-native-sdk";

await setDeviceToken(token);
Step 8: Run your App and send yourself a notification
Run your app to make sure it builds correctly. You should be prompted to subscribe to push notifications.
Test on a physical iOS device before shipping. iOS 16+ Simulator runtimes can receive remote notifications through the APNs sandbox when running on supported Mac hardware and macOS versions. Simulator support depends on the host environment and may not cover every notification scenario, so use a physical device for final validation of token registration, delivery, rich media, and cold-start behavior.
Troubleshooting
The contact has an empty pushToken, but pushSubscribed is correct
pushToken, but pushSubscribed is correctThis is the most common iOS integration issue. pushSubscribed is read live from UNUserNotificationCenter, so it reports correctly even when token storage is broken — which is why the two values disagree. Check in this order:
- App Group. It must be named exactly
group.{bundle_id}.reteno-local-storage, using the main app bundle identifier, and it must be added to both the main target andNotificationServiceExtension(Step 5). The SDK reads and writes the token in this shared container; if it is missing or named differently, the token falls back to an empty string. An App Group your app already uses for its own purposes does not substitute — the Reteno one must be added as well. After adding it, delete and reinstall the app, otherwise the old container is still in use. registerForRemoteNotifications()is called afterinitialize(...)(Step 4). Without it the app never requests an APNs token.iosDeviceTokenHandlingMode: "manual"is set if your app uses@react-native-firebase/messaging(Step 7). In the defaultautomaticmode Reteno swizzles the AppDelegate, which conflicts with Firebase'sGULAppDelegateProxy, and the token bridge is not installed.- Push Notifications capability is enabled on the main app target (Step 6). Without it the permission prompt still appears and
pushSubscribedbecomestrue, but APNs never issues a token.
Pushes are delivered, but clicks are never reported
If clicks are missing only when the app was fully closed before the tap, RetenoReactNativeSdk.delayedStart() is not called in your AppDelegate — see Step 4.1.
If your AppDelegate sets itself as the notification-center delegate (UNUserNotificationCenter.current().delegate = self), it must also implement userNotificationCenter(_:didReceive:withCompletionHandler:) and forward the call to the SDK:
func userNotificationCenter(
  _ center: UNUserNotificationCenter,
  didReceive response: UNNotificationResponse,
  withCompletionHandler completionHandler: @escaping () -> Void
) {
  Reteno.userNotificationService.userNotificationCenter(
    center,
    didReceive: response,
    withCompletionHandler: completionHandler
  )
}
While your object is the delegate, the click is delivered to it and not to the SDK, so without that method the tap reaches nothing and the event is lost — most often on a cold start. Implementing willPresent alone doesn't help: a click arrives through didReceive response:.
Rich media (images) does not appear in notifications
The NotificationServiceExtension is missing, is not subclassing RetenoNotificationServiceExtension, or has sandboxing enabled (Step 1). Note that the extension is also required for Reteno's push analytics, not only for images — without it, delivery statistics are incomplete even if the notification itself looks fine.